Azure SSO
Follow the sections in this guide to set up Azure SSO.
Security requirements for your production environment:
- DELETE the admin default account shipped by OM in case you had Basic Authentication enabled before configuring the authentication with Azure SSO.
- UPDATE the Private / Public keys used for the JWT Tokens. The keys we provide by default are aimed only for quickstart and testing purposes. They should NEVER be used in a production installation.
Create Server Credentials
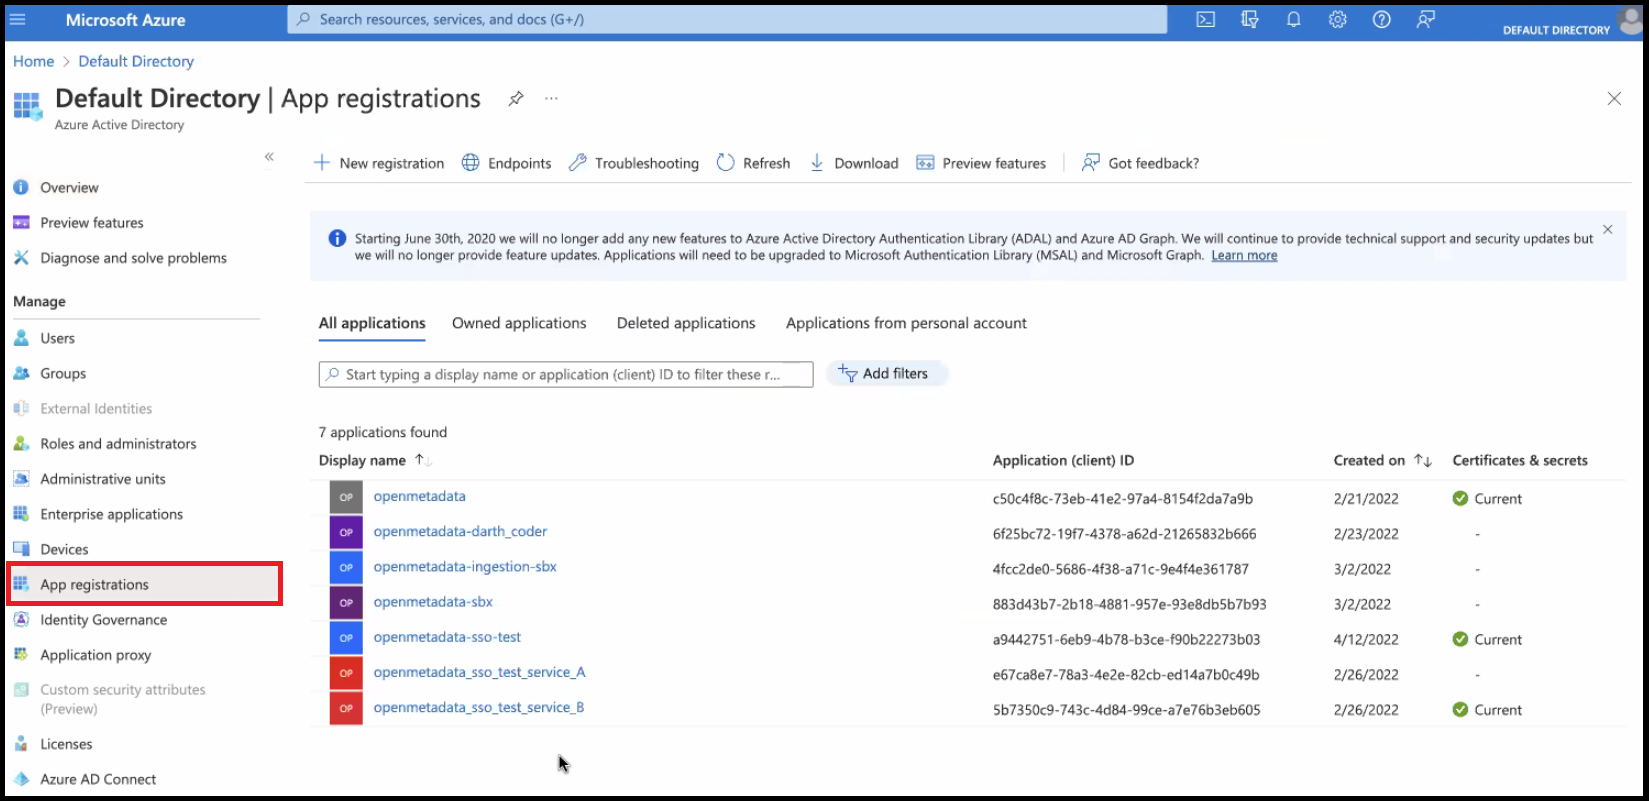
Step 1: Login to Azure Active Directory
- Login to Microsoft Azure Portal
- Navigate to the Azure Active Directory.
Admin permissions are required to register the application on the Azure portal.
Step 2: Create a New Application
- From the Azure Active Directory, navigate to the
App Registrations
section from the left nav bar.

- Click on
New Registration
. This step is for registering the OpenMetadata UI.

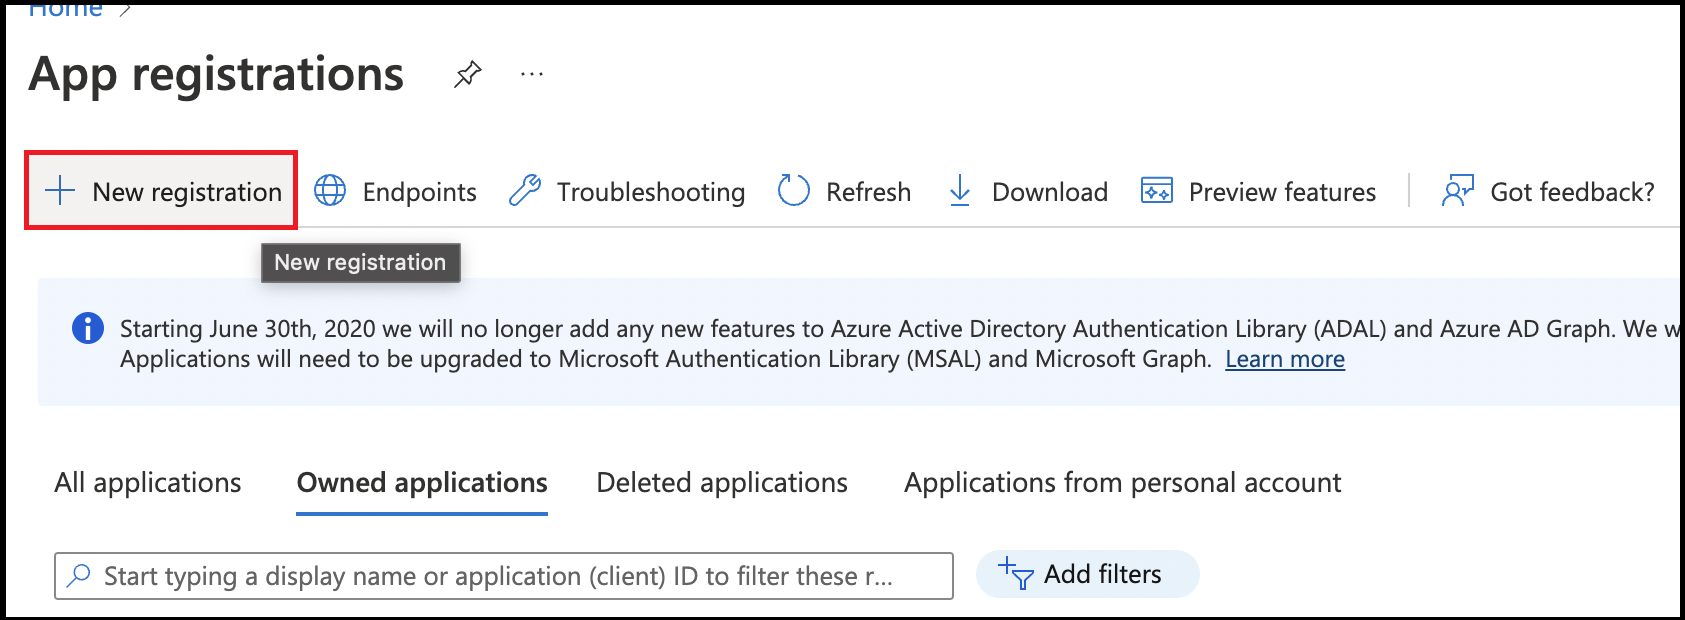
- Provide an Application Name for registration.
- Provide a redirect URL as a
Single Page Application
. - Click on
Register
.

Step 3: Where to Find the Credentials
- The
Client ID
and theTenant ID
are displayed in the Overview section of the registered application.

- When passing the details for
authority
, theTenant ID
is added to the URL as shown in the example below.https://login.microsoftonline.com/TenantID
Create Service Application (optional)
This is a guide to create ingestion bot service account. This step is optional if you configure the ingestion-bot with the JWT Token, you can follow the documentation of Enable JWT Tokens.
Step 1: Access Tokens and ID Tokens
- Navigate to the newly registered application.
- Click on the
Authentication
section. - Select the checkboxes for
Access Token
andID Tokens
. - Click
Save
.

Step 2: Expose an API
- Navigate to the section
Expose an API
.

- Set the
App ID URI
. If it has not been set, the default value isapi://<client_id>
. - Click Save.

Step 3: Add a Scope
- Click on
Add a Scope
. - Enter the details with a custom scope name to expose.
- Once completed, click on Add Scope.

Step 4: Register Another Azure Application
Another Azure Application must be registered for Service ingestion.
- Provide an application name.
public client redirect URI
will be blank.- Click on Register.

Step 5: API Permissions
- Navigate to the Ingestion Application created in step 4.
- Navigate to the section on API Permissions.
- Click on Add a Permission.

- Click on Add a Permission.

- Select the custom scope created in Step 3.
- Click on Add Permissions.

Step 6: Grant Admin Consent for Default Directory
Open Metadata Ingestion authenticates and authorizes workflow connectivity with OpenMetadata API using OAuth2 Client Credentials grant. In the Client Credentials flow, there is no GUI to consent application permissions since it’s a machine to machine communication. So OpenMetadata Ingestion Azure Application will need to be pre-consented by Azure Active Directory to use the scope request to connect to OpenMetadata Azure Application via the application access scope.
- Navigate to the Azure Active Directory >> Enterprise Application.
- Navigate to the ingestion application created in step 4. This is also called the Service Principal.
- Click on Permissions.
- Click on
Grant Admin Consent for Default Directory
.

Step 7: Set the App ID URI
- Navigate to the
Azure Active Directory >> App Registrations >> [OpenMetadata Ingestion Application] >> Expose an API
. - Click on Set in Application ID URI

- Click on Save to set the App ID URI which is required for scopes while connecting from manual ingestion.

Step 8: Create a Client Secret
- Navigate to
Certificates & Secrets
to generate the clientSecret. - Click on New Client Secret.

- Enter a description and an expiry period.

- The
secret_key
is required for ingestion.
Step 9: Note down the information for OpenMetadata configurations
clientID
: The Application (Client) ID is displayed in the Overview section of the registered applications (Azure Application for UI and Azure Service Application if any).authority
: When passing the details for authority, the Tenant ID is added to the URL as shown below.https://login.microsoftonline.com/TenantID
clientSecret
: The clientSecret can be accessed from the Certificates & secret section of the application.scopes
: The scopes for running the ingestion to get token using Client Credentials Flow. This will be in the format of<application-id-uri>/.default
(Application Id URI will be available from Step 7)object-id
: You can fetch theobject id
of Azure Application created for OpenMetadata Service Application as provided in the below image. This is required for setting the OpenMetadata with YAML configurations as well as Updating Ingestion-Bot from UI. You can findobject id
in AzureActive Directory >> Enterprise Applications
.

This information is required to configure ingestion-bot from OpenMetadata UI from 0.12.1 Release.
After the applying these steps, you can update the configuration of your deployment:
Configure Azure SSO for your Docker Deployment.
Bare Metal SecurityConfigure Azure SSO for your Bare Metal Deployment.
Kubernetes SecurityConfigure Azure SSO for your Kubernetes Deployment.
Step 10: Update Ingestion Bot with Azure SSO Service Application
Starting from 0.12.1, Navigate to Settings >> Bots >> ingestion-bot
and click on edit.

Update the Auth Mechanism as Azure SSO and update Email
, ClientSecret
, ClientId
, Authority
, and Scopes
as mentioned in Step 9.
The Email
will be in the format of <object-id-for-azure-service-application-enterprise-application>@<your-domain-name>
.
Next, Click on Save.

This will enable all the Service Connector Ingestions created from UI to securely use Azure SSO Service Applications for connecting with OpenMetadata APIs.
Configure Ingestion from CLI
After everything has been set up, you will need to configure your workflows if you are running them via the metadata
CLI or with any custom scheduler.
When setting up the YAML config for the connector, update the workflowConfig
as follows: