Upgrade on Docker
To run OpenMetadata with Docker, you can simply download the docker-compose.yml file. Optionally, we added some Named Volumes to handle data persistence.
You can find more details about Docker deployment here
Below we have highlighted the steps needed to upgrade to the latest version with Docker.
Prerequisites
Every time that you plan on upgrading OpenMetadata to a newer version, make sure to go over all these steps:
Backup your Metadata
Before upgrading your OpenMetadata version we strongly recommend backing up the metadata.
The source of truth is stored in the underlying database (MySQL and Postgres supported). During each version upgrade there is a database migration process that needs to run. It will directly attack your database and update the shape of the data to the newest OpenMetadata release.
It is important that we backup the data because if we face any unexpected issues during the upgrade process, you will be able to get back to the previous version without any loss.
You can learn more about how the migration process works here.
During the upgrade, please note that the backup is only for safety and should not be used to restore data to a higher version.
Since version 1.4.0, OpenMetadata encourages using the builtin-tools for creating logical backups of the metadata:
For PROD deployment we recommend users to rely on cloud services for their databases, be it AWS RDS, Azure SQL or GCP Cloud SQL.
If you're a user of these services, you can leverage their backup capabilities directly:
You can refer to the following guide to get more details about the backup and restore:
Understanding the Running State in OpenMetadata
In OpenMetadata, the "Running" state indicates that the OpenMetadata server has received a response from Airflow confirming that a workflow is in progress. However, if Airflow unexpectedly stops or crashes before it can send a failure status update through the Failure Callback, OpenMetadata remains unaware of the workflow’s actual state. As a result, the workflow may appear to be stuck in "Running" even though it is no longer executing.
This situation can also occur during an OpenMetadata upgrade. If an ingestion pipeline was running at the time of the upgrade and the process caused Airflow to shut down, OpenMetadata would not receive any further updates from Airflow. Consequently, the pipeline status remains "Running" indefinitely.
Running State in OpenMetadata
Expected Steps to Resolve
To resolve this issue:
- Ensure that Airflow is restarted properly after an unexpected shutdown.
- Manually update the pipeline status if necessary.
- Check Airflow logs to verify if the DAG execution was interrupted.
Update sort_buffer_size (MySQL) or work_mem (Postgres)
Before running the migrations, it is important to update these parameters to ensure there are no runtime errors. A safe value would be setting them to 20MB.
If using MySQL
You can update it via SQL (note that it will reset after the server restarts):
To make the configuration persistent, you'd need to navigate to your MySQL Server install directory and update the my.ini or my.cnf files with sort_buffer_size = 20971520.
If using RDS, you will need to update your instance's Parameter Group to include the above change.
If using Postgres
You can update it via SQL (not that it will reset after the server restarts):
To make the configuration persistent, you'll need to update the postgresql.conf file with work_mem = 20MB.
If using RDS, you will need to update your instance's Parameter Group to include the above change.
Note that this value would depend on the size of your query_entity table. If you still see Out of Sort Memory Errors during the migration after bumping this value, you can increase them further.
After the migration is finished, you can revert this changes.
Breaking Changes
- Ingestion Framework: All workflows have integrated the
workflow.print_status()inside theworkflow.execute()call. This change was needed to better handle logger lifecycles. If you’re using the Ingestion Framework directly to manage workflows via the usual process:
You can now remove the print_status() call. Note that the only side effect would be temporarily getting duplicated summary logs.
- Changed field from status to entityStatus for glossaryTerm and dataContract, as we introduce it for different data assets.
- For Data Contracts, the value also changed from Active to Approved.
MySQL Configuration Required for Airflow 3.x Migration
If you are using MySQL as your Airflow metadata database and upgrading to Airflow 3.x (the new default in OpenMetadata 1.11), you must configure MySQL to allow temporary stored function creation during the migration process.
Root Cause
During the Airflow 3.x database migration on MySQL, Airflow needs to create a temporary stored function (uuid_generate_v7) to backfill UUIDs for the task_instance table. When MySQL runs with binary logging enabled (which is the default in most production setups), it blocks function creation unless log_bin_trust_function_creators is enabled or the user has SUPER privileges. Without this configuration, the migration fails with an error like:
This is a known limitation when running Airflow 3.x migrations on MySQL with binary logging enabled. PostgreSQL users are not affected by this issue.
For more details, see the Apache Airflow issues:
Resolution
Step 1: Enable MySQL Configuration
First, enable log_bin_trust_function_creators in your MySQL instance to allow Airflow to create the necessary stored function:
For Docker deployments, add this to your docker-compose.yml file under the MySQL service:
For standalone MySQL instances, execute this query as a user with sufficient privileges:
Step 2: Clean Airflow Database
After enabling the MySQL configuration, choose one of the following options based on your situation:
Option 1: Clean Airflow Metadata (Recommended for Fresh Start)
If you want to avoid conflicting migration changes and start with a clean Airflow metadata database, you can truncate the task_instance table. This approach removes all task execution history but preserves your DAGs and connections.
This will delete all historical task execution data. Only use this if you're okay with losing task run history.
Execute this script:
Option 2: Fix Stuck Migrations (If Migration Already Failed)
If your migration is already stuck midway (the task_instance table was partially modified), you need to reset the migration state before restarting. Save the following SQL script as fix_airflow_migration.sql:
Then execute the script and restart the container:
Replace USERNAME and PASSWORD with your actual MySQL credentials, and ensure the database name matches your configuration (default is airflow_db).
Upgrade Process
Replace the docker compose file
- Stop the running compose deployment with below command
Download the Docker Compose Service File from OpenMetadata GitHub Release page here
Replace the existing Docker Compose Service File with the one downloaded from the above step
Start the Docker Compose Service with the below command
Post-Upgrade Steps
Reindex
With UI
Go to Settings -> Applications -> Search Indexing
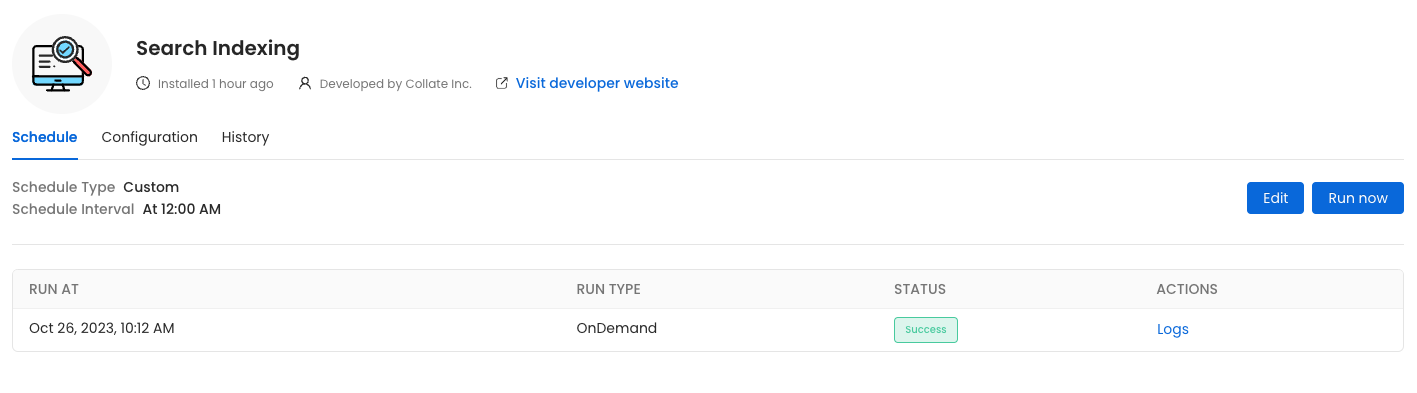
Reindex
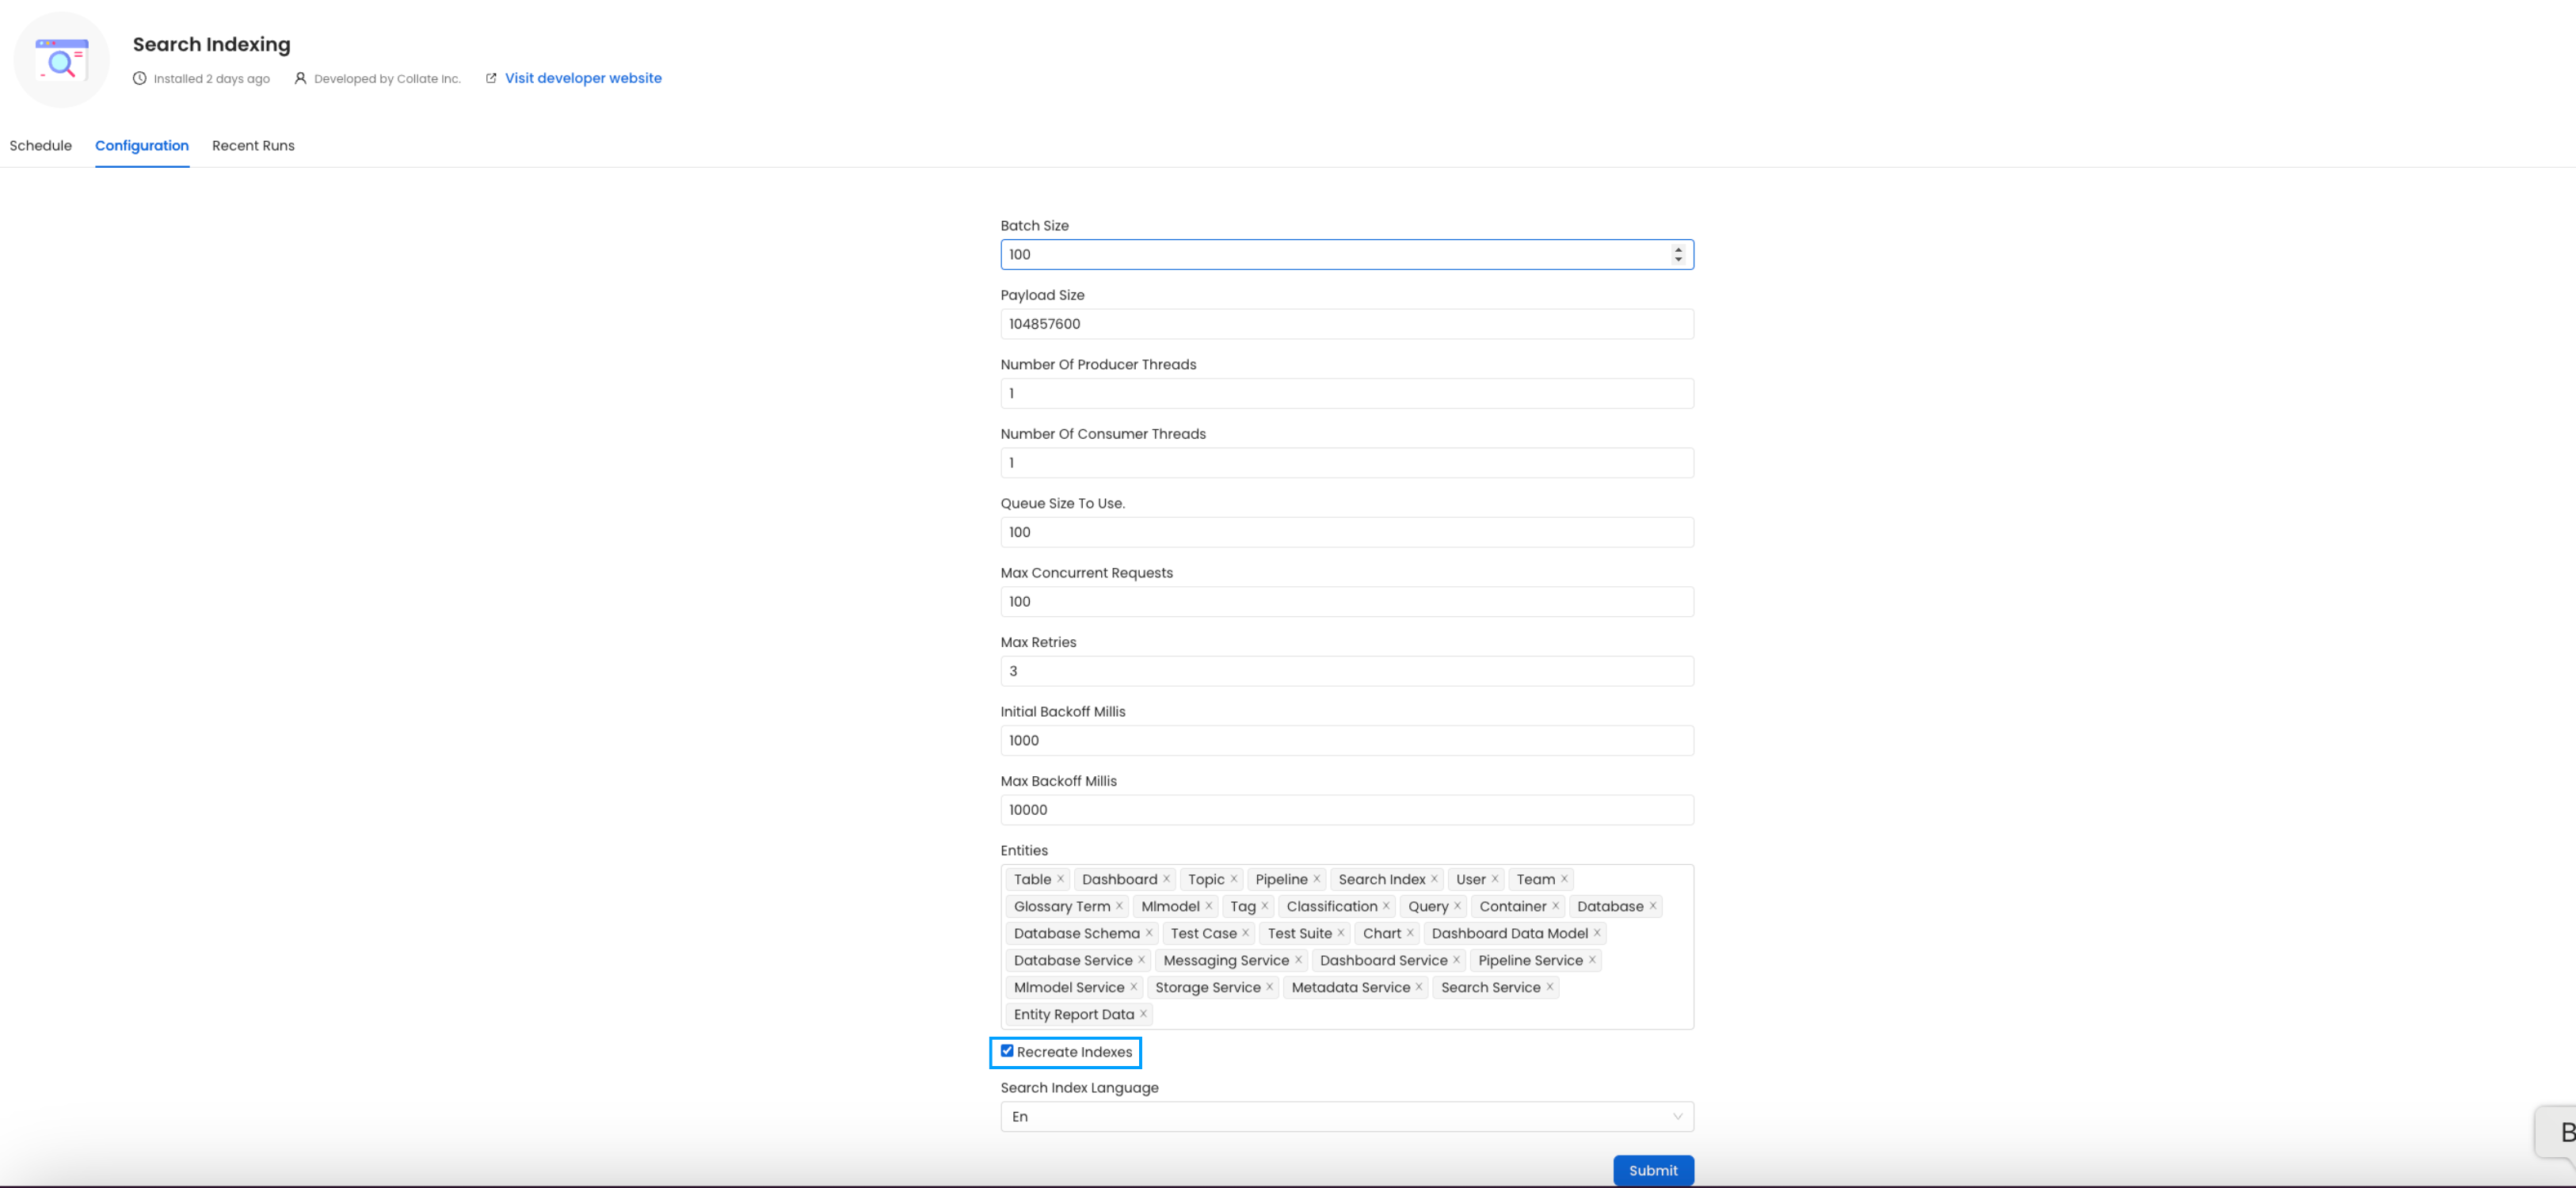
Before initiating the process by clicking Run Now, ensure that the Recreate Indexes option is enabled to allow rebuilding the indexes as needed.
In the configuration section, you can select the entities you want to reindex.
Reindex
Since this is required after the upgrade, we want to reindex All the entities.
(Optional) Update your OpenMetadata Ingestion Client
If you are running the ingestion workflows externally or using a custom Airflow installation, you need to make sure that the Python Client you use is aligned with the OpenMetadata server version.
For example, if you are upgrading the server to the version x.y.z, you will need to update your client with
With Kubernetes
Follow these steps to reindex using the CLI:
- List the CronJobs Use the following command to check the available CronJobs:
Upon running this command you should see output similar to the following.
- Create a Job from a CronJob Create a one-time job from an existing CronJob using the following command:
Replace <job_name> with the actual name of the job.
Upon running this command you should see output similar to the following.
- Check the Job Status Verify the status of the created job with:
Upon running this command you should see output similar to the following.
- view logs To view the logs use the below command.
Replace <job_name> with the actual job name.
The plugin parameter is a list of the sources that we want to ingest. An example would look like this openmetadata-ingestion[mysql,snowflake,s3]==1.2.0. You will find specific instructions for each connector here.
Moreover, if working with your own Airflow deployment - not the openmetadata-ingestion image - you will need to upgrade as well the openmetadata-managed-apis version:
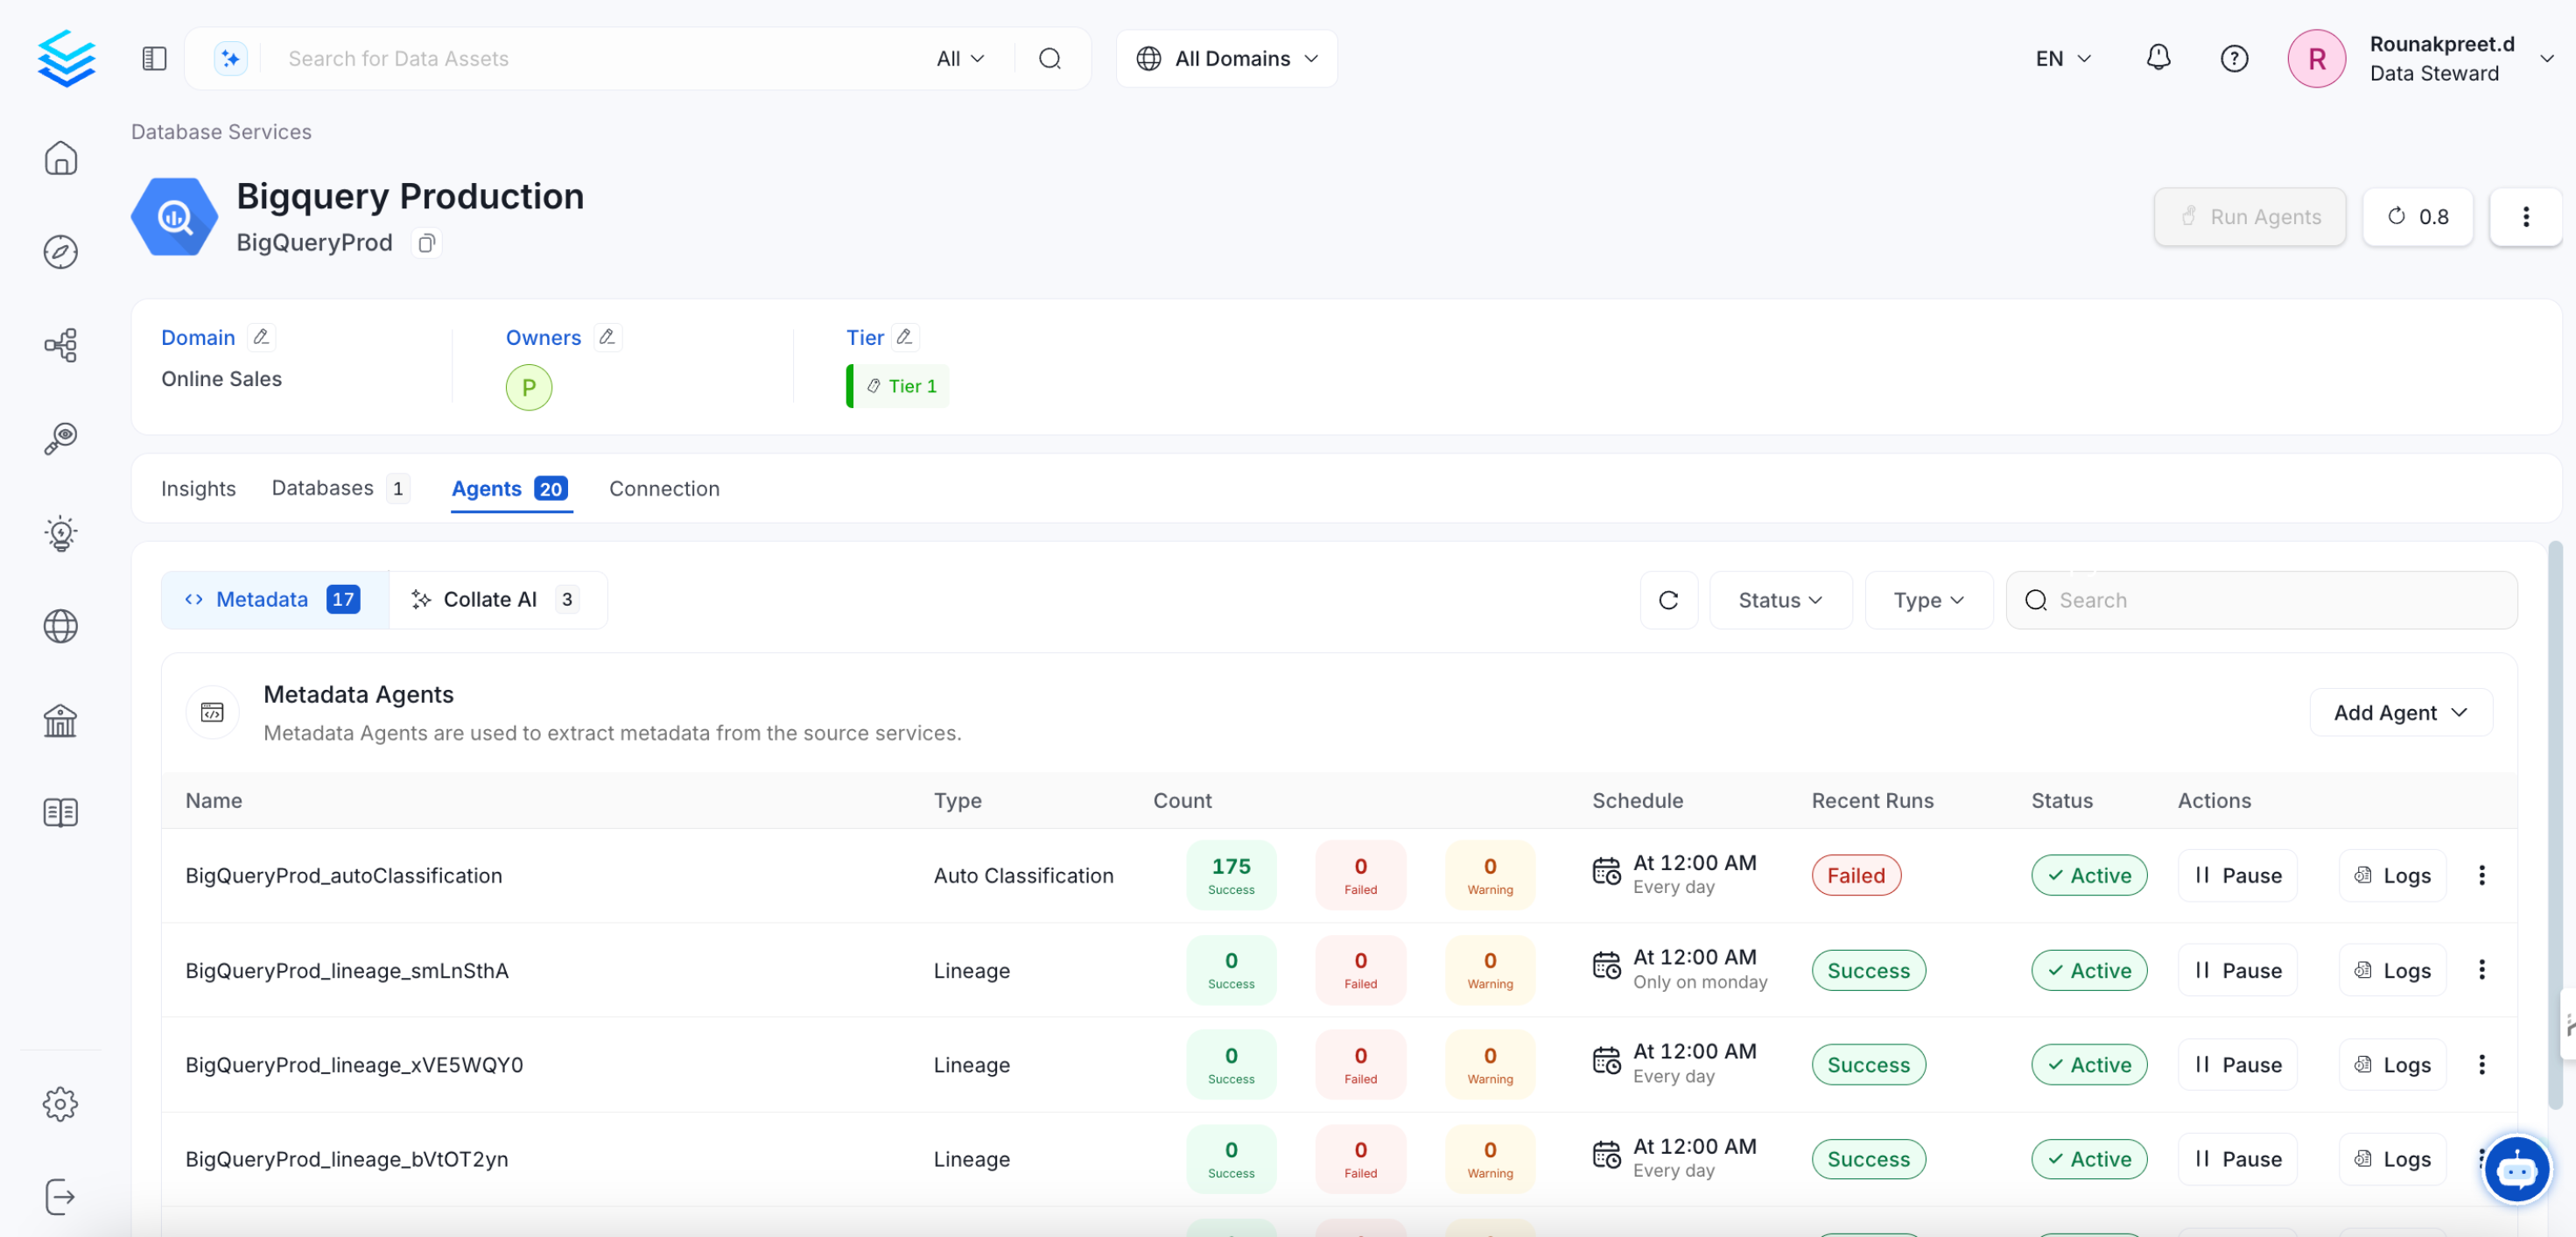
Re Deploy Ingestion Pipelines
With UI
Go to Settings -> {Services} -> {Databases} -> Pipelines
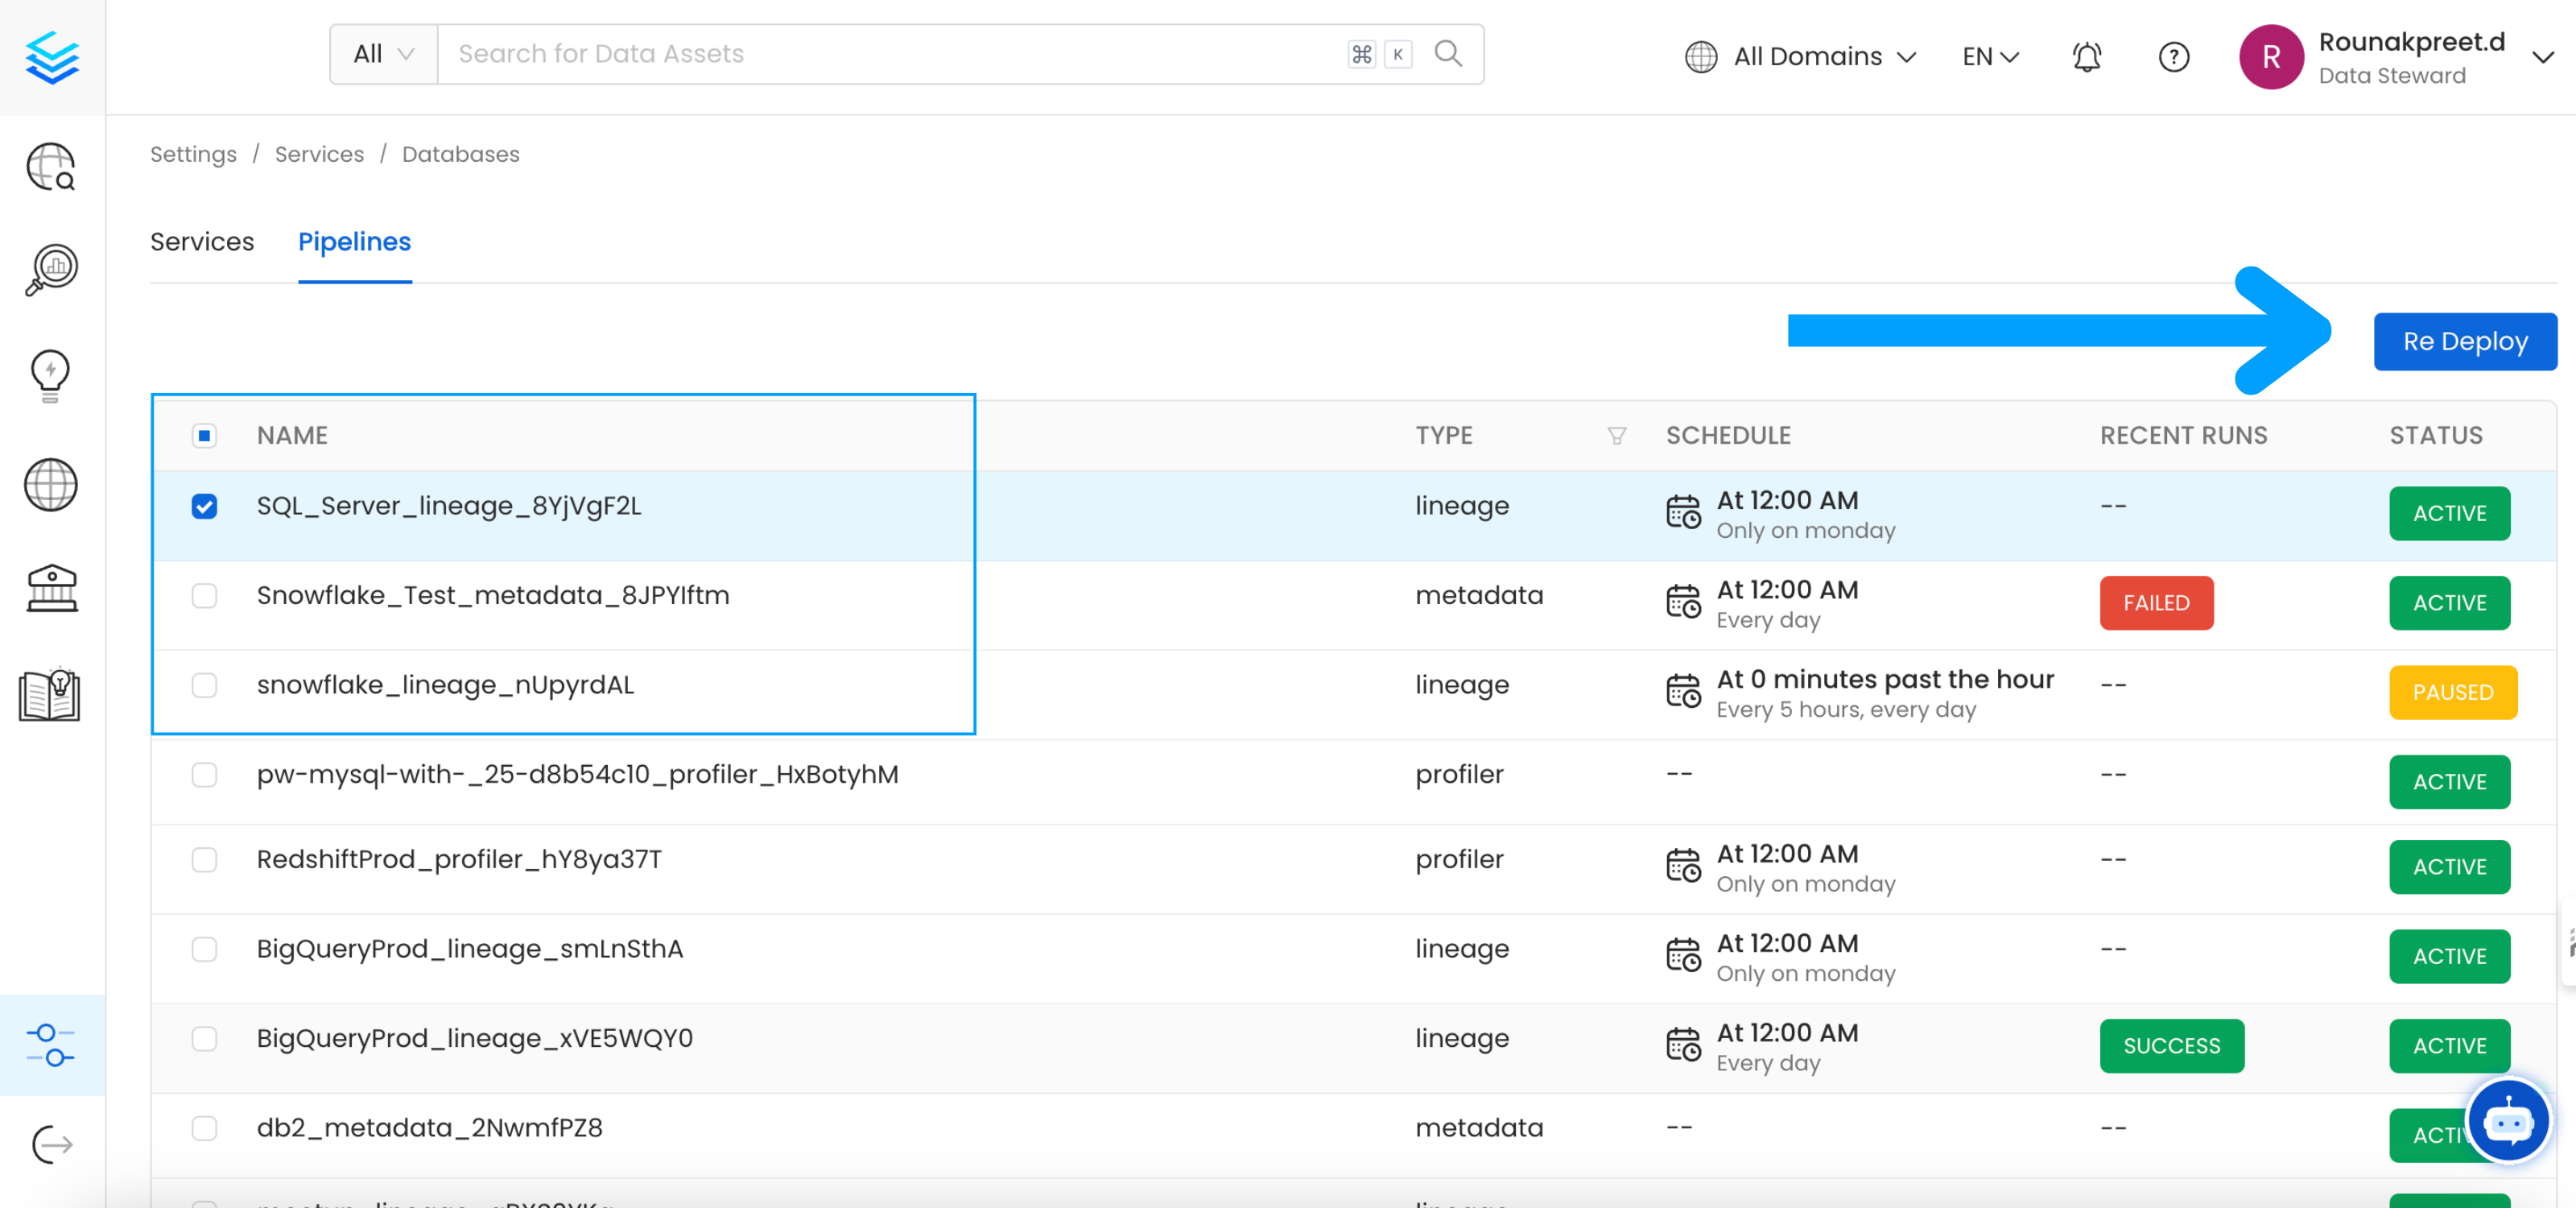
Re-deploy
Select the pipelines you want to Re Deploy click Re Deploy.
With Kubernetes
Follow these steps to deploy pipelines using the CLI:
- List the CronJobs Use the following command to check the available CronJobs:
Upon running this command you should see output similar to the following.
- Create a Job from a CronJob Create a one-time job from an existing CronJob using the following command:
Replace <job_name> with the actual name of the job.
Upon running this command you should see output similar to the following.
- Check the Job Status Verify the status of the created job with:
Upon running this command you should see output similar to the following.
- view logs To view the logs use the below command.
Replace <job_name> with the actual job name.
If you are seeing broken dags select all the pipelines from all the services and re deploy the pipelines.
Openmetadata-ops Script
Overview
The openmetadata-ops script is designed to manage and migrate databases and search indexes, reindex existing data into Elastic Search or OpenSearch, and redeploy service pipelines.
Usage
Commands
- analyze-tables
Migrates secrets from the database to the configured Secrets Manager. Note that this command does not support migrating between external Secrets Managers.
- changelog
Prints the change log of database migration.
- check-connection
Checks if a connection can be successfully obtained for the target database.
- deploy-pipelines
Deploys all the service pipelines.
- drop-create
Deletes any tables in the configured database and creates new tables based on the current version of OpenMetadata. This command also re-creates the search indexes.
- info
Shows the list of migrations applied and the pending migrations waiting to be applied on the target database.
- migrate
Migrates the OpenMetadata database schema and search index mappings.
- migrate-secrets
Migrates secrets from the database to the configured Secrets Manager. Note that this command does not support migrating between external Secrets Managers.
- reindex
Reindexes data into the search engine from the command line.
- repair
Repairs the DATABASE_CHANGE_LOG table, which is used to track all the migrations on the target database. This involves removing entries for the failed migrations and updating the checksum of migrations already applied on the target database.
- validate
Checks if all the migrations have been applied on the target database.
Examples
Display Help To display the help message:
Migrate Database Schema
To migrate the database schema and search index mappings:
Reindex Data
To reindex data into the search engine:
Troubleshooting
Permission Denied when running metadata openmetadata-imports-migration
If you have a Permission Denied error thrown when running metadata openmetadata-imports-migration --change-config-file-path you might need to change the permission on the /opt/airflow/dags folder. SSH into the ingestion container and check the permission on the folder running the below commands
both the dags folder and the files inside dags/ should have airflow root permission. if this is not the case simply run the below command
Broken DAGs can't load config file: Permission Denied
You might need to change the permission on the /opt/airflow/dag_generated_config folder. SSH into the ingestion container and check the permission on the folder running the below commands
both the dags folder and the files inside dags/ should have airflow root permission. if this is not the case simply run the below command
Azure PostgreSQL Extension Issue During 1.11.0 Migration
During the 1.11.0 database migration, OpenMetadata attempts to execute the following SQL command:
However, when using Azure Database for PostgreSQL - Flexible Server, extensions like pg_trgm must be explicitly allow-listed by the administrator.
Since pg_trgm is not allow-listed by default, Azure returns the following error:
This error causes the migration to fail before completing the schema updates.
Recommended Action Ensure that the pg_trgm extension is added to the allow-list in your Azure PostgreSQL server settings prior to running the migration.