> ## Documentation Index
> Fetch the complete documentation index at: https://docs.open-metadata.org/llms.txt
> Use this file to discover all available pages before exploring further.
# Tableau Connector | OpenMetadata Integration Guide
> Connect Tableau dashboards to OpenMetadata with our comprehensive connector guide. Setup instructions, configuration options, and metadata extraction steps.
export const MetadataIngestionUi = ({connector, selectServicePath, addNewServicePath, serviceConnectionPath}) => {
return <>
To ingest metadata from your sources, you need to create a service connection.
The service connects your source system with OpenMetadata. Once you create
a service, you can use it to configure your ingestion workflows.
To create a service connection and ingest your metadata, follow the steps below:
-
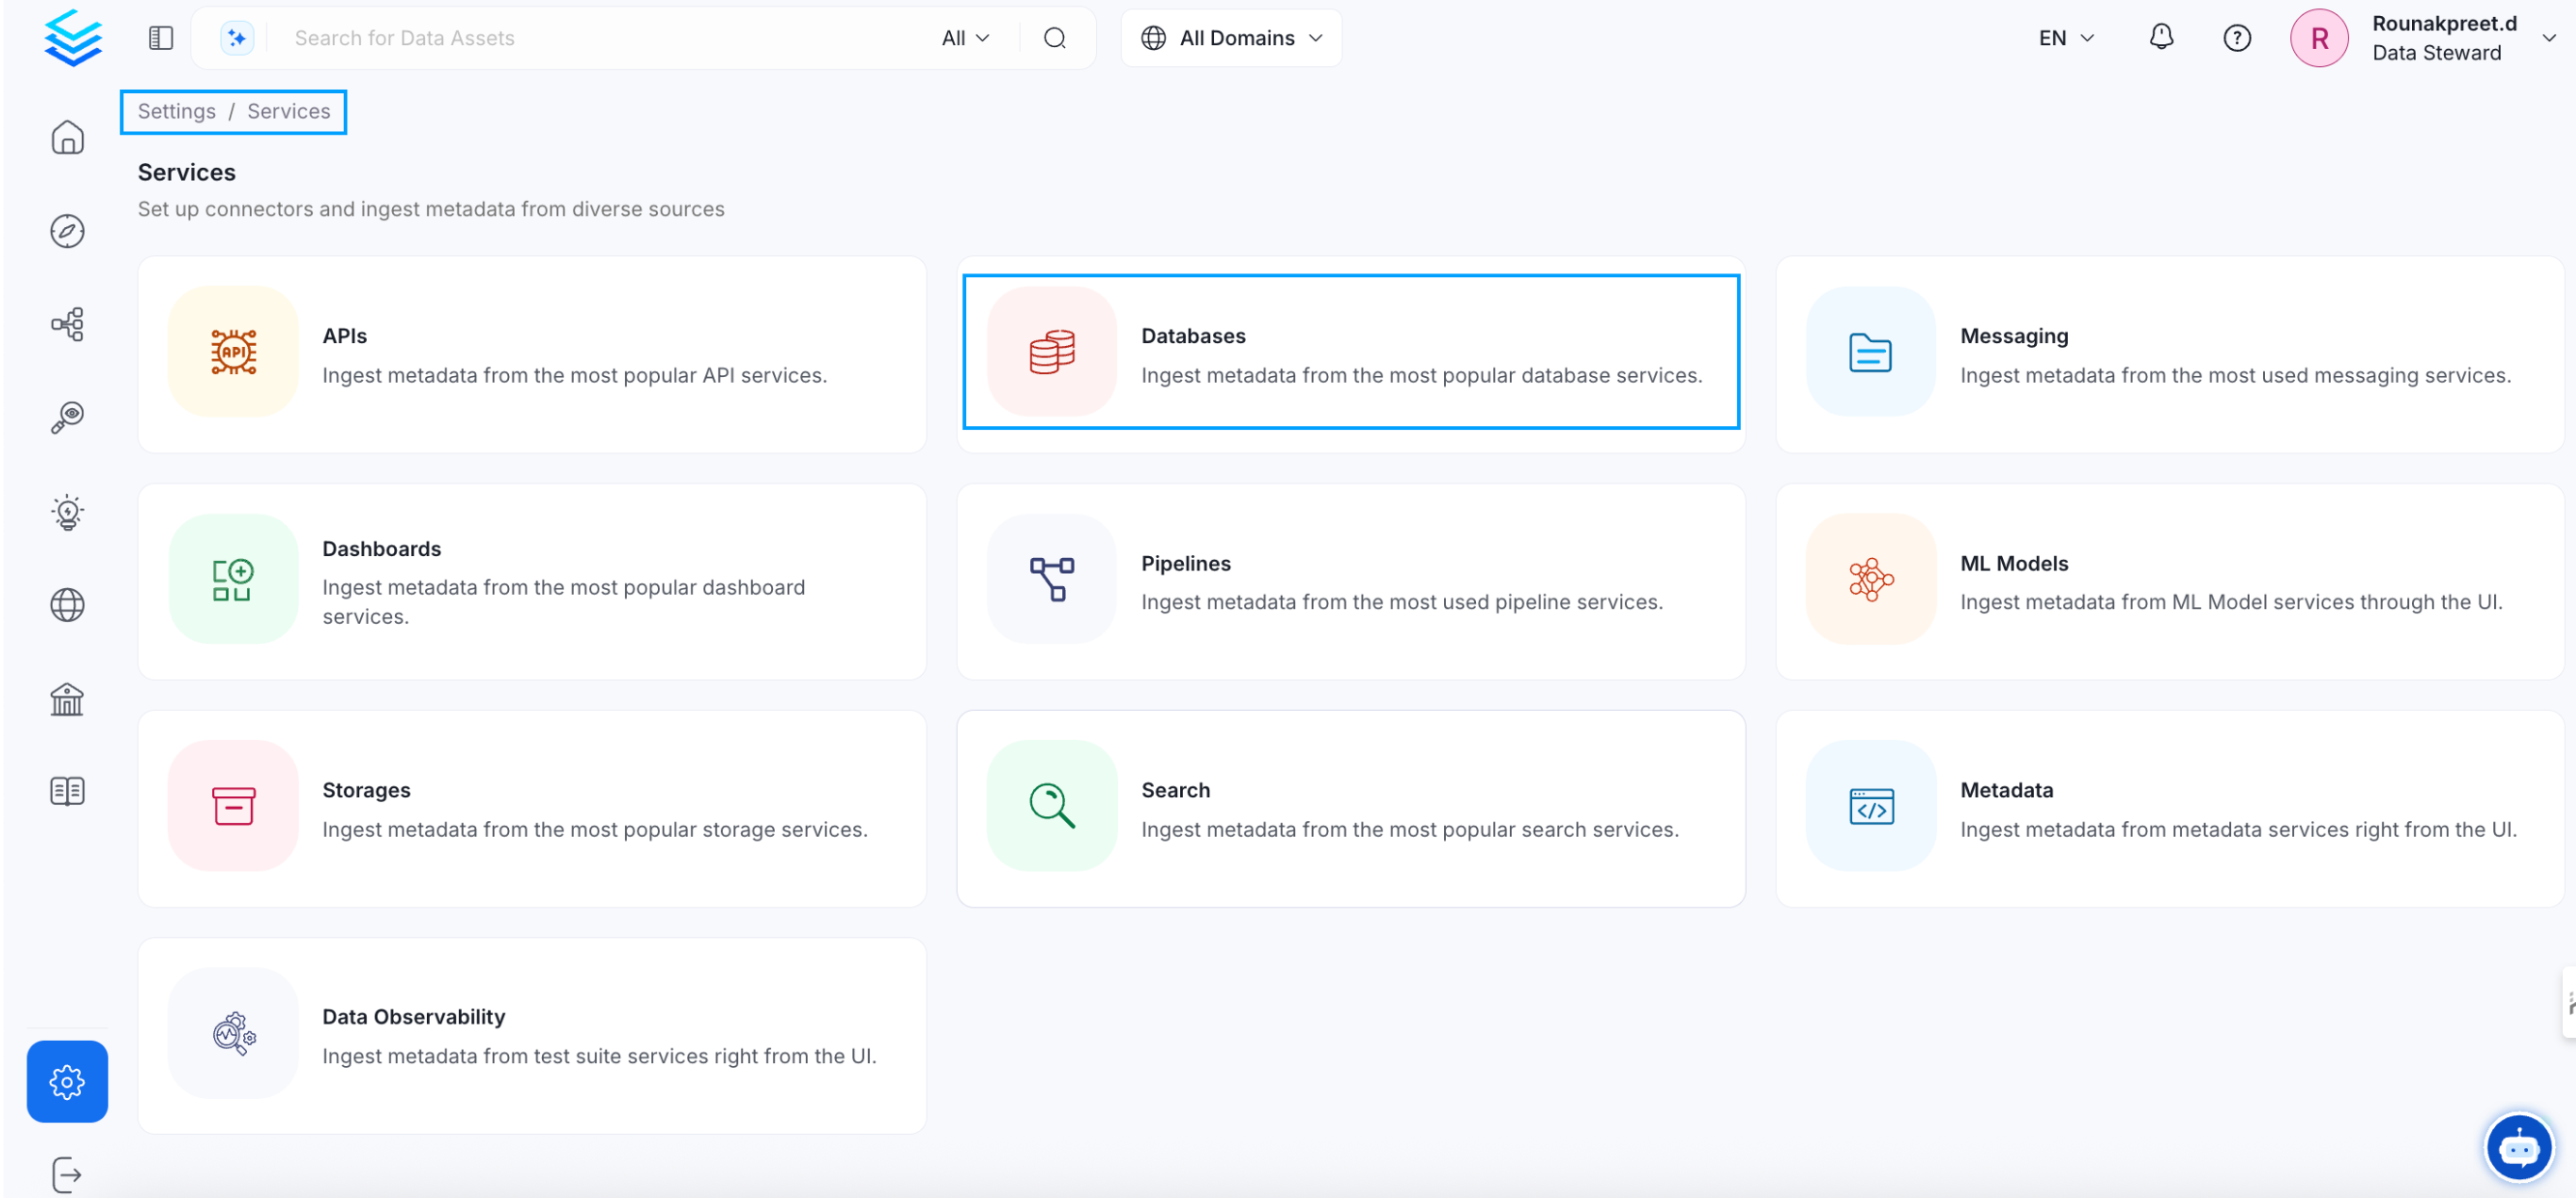
On the left navigation bar, click Settings.
-
On the next page, click Services, and then select the service.
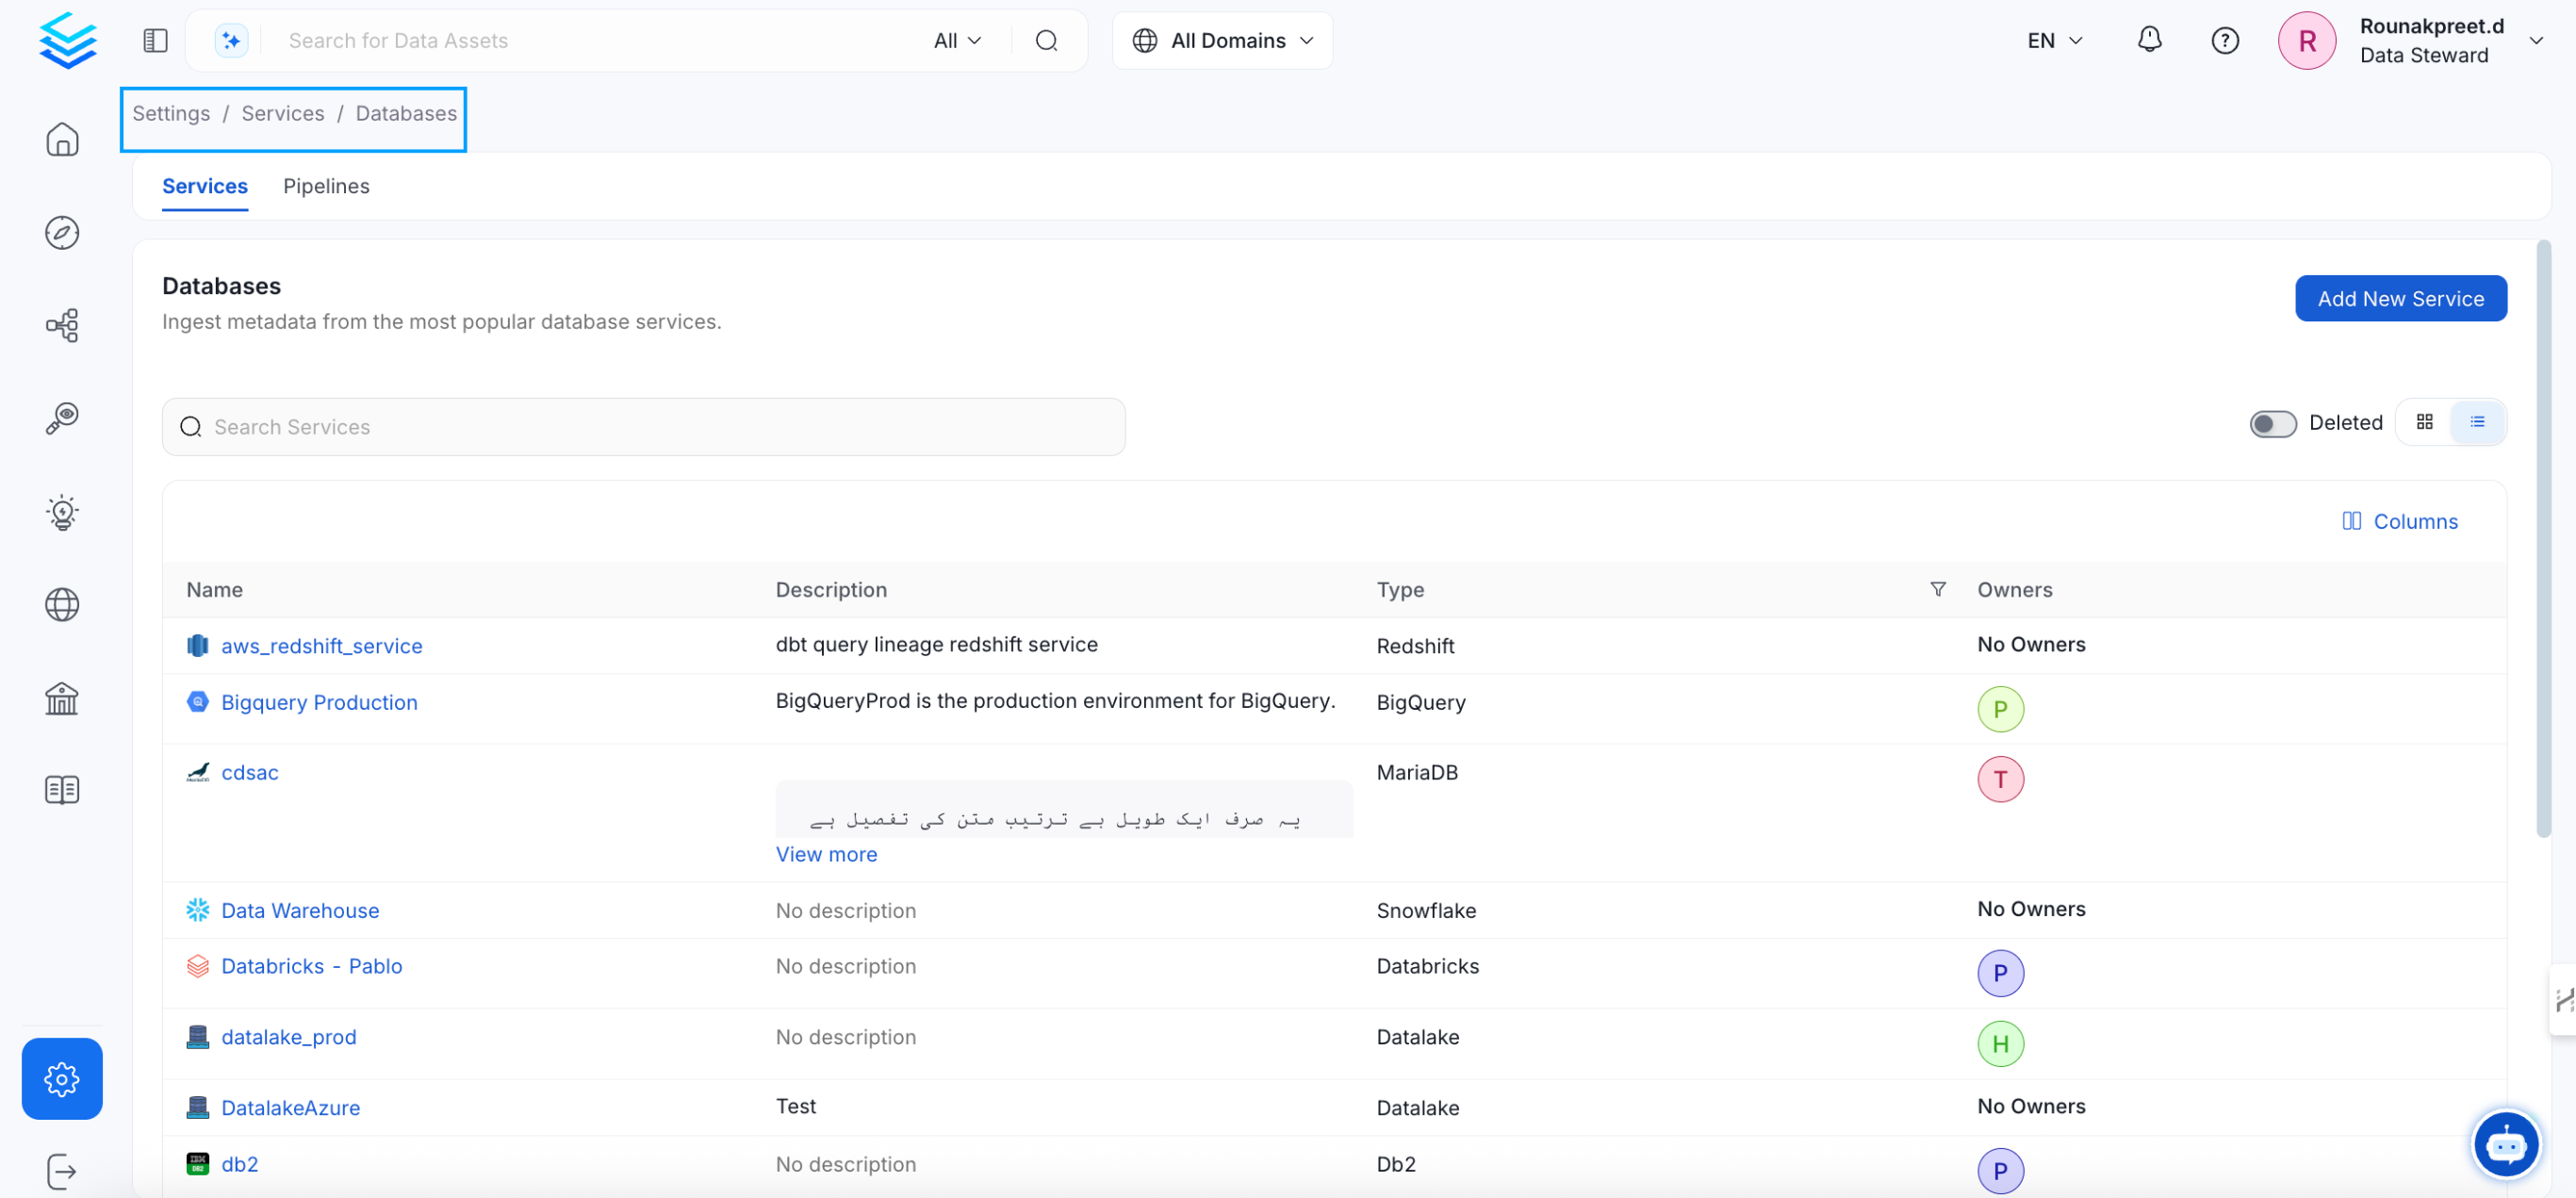
To add a new service connection, click Add New Service.
 Select {connector} as the service type and click Next.
{selectServicePath &&
Select {connector} as the service type and click Next.
{selectServicePath &&  }
Enter a unique Service Name and Description.
}
Enter a unique Service Name and Description.
- Service Name: OpenMetadata identifies services by their service name. Enter a name that distinguishes this deployment from other services, including other {connector} services you are ingesting metadata from.
The service name cannot be changed after it is set.
{addNewServicePath &&  }
Set up the connection settings required for {connector} to set up the service and start ingesting metadata from your sources. The right-hand panel displays help documentation for the selected connection type in the product UI.
{serviceConnectionPath &&
}
Set up the connection settings required for {connector} to set up the service and start ingesting metadata from your sources. The right-hand panel displays help documentation for the selected connection type in the product UI.
{serviceConnectionPath &&  }
;
};
export const ConnectorDetailsHeader = ({name, icon, stage, availableFeatures, unavailableFeatures = [], availableFeaturesCollate = []}) => {
const showSubHeading = availableFeatures?.length > 0 || unavailableFeatures?.length > 0 || availableFeaturesCollate?.length > 0;
const totalAvailableFeatures = [...availableFeatures || [], ...availableFeaturesCollate || []];
return
}
;
};
export const ConnectorDetailsHeader = ({name, icon, stage, availableFeatures, unavailableFeatures = [], availableFeaturesCollate = []}) => {
const showSubHeading = availableFeatures?.length > 0 || unavailableFeatures?.length > 0 || availableFeaturesCollate?.length > 0;
const totalAvailableFeatures = [...availableFeatures || [], ...availableFeaturesCollate || []];
return
{icon &&
}
{name}
{stage}
{showSubHeading &&
Feature List
{totalAvailableFeatures.map(feature =>
✓ {feature}
)}
{unavailableFeatures.map(feature =>
✕ {feature}
)}
}
;
};
In this section, we provide guides and references to use the Tableau connector.
**Supported Authentication Types:**
* **Basic Auth** — Username and password authentication
* **Access Token Auth** — Personal access token name and secret for token-based authentication
Configure and schedule Tableau metadata and profiler workflows from the OpenMetadata UI:
* [Requirements](#requirements)
* [Entity Mapping](#entity-mapping)
* [Metadata Ingestion](#metadata-ingestion)
* [Enable Security](#securing-tableau-connection-with-ssl-in-openmetadata)
* [Lineage](#lineage)
* [Troubleshooting](/v1.12.x/connectors/dashboard/tableau/troubleshooting)
## Requirements
To ingest tableau metadata, minimum `Site Role: Viewer` is required for the tableau user.
To create lineage between tableau dashboard and any database service via the queries provided from Tableau Metadata API, please enable the Tableau Metadata API for your tableau server.
For more information on enabling the Tableau Metadata APIs follow the link [here](https://help.tableau.com/current/api/metadata_api/en-us/docs/meta_api_start.html)
* If using a **default site** on Tableau Server, leave the **Site URL** and **Site Name** fields **blank** in the ingestion configuration.
* Ensure that the **Metadata API** is enabled for the user performing the ingestion. If it is not enabled, ingestion may fail. Follow the official Tableau documentation to [enable the Metadata API](https://help.tableau.com/current/api/metadata_api/en-us/docs/meta_api_start.html#enable-the-tableau-metadata-api-for-tableau-server).
* The minimum required role to retrieve owners is Site Admin Explorer.
* As of OpenMetadata versions `1.7.4` and `1.7.5`, the `siteUrl` field has been removed from the Tableau connector configuration. This change was intentional, as confirmed in the release commit.
* To connect to a non-default Tableau site, use the `siteName` field instead. The Tableau Python SDK does not require `siteUrl` for authentication.
* Ensure the `siteName` field is correctly populated (do not use `*`) to enable successful metadata ingestion for multi-site Tableau environments.
## Entity Mapping
The Tableau connector maps Tableau assets to OpenMetadata entities as follows:
| Tableau Asset | OpenMetadata Entity | Description |
| ------------------------------------------- | --------------------- | -------------------------------------------------------------------------------------------------------------------------------- |
| **Dashboard Views** (sheetType="dashboard") | **Dashboard** | Tableau dashboard views are mapped to OpenMetadata Dashboard entities. These are the actual interactive dashboards in Tableau. |
| **Sheet Views** (worksheets, stories, etc.) | **Chart** | Tableau worksheet views and other sheet types are mapped to OpenMetadata Chart entities. |
| **Workbooks** | **Project Hierarchy** | Workbook information is preserved in the project field as `{ProjectName}/{WorkbookName}` to maintain the container relationship. |
| **Data Sources** | **Data Models** | Tableau data sources are mapped to OpenMetadata Data Model entities. |
### Example Structure
**Tableau Structure:**
```
Project: Sales Team
└── Workbook: Sales Analysis
├── Dashboard: Revenue Overview (sheetType="dashboard")
├── Worksheet: Monthly Sales (sheetType="worksheet")
└── Story: Sales Story (sheetType="story")
```
**OpenMetadata Structure:**
```
Dashboard: "Revenue Overview" (Project: "Sales Team/Sales Analysis")
├── Chart: "Monthly Sales"
└── Chart: "Sales Story"
```
This mapping ensures that:
* Tableau dashboards appear as OpenMetadata dashboards (not charts)
* Workbook context is preserved in the project hierarchy
* URLs point directly to the specific dashboard views
* Chrome Extension compatibility is maintained
## Metadata Ingestion
# Connection Details
When using a **Hybrid Ingestion Runner**, any sensitive credential fields—such as passwords, API keys, or private keys—must reference secrets using the following format:
```
password: secret:/my/database/password
```
This applies **only to fields marked as secrets** in the connection form (these typically mask input and show a visibility toggle icon).
For a complete guide on managing secrets in hybrid setups, see the [Hybrid Ingestion Runner Secret Management Guide](https://docs.getcollate.io/getting-started/day-1/hybrid-saas/hybrid-ingestion-runner#3.-manage-secrets-securely).
* **Host and Port**: URL or IP address of your installation of Tableau Server.
* **Authentication Types**:
1. Basic Authentication
* Username: The name of the user whose credentials will be used to sign in.
* Password: The password of the user.
2. Access Token Authentication
* Personal Access Token: The personal access token name. For more information to get a Personal Access Token please visit this [link](https://help.tableau.com/current/server/en-us/security_personal_access_tokens.htm).
* Personal Access Token Secret: The personal access token value. For more information to get a Personal Access Token please visit this [link](https://help.tableau.com/current/server/en-us/security_personal_access_tokens.htm).
* **API Version**: Tableau API version. If not provided, the version will be used from the Tableau server automatically. A list of versions can be found [here](https://help.tableau.com/current/api/rest_api/en-us/REST/rest_api_concepts_versions.htm).
* **Site Name**: This corresponds to the `contentUrl` attribute in the Tableau REST API. The `site_name` is the portion of the URL that follows the `/site/` in the URL.
* **Pagination Limit**: The pagination limit will be used while querying the Tableau Graphql endpoint to get the data source information.
* **Proxy URL**: Optional proxy URL for the Tableau server. If not provided, the hostPort will be used. This is used to generate the dashboard and chart URLs.
### Site Name
#### 1. Service Connection for Tableau Cloud
If you're connecting to a cloud Tableau instance, add the `Site Name` with your site name.
#### 2. Service Connection for a default tableau site
For a default tableau site the `Site Name` field should be kept empty.
#### 3. Service Connection for a non-default tableau site
For a non-default tableau site the `Site Name` field is required.
If `https://xxx.tableau.com/#/site/MarketingTeam/home` represents the homepage url for your tableau site, the `MarketingTeam` from the url should be entered in the `Site Name` field.
### Authentication Type
### 1. Basic Authentication
We need the name of the user whose credentials will be used to sign in and the password of the user.
### 2. Access Token Authentication
In this case, the personal access token name and the personal access token value are required.
For more information to get a Personal Access Token please visit this [link](https://help.tableau.com/current/server/en-us/security_personal_access_tokens.htm).
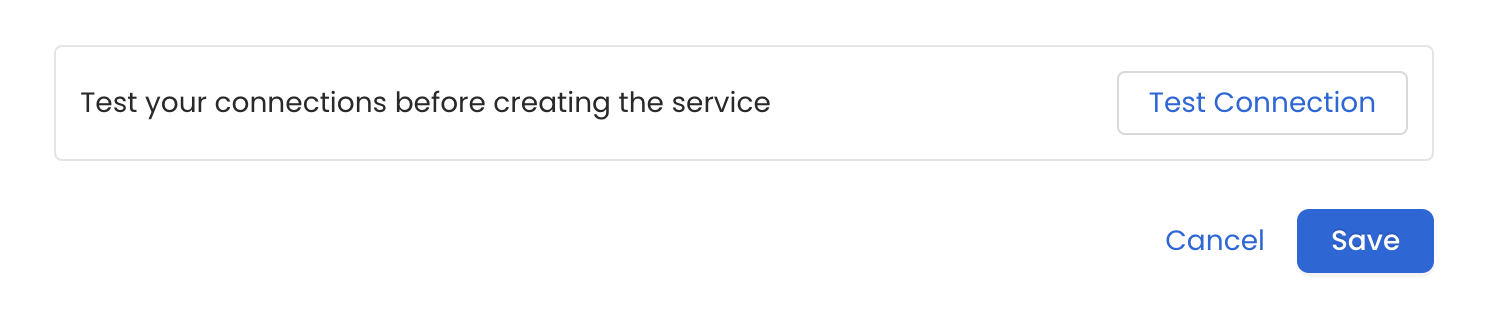
Once the credentials have been added, click on *Test Connection* and *Save* the changes.
 After adding and testing the dashboard service, configure the metadata ingestion pipeline. To configure, follow the steps below:
1. Navigate to **Settings** > **Services** > **Dashboards**.
2. On the **Dashboards** services page, click the service you've added.
3. Go to the **Agents** tab, and then click **Add Agent** > **Add Metadata Agent**.
4. Configure the ingestion details. See [Metadata Ingestion Options](#metadata-ingestion-options).
After adding and testing the dashboard service, configure the metadata ingestion pipeline. To configure, follow the steps below:
1. Navigate to **Settings** > **Services** > **Dashboards**.
2. On the **Dashboards** services page, click the service you've added.
3. Go to the **Agents** tab, and then click **Add Agent** > **Add Metadata Agent**.
4. Configure the ingestion details. See [Metadata Ingestion Options](#metadata-ingestion-options).
 #### Metadata Ingestion Options
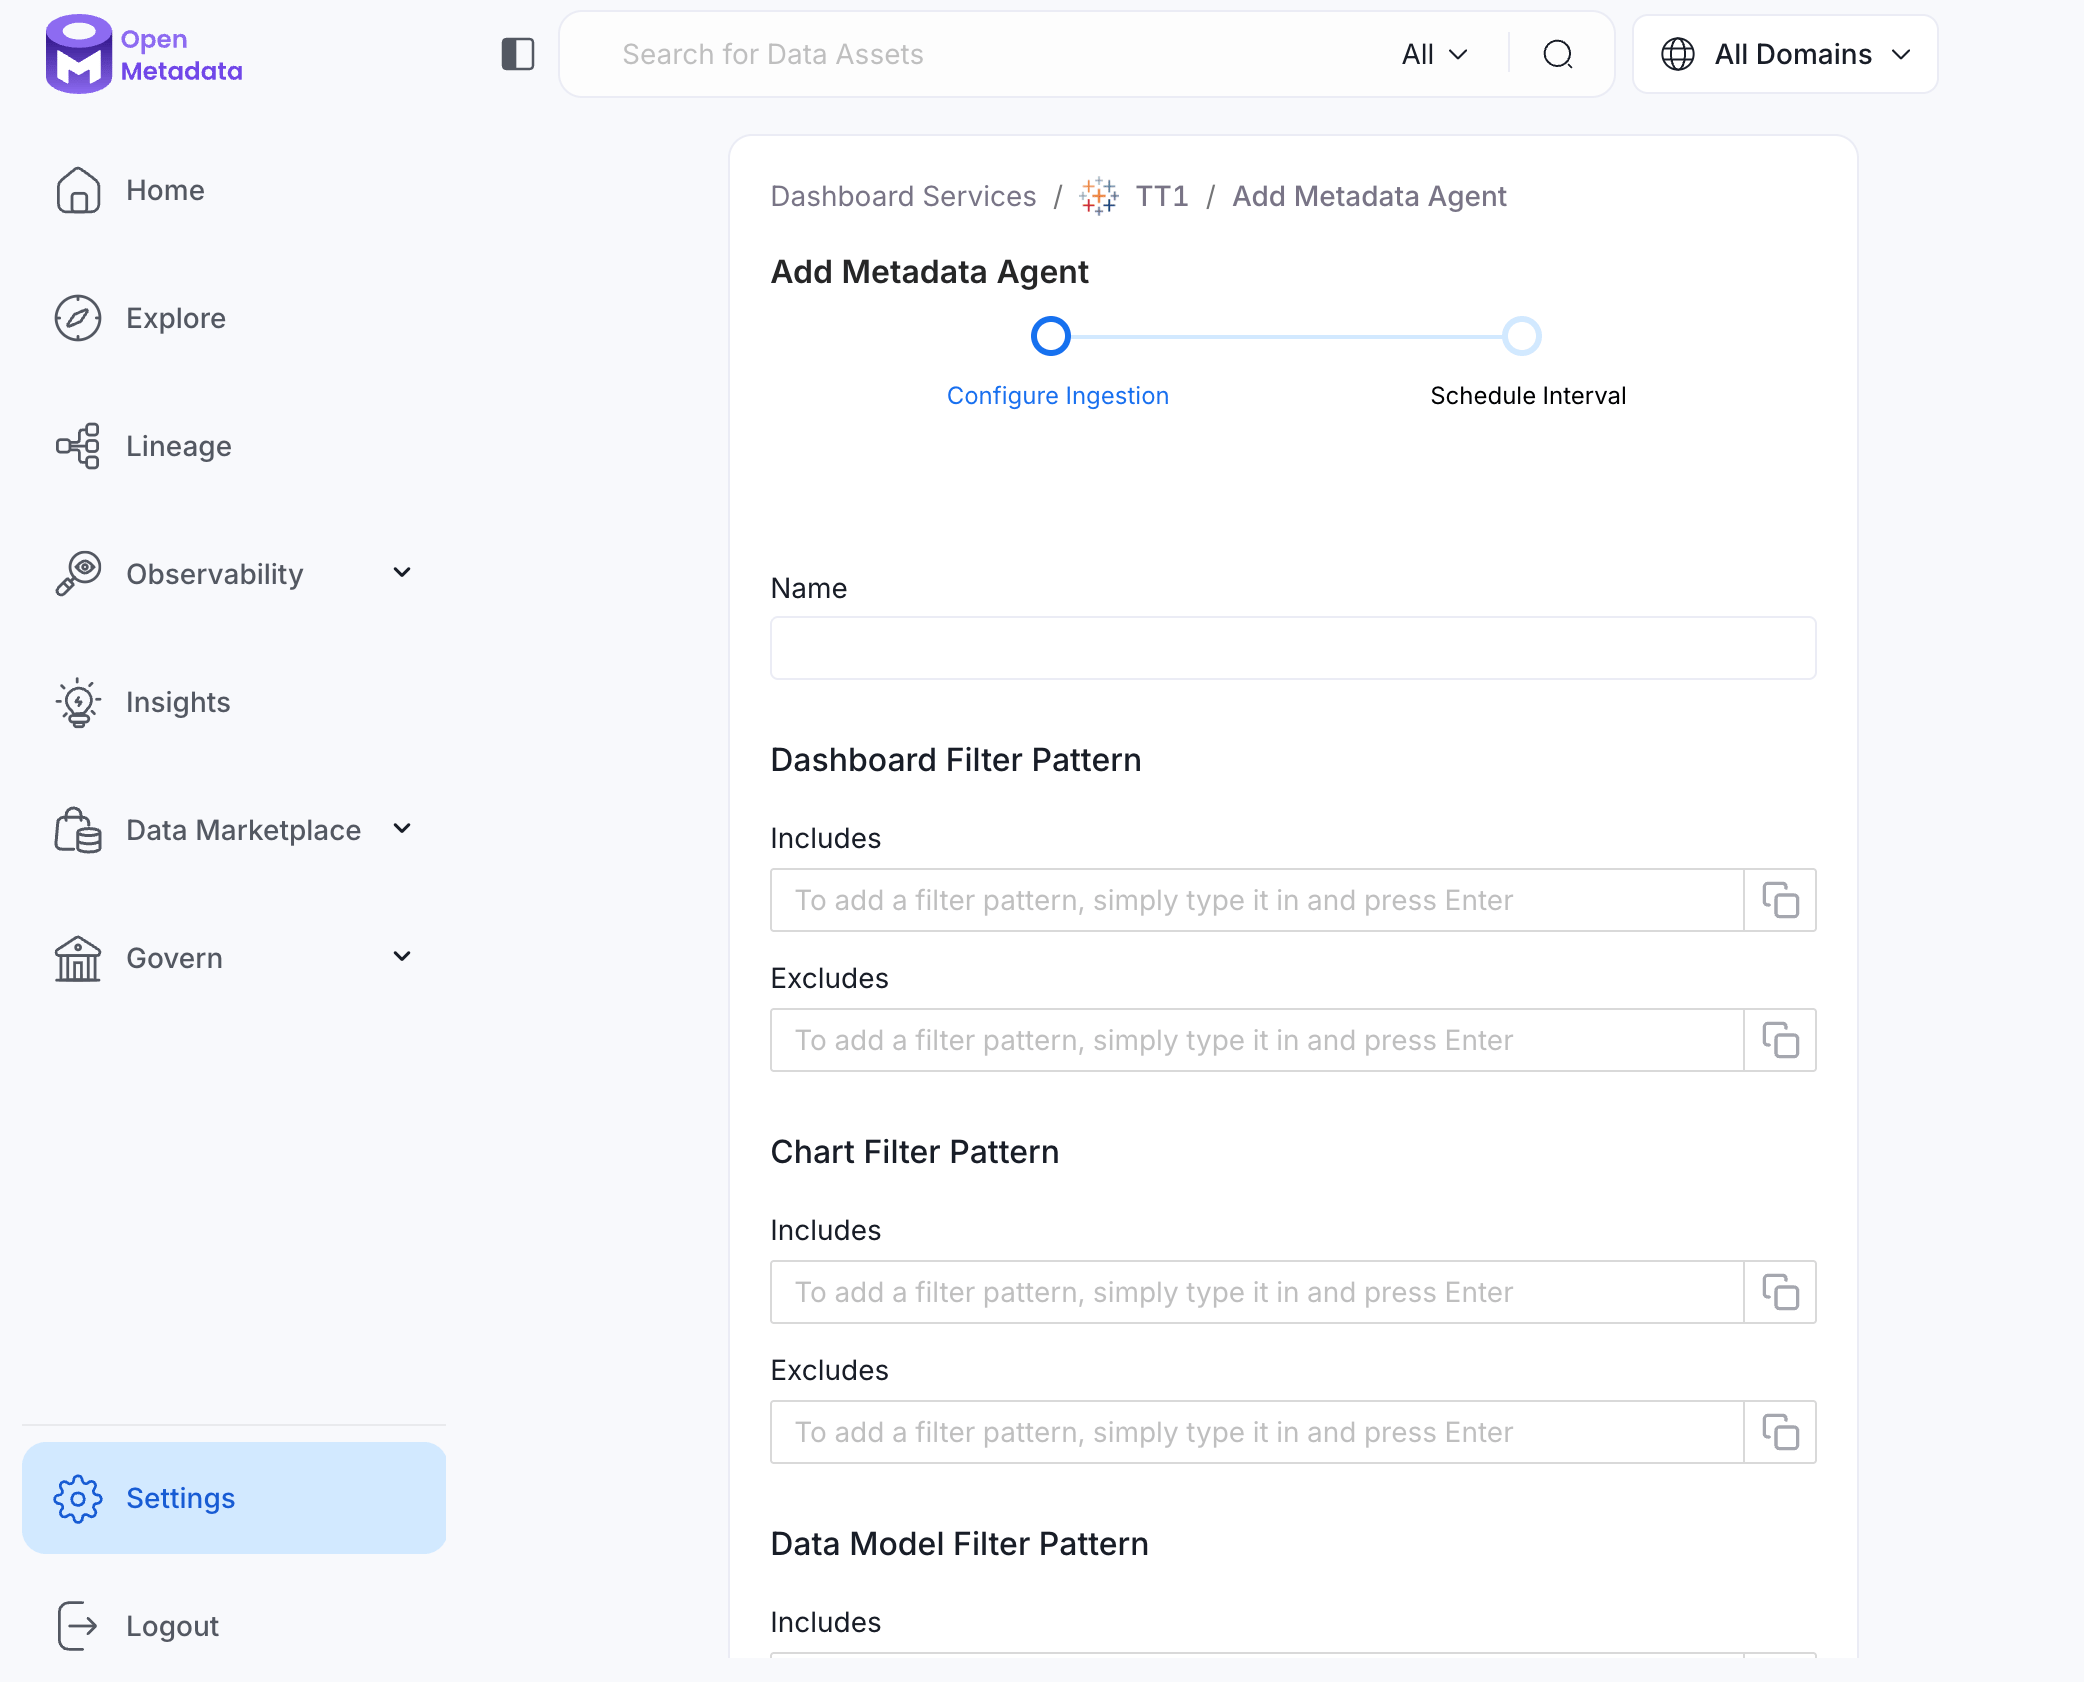
* **Name**: This field is the name of the ingestion pipeline. Customize it or use the generated name.
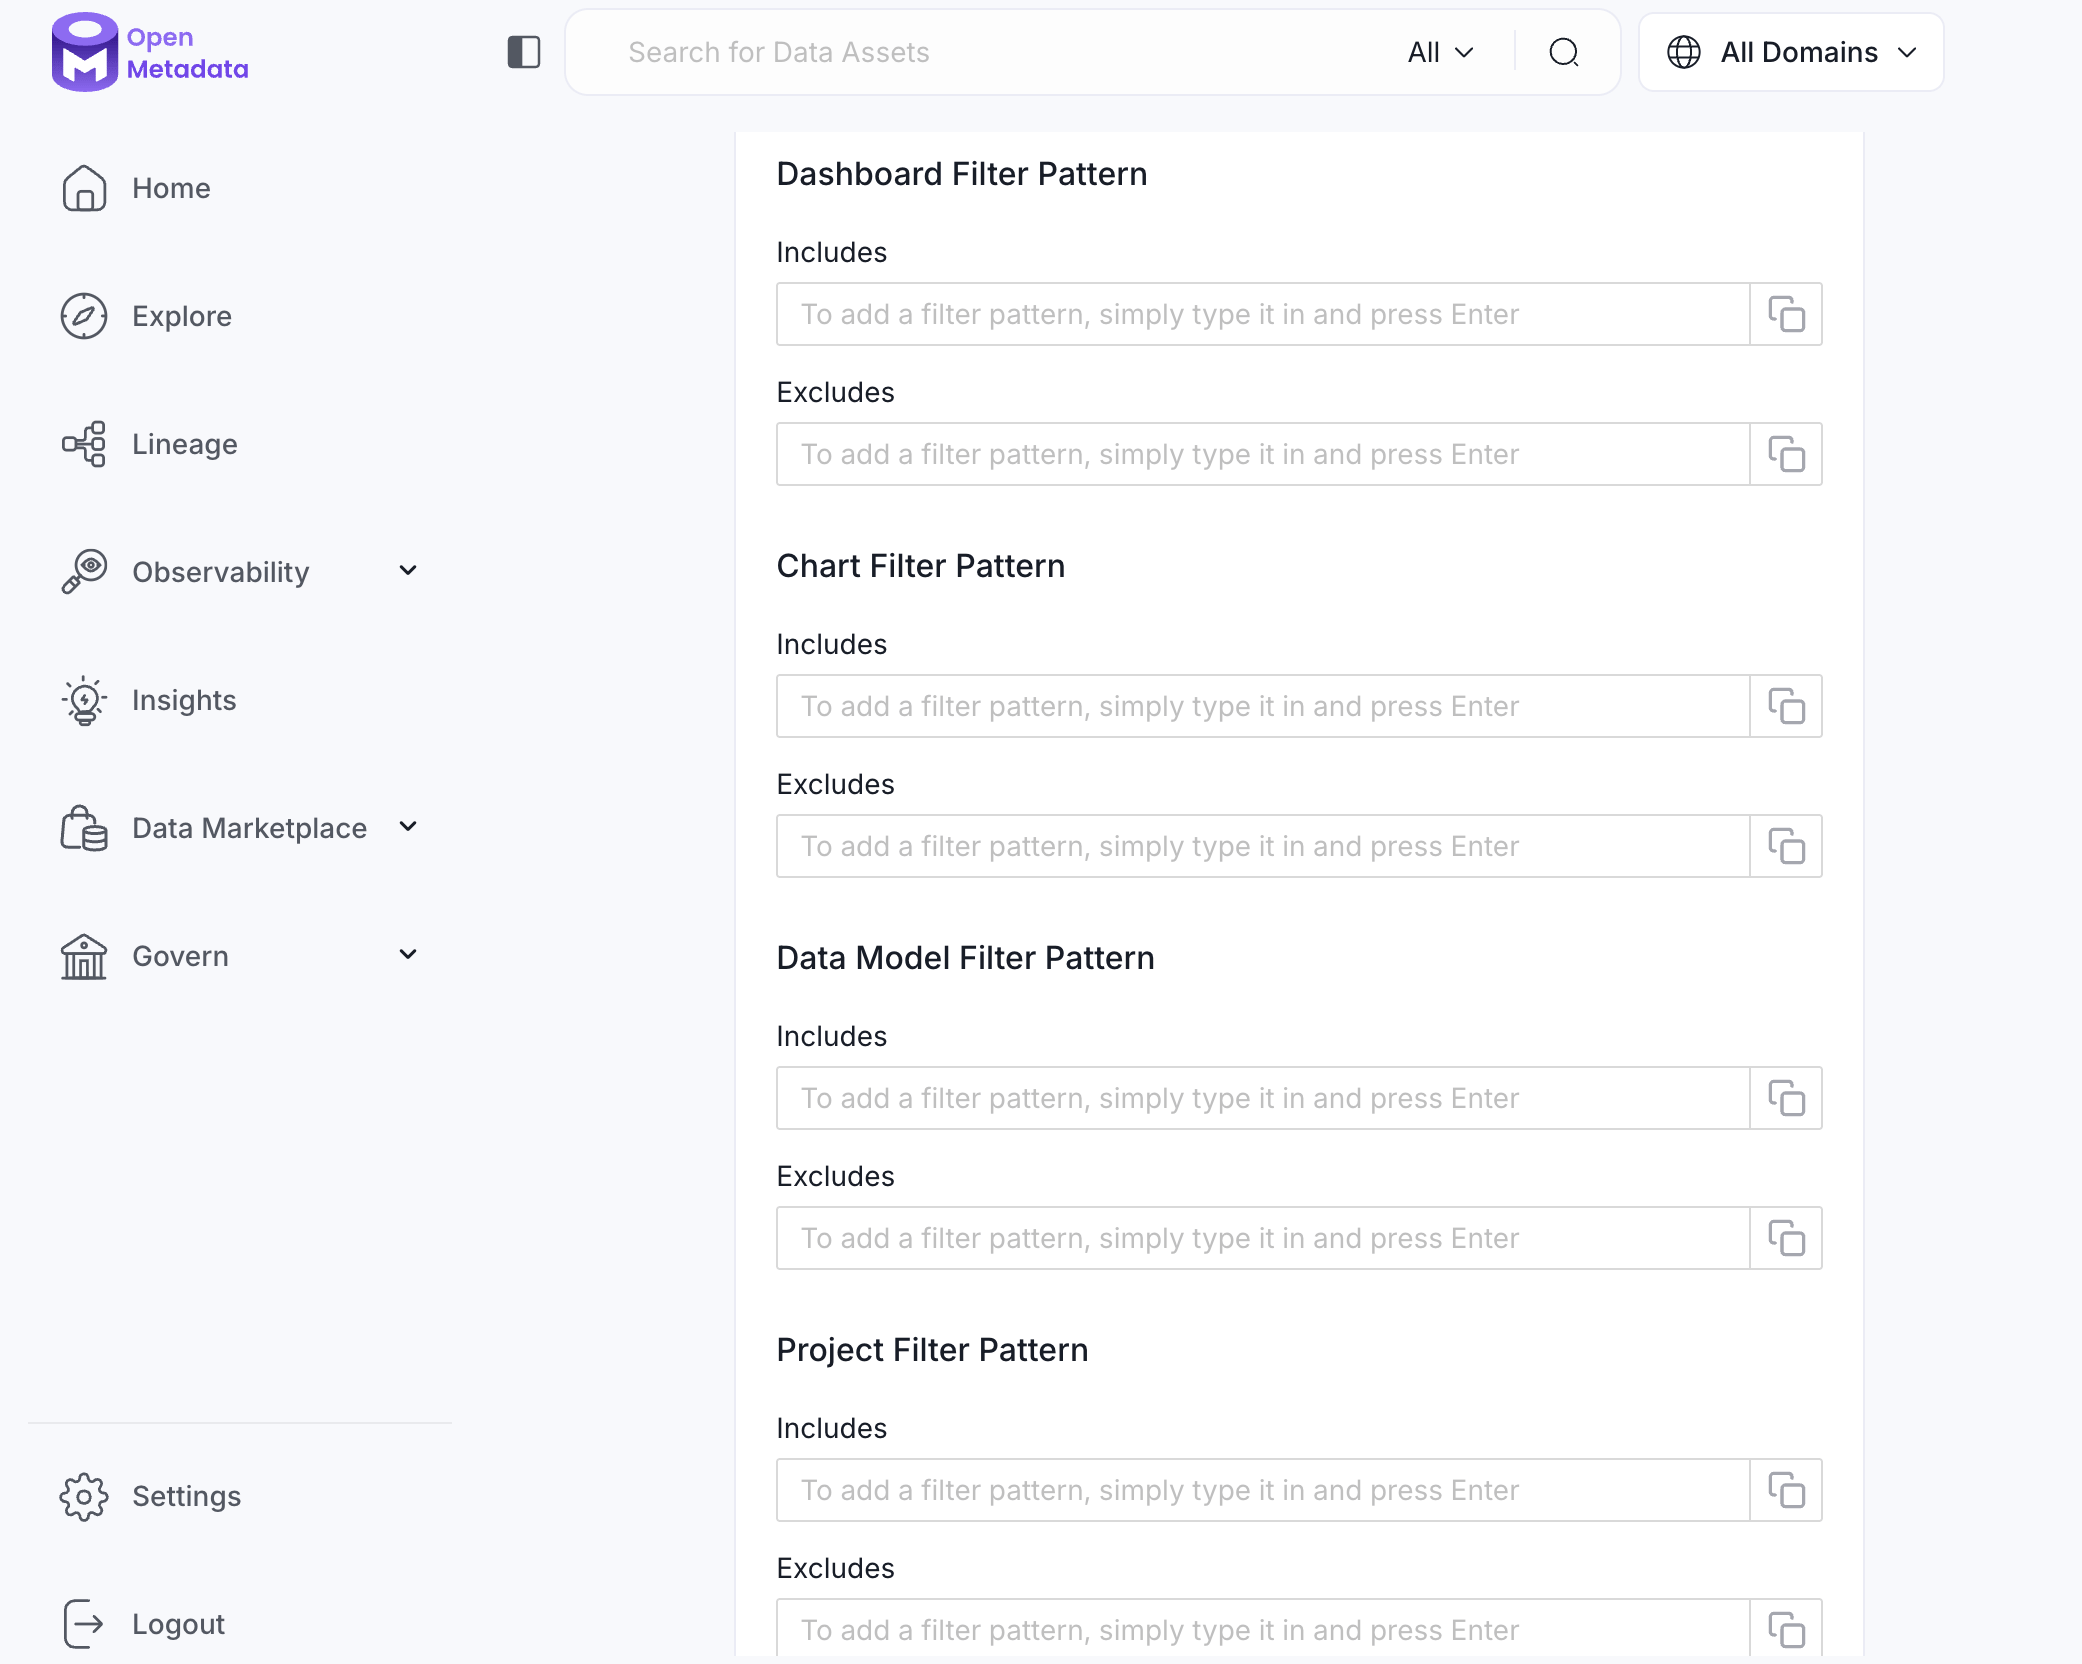
* **Dashboard Filter Pattern (Optional)**: Use it to control whether to include dashboards as part of metadata ingestion.
* **Include**: Explicitly include dashboards by adding comma-separated regular expressions to the 'Include' field. OpenMetadata will include all dashboards with names matching one or more of the supplied regular expressions. All other dashboards will be excluded.
* **Exclude**: Explicitly exclude dashboards by adding comma-separated regular expressions to the 'Exclude' field. OpenMetadata will exclude all dashboards with names matching one or more of the supplied regular expressions. All other dashboards will be included.
* **Chart Filter Pattern (Optional)**: Use it to control whether to include charts as part of metadata ingestion.
* **Include**: Explicitly include charts by adding comma-separated regular expressions to the 'Include' field. OpenMetadata will include all charts with names matching one or more of the supplied regular expressions. All other charts will be excluded.
* **Exclude**: Explicitly exclude charts by adding comma-separated regular expressions to the 'Exclude' field. OpenMetadata will exclude all charts with names matching one or more of the supplied regular expressions. All other charts will be included.
* **Data Model Filter Pattern (Optional)**: Use it to control whether to include data models as part of metadata ingestion.
* **Include**: Explicitly include data models by adding comma-separated regular expressions to the 'Include' field. OpenMetadata will include all data models with names matching one or more of the supplied regular expressions. All other data models will be excluded.
* **Exclude**: Explicitly exclude data models by adding comma-separated regular expressions to the 'Exclude' field. OpenMetadata will exclude all data models with names matching one or more of the supplied regular expressions. All other data models will be included.
* **Project Filter Pattern**: Filter the dashboards, charts, and data sources by projects. Note that all of them support regex as include or exclude. For example, "My project, My proj.\*, .\*Project".
We filter the projects by concatenating the entire project hierarchy using dot notation
(for example, `Project1.NestedProjectA.OtherProject`).
Make sure the regex filter pattern accounts for this fully-qualified format.
* **Enable Debug Log**: Enable this toggle to use debug-level logging.
#### Metadata Ingestion Options
* **Name**: This field is the name of the ingestion pipeline. Customize it or use the generated name.
* **Dashboard Filter Pattern (Optional)**: Use it to control whether to include dashboards as part of metadata ingestion.
* **Include**: Explicitly include dashboards by adding comma-separated regular expressions to the 'Include' field. OpenMetadata will include all dashboards with names matching one or more of the supplied regular expressions. All other dashboards will be excluded.
* **Exclude**: Explicitly exclude dashboards by adding comma-separated regular expressions to the 'Exclude' field. OpenMetadata will exclude all dashboards with names matching one or more of the supplied regular expressions. All other dashboards will be included.
* **Chart Filter Pattern (Optional)**: Use it to control whether to include charts as part of metadata ingestion.
* **Include**: Explicitly include charts by adding comma-separated regular expressions to the 'Include' field. OpenMetadata will include all charts with names matching one or more of the supplied regular expressions. All other charts will be excluded.
* **Exclude**: Explicitly exclude charts by adding comma-separated regular expressions to the 'Exclude' field. OpenMetadata will exclude all charts with names matching one or more of the supplied regular expressions. All other charts will be included.
* **Data Model Filter Pattern (Optional)**: Use it to control whether to include data models as part of metadata ingestion.
* **Include**: Explicitly include data models by adding comma-separated regular expressions to the 'Include' field. OpenMetadata will include all data models with names matching one or more of the supplied regular expressions. All other data models will be excluded.
* **Exclude**: Explicitly exclude data models by adding comma-separated regular expressions to the 'Exclude' field. OpenMetadata will exclude all data models with names matching one or more of the supplied regular expressions. All other data models will be included.
* **Project Filter Pattern**: Filter the dashboards, charts, and data sources by projects. Note that all of them support regex as include or exclude. For example, "My project, My proj.\*, .\*Project".
We filter the projects by concatenating the entire project hierarchy using dot notation
(for example, `Project1.NestedProjectA.OtherProject`).
Make sure the regex filter pattern accounts for this fully-qualified format.
* **Enable Debug Log**: Enable this toggle to use debug-level logging.
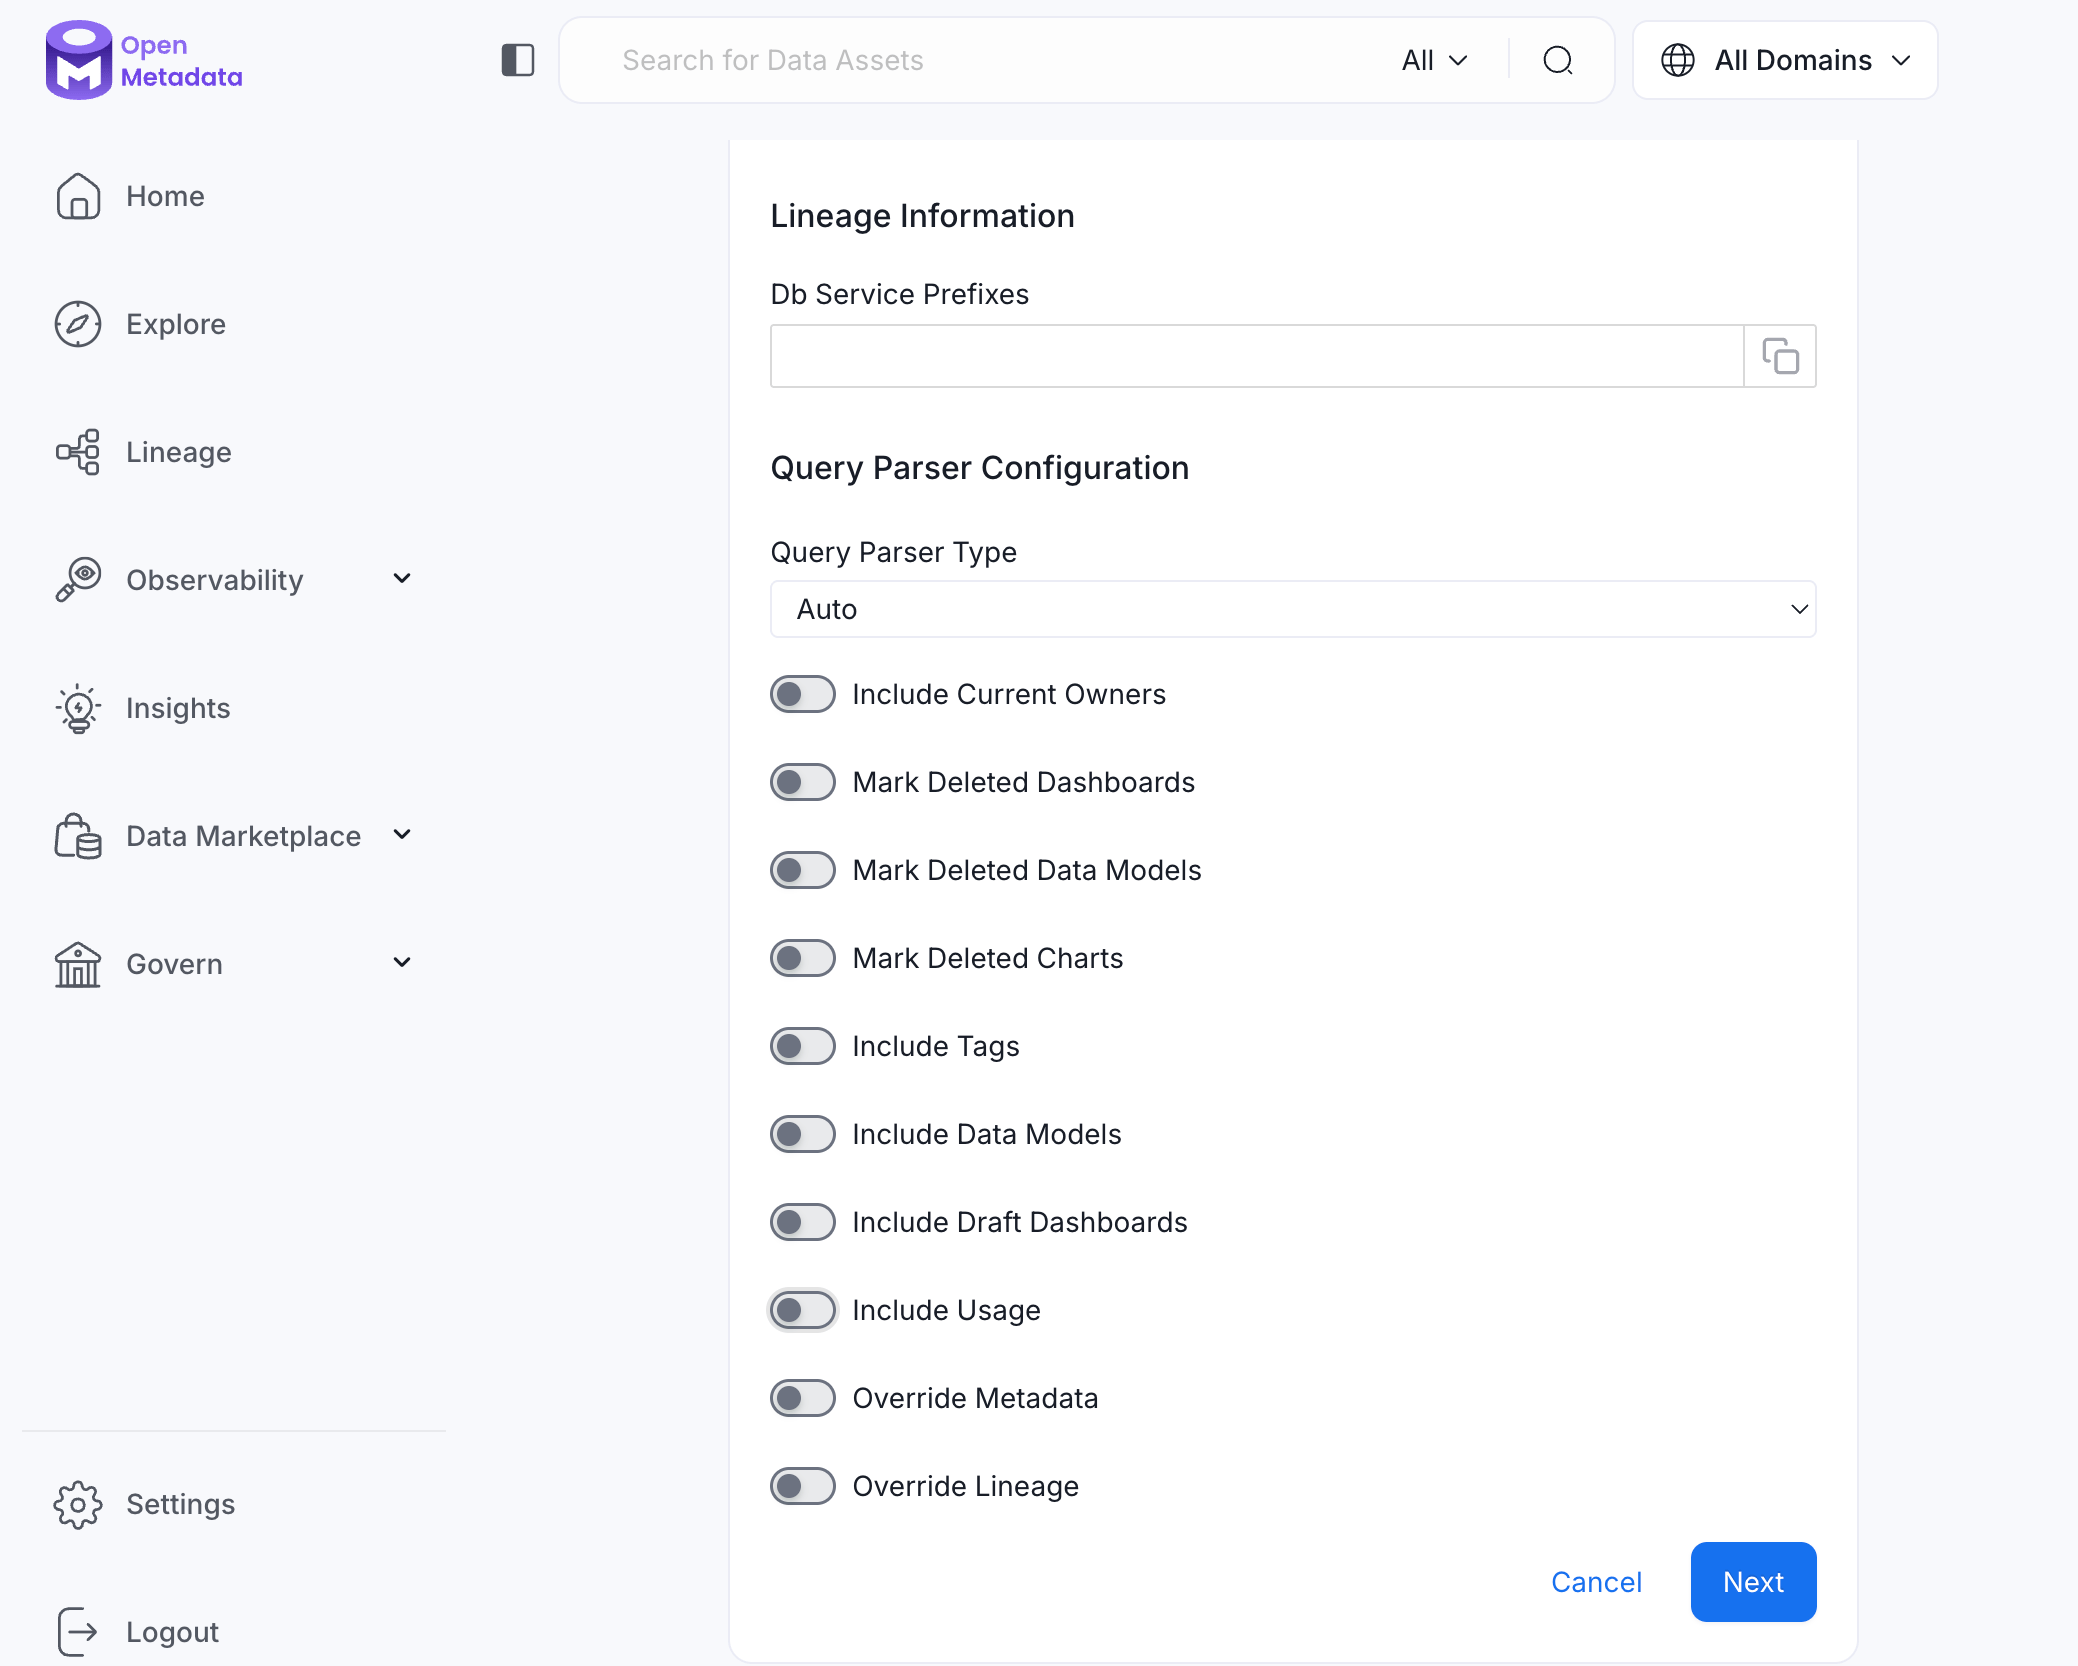
 * **Lineage Information (Optional)**: Configure this section to enable lineage between your dashboards and the database tables they are built on. OpenMetadata uses the database service name to match and draw the lineage path from table to dashboard.
* **Db Service Prefixes**: Enter one or more service path prefixes to tell OpenMetadata where to look for the source tables used by your dashboards. Supported formats:
* `DBServiceName`—matches all tables in the service
* `DBServiceName.DatabaseName`—matches tables in a specific database
* `DBServiceName.DatabaseName.SchemaName`—matches tables in a specific schema
* `DBServiceName.DatabaseName.SchemaName.TableName`—matches a specific table
* **Query Parser Configuration**: Controls how OpenMetadata parses SQL queries to extract lineage. Use this to select the SQL parser that best fits your data source's dialect.
* **Query Parser Type**: Choose the SQL parser for lineage extraction:
* **Auto** (default): Automatically tries SqlGlot first, falls back to SqlFluff, then SqlParse. Recommended for best results.
* **SqlGlot**: High-performance parser with good dialect support. Falls back to SqlParse on failure.
* **SqlFluff**: Comprehensive but slower parser with strong dialect support. Falls back to SqlParse on failure.
* **Include Current Owners**: Enable this toggle to control whether to include owners for the ingested entity if the owner email matches a user stored in the OpenMetadata server as part of metadata ingestion. If the ingested entity already exists and has an owner, the owner will not be overwritten.
* **Mark Deleted Dashboards**: Optional configuration to soft delete dashboards in OpenMetadata if the source dashboards are deleted. After deleting, all associated entities like lineage and other related data for that dashboard will be deleted.
* **Mark Deleted Data Models**: Optional configuration to soft delete data models in OpenMetadata if the source data models are deleted. After deleting, all associated entities with that data model will be deleted.
* **Mark Deleted Charts**: Optional configuration to soft delete charts in OpenMetadata if the source charts are deleted. After deleting, all associated entities with that chart will be deleted.
* **Include Tags**: Enable this toggle to control whether to include tags in metadata ingestion.
* **Include Data Models**: Enable this toggle to control whether to include data models as part of metadata ingestion.
* **Include Draft Dashboard**: Enable this toggle to include draft dashboards. By default, this is enabled.
* **Include Usage**: Enable this toggle to control whether to include usage data as part of metadata ingestion.
* **Override Metadata**: Enable this toggle to control whether to override the existing metadata in the OpenMetadata server with the metadata fetched from the source. If enabled, the metadata fetched from the source will override the existing metadata in OpenMetadata. If disabled, only fields that have no value in OpenMetadata will be updated. This is applicable for fields like description, tags, owner, and displayName.
* **Override Lineage**: Enable this toggle to control whether to override the existing lineage in OpenMetadata with the lineage fetched from the source. If enabled, existing lineage will be replaced. If disabled, new lineage edges will be added without removing existing ones.
* **Lineage Information (Optional)**: Configure this section to enable lineage between your dashboards and the database tables they are built on. OpenMetadata uses the database service name to match and draw the lineage path from table to dashboard.
* **Db Service Prefixes**: Enter one or more service path prefixes to tell OpenMetadata where to look for the source tables used by your dashboards. Supported formats:
* `DBServiceName`—matches all tables in the service
* `DBServiceName.DatabaseName`—matches tables in a specific database
* `DBServiceName.DatabaseName.SchemaName`—matches tables in a specific schema
* `DBServiceName.DatabaseName.SchemaName.TableName`—matches a specific table
* **Query Parser Configuration**: Controls how OpenMetadata parses SQL queries to extract lineage. Use this to select the SQL parser that best fits your data source's dialect.
* **Query Parser Type**: Choose the SQL parser for lineage extraction:
* **Auto** (default): Automatically tries SqlGlot first, falls back to SqlFluff, then SqlParse. Recommended for best results.
* **SqlGlot**: High-performance parser with good dialect support. Falls back to SqlParse on failure.
* **SqlFluff**: Comprehensive but slower parser with strong dialect support. Falls back to SqlParse on failure.
* **Include Current Owners**: Enable this toggle to control whether to include owners for the ingested entity if the owner email matches a user stored in the OpenMetadata server as part of metadata ingestion. If the ingested entity already exists and has an owner, the owner will not be overwritten.
* **Mark Deleted Dashboards**: Optional configuration to soft delete dashboards in OpenMetadata if the source dashboards are deleted. After deleting, all associated entities like lineage and other related data for that dashboard will be deleted.
* **Mark Deleted Data Models**: Optional configuration to soft delete data models in OpenMetadata if the source data models are deleted. After deleting, all associated entities with that data model will be deleted.
* **Mark Deleted Charts**: Optional configuration to soft delete charts in OpenMetadata if the source charts are deleted. After deleting, all associated entities with that chart will be deleted.
* **Include Tags**: Enable this toggle to control whether to include tags in metadata ingestion.
* **Include Data Models**: Enable this toggle to control whether to include data models as part of metadata ingestion.
* **Include Draft Dashboard**: Enable this toggle to include draft dashboards. By default, this is enabled.
* **Include Usage**: Enable this toggle to control whether to include usage data as part of metadata ingestion.
* **Override Metadata**: Enable this toggle to control whether to override the existing metadata in the OpenMetadata server with the metadata fetched from the source. If enabled, the metadata fetched from the source will override the existing metadata in OpenMetadata. If disabled, only fields that have no value in OpenMetadata will be updated. This is applicable for fields like description, tags, owner, and displayName.
* **Override Lineage**: Enable this toggle to control whether to override the existing lineage in OpenMetadata with the lineage fetched from the source. If enabled, existing lineage will be replaced. If disabled, new lineage edges will be added without removing existing ones.
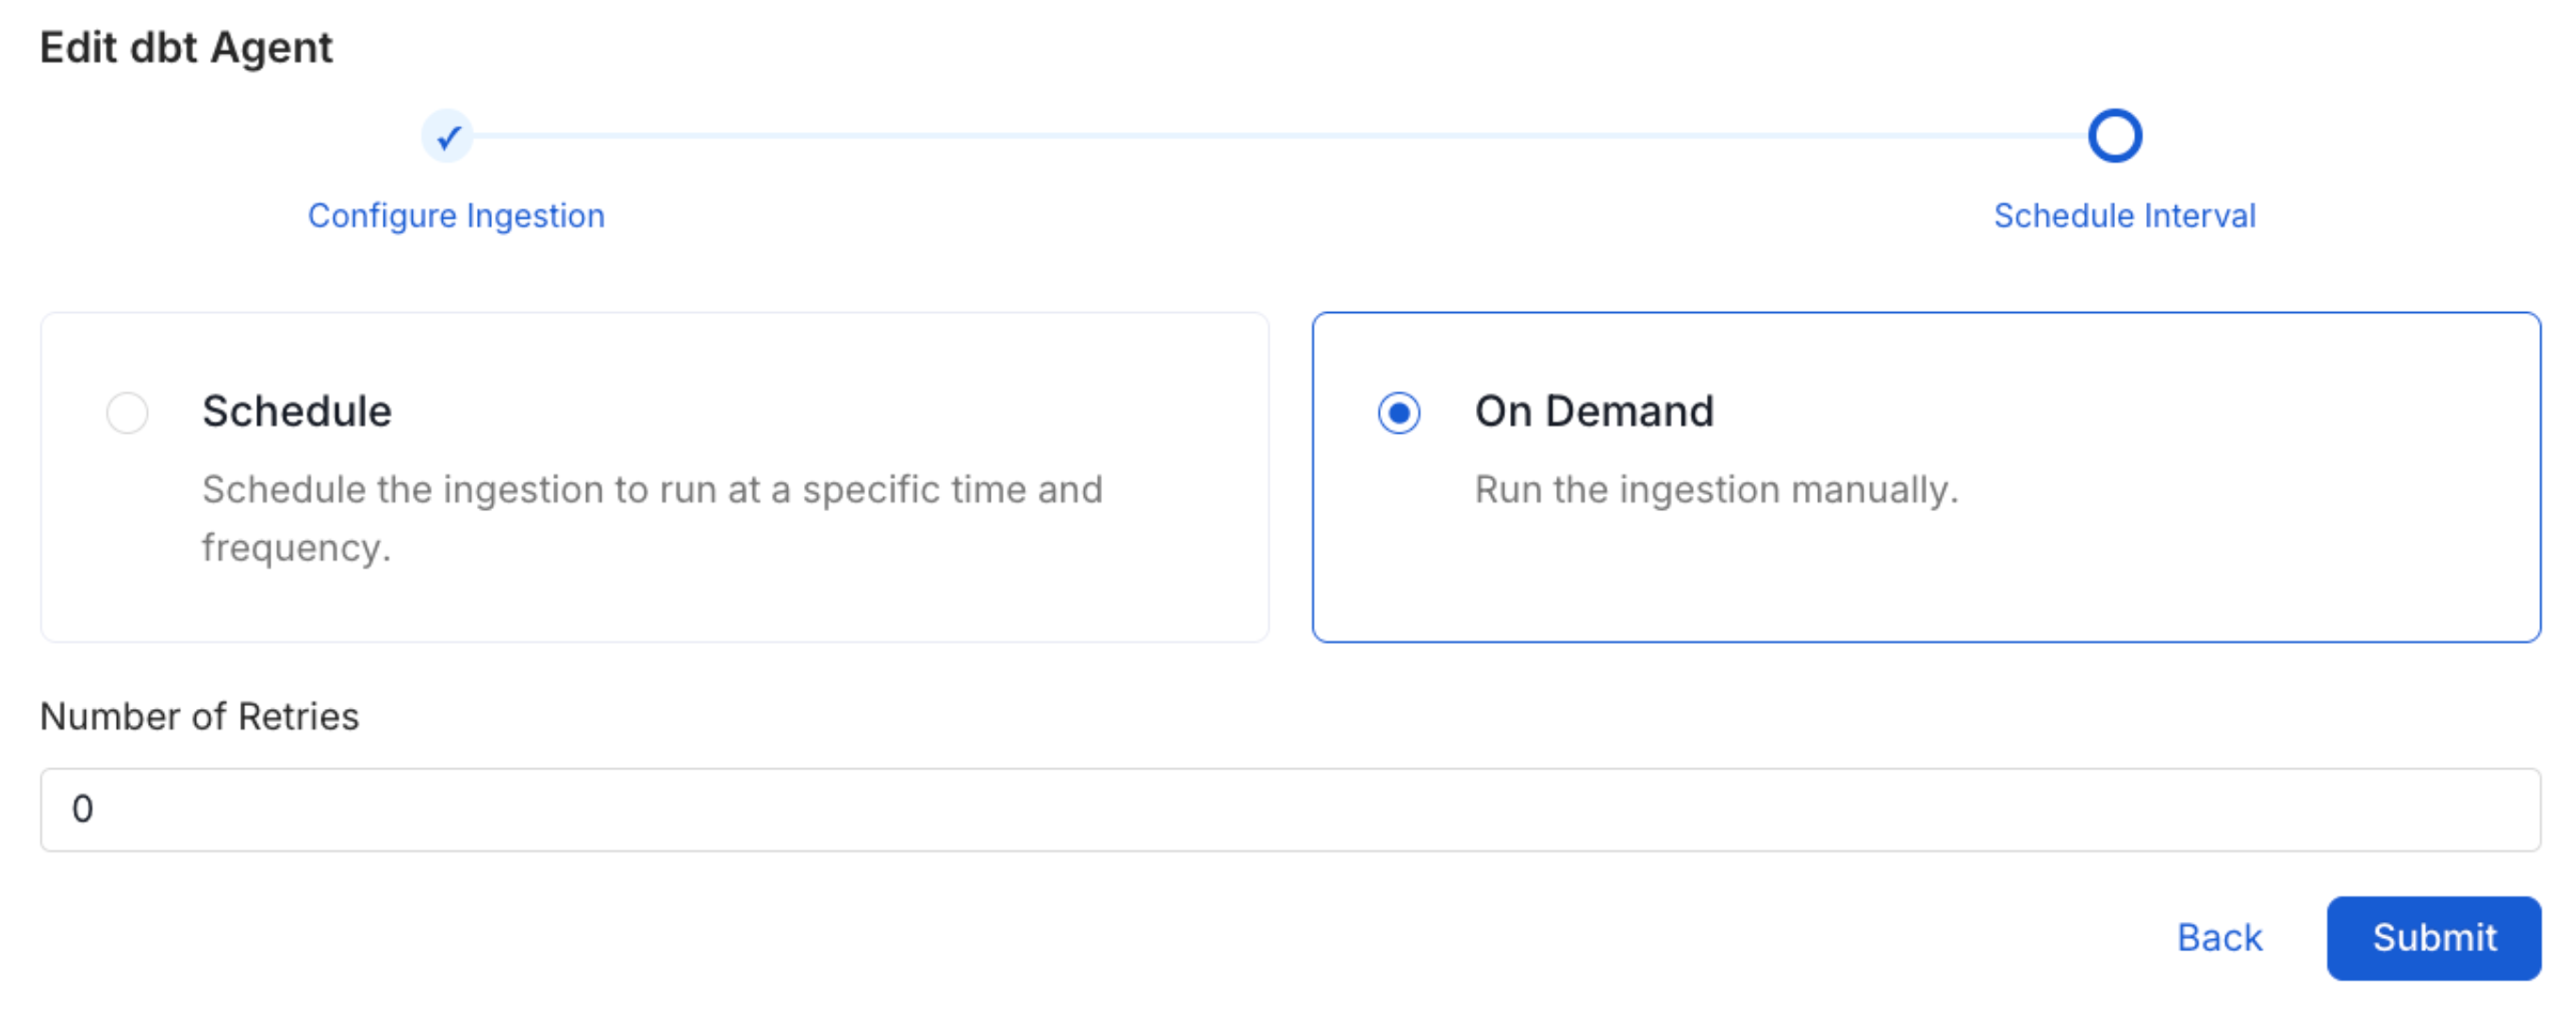
 Scheduling can be set up at an hourly, daily, weekly, or manual cadence. The
timezone is in UTC. Select a Start Date to schedule for ingestion. It is
optional to add an End Date.
Review your configuration settings. If they match what you intended,
click Deploy to create the service and schedule metadata ingestion.
If something doesn't look right, click the Back button to return to the
appropriate step and change the settings as needed.
After configuring the workflow, you can click on Deploy to create the
pipeline.
Scheduling can be set up at an hourly, daily, weekly, or manual cadence. The
timezone is in UTC. Select a Start Date to schedule for ingestion. It is
optional to add an End Date.
Review your configuration settings. If they match what you intended,
click Deploy to create the service and schedule metadata ingestion.
If something doesn't look right, click the Back button to return to the
appropriate step and change the settings as needed.
After configuring the workflow, you can click on Deploy to create the
pipeline.
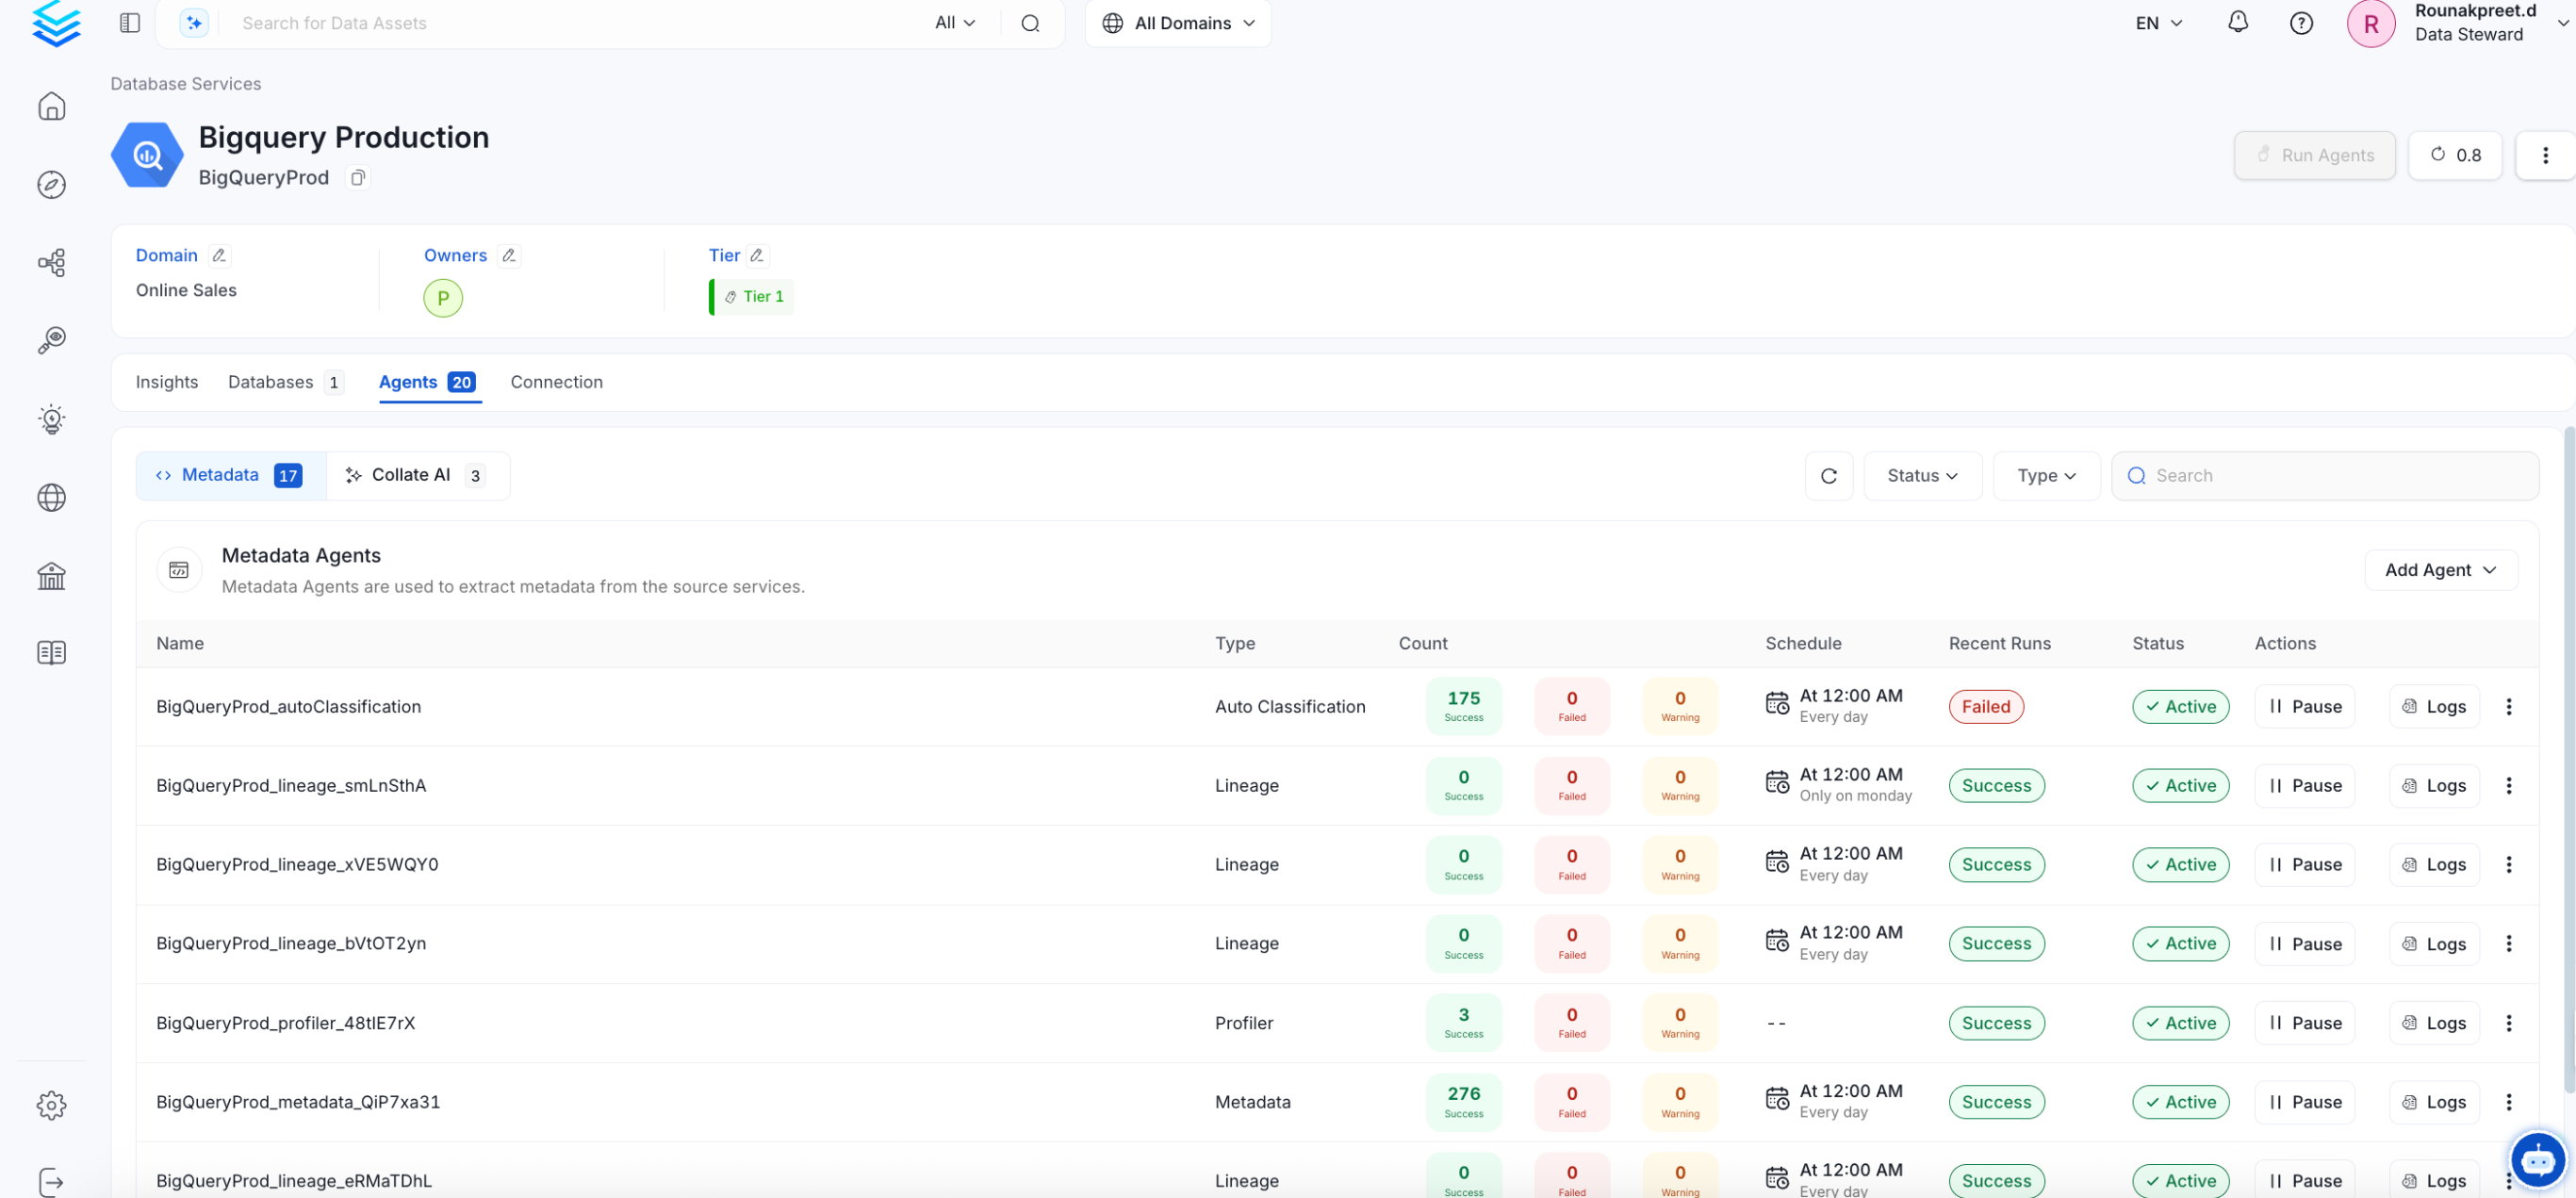
 Once the workflow has been successfully deployed, you can view the
Ingestion Pipeline running from the Service Page.
Once the workflow has been successfully deployed, you can view the
Ingestion Pipeline running from the Service Page.
 If AutoPilot is enabled, workflows like usage tracking, data lineage, and similar tasks will be handled automatically. Users don’t need to set up or manage them - AutoPilot takes care of everything in the system.
## Securing Tableau Connection with SSL in OpenMetadata
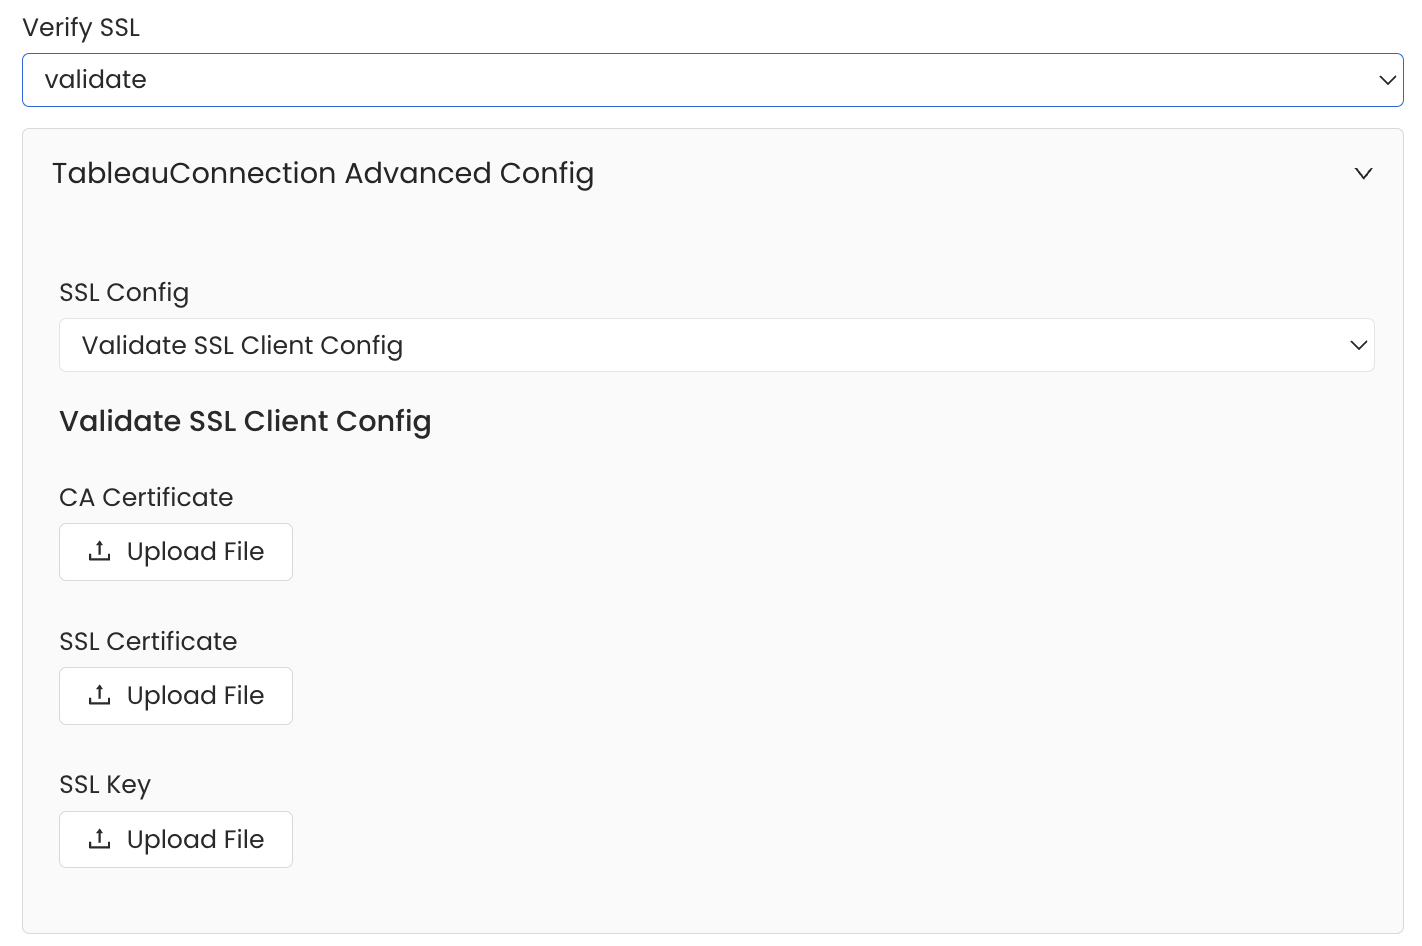
To establish secure connections between OpenMetadata and Tableau, navigate to the `Advanced Config` section. Here, you can provide the CA certificate used for SSL validation by specifying the `caCertificate`. Alternatively, if both client and server require mutual authentication, you’ll need to use all three parameters: `ssl_key`, `ssl_cert`, and `caCertificate`. In this case, `ssl_cert` is used for the client’s SSL certificate, `ssl_key` for the private key associated with the SSL certificate, and `caCertificate` for the CA certificate to validate the server’s certificate.
If AutoPilot is enabled, workflows like usage tracking, data lineage, and similar tasks will be handled automatically. Users don’t need to set up or manage them - AutoPilot takes care of everything in the system.
## Securing Tableau Connection with SSL in OpenMetadata
To establish secure connections between OpenMetadata and Tableau, navigate to the `Advanced Config` section. Here, you can provide the CA certificate used for SSL validation by specifying the `caCertificate`. Alternatively, if both client and server require mutual authentication, you’ll need to use all three parameters: `ssl_key`, `ssl_cert`, and `caCertificate`. In this case, `ssl_cert` is used for the client’s SSL certificate, `ssl_key` for the private key associated with the SSL certificate, and `caCertificate` for the CA certificate to validate the server’s certificate.
 ## Lineage
Lineage in OpenMetadata shows you which database tables power each dashboard. When lineage is set up, you can trace any dashboard back to the exact source tables in your database.
There is no separate lineage agent or lineage pipeline—lineage is collected as part of the same metadata ingestion workflow. Configuring the **Db Service Prefixes** field (covered below) is optional but recommended — it restricts table matching to specific database services. If left blank, OpenMetadata attempts to match source tables across all ingested database services.
## Lineage
Lineage in OpenMetadata shows you which database tables power each dashboard. When lineage is set up, you can trace any dashboard back to the exact source tables in your database.
There is no separate lineage agent or lineage pipeline—lineage is collected as part of the same metadata ingestion workflow. Configuring the **Db Service Prefixes** field (covered below) is optional but recommended — it restricts table matching to specific database services. If left blank, OpenMetadata attempts to match source tables across all ingested database services.
 ### How to Set Up Lineage
1. Go to **Settings** > **Services** > **Dashboards**.
2. Click the dashboard service you've added.
3. Go to the **Agents** tab, then select **Add Agent** > **Add Metadata Agent**.
If a metadata agent already exists, select the three-dot context menu (⋮) next to it and select **Edit**.
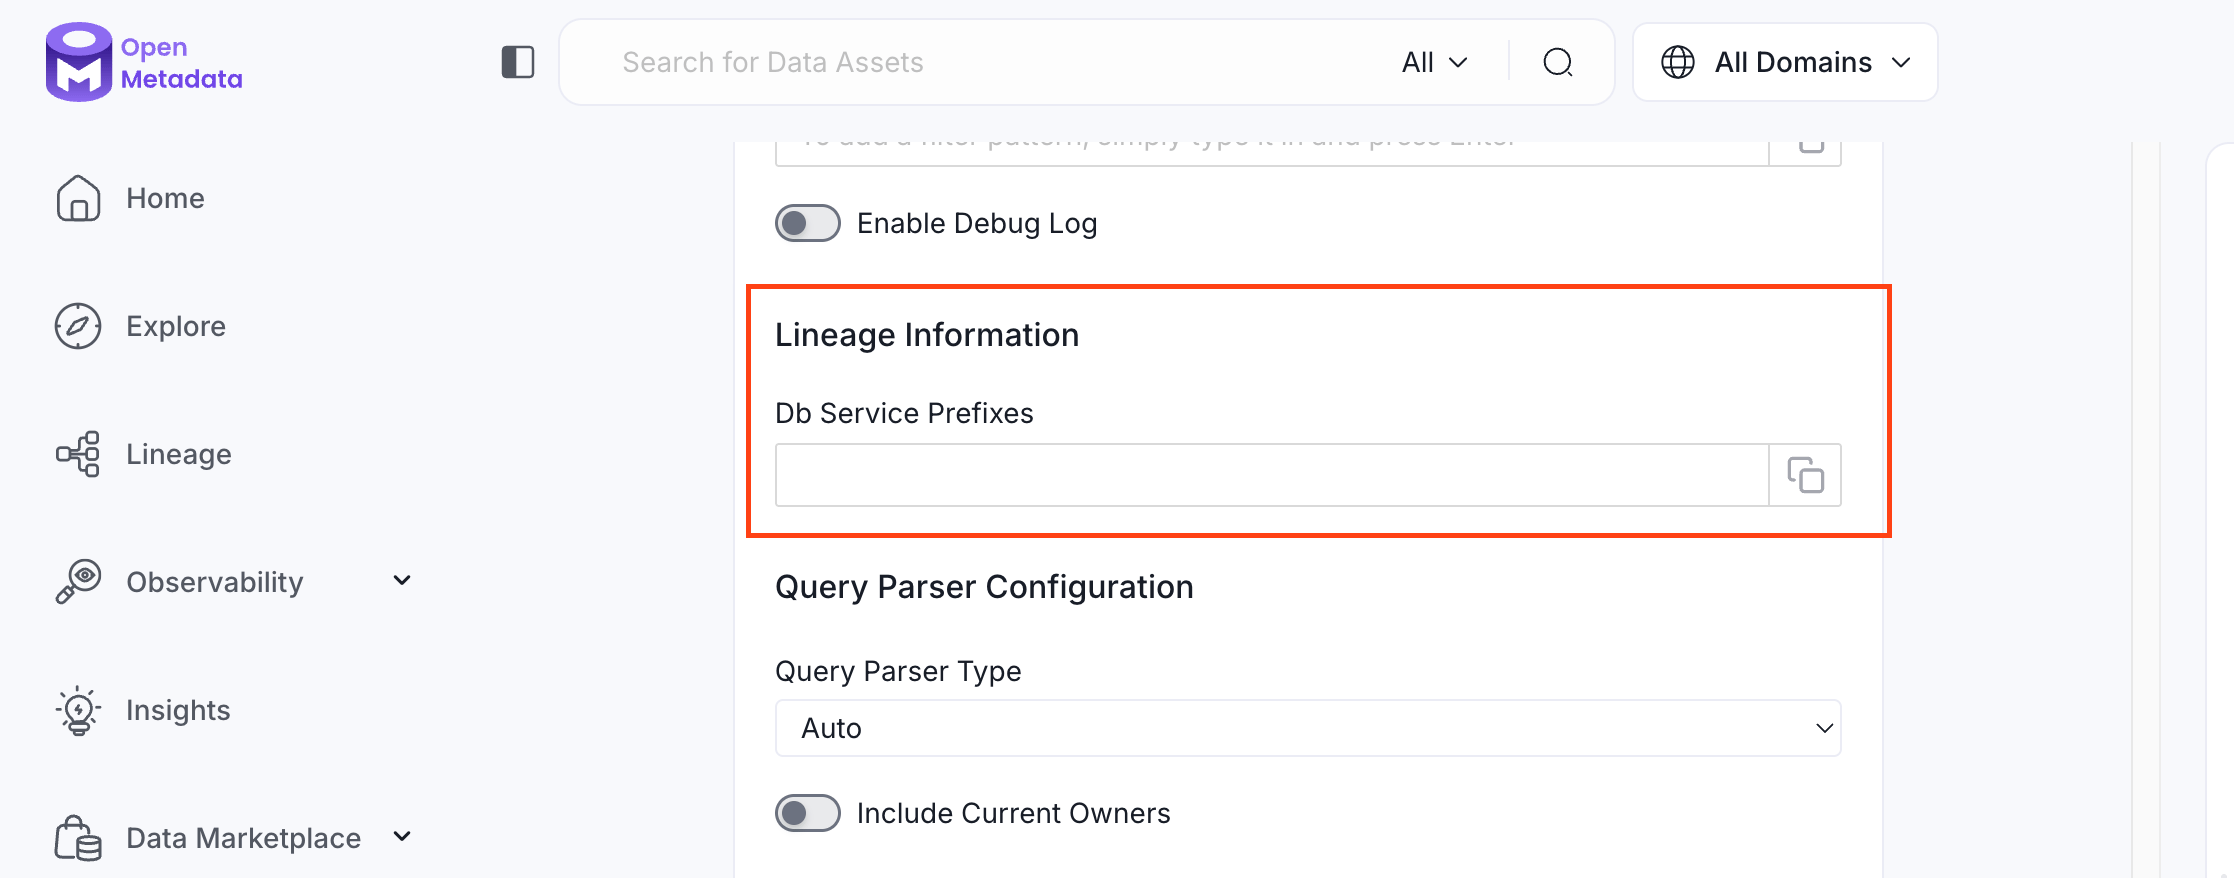
4. In the **Configure Ingestion** step, scroll down to the **Lineage Information** section.
5. Optionally enter one or more database service names in the **Db Service Prefixes** field to restrict table matching to specific services. If left blank, OpenMetadata searches across all ingested database services.
The **Db Service Prefixes** field helps OpenMetadata locate the source tables and draw the lineage path from table to dashboard.
**Examples of valid entries:**
| What you enter | What it matches |
| ------------------------------- | --------------------------------------------------------- |
| `SnowflakeProd` | All tables in the Snowflake service named `SnowflakeProd` |
| `SnowflakeProd.sales_db` | Tables in the `sales_db` database within `SnowflakeProd` |
| `SnowflakeProd.sales_db.public` | Tables in the `public` schema within `sales_db` |
If your dashboards pull data from multiple database services, add each service as a separate entry in the **Db Service Prefixes** field.
### Tableau Metadata API requirement
Make sure the **Tableau Metadata API** is enabled on your Tableau server. OpenMetadata uses this API to find out which database tables each dashboard is built on. Without it, lineage will not be collected.
* To enable the Tableau Metadata API, see [Enable the Tableau Metadata API for Tableau Server](https://help.tableau.com/current/api/metadata_api/en-us/docs/meta_api_start.html#enable-the-tableau-metadata-api-for-tableau-server).
### How to Set Up Lineage
1. Go to **Settings** > **Services** > **Dashboards**.
2. Click the dashboard service you've added.
3. Go to the **Agents** tab, then select **Add Agent** > **Add Metadata Agent**.
If a metadata agent already exists, select the three-dot context menu (⋮) next to it and select **Edit**.
4. In the **Configure Ingestion** step, scroll down to the **Lineage Information** section.
5. Optionally enter one or more database service names in the **Db Service Prefixes** field to restrict table matching to specific services. If left blank, OpenMetadata searches across all ingested database services.
The **Db Service Prefixes** field helps OpenMetadata locate the source tables and draw the lineage path from table to dashboard.
**Examples of valid entries:**
| What you enter | What it matches |
| ------------------------------- | --------------------------------------------------------- |
| `SnowflakeProd` | All tables in the Snowflake service named `SnowflakeProd` |
| `SnowflakeProd.sales_db` | Tables in the `sales_db` database within `SnowflakeProd` |
| `SnowflakeProd.sales_db.public` | Tables in the `public` schema within `sales_db` |
If your dashboards pull data from multiple database services, add each service as a separate entry in the **Db Service Prefixes** field.
### Tableau Metadata API requirement
Make sure the **Tableau Metadata API** is enabled on your Tableau server. OpenMetadata uses this API to find out which database tables each dashboard is built on. Without it, lineage will not be collected.
* To enable the Tableau Metadata API, see [Enable the Tableau Metadata API for Tableau Server](https://help.tableau.com/current/api/metadata_api/en-us/docs/meta_api_start.html#enable-the-tableau-metadata-api-for-tableau-server).