> ## Documentation Index
> Fetch the complete documentation index at: https://docs.open-metadata.org/llms.txt
> Use this file to discover all available pages before exploring further.
# Databricks Connector | OpenMetadata Integration Guide
> Connect Databricks to OpenMetadata effortlessly. Complete setup guide, configuration steps, and metadata extraction for your data lakehouse platform.
export const MetadataIngestionUi = ({connector, selectServicePath, addNewServicePath, serviceConnectionPath}) => {
return <>
To ingest metadata from your sources, you need to create a service connection.
The service connects your source system with OpenMetadata. Once you create
a service, you can use it to configure your ingestion workflows.
To create a service connection and ingest your metadata, follow the steps below:
-
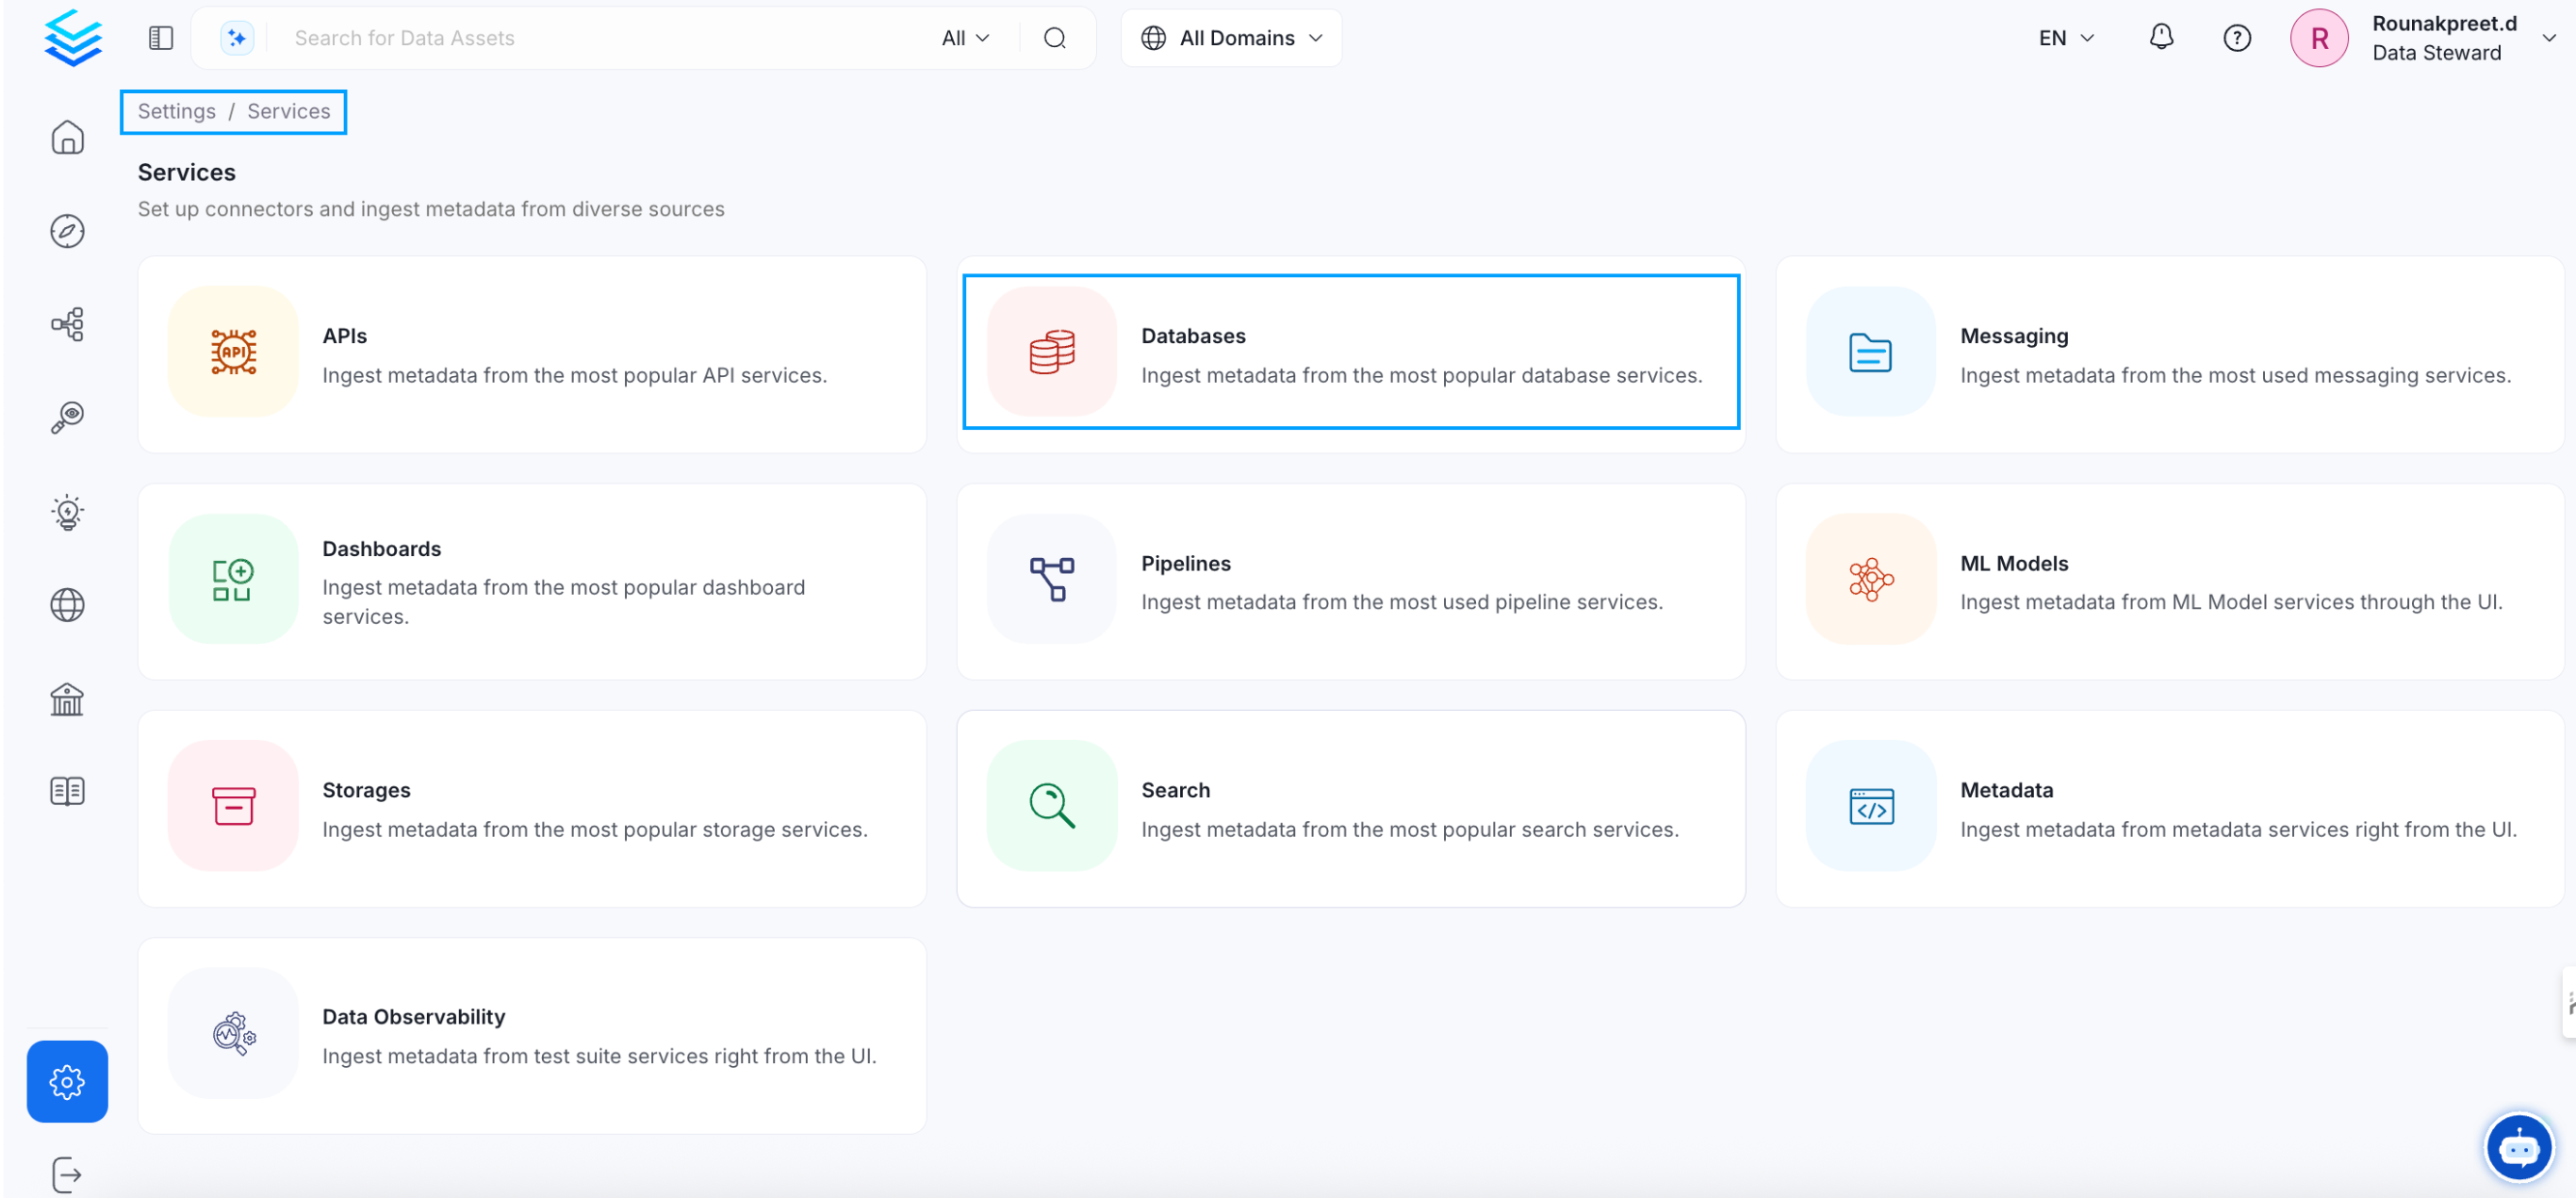
On the left navigation bar, click Settings.
-
On the next page, click Services, and then select the service.
To add a new service connection, click Add New Service.
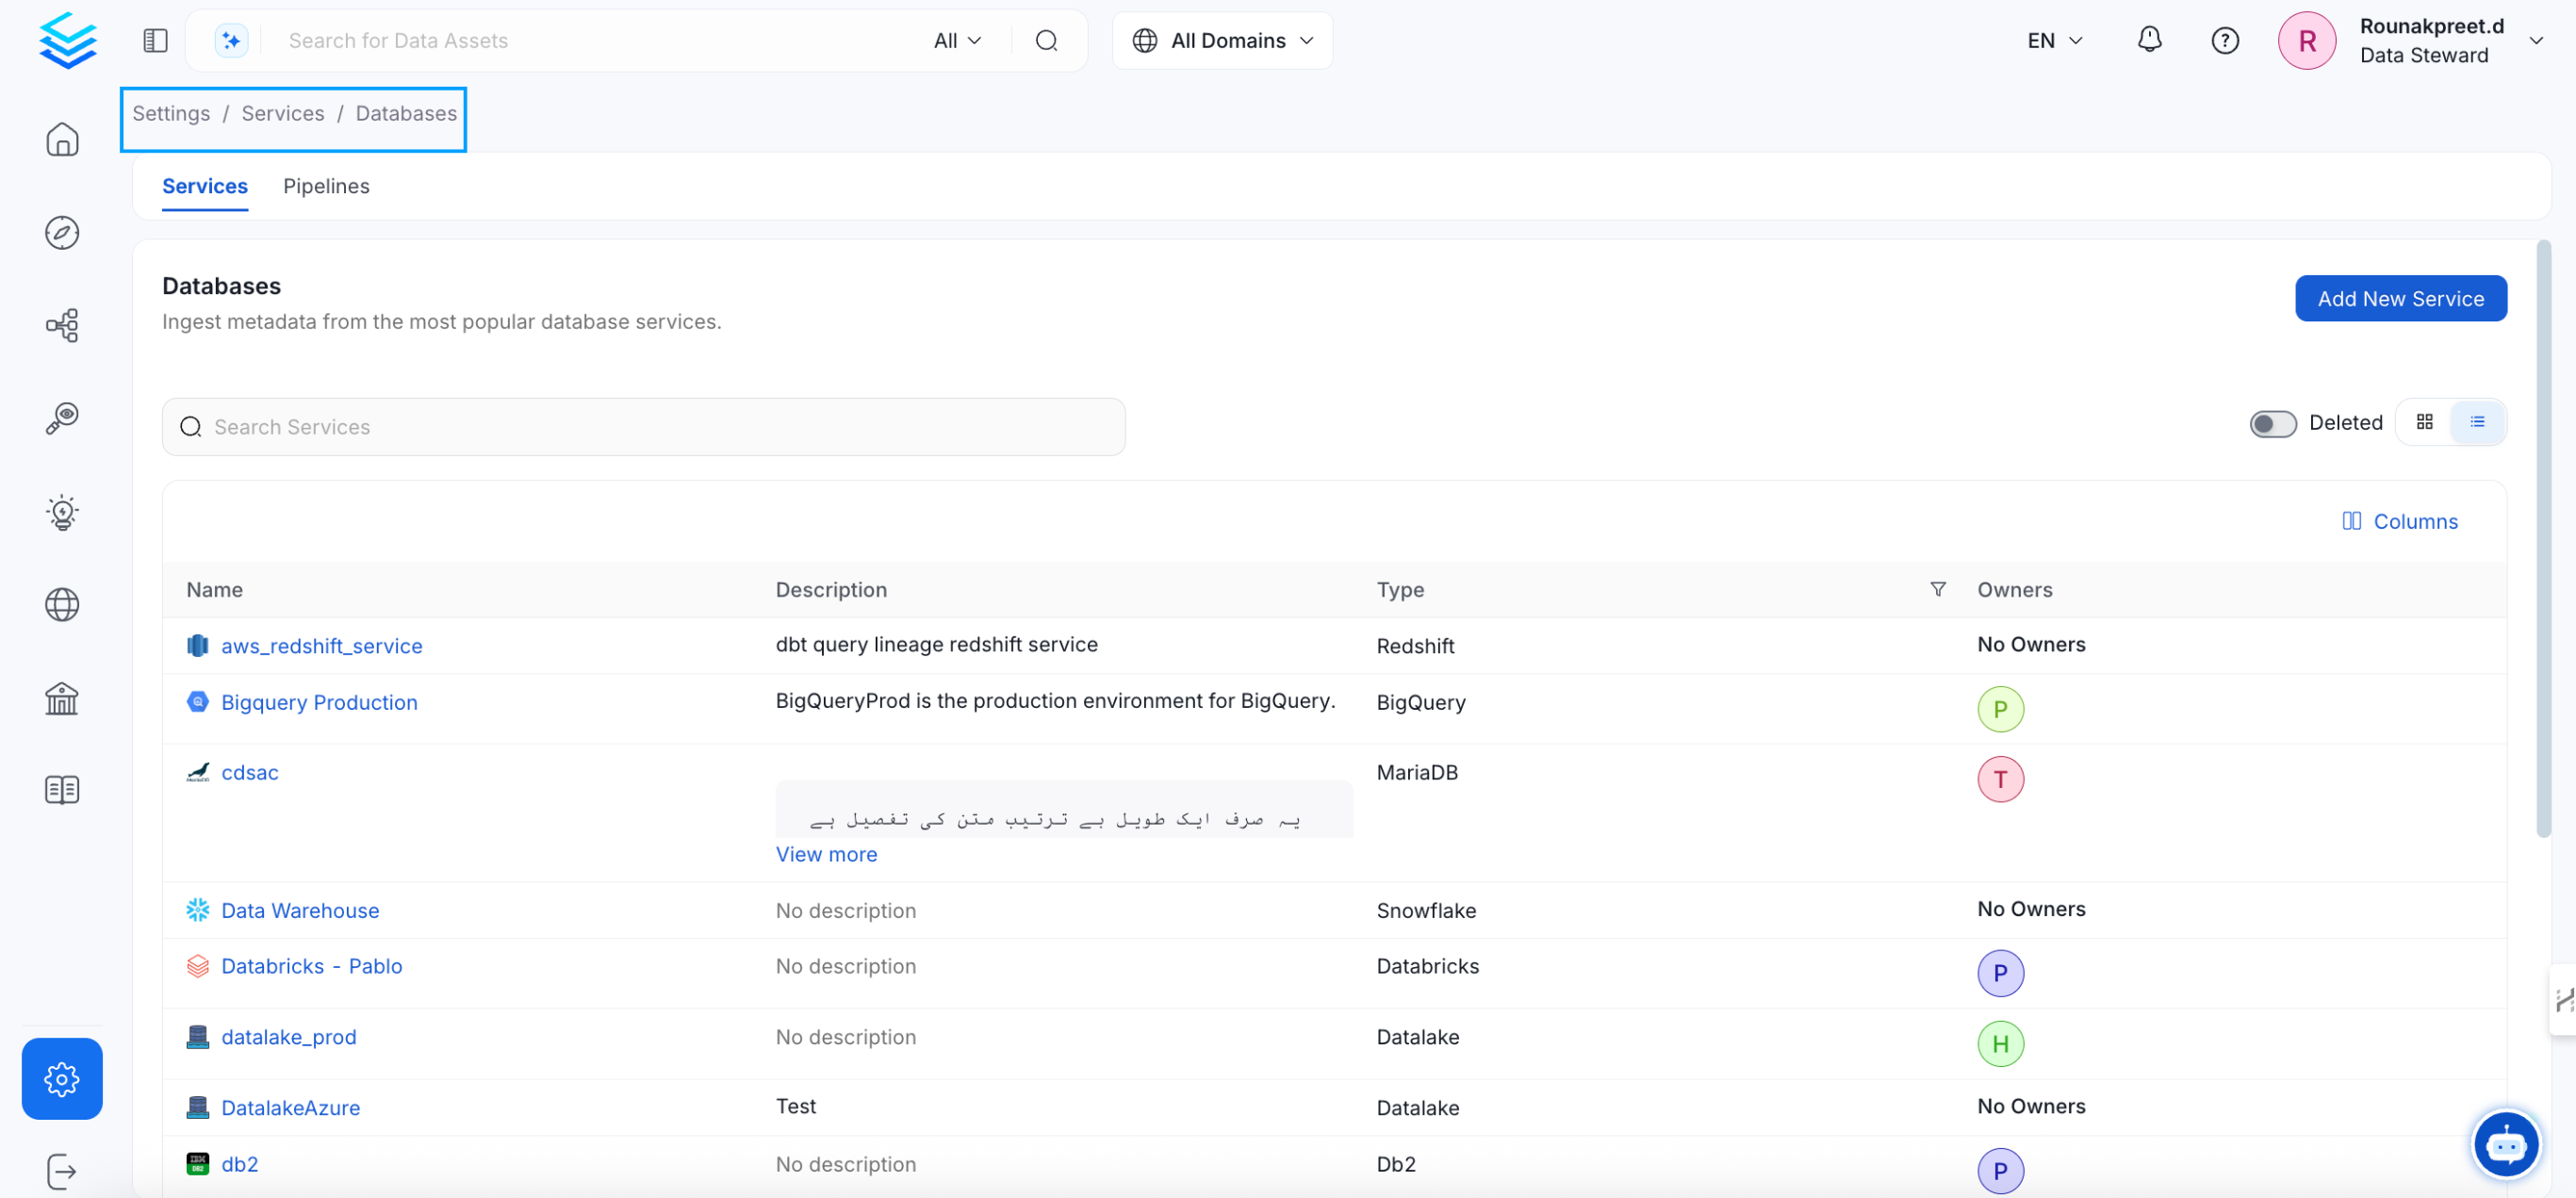 Select {connector} as the service type and click Next.
{selectServicePath &&
Select {connector} as the service type and click Next.
{selectServicePath &&  }
Enter a unique Service Name and Description.
}
Enter a unique Service Name and Description.
- Service Name: OpenMetadata identifies services by their service name. Enter a name that distinguishes this deployment from other services, including other {connector} services you are ingesting metadata from.
The service name cannot be changed after it is set.
{addNewServicePath &&  }
Set up the connection settings required for {connector} to set up the service and start ingesting metadata from your sources. The right-hand panel displays help documentation for the selected connection type in the product UI.
{serviceConnectionPath &&
}
Set up the connection settings required for {connector} to set up the service and start ingesting metadata from your sources. The right-hand panel displays help documentation for the selected connection type in the product UI.
{serviceConnectionPath &&  }
;
};
export const ConnectorDetailsHeader = ({name, icon, stage, availableFeatures, unavailableFeatures = [], availableFeaturesCollate = []}) => {
const showSubHeading = availableFeatures?.length > 0 || unavailableFeatures?.length > 0 || availableFeaturesCollate?.length > 0;
const totalAvailableFeatures = [...availableFeatures || [], ...availableFeaturesCollate || []];
return
}
;
};
export const ConnectorDetailsHeader = ({name, icon, stage, availableFeatures, unavailableFeatures = [], availableFeaturesCollate = []}) => {
const showSubHeading = availableFeatures?.length > 0 || unavailableFeatures?.length > 0 || availableFeaturesCollate?.length > 0;
const totalAvailableFeatures = [...availableFeatures || [], ...availableFeaturesCollate || []];
return
{icon &&
}
{name}
{stage}
{showSubHeading &&
Feature List
{totalAvailableFeatures.map(feature =>
✓ {feature}
)}
{unavailableFeatures.map(feature =>
✕ {feature}
)}
}
;
};
As per the [documentation](https://docs.databricks.com/en/data-governance/unity-catalog/tags.html#manage-tags-with-sql-commands) here, note that we only support metadata `tag` extraction for Databricks version 13.3 version and higher.
In this section, we provide guides and references to use the Databricks connector.
**Supported Authentication Types:**
* **Personal Access Token** — Token-based workspace authentication generated from User Settings in Databricks
* **Databricks OAuth** — OAuth2 Machine-to-Machine authentication using Service Principal credentials
* **Azure AD Setup** — Azure Active Directory authentication using Azure Service Principal (for Azure Databricks workspaces)
Configure and schedule Databricks metadata and profiler workflows from the OpenMetadata UI:
* [Requirements](#requirements)
* [Unity Catalog](#unity-catalog)
* [Metadata Ingestion](#metadata-ingestion)
* [Query Usage](/v1.12.x/connectors/ingestion/workflows/usage)
* [Data Profiler](/v1.12.x/how-to-guides/data-quality-observability/profiler/profiler-workflow)
* [Data Quality](/v1.12.x/how-to-guides/data-quality-observability/quality)
* [Lineage](/v1.12.x/how-to-guides/data-lineage/workflow)
* [dbt Integration](/v1.12.x/connectors/database/dbt)
* [Troubleshooting](/v1.12.x/connectors/database/databricks/troubleshooting)
## How to Run the Connector Externally
To run the Ingestion via the UI you'll need to use the OpenMetadata Ingestion Container, which comes shipped with
custom Airflow plugins to handle the workflow deployment.
If, instead, you want to manage your workflows externally on your preferred orchestrator, you can check
the following docs to run the Ingestion Framework **anywhere**.
Get more information about running the Ingestion Framework Externally
## Requirements
### Permission Requirement
To enable full functionality of metadata extraction, profiling, usage, and lineage features in OpenMetadata, the following permissions must be granted to the relevant users in your Databricks environment.
### Metadata and Profiling Permissions
These permissions are required on the catalogs, schemas, and tables from which metadata and profiling information will be ingested.
```sql theme={null}
GRANT USE CATALOG ON CATALOG TO ``;
GRANT USE SCHEMA ON SCHEMA TO ``;
GRANT SELECT ON TABLE TO ``;
```
Ensure these grants are applied to all relevant tables for metadata ingestion and profiling operations.
### Usage and Lineage
These permissions enable OpenMetadata to extract query history and construct lineage information.
```sql theme={null}
-- Query history for usage analytics and SQL-based lineage
GRANT SELECT ON SYSTEM.QUERY.HISTORY TO ``;
GRANT USE SCHEMA ON SCHEMA system.query TO ``;
-- System lineage tables for table and column-level lineage
GRANT SELECT ON system.access.table_lineage TO ``;
GRANT SELECT ON system.access.column_lineage TO ``;
GRANT USE SCHEMA ON SCHEMA system.access TO ``;
```
These permissions allow access to Databricks system tables that track query activity and lineage relationships, enabling lineage and usage statistics generation.
### View Definitions
To extract view definitions, the user needs access to the information schema:
```sql theme={null}
GRANT SELECT ON INFORMATION_SCHEMA.VIEWS TO ``;
```
### Tags (Databricks 13.3+)
To extract Databricks tags on catalogs, schemas, tables, and columns, the following permissions are required:
```sql theme={null}
GRANT SELECT ON ``.information_schema.catalog_tags TO ``;
GRANT SELECT ON ``.information_schema.schema_tags TO ``;
GRANT SELECT ON ``.information_schema.table_tags TO ``;
GRANT SELECT ON ``.information_schema.column_tags TO ``;
```
Tag extraction requires Databricks Runtime 13.3 or higher. If your cluster is running an older version, tags will not be extracted.
Adjust \, \, \, and \ according to your specific deployment and security requirements.
## Unity Catalog
If you are using Unity Catalog in Databricks, then checkout the [Unity Catalog](/v1.12.x/connectors/database/unity-catalog) connector.
## Metadata Ingestion
# Connection Details
When using a **Hybrid Ingestion Runner**, any sensitive credential fields—such as passwords, API keys, or private keys—must reference secrets using the following format:
```
password: secret:/my/database/password
```
This applies **only to fields marked as secrets** in the connection form (these typically mask input and show a visibility toggle icon).
For a complete guide on managing secrets in hybrid setups, see the [Hybrid Ingestion Runner Secret Management Guide](https://docs.getcollate.io/getting-started/day-1/hybrid-saas/hybrid-ingestion-runner#3.-manage-secrets-securely).
* **Host and Port**: Enter the fully qualified hostname and port number for your Databricks deployment in the Host and Port field.
* **Authentication Type**: Choose one of the following authentication methods:
* **Personal Access Token** — Provide a `token` generated from User Settings → Developer → Access Tokens in your Databricks workspace.
* **Databricks OAuth** — Provide a `clientId` and `clientSecret` for a Service Principal created in your Databricks Account Console.
* **Azure AD Setup** — Provide `azureClientId`, `azureClientSecret`, and `azureTenantId` for an Azure Service Principal registered in Azure Active Directory (for Azure Databricks workspaces only).
* **HTTP Path**: Databricks compute resources URL.
* **Connection Timeout**: The maximum amount of time (in seconds) to wait for a successful connection to the data source. If the connection attempt takes longer than this timeout period, an error will be returned.
* **Catalog**: Catalog of the data source (Example: hive\_metastore). This is an optional parameter, if you would like to restrict the metadata reading to a single catalog. When left blank, OpenMetadata Ingestion attempts to scan all the catalogs.
* **DatabaseSchema**: Database schema of the data source. This is an optional parameter, if you would like to restrict the metadata reading to a single database schema. When left blank, OpenMetadata Ingestion attempts to scan all the database schemas.
* **Query History Table**: Table name to fetch the query history from. Defaults to `system.query.history`.
Database Services have an Advanced Configuration section, where you can pass extra arguments to the connector
and, if needed, change the connection Scheme.
This would only be required to handle advanced connectivity scenarios or customizations.
* **Connection Options (Optional)**: Enter the details for any additional connection options that can be sent to database during the connection. These details must be added as Key-Value pairs.
* **Connection Arguments (Optional)**: Enter the details for any additional connection arguments such as security or protocol configs that can be sent during the connection. These details must be added as Key-Value pairs.
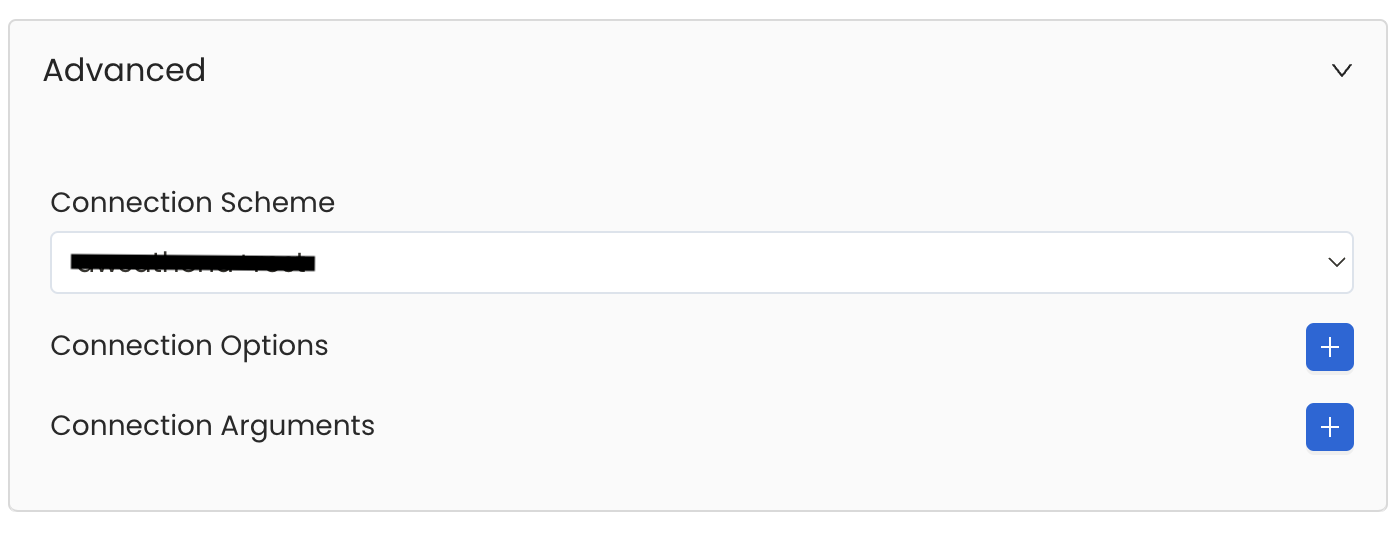 Once the credentials have been added, click on *Test Connection* and *Save* the changes.
 In this step we will configure the metadata ingestion pipeline,
Please follow the instructions below
In this step we will configure the metadata ingestion pipeline,
Please follow the instructions below
 #### Metadata Ingestion Options
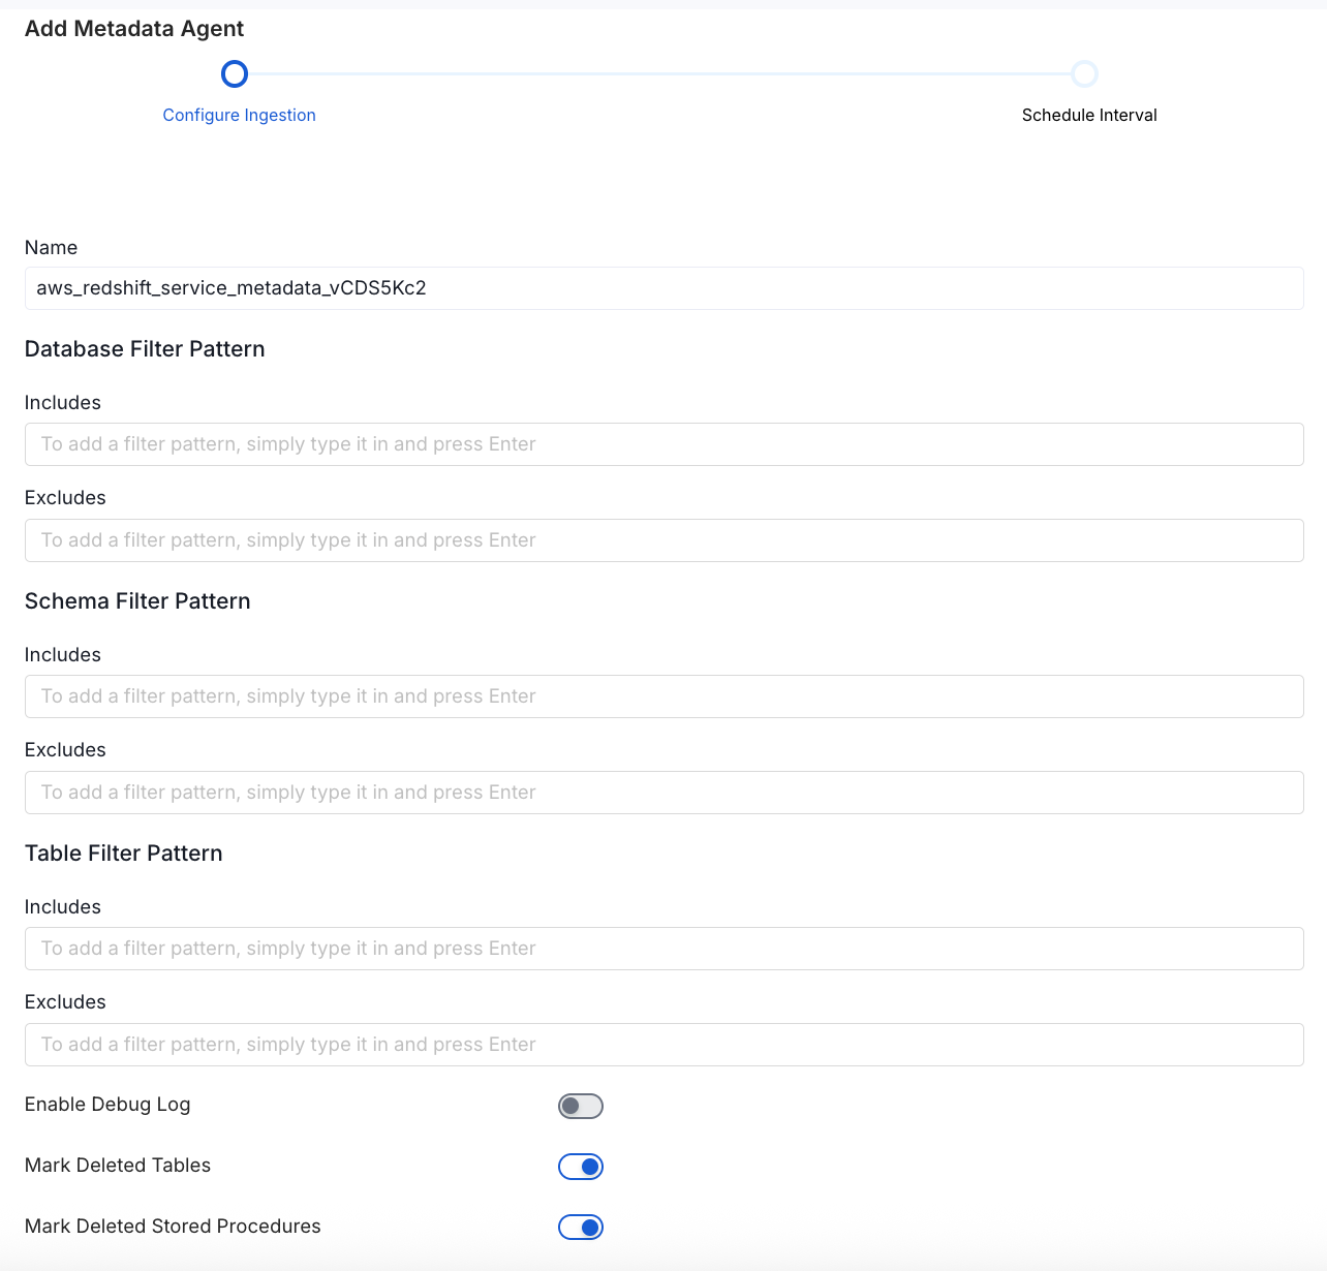
If the owner's name is openmetadata, you need to enter `openmetadata@domain.com` in the name section of add team/user form, click [here](/connectors/database/dbt/ingest-dbt-owner#following-steps-shows-adding-a-user-to-openmetadata) for more info.
* **Name**: This field refers to the name of ingestion pipeline, you can customize the name or use the generated name.
* **Database Filter Pattern (Optional)**: Use to database filter patterns to control whether or not to include database as part of metadata ingestion.
* **Include**: Explicitly include databases by adding a list of comma-separated regular expressions to the Include field. OpenMetadata will include all databases with names matching one or more of the supplied regular expressions. All other databases will be excluded.
* **Exclude**: Explicitly exclude databases by adding a list of comma-separated regular expressions to the Exclude field. OpenMetadata will exclude all databases with names matching one or more of the supplied regular expressions. All other databases will be included.
* **Schema Filter Pattern (Optional)**: Use to schema filter patterns to control whether to include schemas as part of metadata ingestion.
* **Include**: Explicitly include schemas by adding a list of comma-separated regular expressions to the Include field. OpenMetadata will include all schemas with names matching one or more of the supplied regular expressions. All other schemas will be excluded.
* **Exclude**: Explicitly exclude schemas by adding a list of comma-separated regular expressions to the Exclude field. OpenMetadata will exclude all schemas with names matching one or more of the supplied regular expressions. All other schemas will be included.
* **Table Filter Pattern (Optional)**: Use to table filter patterns to control whether to include tables as part of metadata ingestion.
* **Include**: Explicitly include tables by adding a list of comma-separated regular expressions to the Include field. OpenMetadata will include all tables with names matching one or more of the supplied regular expressions. All other tables will be excluded.
* **Exclude**: Explicitly exclude tables by adding a list of comma-separated regular expressions to the Exclude field. OpenMetadata will exclude all tables with names matching one or more of the supplied regular expressions. All other tables will be included.
* **Enable Debug Log (toggle)**: Set the Enable Debug Log toggle to set the default log level to debug.
* **Mark Deleted Tables (toggle)**: Set the Mark Deleted Tables toggle to flag tables as soft-deleted if they are not present anymore in the source system.
* **Mark Deleted Tables from Filter Only (toggle)**: Set the Mark Deleted Tables from Filter Only toggle to flag tables as soft-deleted if they are not present anymore within the filtered schema or database only. This flag is useful when you have more than one ingestion pipelines. For example if you have a schema
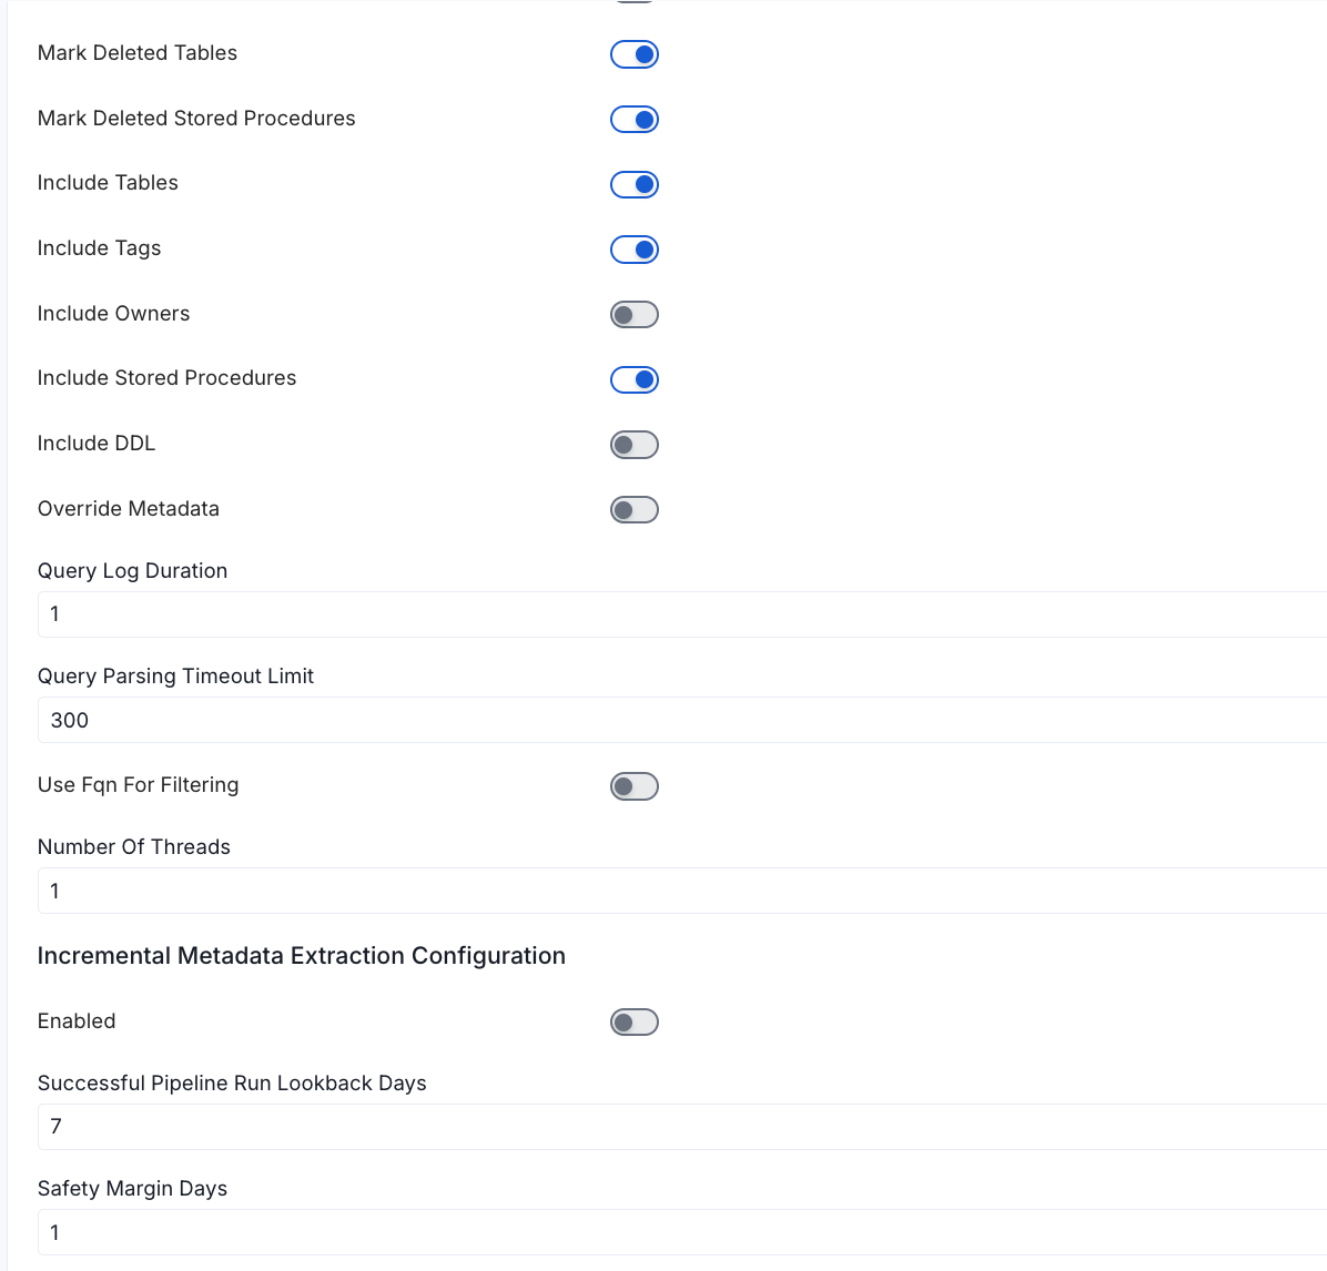
* **includeTables (toggle)**: Optional configuration to turn off fetching metadata for tables.
* **includeViews (toggle)**: Set the Include views toggle to control whether to include views as part of metadata ingestion.
* **includeTags (toggle)**: Set the 'Include Tags' toggle to control whether to include tags as part of metadata ingestion.
* **includeOwners (toggle)**: Set the 'Include Owners' toggle to control whether to include owners to the ingested entity if the owner email matches with a user stored in the OM server as part of metadata ingestion. If the ingested entity already exists and has an owner, the owner will not be overwritten.
* **includeStoredProcedures (toggle)**: Optional configuration to toggle the Stored Procedures ingestion.
* **includeDDL (toggle)**: Optional configuration to toggle the DDL Statements ingestion.
* **queryLogDuration (Optional)**: Configuration to tune how far we want to look back in query logs to process Stored Procedures results.
* **queryParsingTimeoutLimit (Optional)**: Configuration to set the timeout for parsing the query in seconds.
* **useFqnForFiltering (toggle)**: Regex will be applied on fully qualified name (e.g service\_name.db\_name.schema\_name.table\_name) instead of raw name (e.g. table\_name).
* **Incremental (Beta)**: Use Incremental Metadata Extraction after the first execution. This is done by getting the changed tables instead of all of them. **Only Available for BigQuery, Redshift and Snowflake**
* **Enabled**: If `True`, enables Metadata Extraction to be Incremental.
* **lookback Days**: Number of days to search back for a successful pipeline run. The timestamp of the last found successful pipeline run will be used as a base to search for updated entities.
* **Safety Margin Days**: Number of days to add to the last successful pipeline run timestamp to search for updated entities.
* **Threads (Beta)**: Use a Multithread approach for Metadata Extraction. You can define here the number of threads you would like to run concurrently.
Note that the right-hand side panel in the OpenMetadata UI will also share useful documentation when configuring the ingestion.
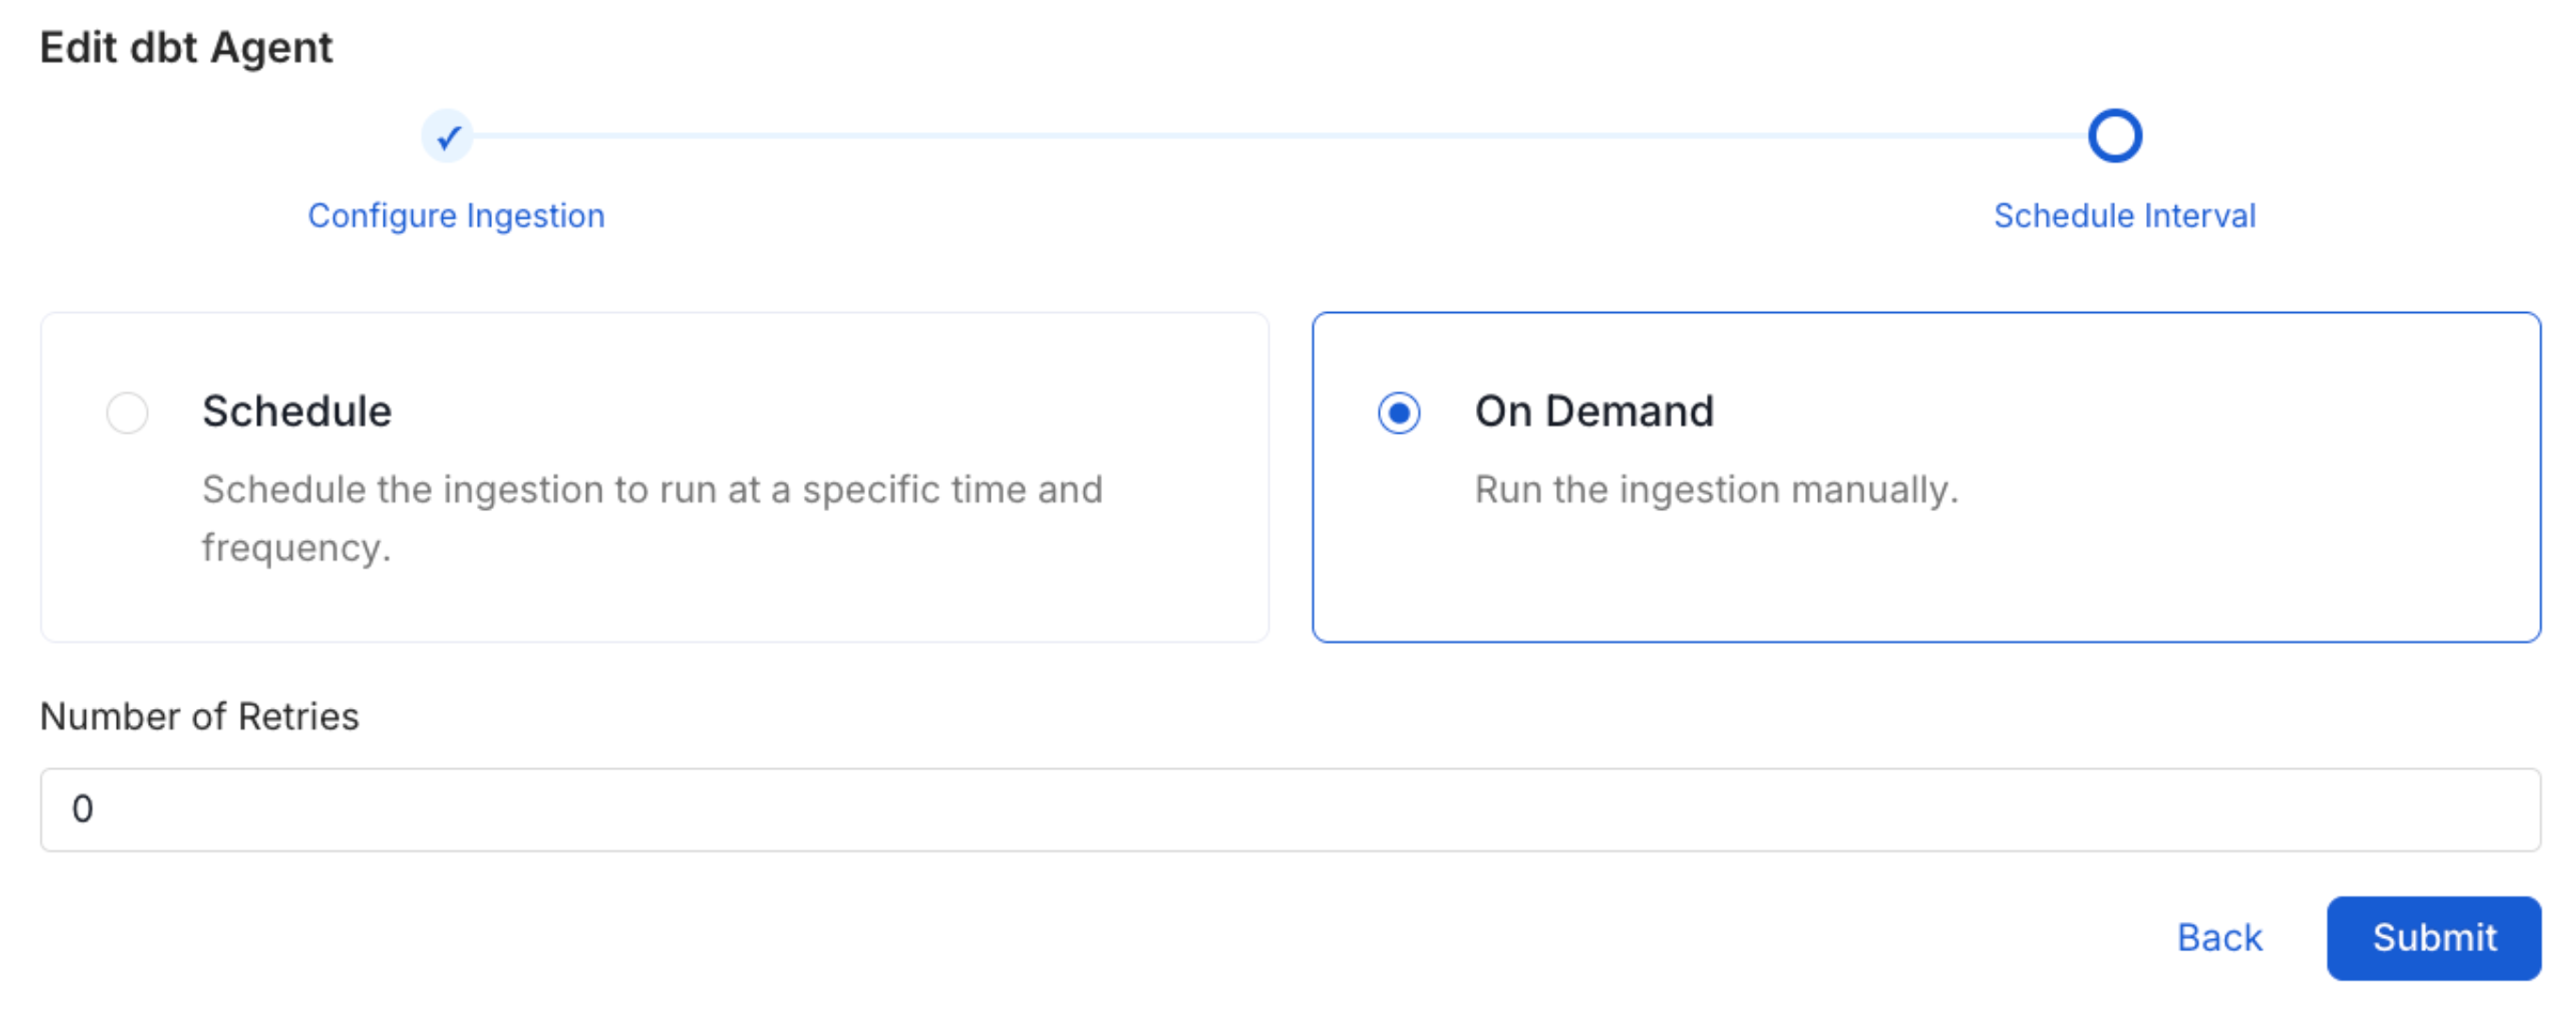
Scheduling can be set up at an hourly, daily, weekly, or manual cadence. The
timezone is in UTC. Select a Start Date to schedule for ingestion. It is
optional to add an End Date.
Review your configuration settings. If they match what you intended,
click Deploy to create the service and schedule metadata ingestion.
If something doesn't look right, click the Back button to return to the
appropriate step and change the settings as needed.
After configuring the workflow, you can click on Deploy to create the
pipeline.
#### Metadata Ingestion Options
If the owner's name is openmetadata, you need to enter `openmetadata@domain.com` in the name section of add team/user form, click [here](/connectors/database/dbt/ingest-dbt-owner#following-steps-shows-adding-a-user-to-openmetadata) for more info.
* **Name**: This field refers to the name of ingestion pipeline, you can customize the name or use the generated name.
* **Database Filter Pattern (Optional)**: Use to database filter patterns to control whether or not to include database as part of metadata ingestion.
* **Include**: Explicitly include databases by adding a list of comma-separated regular expressions to the Include field. OpenMetadata will include all databases with names matching one or more of the supplied regular expressions. All other databases will be excluded.
* **Exclude**: Explicitly exclude databases by adding a list of comma-separated regular expressions to the Exclude field. OpenMetadata will exclude all databases with names matching one or more of the supplied regular expressions. All other databases will be included.
* **Schema Filter Pattern (Optional)**: Use to schema filter patterns to control whether to include schemas as part of metadata ingestion.
* **Include**: Explicitly include schemas by adding a list of comma-separated regular expressions to the Include field. OpenMetadata will include all schemas with names matching one or more of the supplied regular expressions. All other schemas will be excluded.
* **Exclude**: Explicitly exclude schemas by adding a list of comma-separated regular expressions to the Exclude field. OpenMetadata will exclude all schemas with names matching one or more of the supplied regular expressions. All other schemas will be included.
* **Table Filter Pattern (Optional)**: Use to table filter patterns to control whether to include tables as part of metadata ingestion.
* **Include**: Explicitly include tables by adding a list of comma-separated regular expressions to the Include field. OpenMetadata will include all tables with names matching one or more of the supplied regular expressions. All other tables will be excluded.
* **Exclude**: Explicitly exclude tables by adding a list of comma-separated regular expressions to the Exclude field. OpenMetadata will exclude all tables with names matching one or more of the supplied regular expressions. All other tables will be included.
* **Enable Debug Log (toggle)**: Set the Enable Debug Log toggle to set the default log level to debug.
* **Mark Deleted Tables (toggle)**: Set the Mark Deleted Tables toggle to flag tables as soft-deleted if they are not present anymore in the source system.
* **Mark Deleted Tables from Filter Only (toggle)**: Set the Mark Deleted Tables from Filter Only toggle to flag tables as soft-deleted if they are not present anymore within the filtered schema or database only. This flag is useful when you have more than one ingestion pipelines. For example if you have a schema
* **includeTables (toggle)**: Optional configuration to turn off fetching metadata for tables.
* **includeViews (toggle)**: Set the Include views toggle to control whether to include views as part of metadata ingestion.
* **includeTags (toggle)**: Set the 'Include Tags' toggle to control whether to include tags as part of metadata ingestion.
* **includeOwners (toggle)**: Set the 'Include Owners' toggle to control whether to include owners to the ingested entity if the owner email matches with a user stored in the OM server as part of metadata ingestion. If the ingested entity already exists and has an owner, the owner will not be overwritten.
* **includeStoredProcedures (toggle)**: Optional configuration to toggle the Stored Procedures ingestion.
* **includeDDL (toggle)**: Optional configuration to toggle the DDL Statements ingestion.
* **queryLogDuration (Optional)**: Configuration to tune how far we want to look back in query logs to process Stored Procedures results.
* **queryParsingTimeoutLimit (Optional)**: Configuration to set the timeout for parsing the query in seconds.
* **useFqnForFiltering (toggle)**: Regex will be applied on fully qualified name (e.g service\_name.db\_name.schema\_name.table\_name) instead of raw name (e.g. table\_name).
* **Incremental (Beta)**: Use Incremental Metadata Extraction after the first execution. This is done by getting the changed tables instead of all of them. **Only Available for BigQuery, Redshift and Snowflake**
* **Enabled**: If `True`, enables Metadata Extraction to be Incremental.
* **lookback Days**: Number of days to search back for a successful pipeline run. The timestamp of the last found successful pipeline run will be used as a base to search for updated entities.
* **Safety Margin Days**: Number of days to add to the last successful pipeline run timestamp to search for updated entities.
* **Threads (Beta)**: Use a Multithread approach for Metadata Extraction. You can define here the number of threads you would like to run concurrently.
Note that the right-hand side panel in the OpenMetadata UI will also share useful documentation when configuring the ingestion.
Scheduling can be set up at an hourly, daily, weekly, or manual cadence. The
timezone is in UTC. Select a Start Date to schedule for ingestion. It is
optional to add an End Date.
Review your configuration settings. If they match what you intended,
click Deploy to create the service and schedule metadata ingestion.
If something doesn't look right, click the Back button to return to the
appropriate step and change the settings as needed.
After configuring the workflow, you can click on Deploy to create the
pipeline.
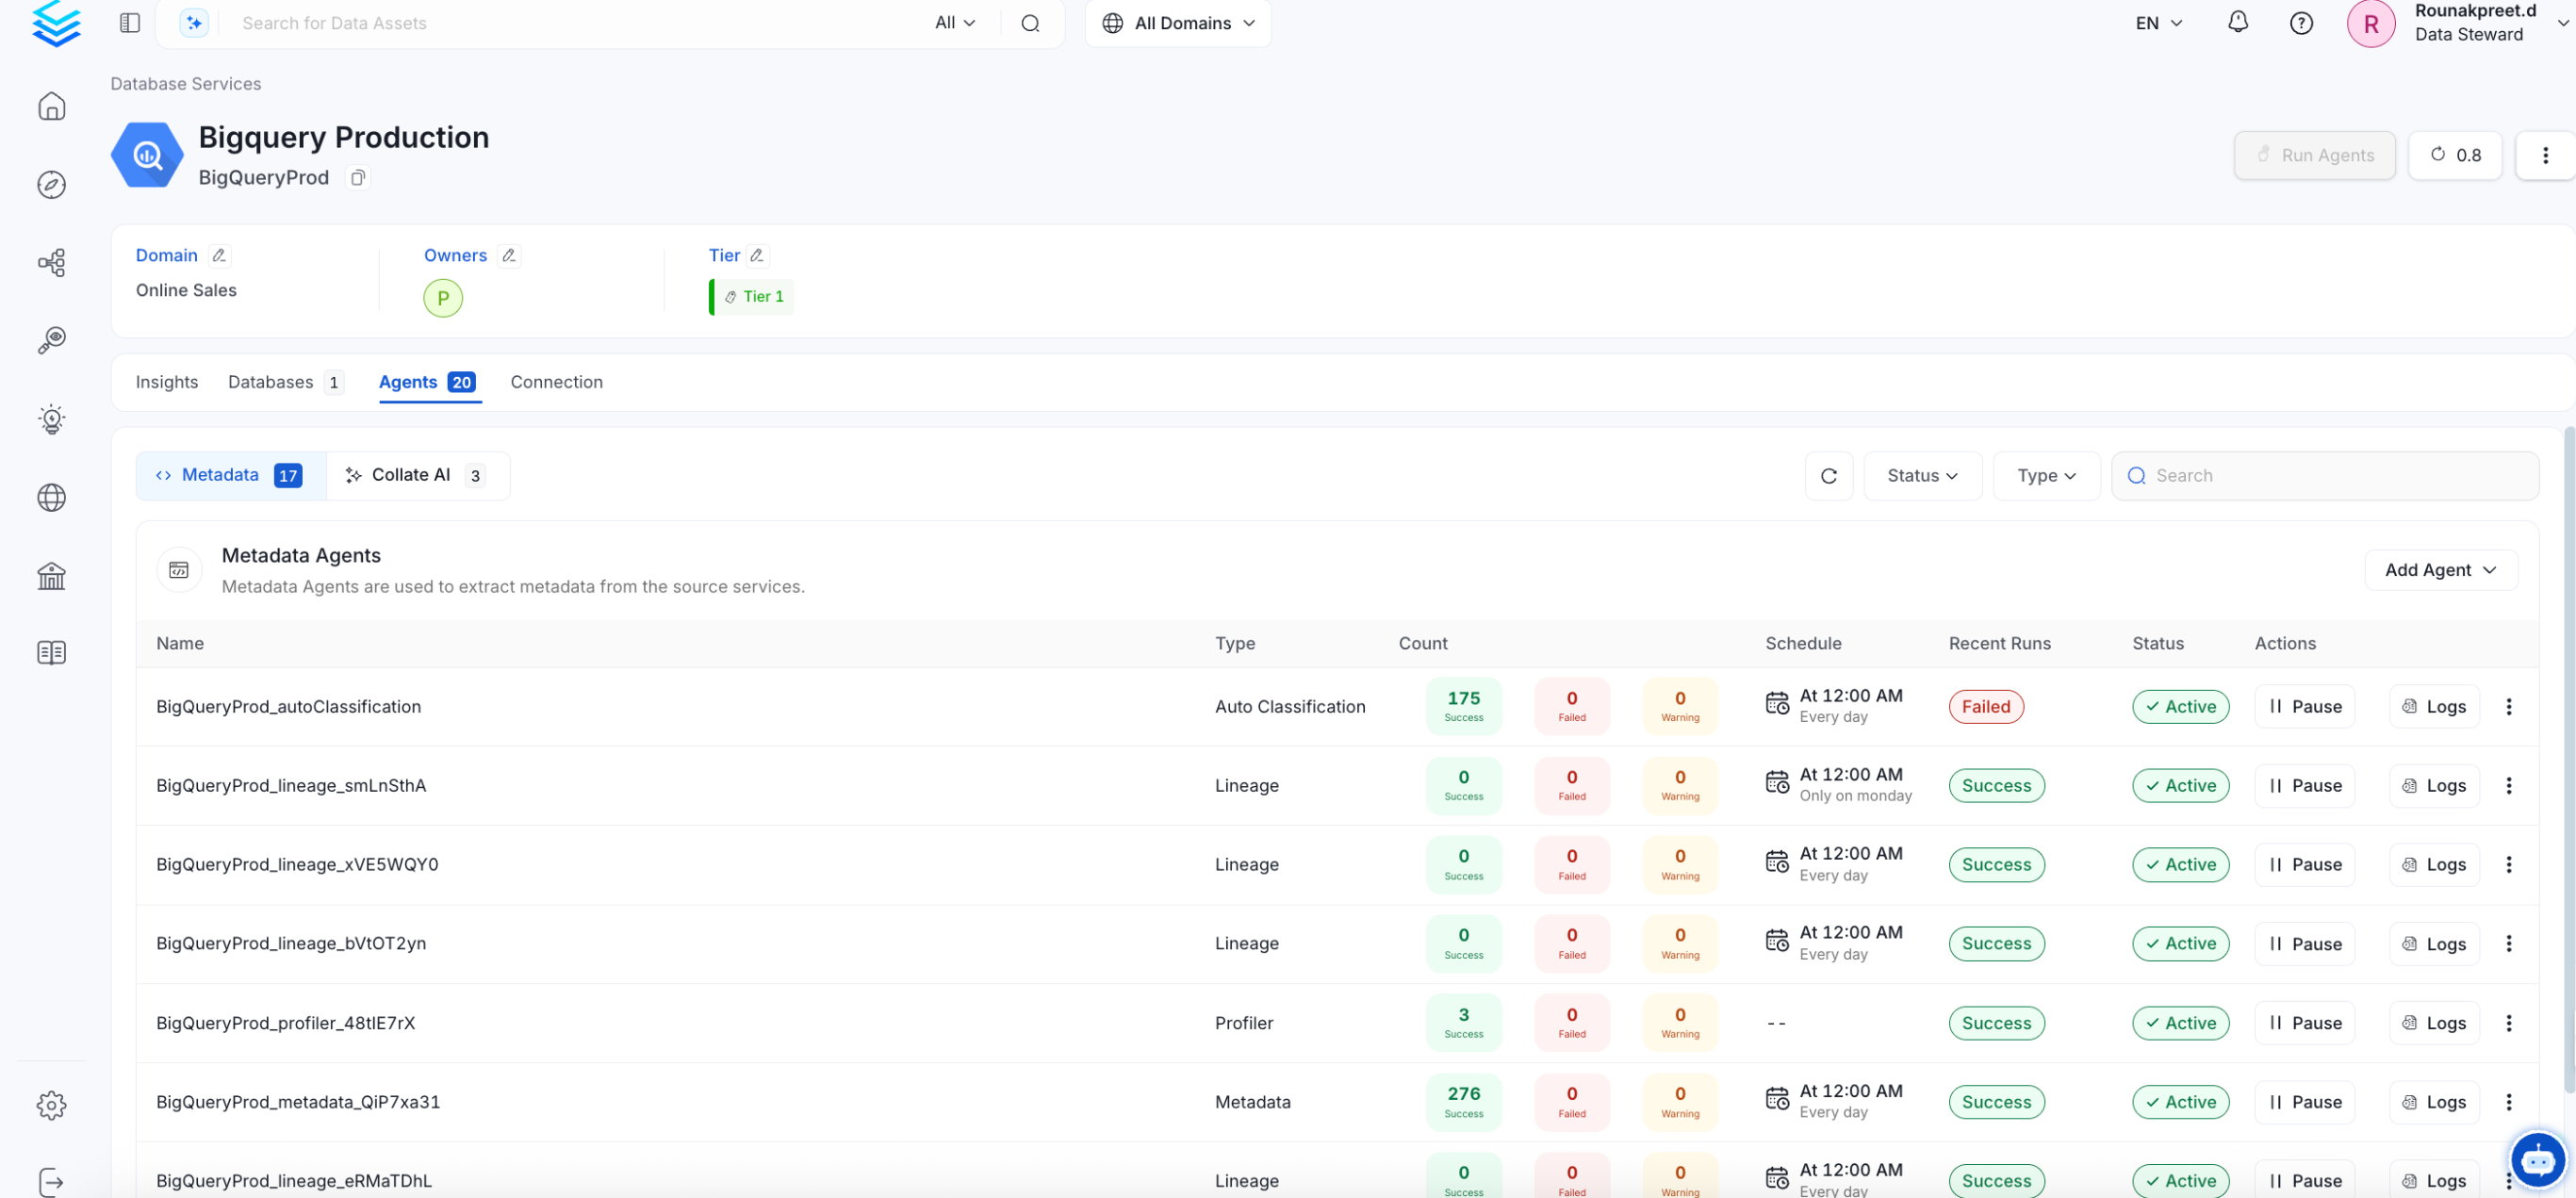
 Once the workflow has been successfully deployed, you can view the
Ingestion Pipeline running from the Service Page.
Once the workflow has been successfully deployed, you can view the
Ingestion Pipeline running from the Service Page.
 If AutoPilot is enabled, workflows like usage tracking, data lineage, and similar tasks will be handled automatically. Users don’t need to set up or manage them - AutoPilot takes care of everything in the system.
## Related
Learn more about how to configure the Usage Workflow to ingest Query information from the UI.
Learn more about how to configure the Lineage from the UI.
Learn more about how to configure the Data Profiler from the UI.
Learn more about how to configure the Data Quality tests from the UI.
Learn more about how to ingest dbt models' definitions and their lineage.
If AutoPilot is enabled, workflows like usage tracking, data lineage, and similar tasks will be handled automatically. Users don’t need to set up or manage them - AutoPilot takes care of everything in the system.
## Related
Learn more about how to configure the Usage Workflow to ingest Query information from the UI.
Learn more about how to configure the Lineage from the UI.
Learn more about how to configure the Data Profiler from the UI.
Learn more about how to configure the Data Quality tests from the UI.
Learn more about how to ingest dbt models' definitions and their lineage.