> ## Documentation Index
> Fetch the complete documentation index at: https://docs.open-metadata.org/llms.txt
> Use this file to discover all available pages before exploring further.
# Setup SAP ERP APIs | OpenMetadata Integration Guide
> Set up SAP ERP APIs for metadata ingestion, configure access and validate integration readiness.
# Setup SAP ERP APIs
In this section, we provide guides and references to use setup the SAP ERP APIs needed for the connector.
This document details the integration of Open Metadata with SAP systems, emphasizing the use of CDS Views and OData services to efficiently expose SAP data. To achieve this, data must be exposed via RESTful interfaces. Key concepts include:
* **SAP Gateway**: A software component that bridges RFC and RESTful interfaces.
* **RAP (Restful Application Programming)**: A coding framework designed to expose services via RESTful interfaces.
* **CDS (Core Data Services)**: A layer that describes data objects and annotates them with desired functionalities, which are converted into code upon activation.
* **OData V2 or V4**: A RESTful standard that simplifies interaction with database backends.
## Steps
### 1. ABAP Development Tools (ADT)
Using the Eclipse based [ABAP Development Tools (ADT)](https://tools.hana.ondemand.com/#abap) the Restful interfaces are built.
### 2. CDS Views
After creating a new ABAP Project for the connected SAP system, a new Data Definition object is to be created.
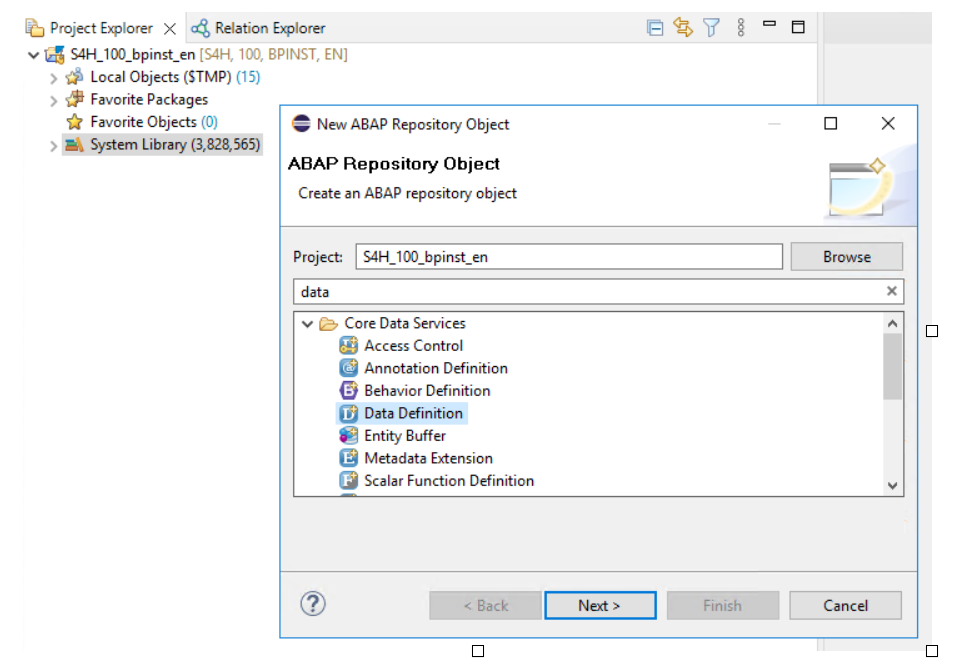 * Create the first view that gets the table metadata
```sql theme={null}
@AbapCatalog.sqlViewName: 'ZZ_I_DDIC_TAB_CDS'
@AbapCatalog.compiler.compareFilter: true
@AbapCatalog.preserveKey: true
@AccessControl.authorizationCheck: #CHECK
@EndUserText.label: 'Open Metadata Tables'
define view ZZ_I_DDIC_TAB_CDS as select from dd02l l
left outer join dd02t t on
(l.tabname = t.tabname and l.as4local = t.as4local and l.as4vers = t.as4vers and t.ddlanguage = 'E')
{
key l.tabname,
key l.as4local,
key l.as4vers,
@ObjectModel.readOnly: true
'E' as LANG,
@ObjectModel.readOnly: true
l.tabclass,
@ObjectModel.readOnly: true
l.sqltab,
@ObjectModel.readOnly: true
l.applclass,
@ObjectModel.readOnly: true
l.authclass,
@ObjectModel.readOnly: true
l.as4date,
@ObjectModel.readOnly: true
l.as4time,
@ObjectModel.readOnly: true
l.masterlang,
@ObjectModel.readOnly: true
t.ddtext
}
```
* Then create the second view for table columns
```sql theme={null}
@AbapCatalog.sqlViewName: 'ZZ_I_DDIC_COL_CDS_V'
@AbapCatalog.compiler.compareFilter: true
@AbapCatalog.preserveKey: true
@AccessControl.authorizationCheck: #CHECK
@EndUserText.label: 'Open Metadata Column'
define view ZZ_I_DDIC_COL_CDS as select from dd03l l
left outer join dd03t t on
(l.tabname = t.tabname and l.fieldname = t.fieldname and l.as4local = t.as4local and t.ddlanguage = 'E')
{
key l.tabname,
key l.fieldname,
key l.as4local,
key l.as4vers,
key l.position as POS,
@ObjectModel.readOnly: true
'E' as LANG,
@ObjectModel.readOnly: true
l.keyflag,
@ObjectModel.readOnly: true
l.mandatory,
@ObjectModel.readOnly: true
l.checktable,
@ObjectModel.readOnly: true
l.inttype,
@ObjectModel.readOnly: true
l.intlen,
@ObjectModel.readOnly: true
l.reftable,
@ObjectModel.readOnly: true
l.precfield,
@ObjectModel.readOnly: true
l.reffield,
@ObjectModel.readOnly: true
l.notnull,
@ObjectModel.readOnly: true
l.datatype,
@ObjectModel.readOnly: true
l.leng,
@ObjectModel.readOnly: true
l.decimals,
@ObjectModel.readOnly: true
l.domname,
@ObjectModel.readOnly: true
l.comptype,
@ObjectModel.readOnly: true
l.reftype,
@ObjectModel.readOnly: true
t.ddtext
}
where l.as4local = 'A'
```
### 3. SAP Gateway
Using the transaction `/nsegw` in SAPGUI, open the configuration screen for the SAP Gateway and create a new project with default project type.
* Create the first view that gets the table metadata
```sql theme={null}
@AbapCatalog.sqlViewName: 'ZZ_I_DDIC_TAB_CDS'
@AbapCatalog.compiler.compareFilter: true
@AbapCatalog.preserveKey: true
@AccessControl.authorizationCheck: #CHECK
@EndUserText.label: 'Open Metadata Tables'
define view ZZ_I_DDIC_TAB_CDS as select from dd02l l
left outer join dd02t t on
(l.tabname = t.tabname and l.as4local = t.as4local and l.as4vers = t.as4vers and t.ddlanguage = 'E')
{
key l.tabname,
key l.as4local,
key l.as4vers,
@ObjectModel.readOnly: true
'E' as LANG,
@ObjectModel.readOnly: true
l.tabclass,
@ObjectModel.readOnly: true
l.sqltab,
@ObjectModel.readOnly: true
l.applclass,
@ObjectModel.readOnly: true
l.authclass,
@ObjectModel.readOnly: true
l.as4date,
@ObjectModel.readOnly: true
l.as4time,
@ObjectModel.readOnly: true
l.masterlang,
@ObjectModel.readOnly: true
t.ddtext
}
```
* Then create the second view for table columns
```sql theme={null}
@AbapCatalog.sqlViewName: 'ZZ_I_DDIC_COL_CDS_V'
@AbapCatalog.compiler.compareFilter: true
@AbapCatalog.preserveKey: true
@AccessControl.authorizationCheck: #CHECK
@EndUserText.label: 'Open Metadata Column'
define view ZZ_I_DDIC_COL_CDS as select from dd03l l
left outer join dd03t t on
(l.tabname = t.tabname and l.fieldname = t.fieldname and l.as4local = t.as4local and t.ddlanguage = 'E')
{
key l.tabname,
key l.fieldname,
key l.as4local,
key l.as4vers,
key l.position as POS,
@ObjectModel.readOnly: true
'E' as LANG,
@ObjectModel.readOnly: true
l.keyflag,
@ObjectModel.readOnly: true
l.mandatory,
@ObjectModel.readOnly: true
l.checktable,
@ObjectModel.readOnly: true
l.inttype,
@ObjectModel.readOnly: true
l.intlen,
@ObjectModel.readOnly: true
l.reftable,
@ObjectModel.readOnly: true
l.precfield,
@ObjectModel.readOnly: true
l.reffield,
@ObjectModel.readOnly: true
l.notnull,
@ObjectModel.readOnly: true
l.datatype,
@ObjectModel.readOnly: true
l.leng,
@ObjectModel.readOnly: true
l.decimals,
@ObjectModel.readOnly: true
l.domname,
@ObjectModel.readOnly: true
l.comptype,
@ObjectModel.readOnly: true
l.reftype,
@ObjectModel.readOnly: true
t.ddtext
}
where l.as4local = 'A'
```
### 3. SAP Gateway
Using the transaction `/nsegw` in SAPGUI, open the configuration screen for the SAP Gateway and create a new project with default project type.
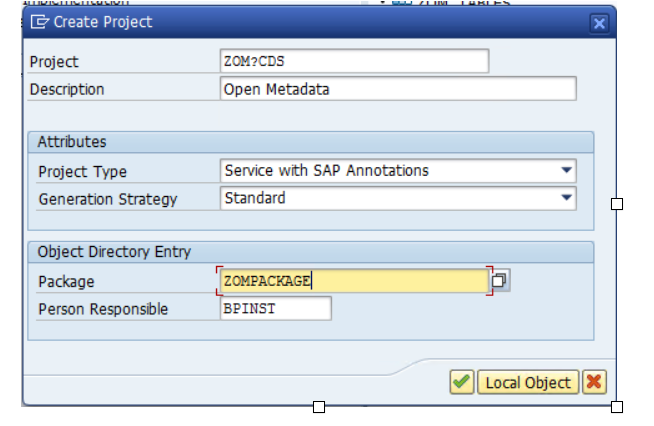 Create a reference to the CDS views under Data Model and import the views. This is all that is needed to configure the OData details thanks to the CDS view annotations.
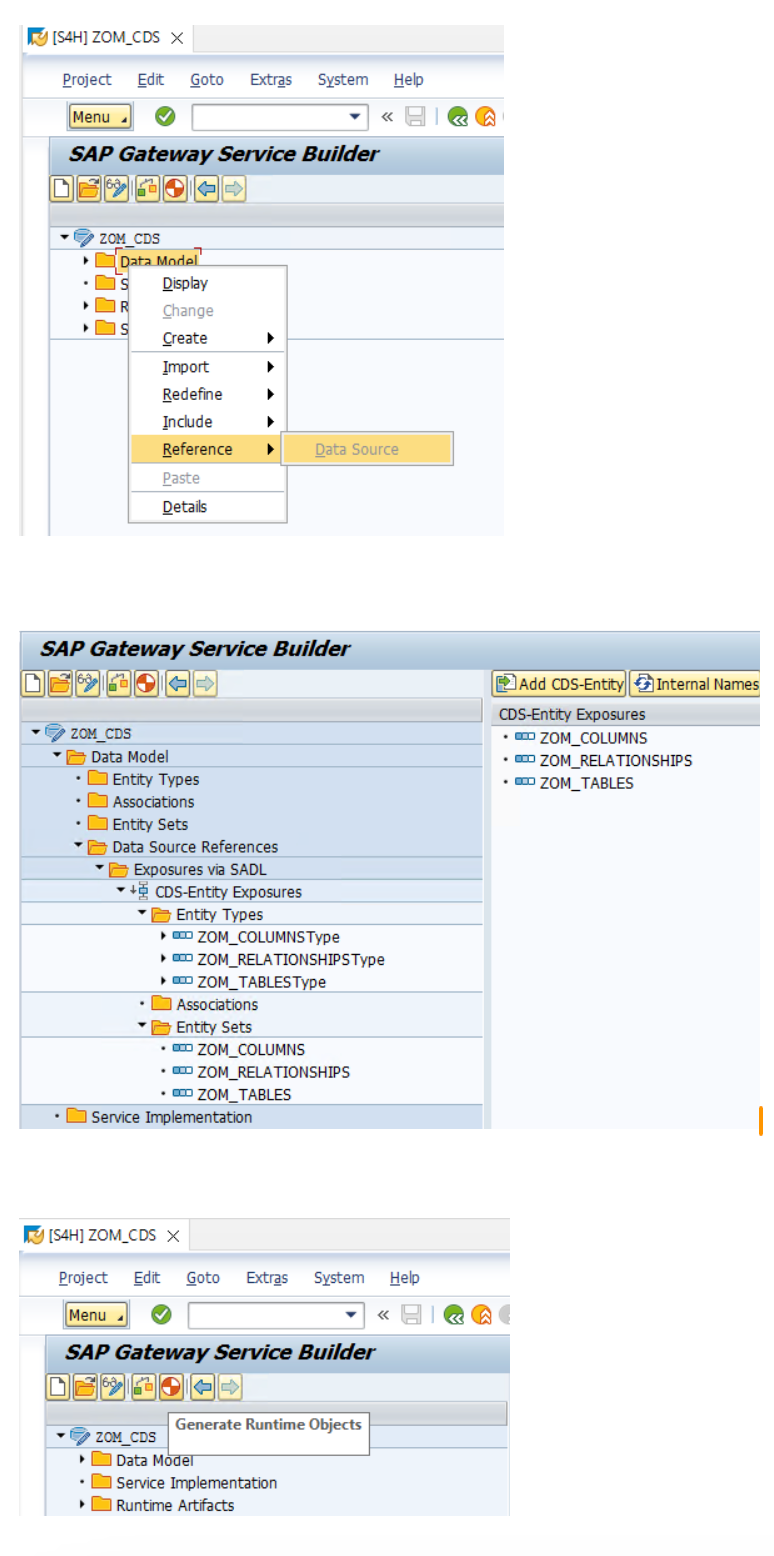 The final step is to expose the generated code as OData service. This is the Register step.
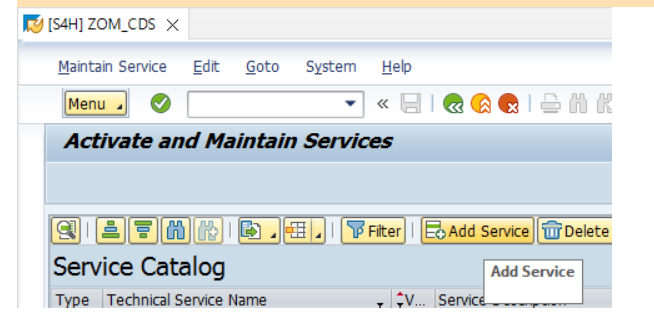
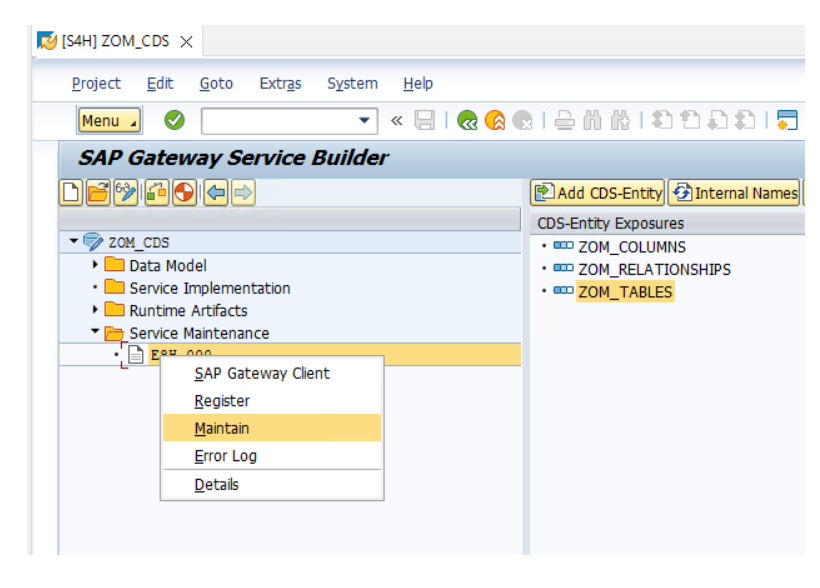 In the next screen click on Add Service and add the service as new OData endpoint. The service alias is the location where the SAP Gateway is installed.