> ## Documentation Index
> Fetch the complete documentation index at: https://docs.open-metadata.org/llms.txt
> Use this file to discover all available pages before exploring further.
# Spark Lineage Ingestion
# Spark Lineage Ingestion
A spark job may involve movement/transfer of data which may result into a data lineage, to capture such lineages you can make use of `OpenMetadata Spark Agent` which you can configure with your spark session and capture these spark lineages into your OpenMetadata instance.
In this guide we will explain how you can make use of the `OpenMetadata Spark Agent` to capture such lineage.
* [Requirements](#requirements)
* [Configuration](#configuration)
* [Using Spark Agent with Databricks](#using-spark-agent-with-databricks)
* [Using Spark Agent with Glue](#using-spark-agent-with-glue)
## Requirement
To use the `OpenMetadata Spark Agent`, you will have to download the latest jar from [here](https://github.com/open-metadata/openmetadata-spark-agent/releases).
We support spark version 3.1 and above.
## Configuration
While configuring the spark session, in this guide we will make use of PySpark to demonstrate the use of `OpenMetadata Spark Agent`
Once you have downloaded the jar from [here](https://github.com/open-metadata/openmetadata-spark-agent/releases) in your spark configuration you will have to add the path to your `openmetadata-spark-agent.jar` along with other required jars to run your spark job, in this example it is `mysql-connector-java.jar`
`openmetadata-spark-agent.jar` comes with a custom spark listener i.e. `io.openlineage.spark.agent.OpenLineageSparkListener` you will need to add this as `extraListeners` spark configuration.
`spark.openmetadata.transport.hostPort`: Specify the host & port of the instance where your OpenMetadata is hosted.
`spark.openmetadata.transport.type` is required configuration with value as `openmetadata`.
`spark.openmetadata.transport.jwtToken`: Specify your OpenMetadata Jwt token here. Checkout [this](/v1.12.x/deployment/security/enable-jwt-tokens#generate-token) documentation on how you can generate a jwt token in OpenMetadata.
`spark.openmetadata.transport.pipelineServiceName`: This spark job will be creating a new pipeline service of type `Spark`, use this configuration to customize the pipeline service name.
Note: If the pipeline service with the specified name already exists then we will be updating/using the same pipeline service.
`spark.openmetadata.transport.pipelineName`: This spark job will also create a new pipeline within the pipeline service defined above. Use this configuration to customize the name of pipeline.
Note: If the pipeline with the specified name already exists then we will be updating/using the same pipeline.
`spark.openmetadata.transport.pipelineSourceUrl`: You can use this configuration to provide additional context to your pipeline by specifying a url related to the pipeline.
`spark.openmetadata.transport.pipelineDescription`: Provide pipeline description using this spark configuration.
`spark.openmetadata.transport.databaseServiceNames`: Provide the comma separated list of database service names which contains the source tables used in this job. If you do not provide this configuration then we will be searching through all the services available in openmetadata.
`spark.openmetadata.transport.timeout`: Provide the timeout to communicate with OpenMetadata APIs.
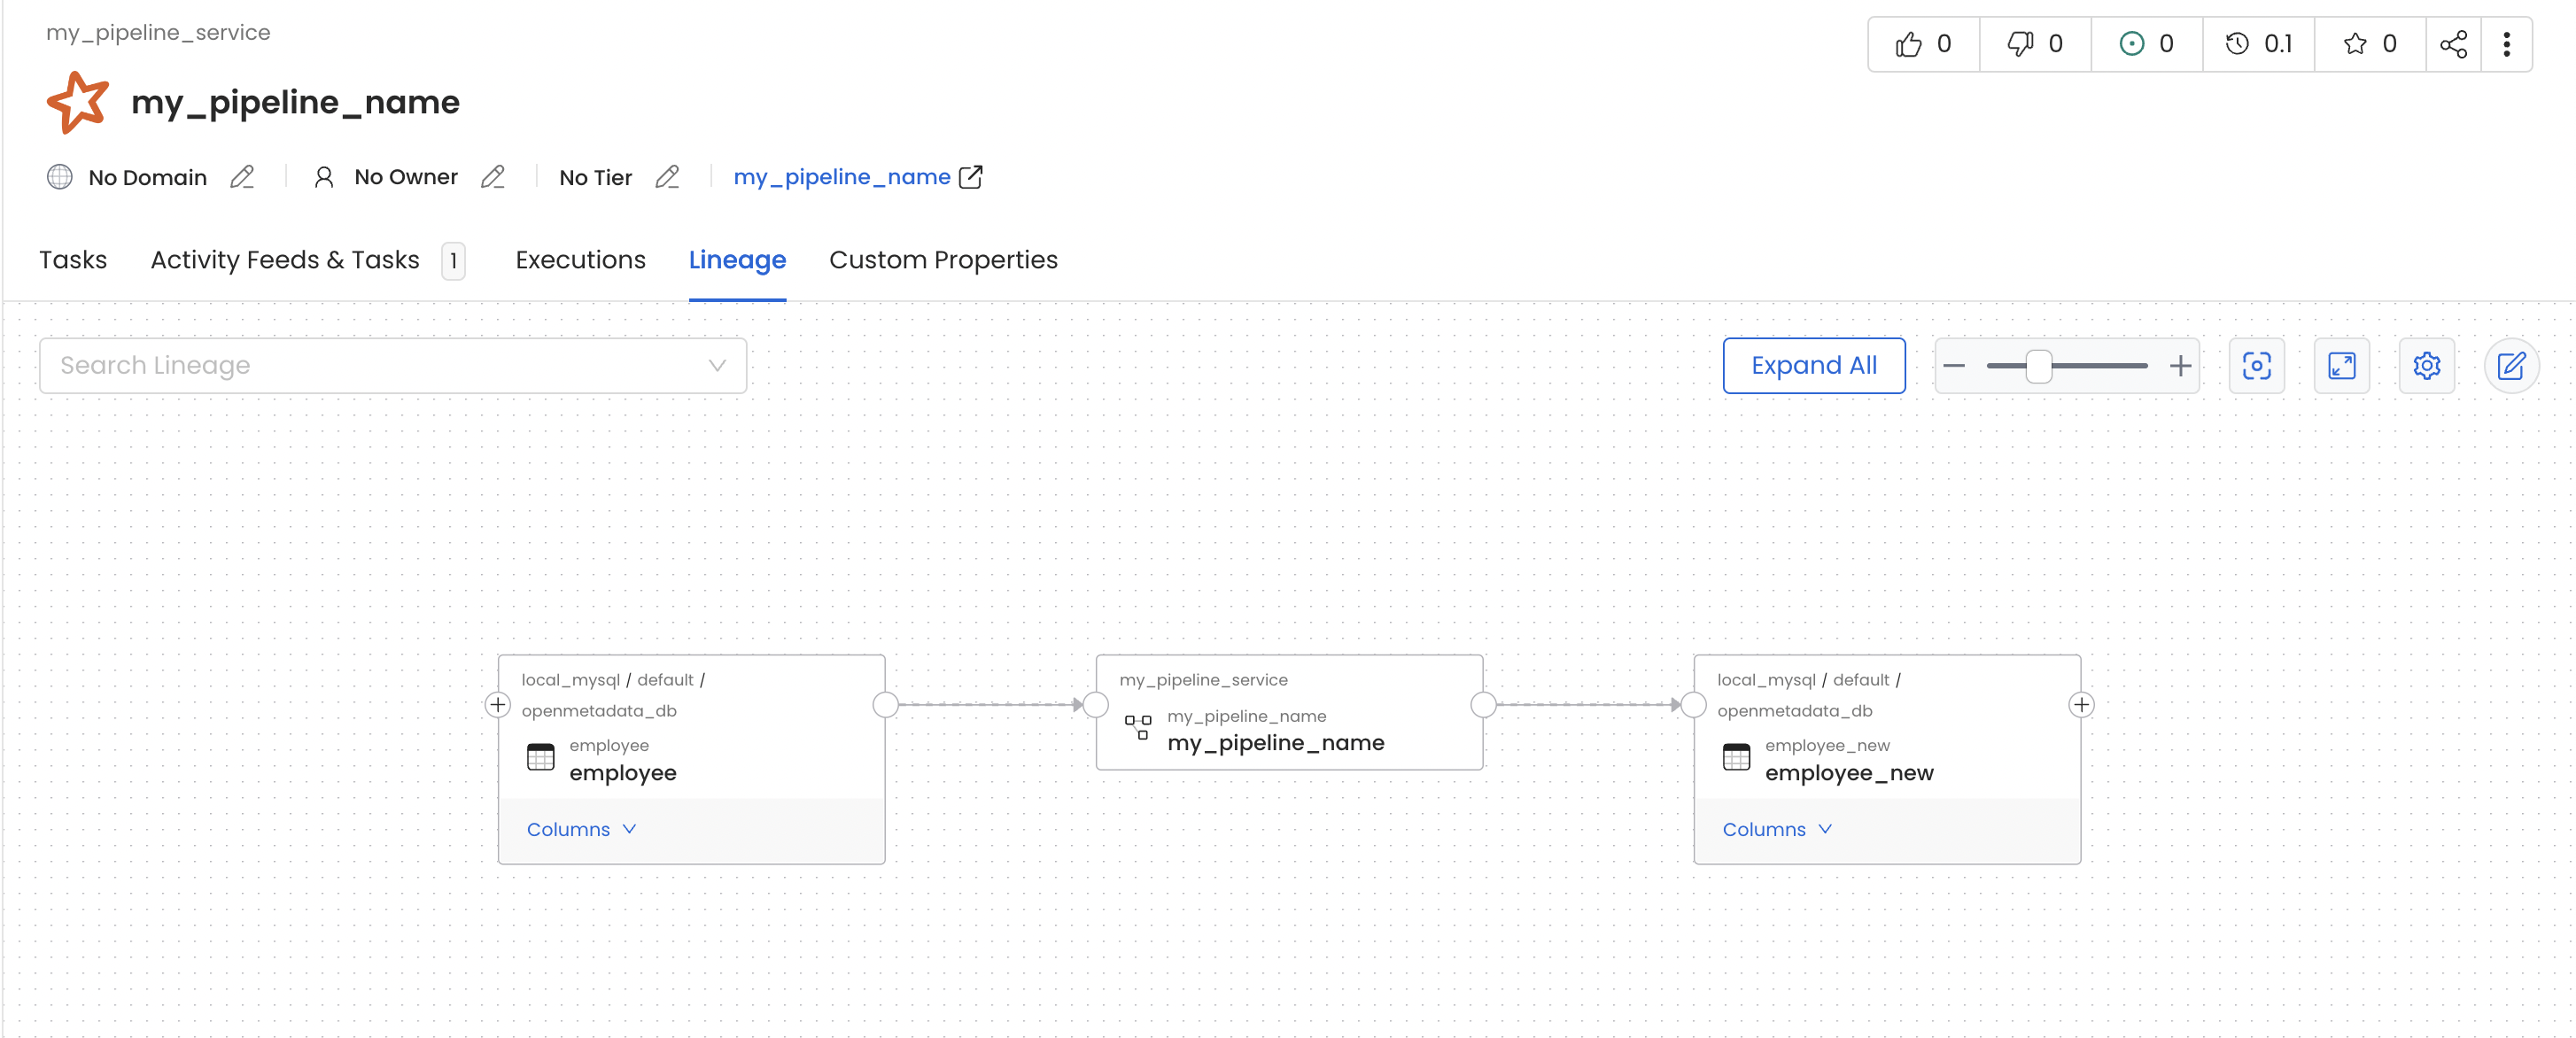
In this job we are reading data from `employee` table and moving it to another table `employee_new` of within same mysql source.
```py theme={null}
from pyspark.sql import SparkSession
spark = (
SparkSession.builder.master("local")
.appName("localTestApp")
.config(
"spark.jars",
"path/to/openmetadata-spark-agent.jar,path/to/mysql-connector-java-8.0.30.jar",
)
.config(
"spark.extraListeners",
"io.openlineage.spark.agent.OpenLineageSparkListener",
)
.config("spark.openmetadata.transport.hostPort", "http://localhost:8585")
.config("spark.openmetadata.transport.type", "openmetadata")
.config("spark.openmetadata.transport.jwtToken", "")
.config(
"spark.openmetadata.transport.pipelineServiceName", "my_pipeline_service"
)
.config("spark.openmetadata.transport.pipelineName", "my_pipeline_name")
.config(
"spark.openmetadata.transport.pipelineSourceUrl",
"http://your.org/path/to/pipeline",
)
.config(
"spark.openmetadata.transport.pipelineDescription", "My ETL Pipeline"
)
.config(
"spark.openmetadata.transport.databaseServiceNames",
"random,local_mysql",
)
.config("spark.openmetadata.transport.timeout", "30")
.getOrCreate()
)
# Read table using jdbc()
# Read from MySQL Table
employee_df = (
spark.read.format("jdbc")
.option("url", "jdbc:mysql://localhost:3306/openmetadata_db")
.option("driver", "com.mysql.cj.jdbc.Driver")
.option("dbtable", "employee")
.option("user", "openmetadata_user")
.option("password", "openmetadata_password")
.load()
)
# Write data to the new employee_new table
(
employee_df.write.format("jdbc")
.option("url", "jdbc:mysql://localhost:3306/openmetadata_db")
.option("driver", "com.mysql.cj.jdbc.Driver")
.option("dbtable", "employee_new")
.option("user", "openmetadata_user")
.option("password", "openmetadata_password")
.mode("overwrite")
.save()
)
# Stop the Spark session
spark.stop()
```
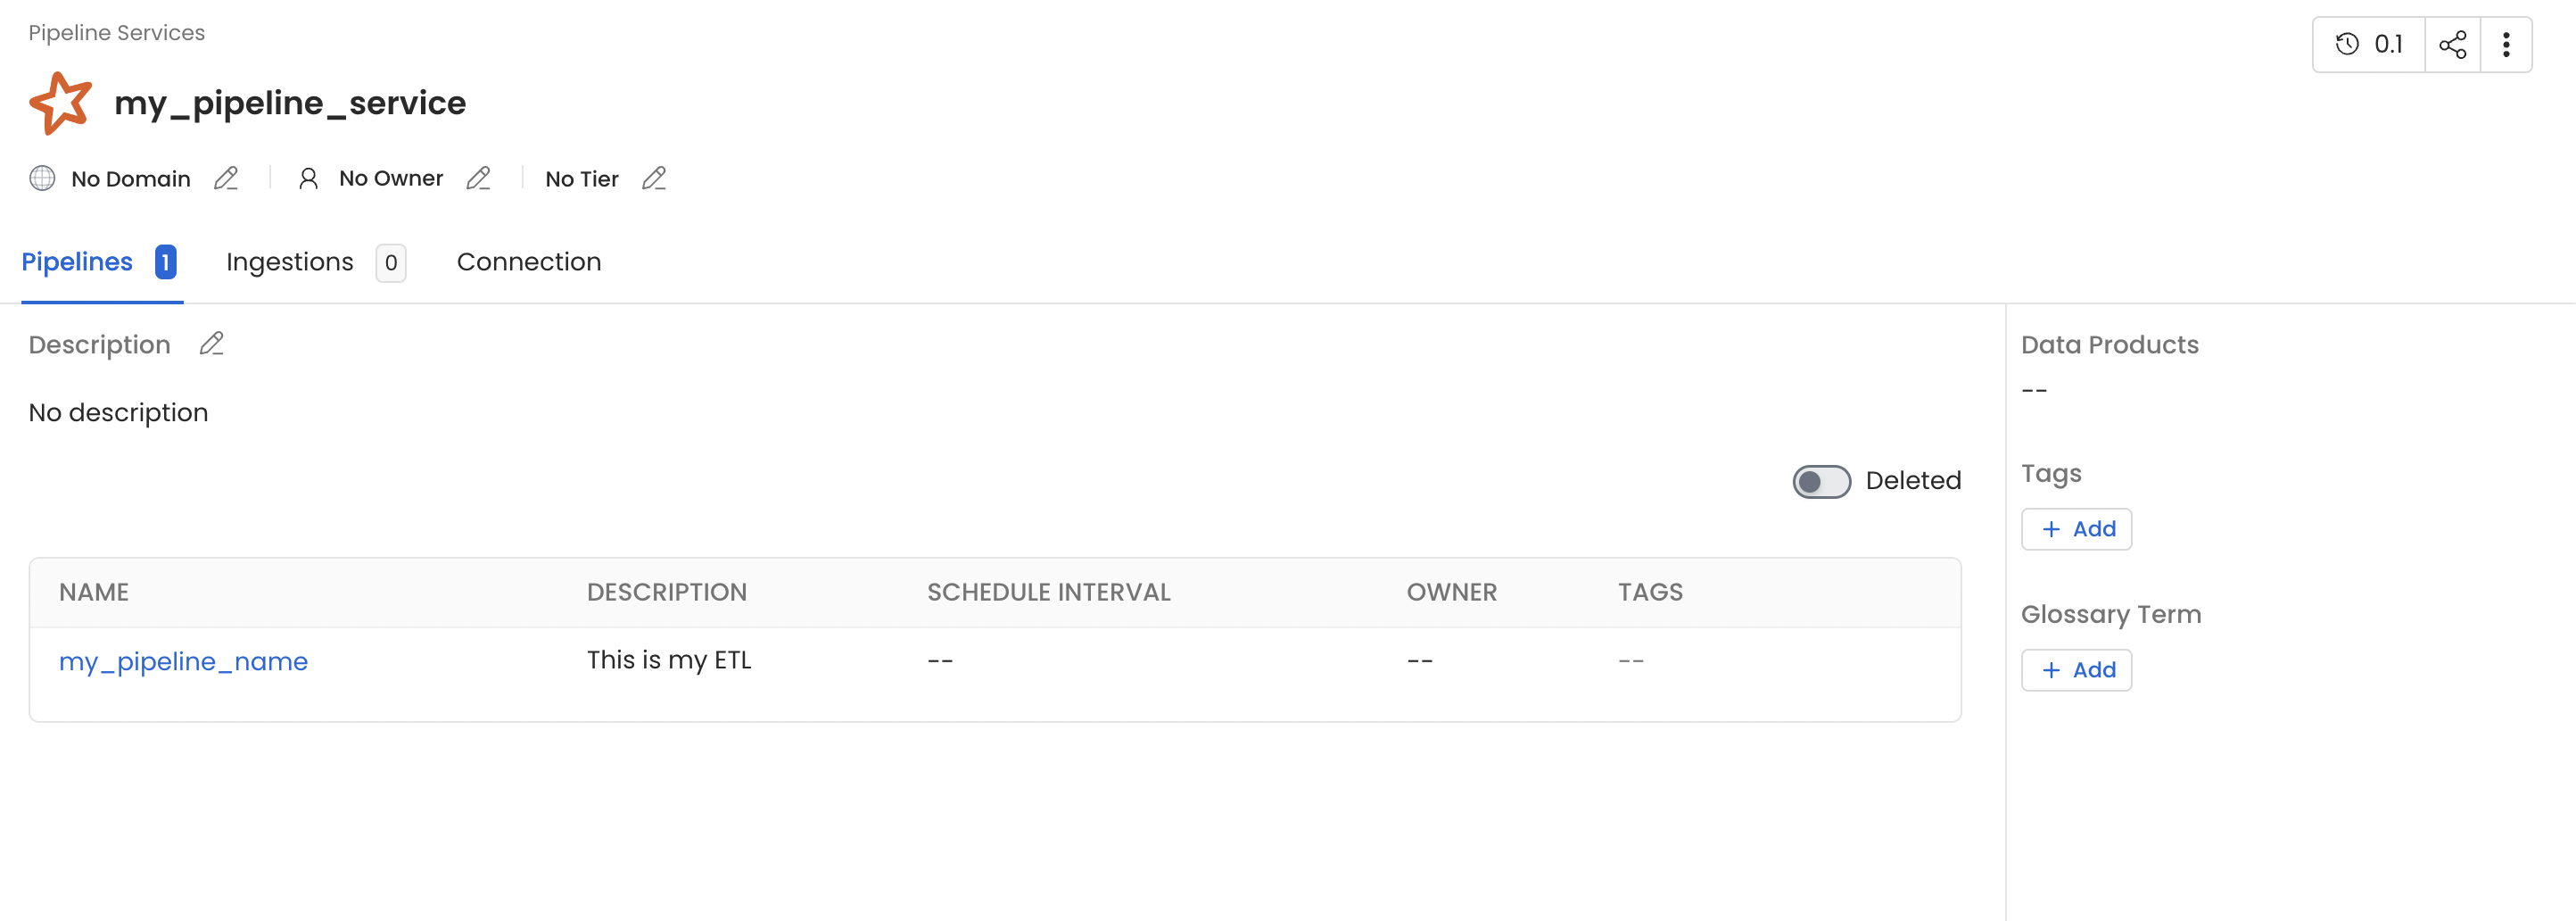
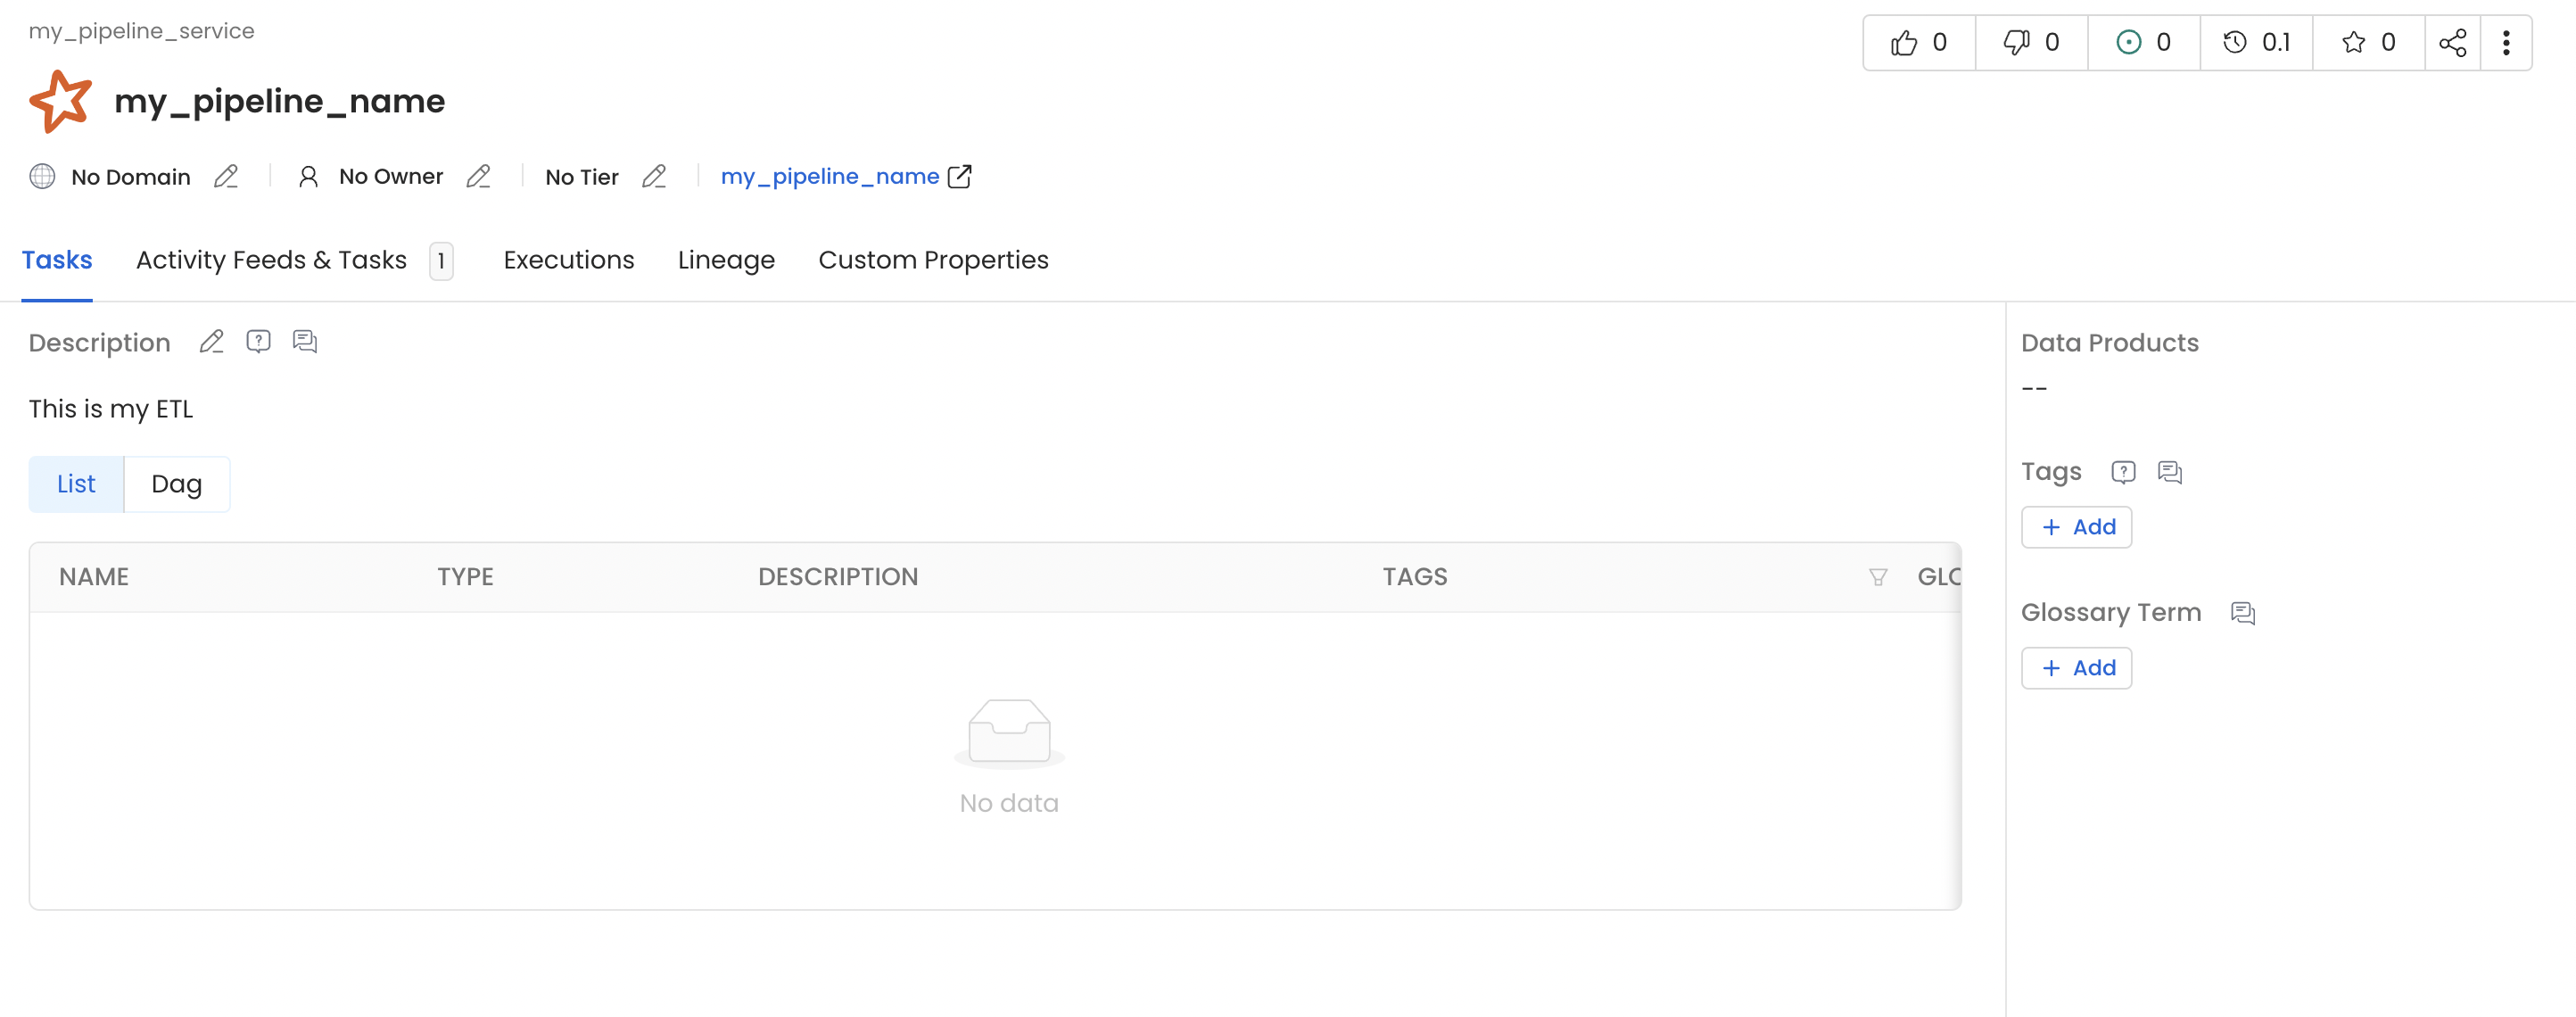
Once this pyspark job get finished you will see a new pipeline service with name `my_pipeline_service` generated in your openmetadata instance which would contain a pipeline with name `my_pipeline` as per the above example and you should also see lineage between the table `employee` and `employee_new` via `my_pipeline`.
 ## Using Spark Agent with Databricks
Follow the below steps in order to use OpenMetadata Spark Agent with databricks.
### 1. Upload the jar to compute cluster
To use the `OpenMetadata Spark Agent`, you will have to download the latest jar from [here](https://github.com/open-metadata/openmetadata-spark-agent/releases) and upload it to your databricks compute cluster.
To upload the jar you can visit the compute details page and then go to the libraries tab
## Using Spark Agent with Databricks
Follow the below steps in order to use OpenMetadata Spark Agent with databricks.
### 1. Upload the jar to compute cluster
To use the `OpenMetadata Spark Agent`, you will have to download the latest jar from [here](https://github.com/open-metadata/openmetadata-spark-agent/releases) and upload it to your databricks compute cluster.
To upload the jar you can visit the compute details page and then go to the libraries tab
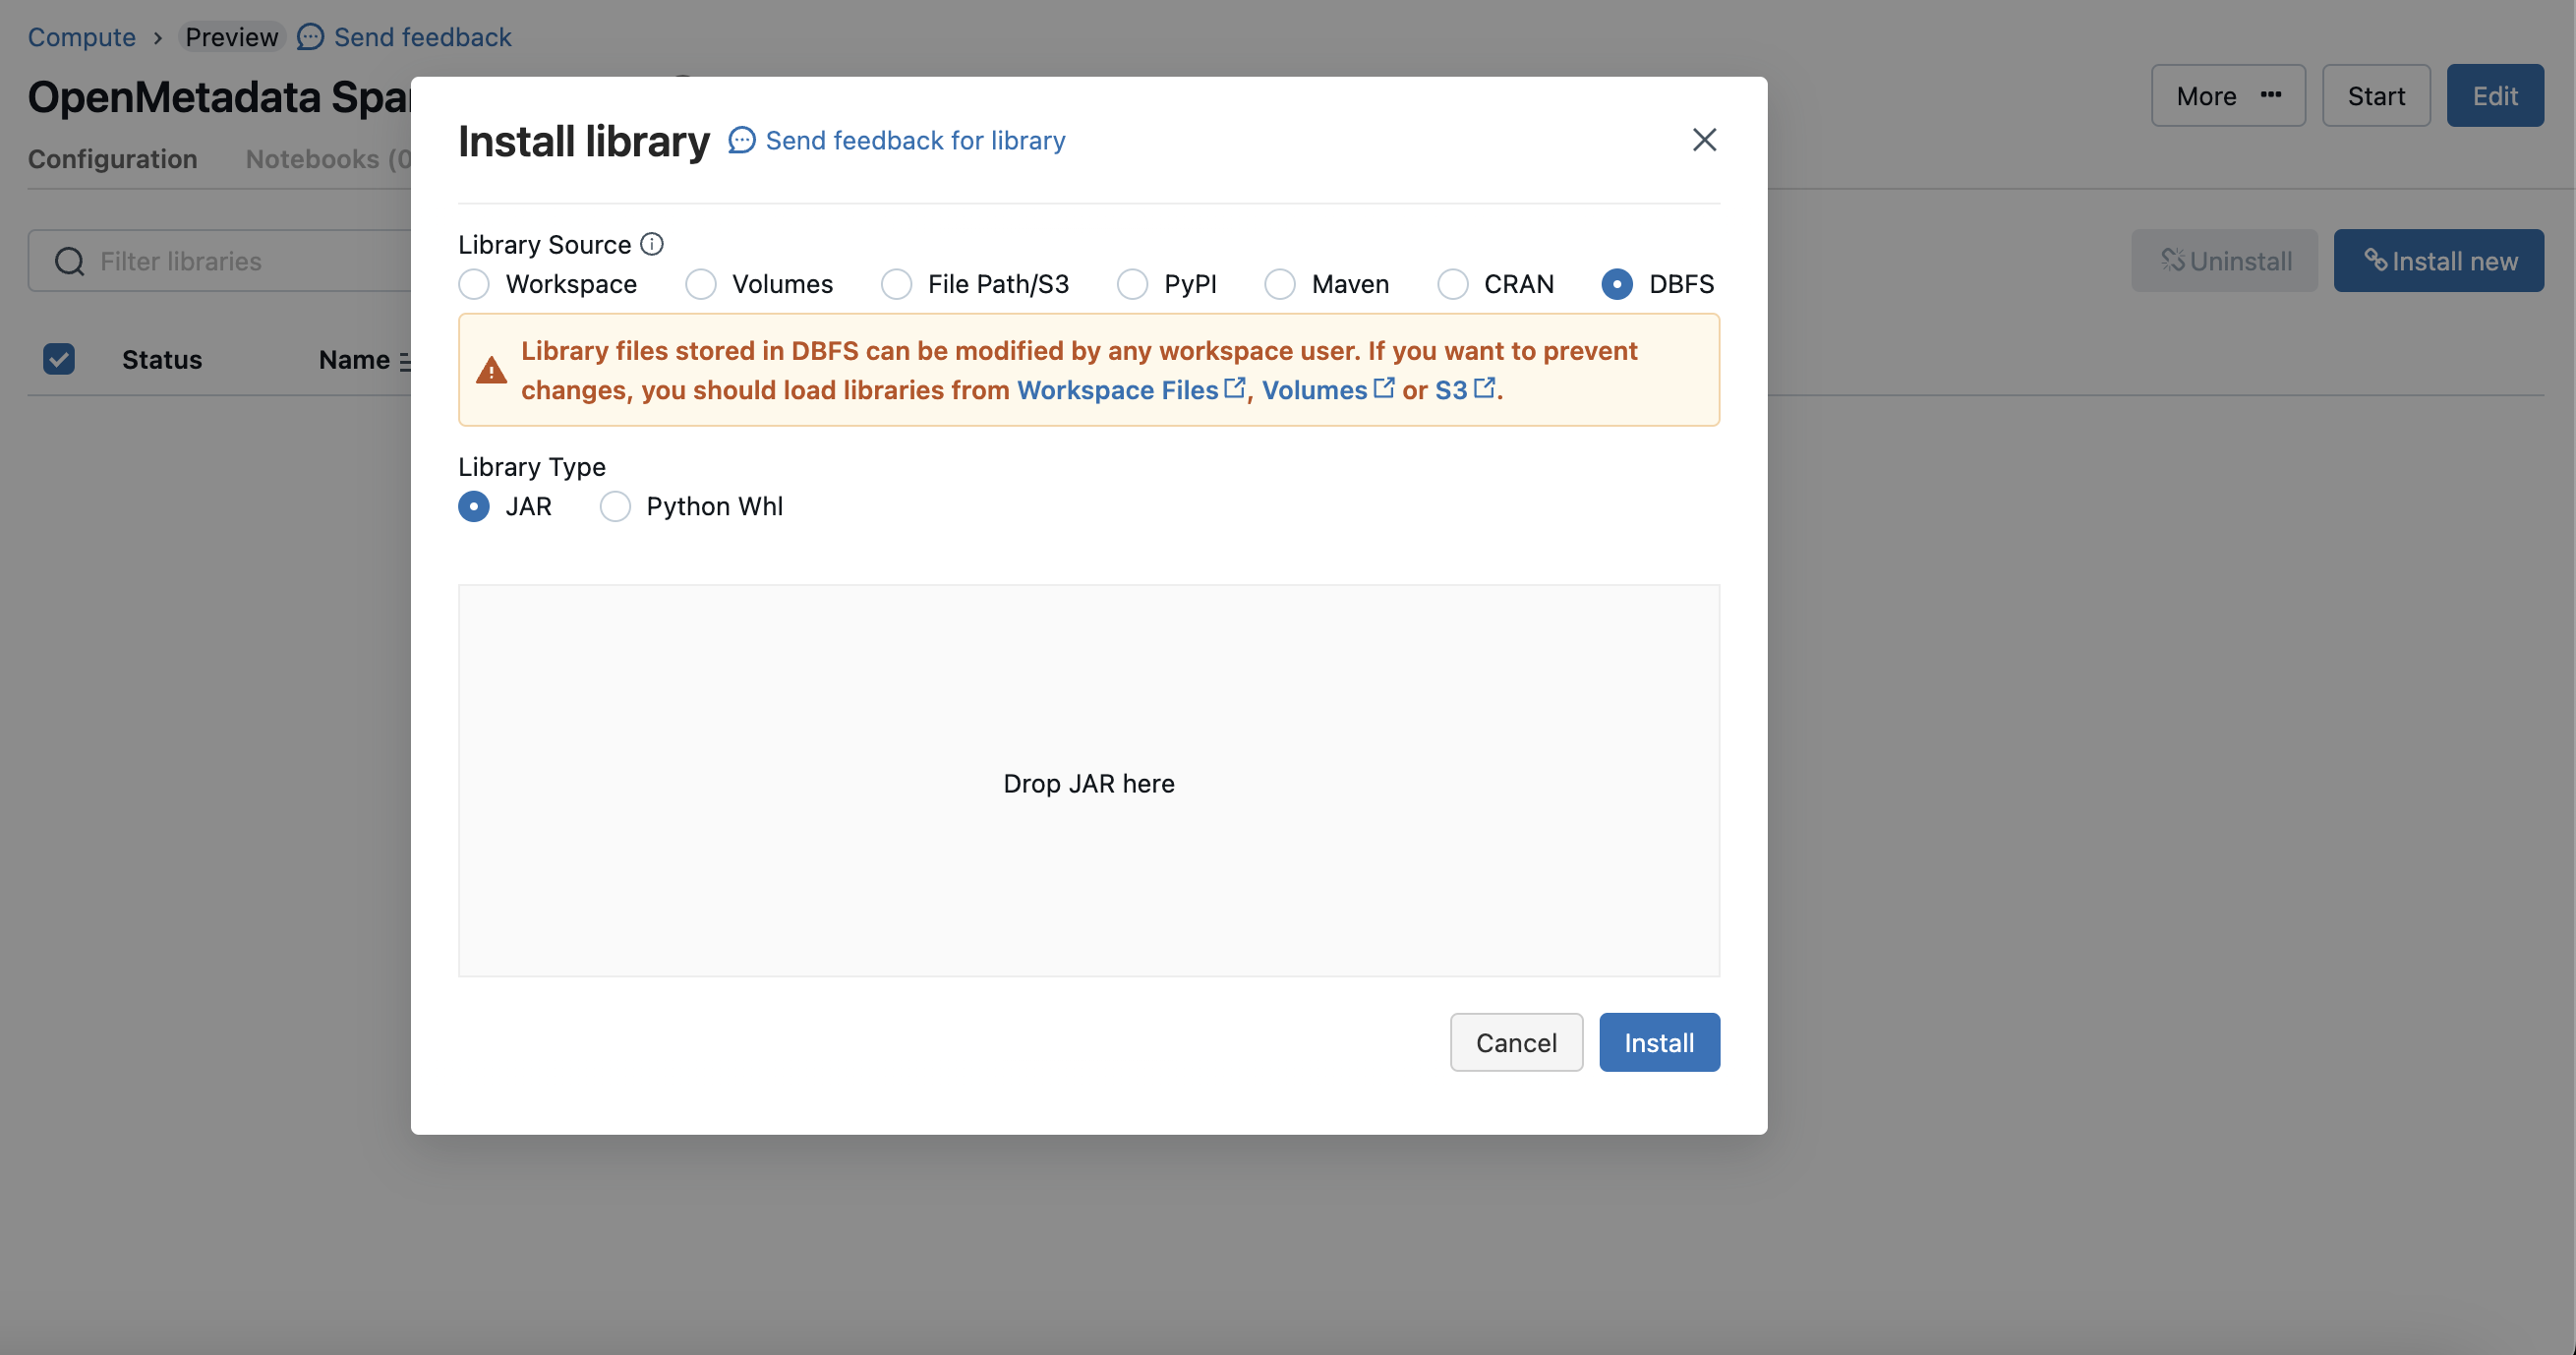
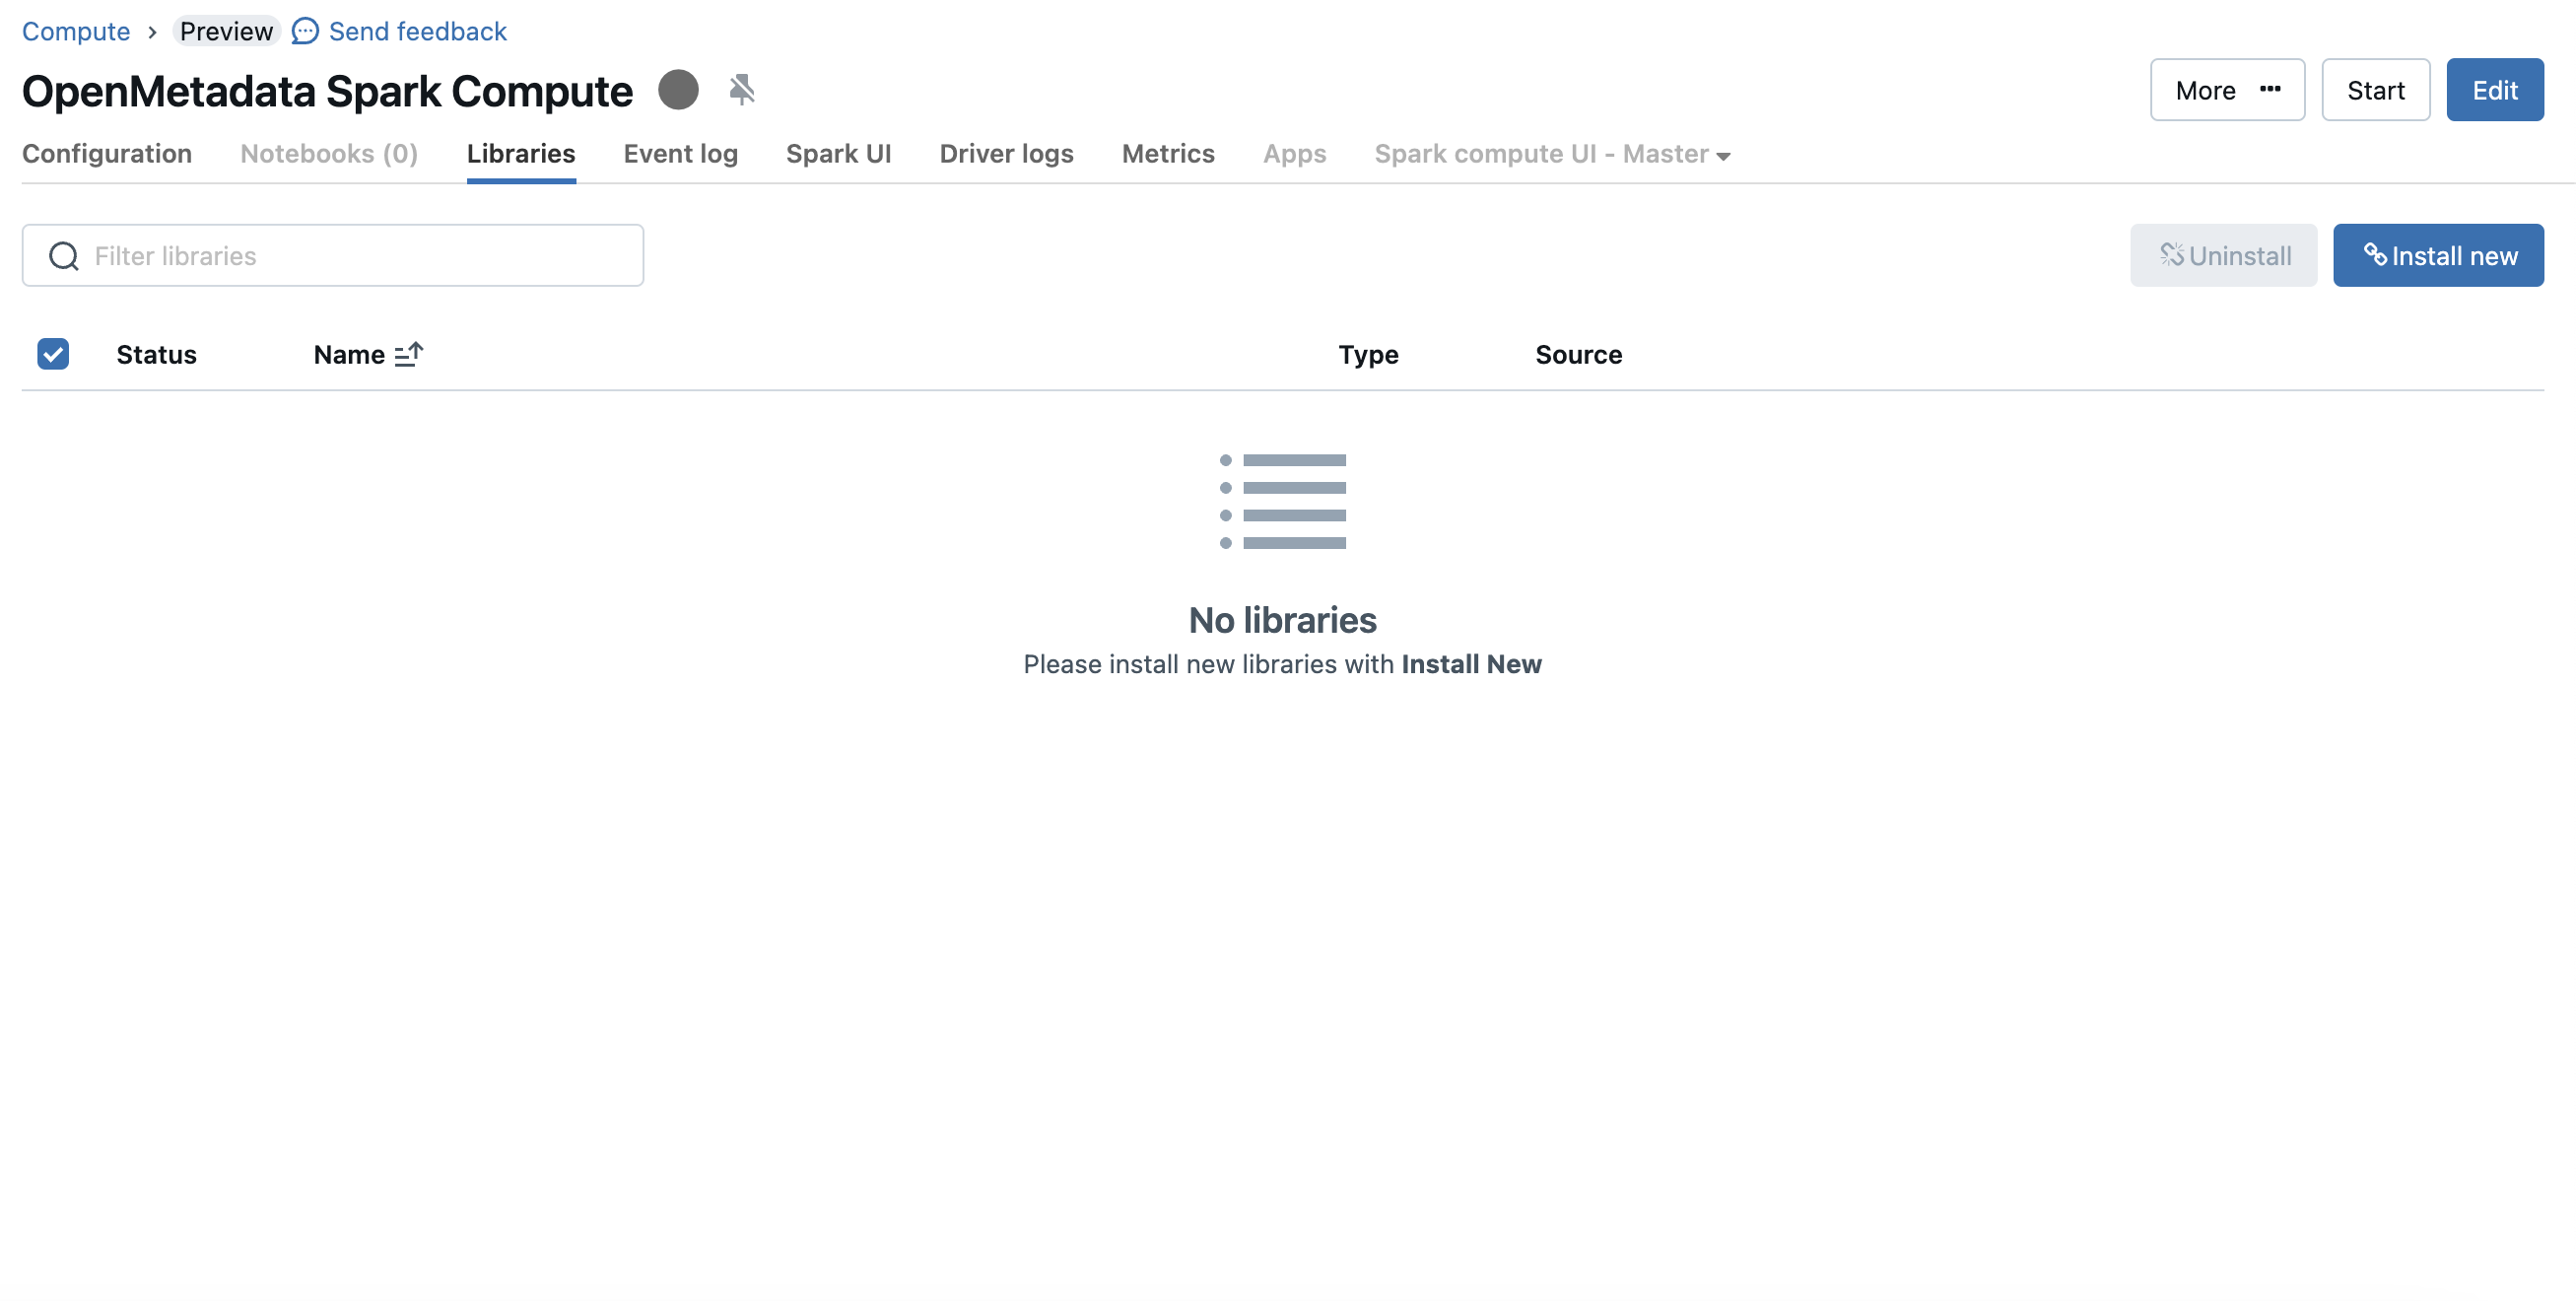 Click on the "Install Now" button and choose `dbfs` mode and upload the `OpenMetadata Spark Agent` jar.
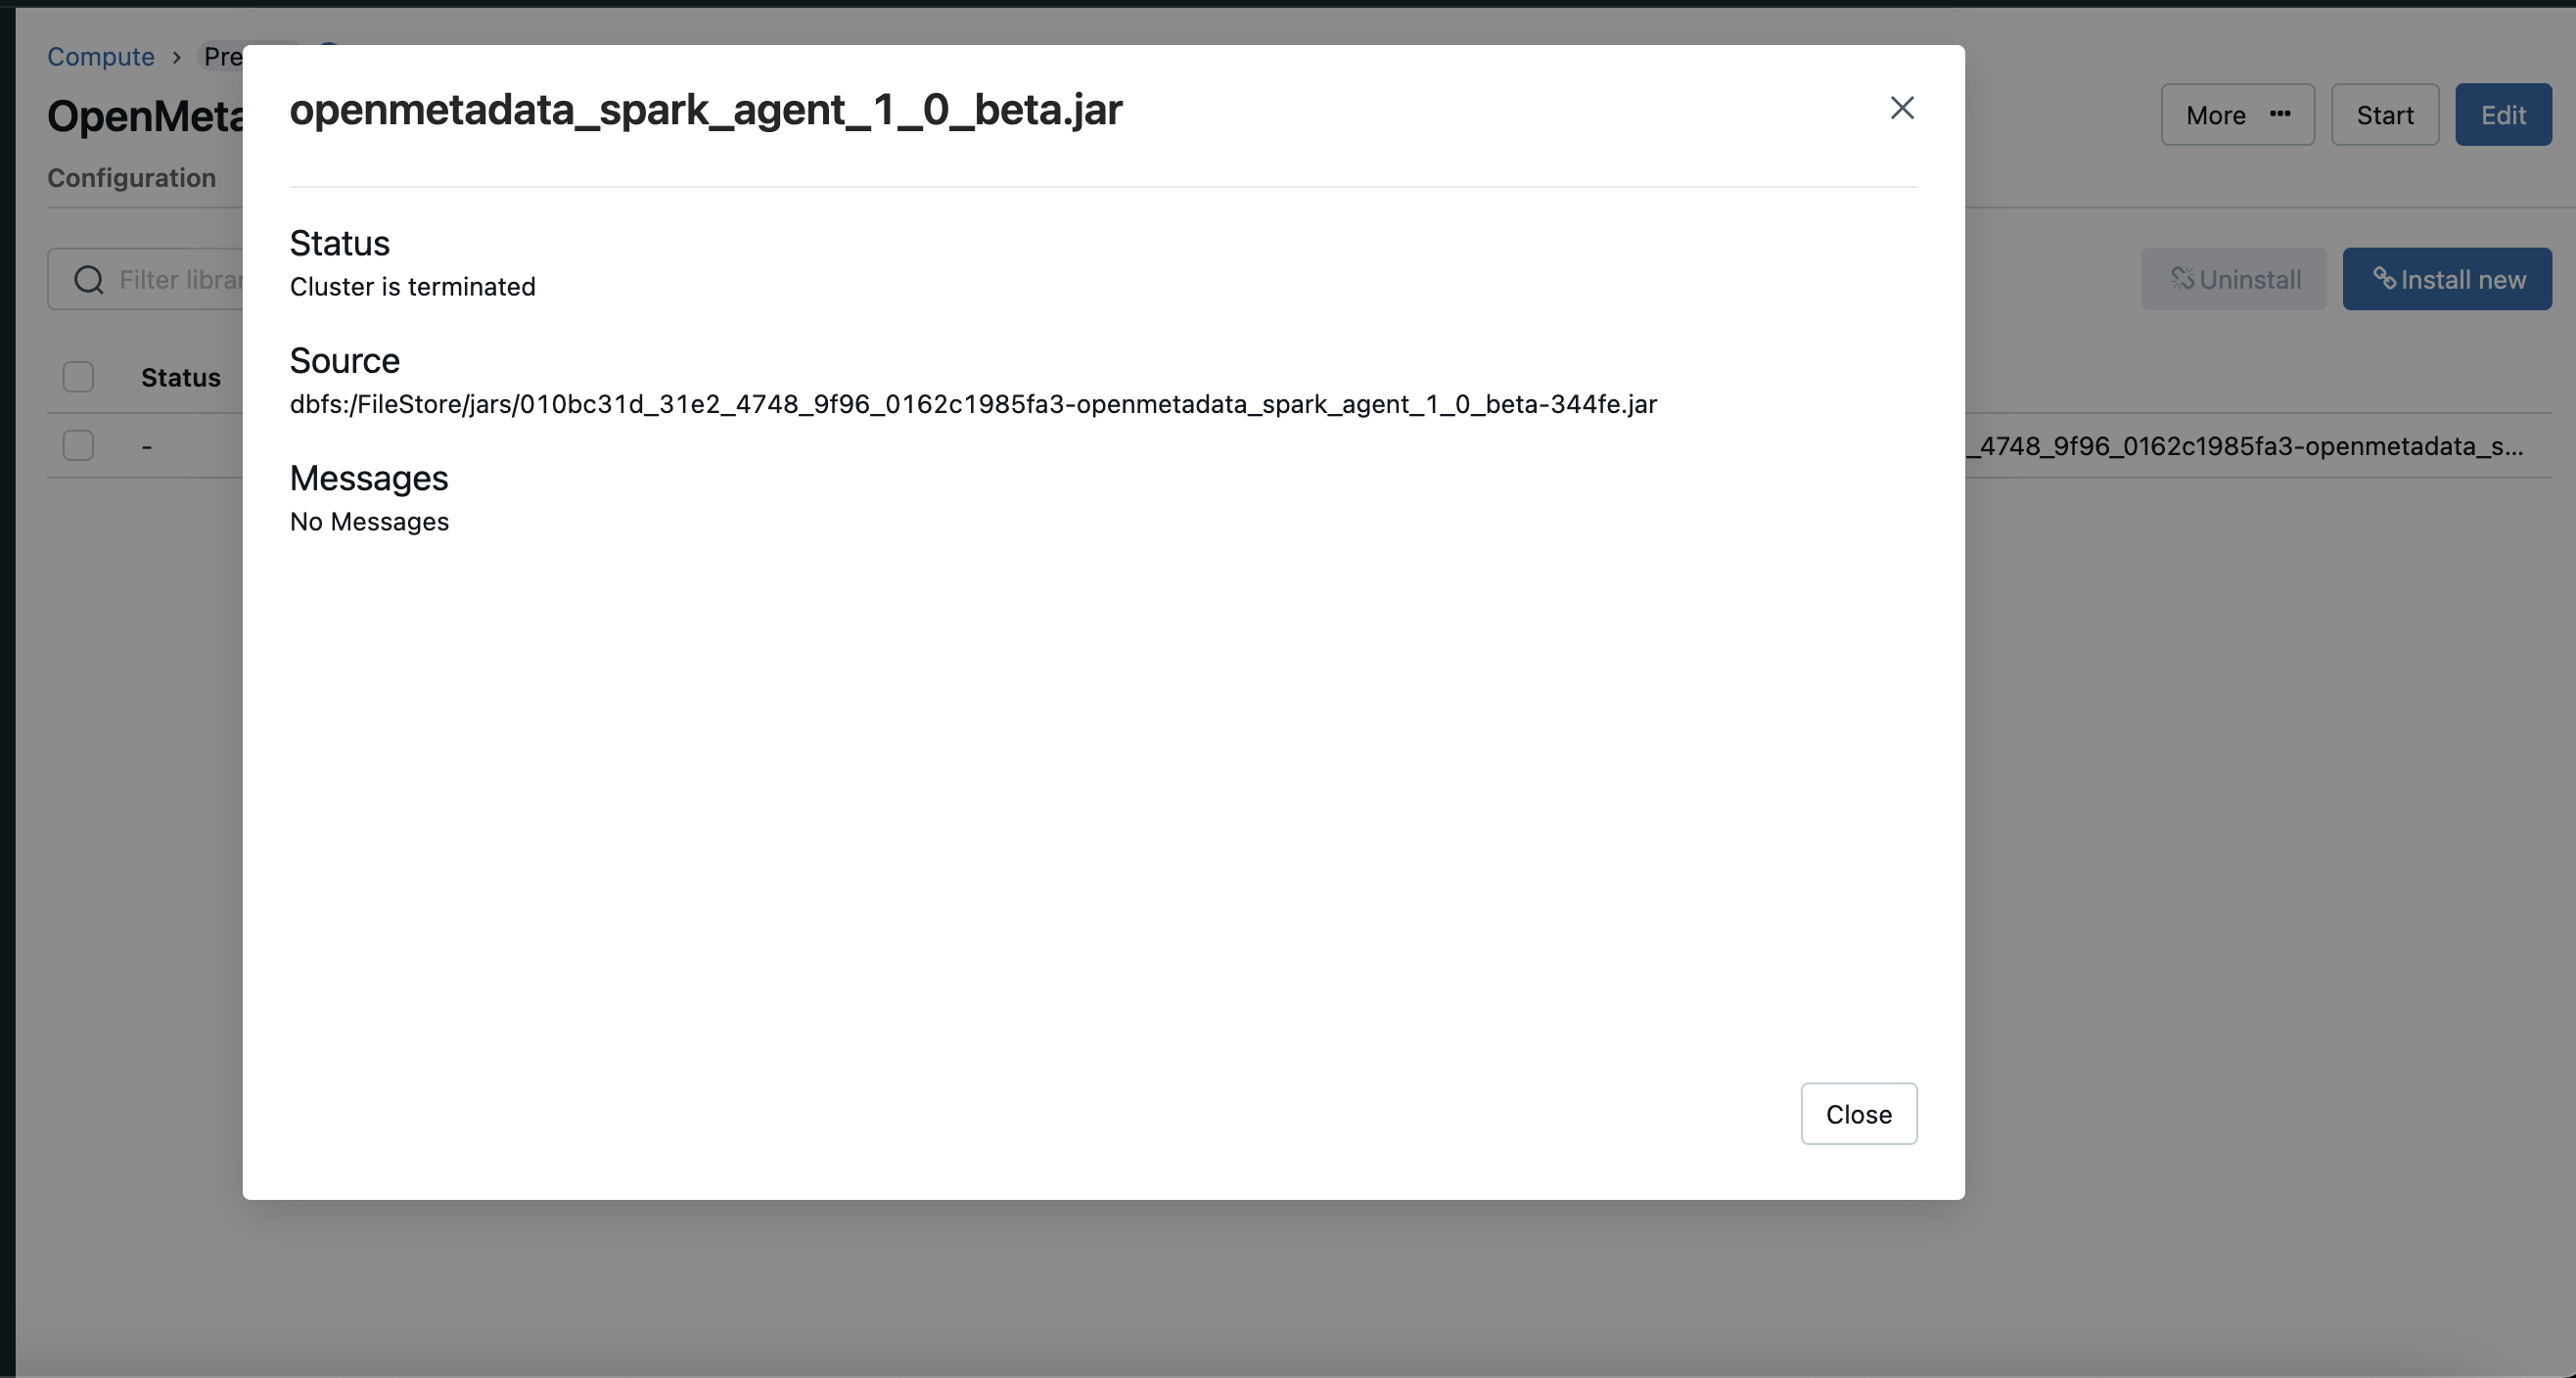
 Once your jar is uploaded copy the path of the jar for the next steps.
 ### 2. Create Initialization Script
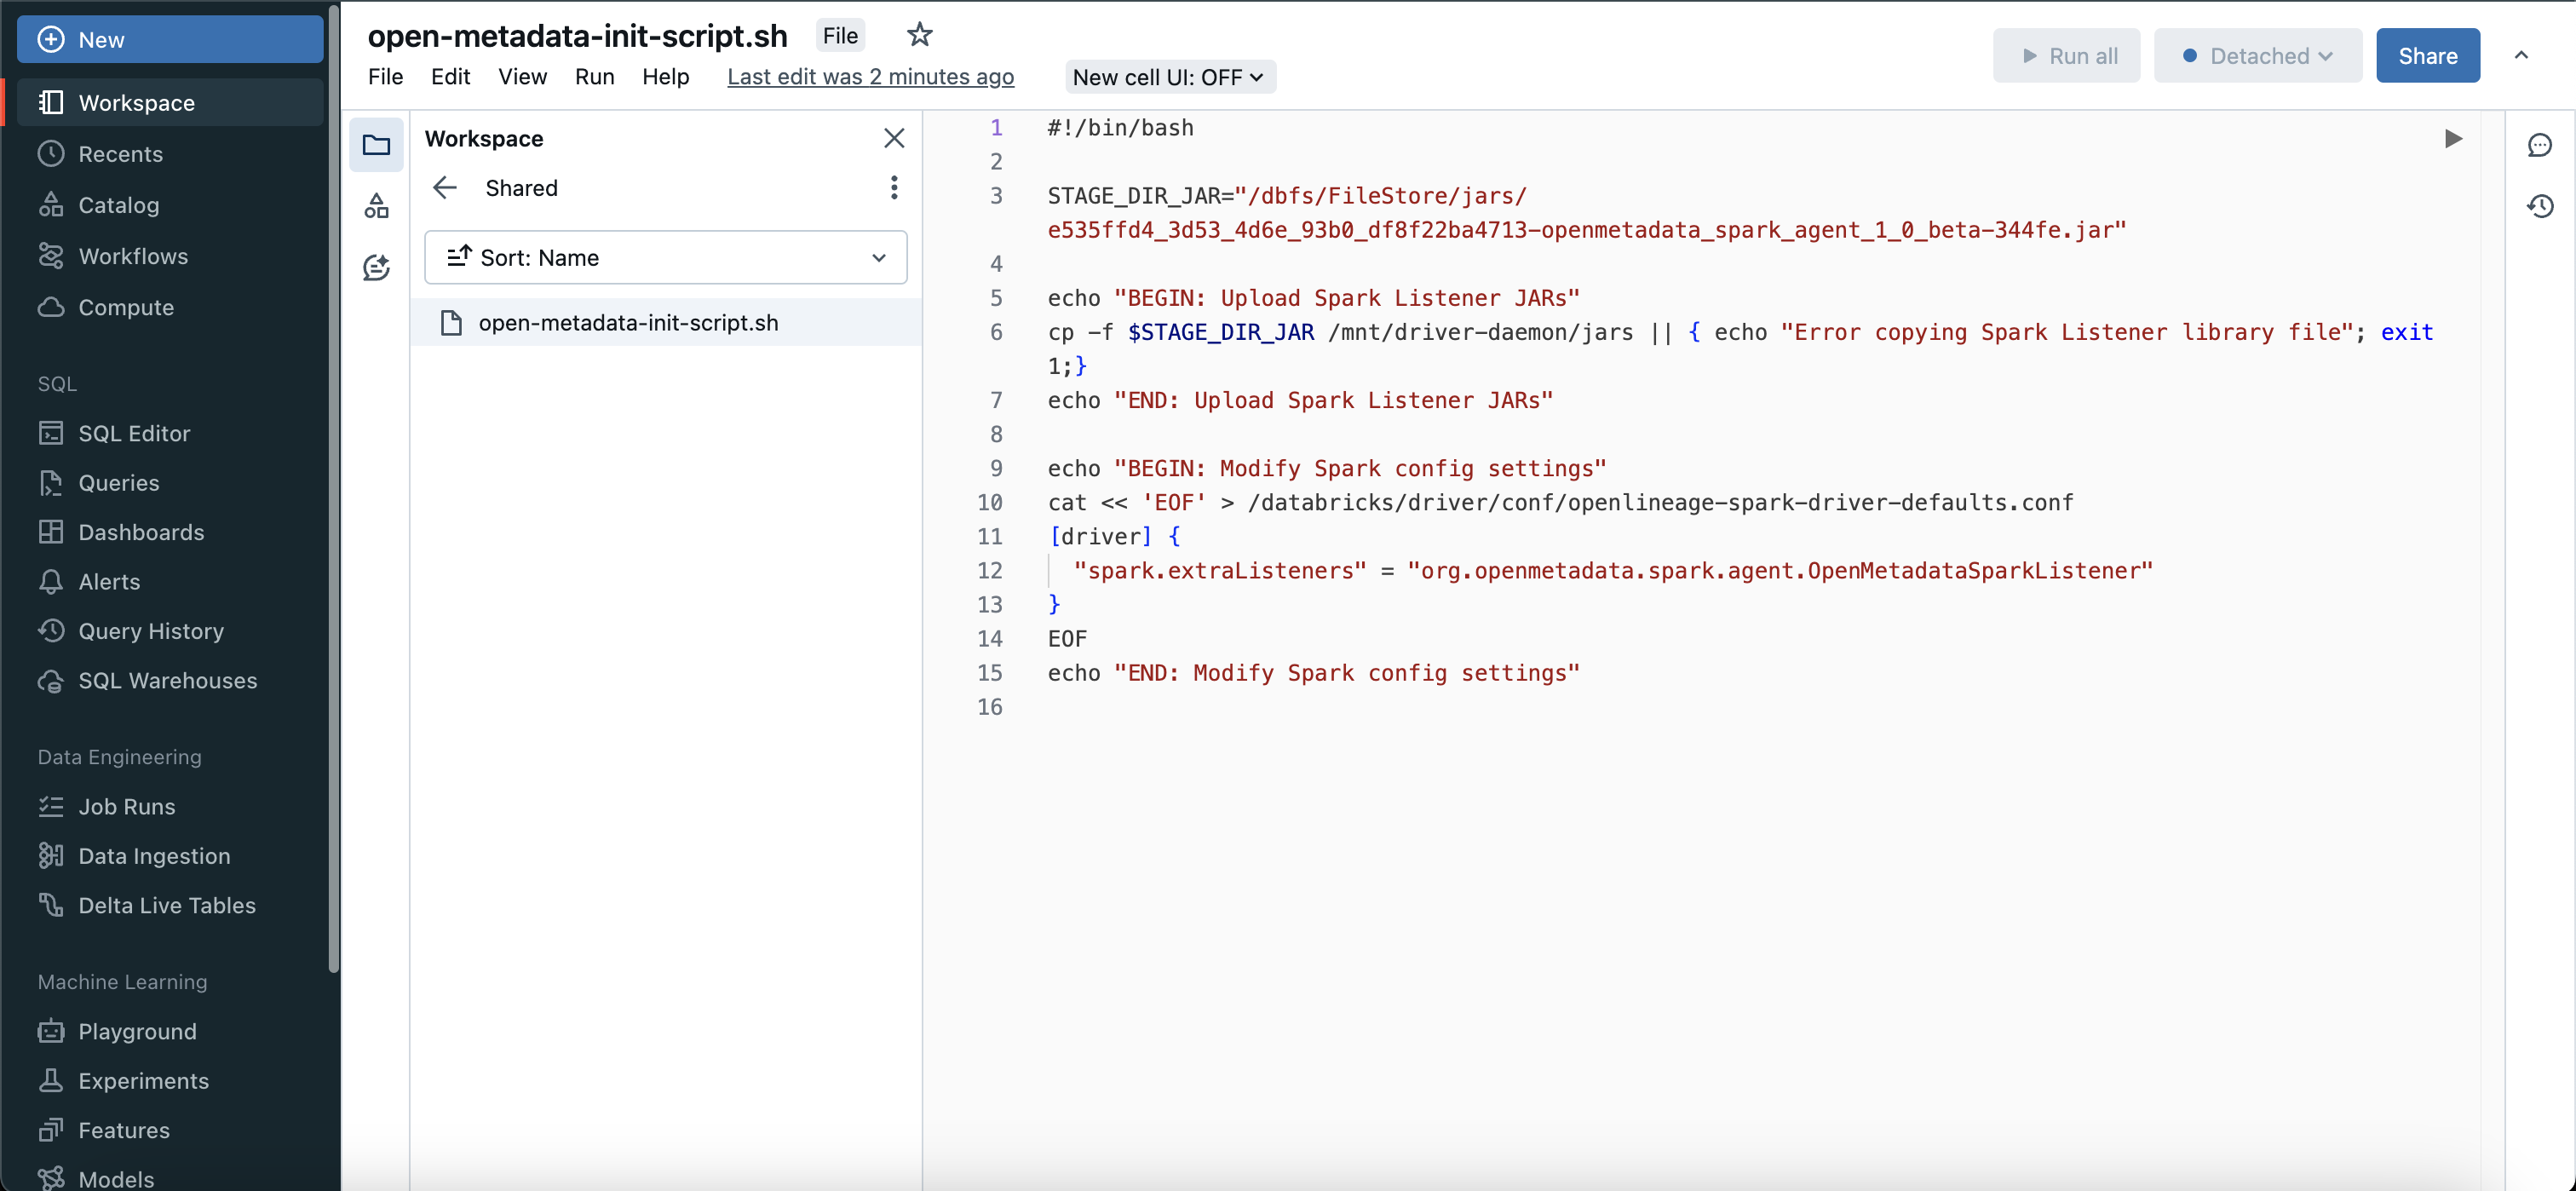
Once your jar is uploaded you need to create a initialization script in your workspace.
```
#!/bin/bash
STAGE_DIR_JAR=""
echo "BEGIN: Upload Spark Listener JARs"
cp -f $STAGE_DIR_JAR /mnt/driver-daemon/jars || { echo "Error copying Spark Listener library file"; exit 1;}
echo "END: Upload Spark Listener JARs"
echo "BEGIN: Modify Spark config settings"
cat << 'EOF' > /databricks/driver/conf/openlineage-spark-driver-defaults.conf
[driver] {
"spark.extraListeners" = "io.openlineage.spark.agent.OpenLineageSparkListener"
}
EOF
echo "END: Modify Spark config settings"
```
Note: The copied path would look like this `dbfs:/FileStore/jars/....` you need to modify it like `/dbfs/FileStore/jars/...` this.
### 2. Create Initialization Script
Once your jar is uploaded you need to create a initialization script in your workspace.
```
#!/bin/bash
STAGE_DIR_JAR=""
echo "BEGIN: Upload Spark Listener JARs"
cp -f $STAGE_DIR_JAR /mnt/driver-daemon/jars || { echo "Error copying Spark Listener library file"; exit 1;}
echo "END: Upload Spark Listener JARs"
echo "BEGIN: Modify Spark config settings"
cat << 'EOF' > /databricks/driver/conf/openlineage-spark-driver-defaults.conf
[driver] {
"spark.extraListeners" = "io.openlineage.spark.agent.OpenLineageSparkListener"
}
EOF
echo "END: Modify Spark config settings"
```
Note: The copied path would look like this `dbfs:/FileStore/jars/....` you need to modify it like `/dbfs/FileStore/jars/...` this.
 ### 3. Configure Initialization Script
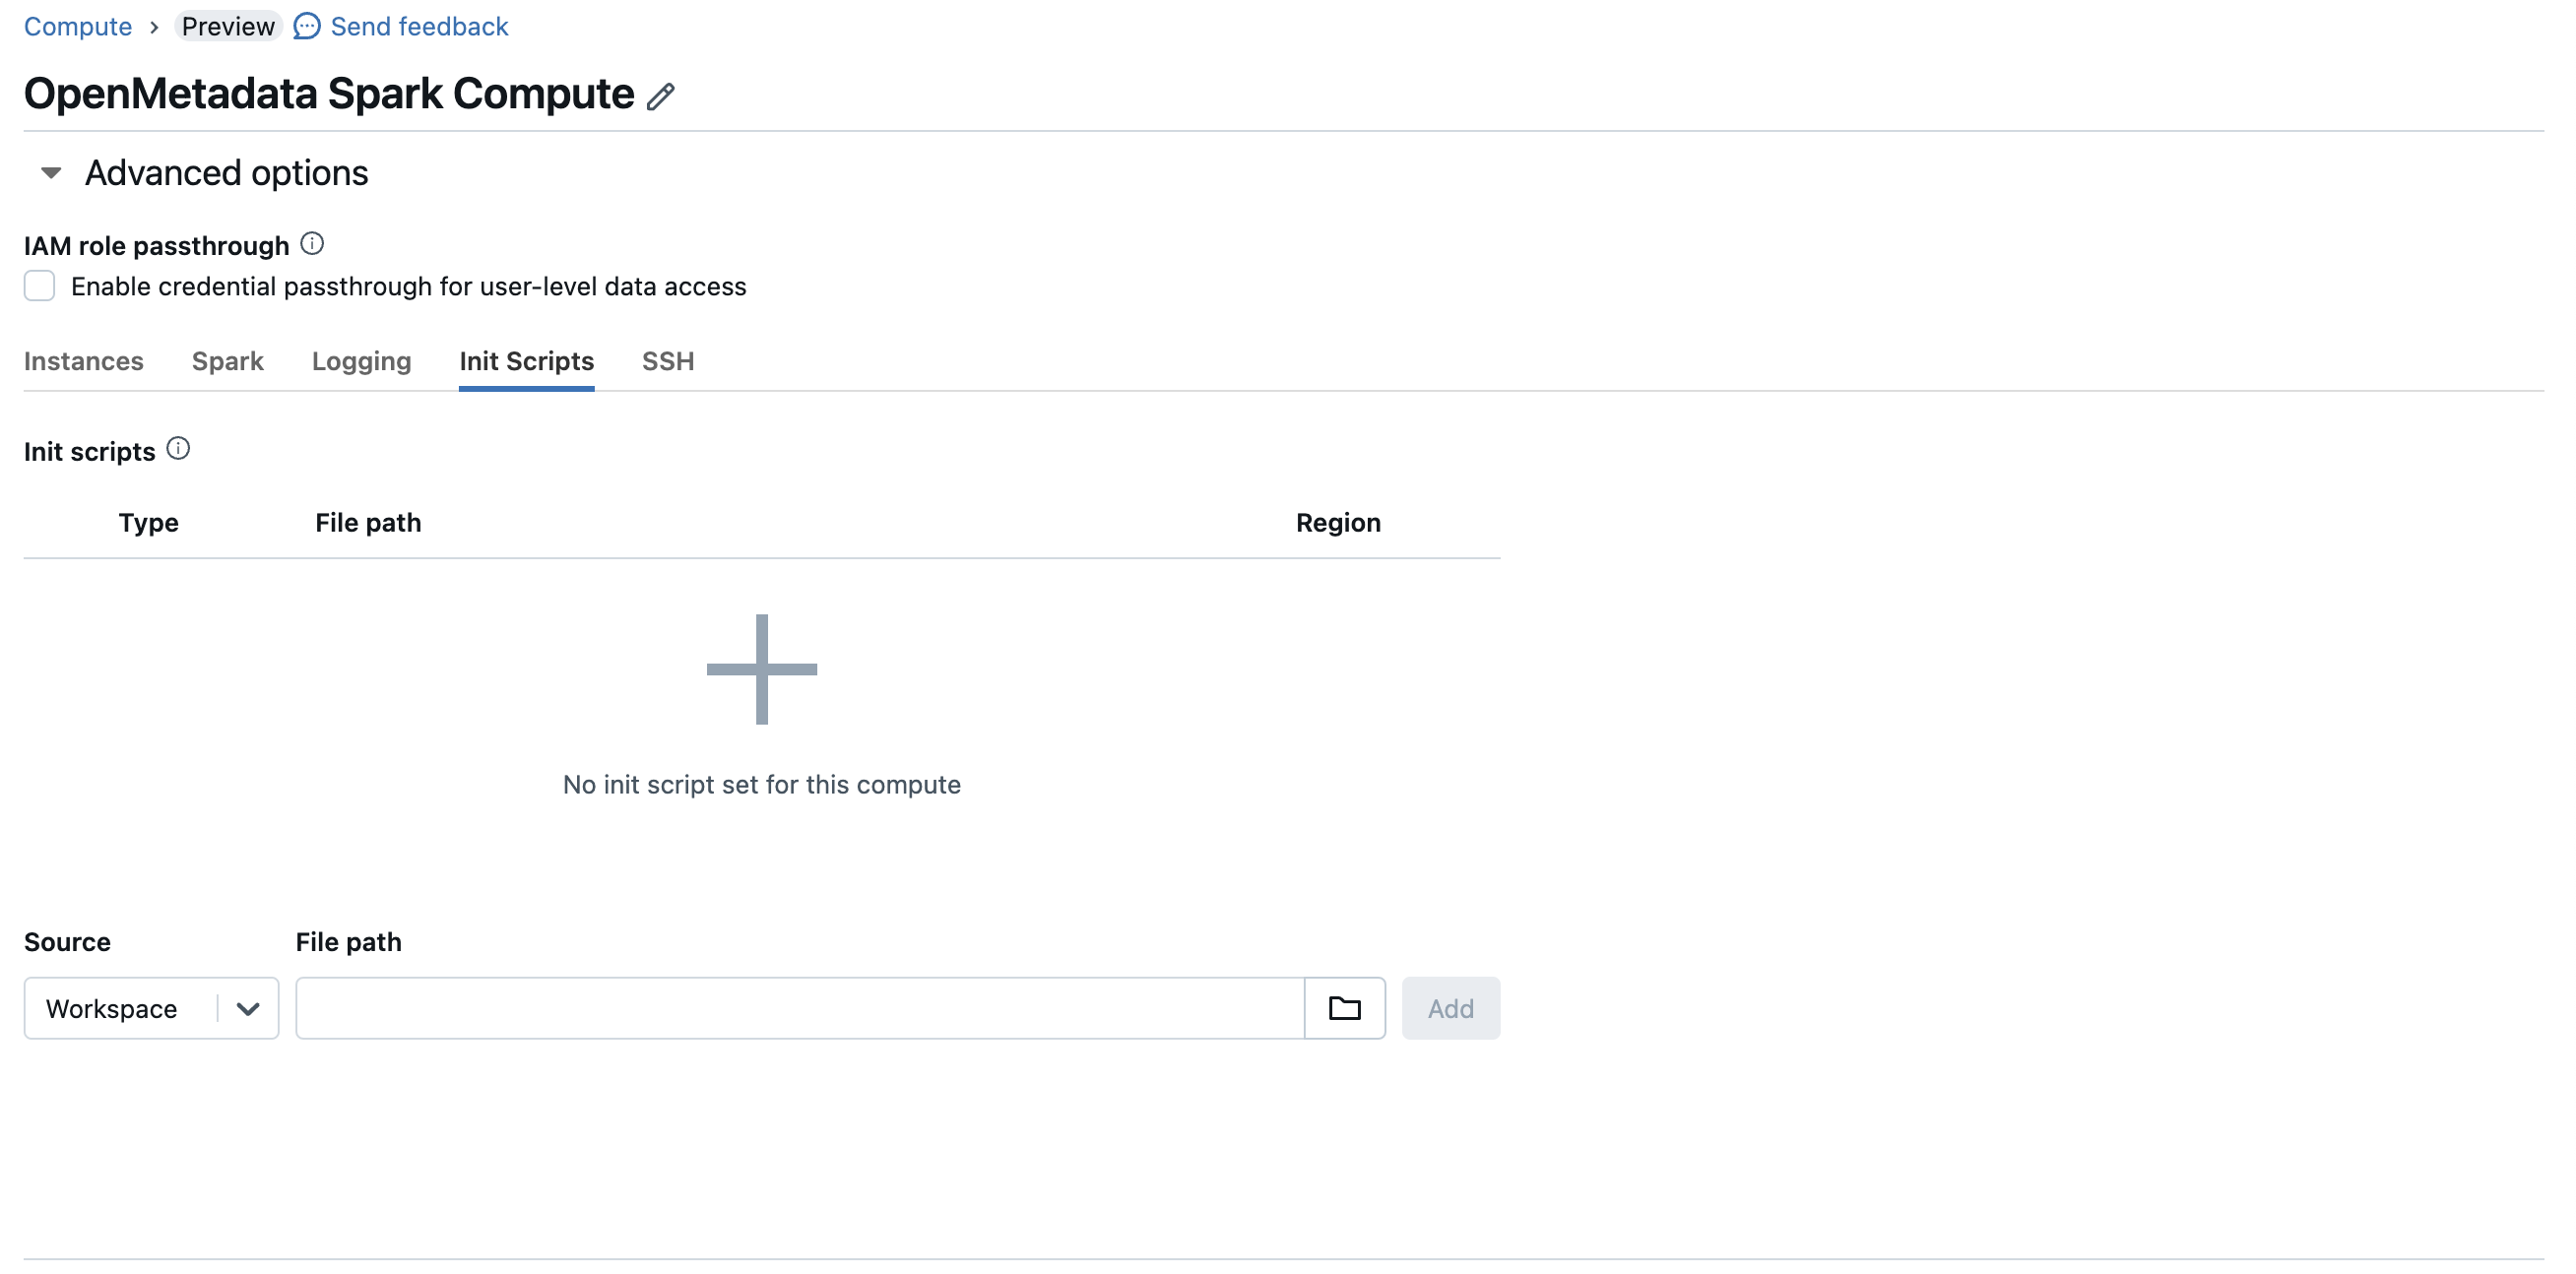
Once you have created a initialization script, you will need to attach this script to your compute instance, to do that you can go to advanced config > init scripts and add your script path.
### 3. Configure Initialization Script
Once you have created a initialization script, you will need to attach this script to your compute instance, to do that you can go to advanced config > init scripts and add your script path.
 ### 4. Configure Spark
After configuring the init script, you will need to update the spark config as well.
### 4. Configure Spark
After configuring the init script, you will need to update the spark config as well.
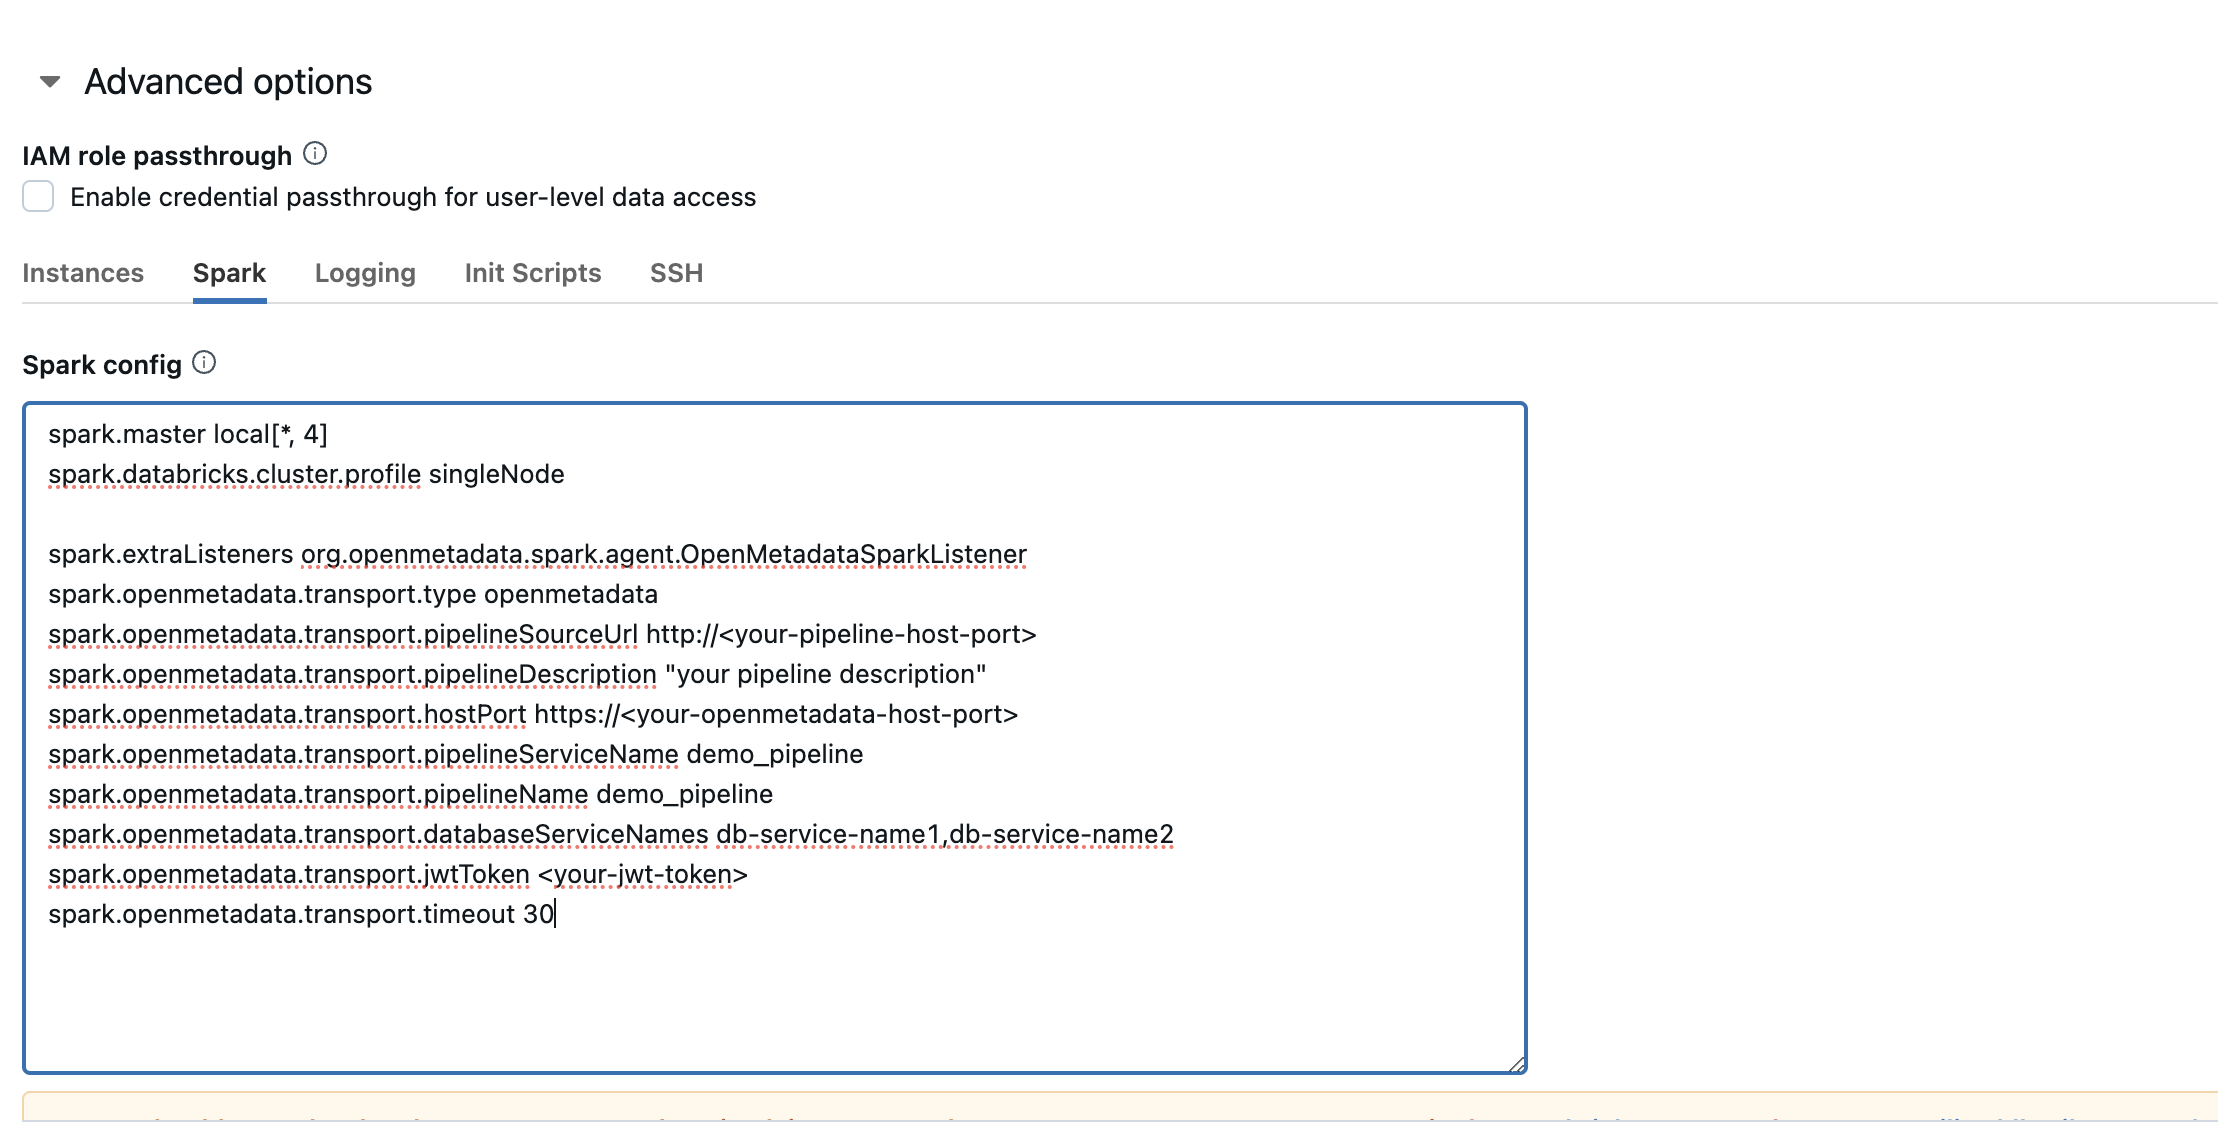 these are the possible configurations that you can do, please refer the `Configuration` section above to get the detailed information about the same.
```
spark.extraListeners io.openlineage.spark.agent.OpenLineageSparkListener
spark.openmetadata.transport.type openmetadata
spark.openmetadata transport.pipelineSourceUrl http://
spark.openmetadata transport.pipelineDescription "your pipeline description"
spark.openmetadata.transport.hostPort https://
spark openmetadata transport.pipelineServiceName demo_pipeline
spark.openmetadata transport.pipelineName demo_pipeline
spark.openmetadata transport.databaseServiceNames db-service-name1,db-service-name2
spark.openmetadata.transport.jwtToken
spark.openmetadata.transport.timeout 30
```
After all these steps are completed you can start/restart your compute instance and you are ready to extract the lineage from spark to OpenMetadata.
## Using Spark Agent with Glue
Follow the below steps in order to use OpenMetadata Spark Agent with glue.
### 1. Specify the OpenMetadata Spark Agent JAR URL
1. Upload the OpenMetadata Spark Agent Jar to S3
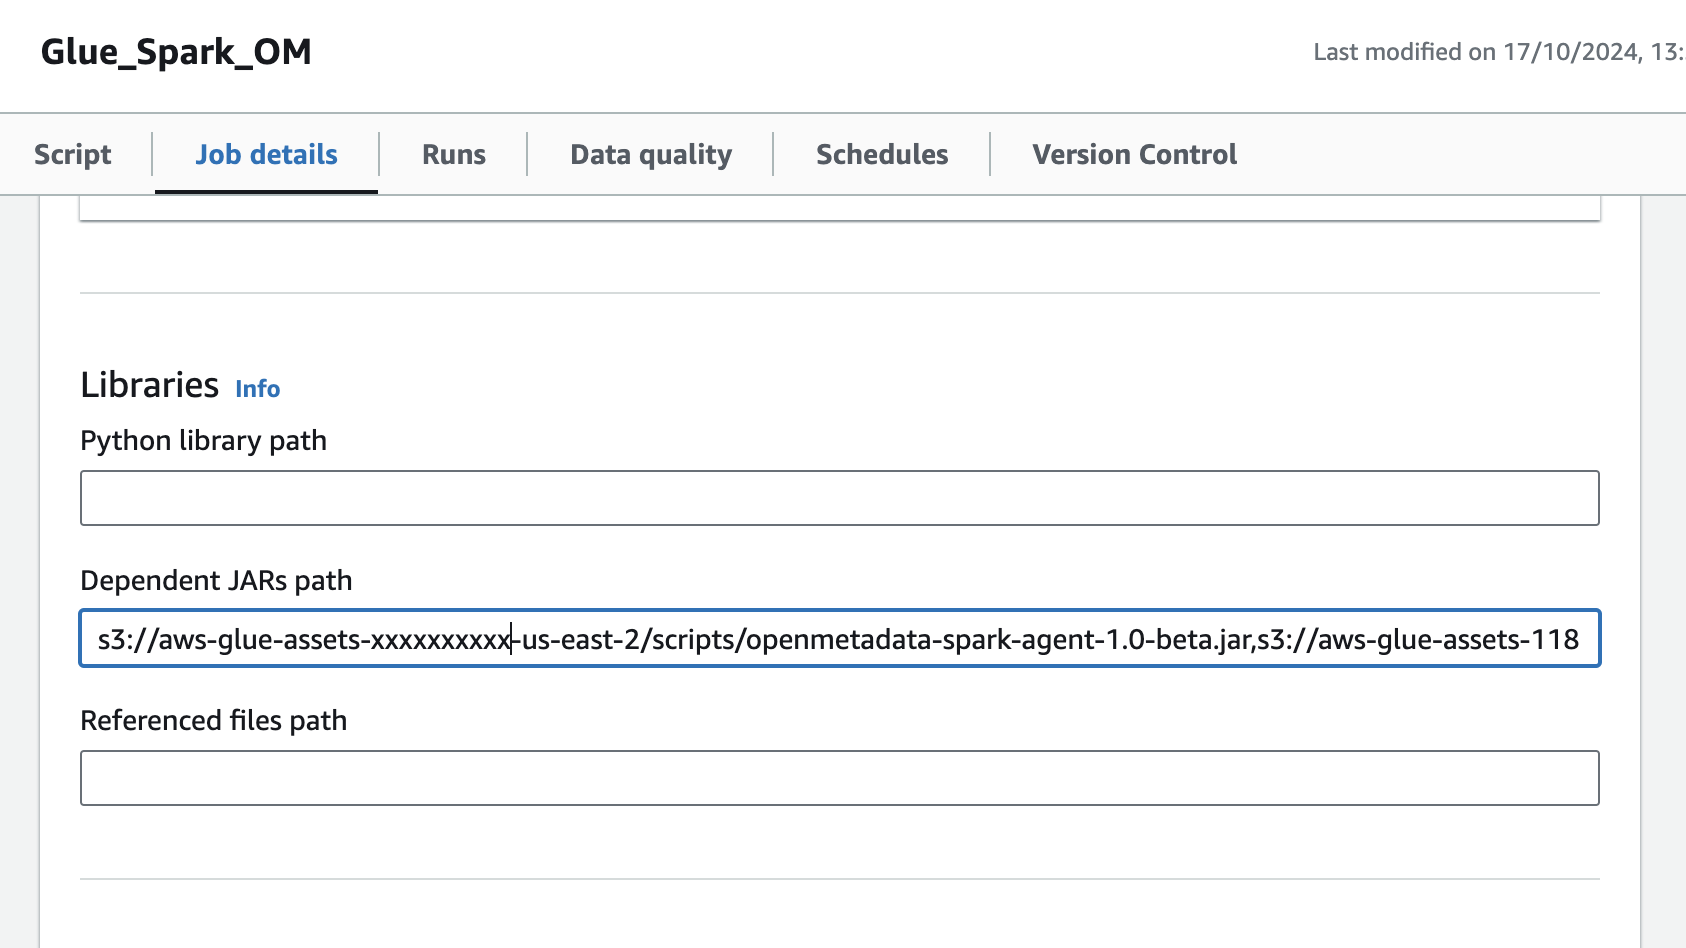
2. Navigate to the glue job,In the Job details tab, navigate to Advanced properties → Libraries → Dependent Jars path
3. Add the S3 url of OpenMetadata Spark Agent Jar in the Dependent Jars path.
these are the possible configurations that you can do, please refer the `Configuration` section above to get the detailed information about the same.
```
spark.extraListeners io.openlineage.spark.agent.OpenLineageSparkListener
spark.openmetadata.transport.type openmetadata
spark.openmetadata transport.pipelineSourceUrl http://
spark.openmetadata transport.pipelineDescription "your pipeline description"
spark.openmetadata.transport.hostPort https://
spark openmetadata transport.pipelineServiceName demo_pipeline
spark.openmetadata transport.pipelineName demo_pipeline
spark.openmetadata transport.databaseServiceNames db-service-name1,db-service-name2
spark.openmetadata.transport.jwtToken
spark.openmetadata.transport.timeout 30
```
After all these steps are completed you can start/restart your compute instance and you are ready to extract the lineage from spark to OpenMetadata.
## Using Spark Agent with Glue
Follow the below steps in order to use OpenMetadata Spark Agent with glue.
### 1. Specify the OpenMetadata Spark Agent JAR URL
1. Upload the OpenMetadata Spark Agent Jar to S3
2. Navigate to the glue job,In the Job details tab, navigate to Advanced properties → Libraries → Dependent Jars path
3. Add the S3 url of OpenMetadata Spark Agent Jar in the Dependent Jars path.
 ### 2. Add Spark configuration in Job Parameters
In the same Job details tab, add a new property under Job parameters:
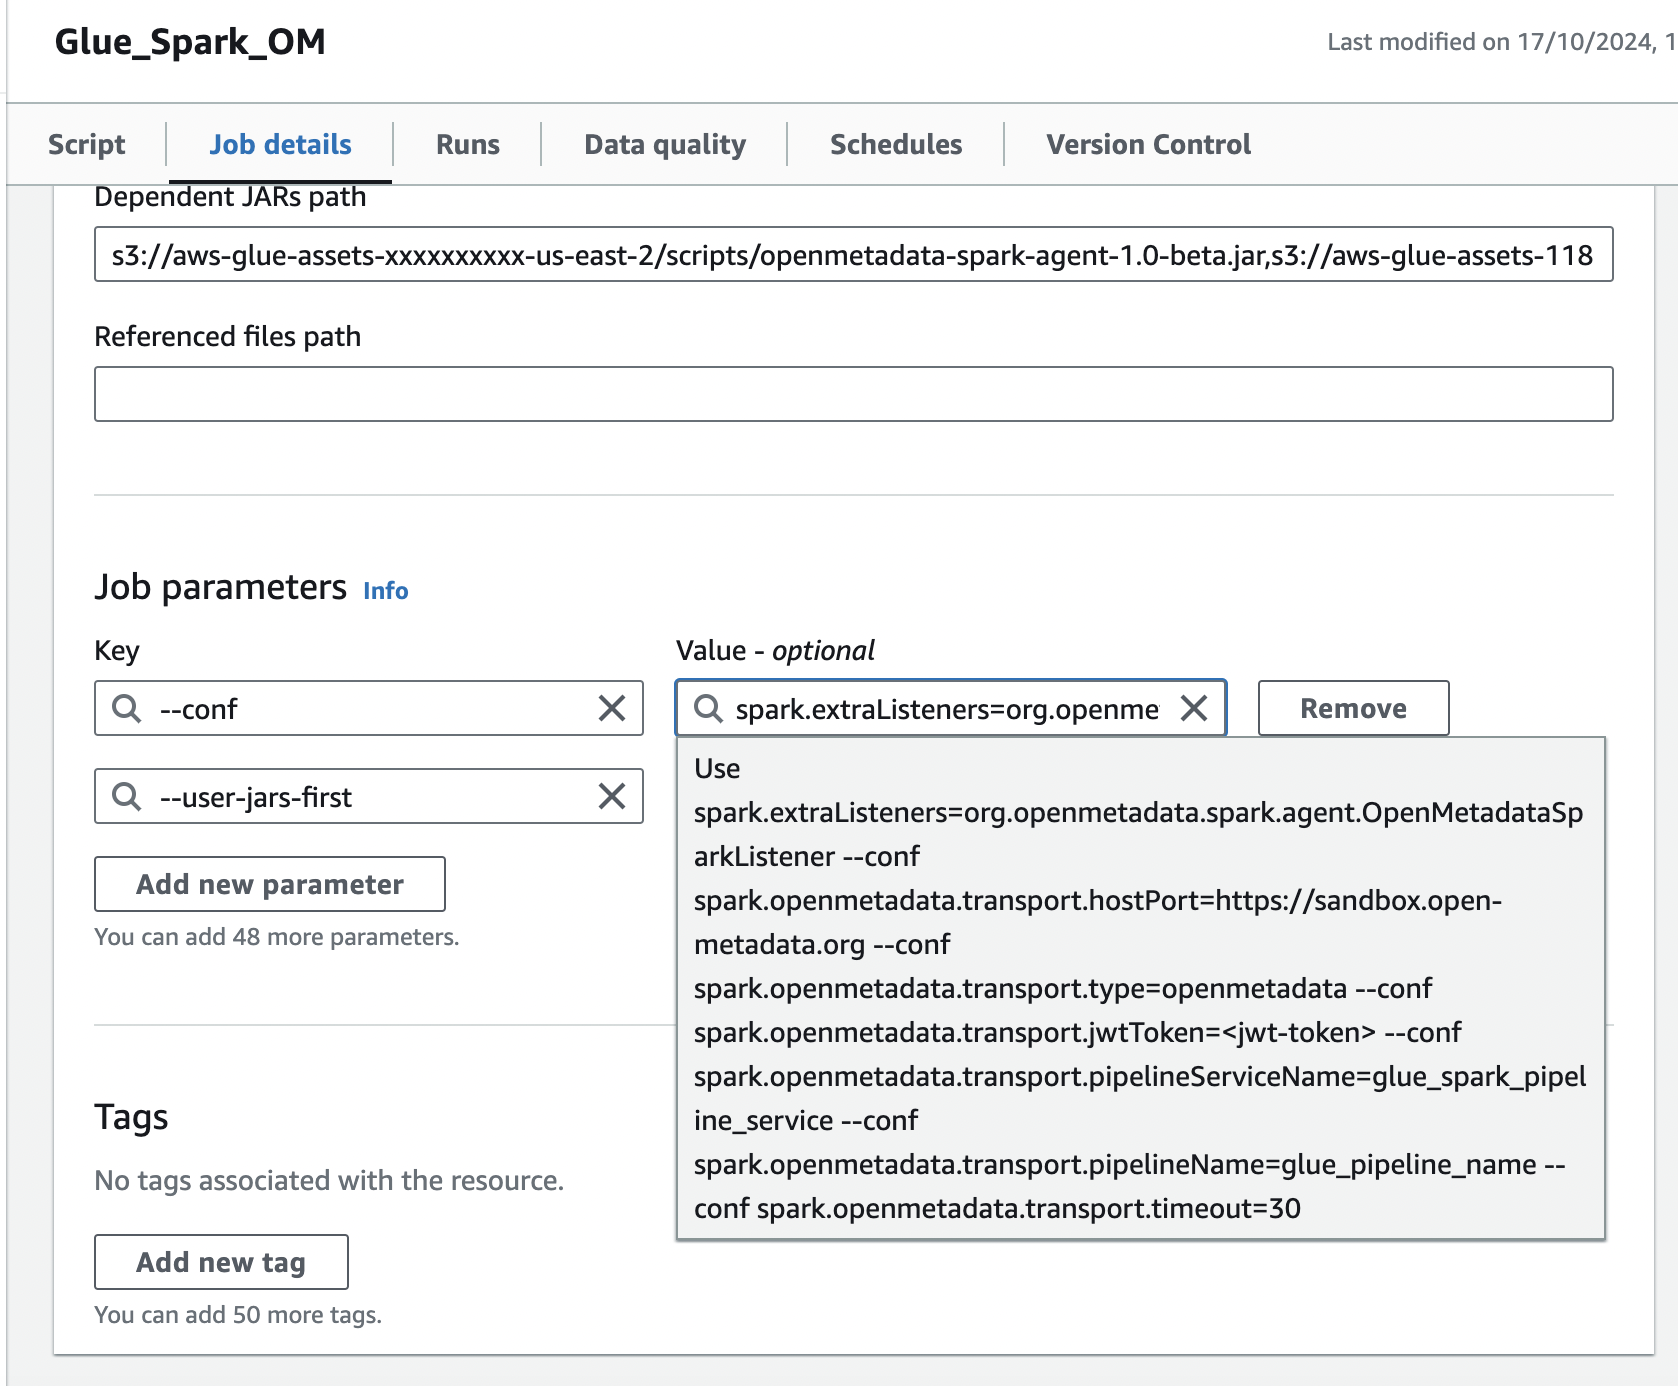
1. Add the `--conf` property with following value, make sure to customize this configuration as described in the above documentation.
```
spark.extraListeners=io.openlineage.spark.agent.OpenLineageSparkListener --conf spark.openmetadata.transport.hostPort=https://your-org.host:port --conf spark.openmetadata.transport.type=openmetadata --conf spark.openmetadata.transport.jwtToken= --conf spark.openmetadata.transport.pipelineServiceName=glue_spark_pipeline_service --conf spark.openmetadata.transport.pipelineName=glue_pipeline_name --conf spark.openmetadata.transport.timeout=30
```
2. Add the `--user-jars-first` parameter and set its value to `true`
### 2. Add Spark configuration in Job Parameters
In the same Job details tab, add a new property under Job parameters:
1. Add the `--conf` property with following value, make sure to customize this configuration as described in the above documentation.
```
spark.extraListeners=io.openlineage.spark.agent.OpenLineageSparkListener --conf spark.openmetadata.transport.hostPort=https://your-org.host:port --conf spark.openmetadata.transport.type=openmetadata --conf spark.openmetadata.transport.jwtToken= --conf spark.openmetadata.transport.pipelineServiceName=glue_spark_pipeline_service --conf spark.openmetadata.transport.pipelineName=glue_pipeline_name --conf spark.openmetadata.transport.timeout=30
```
2. Add the `--user-jars-first` parameter and set its value to `true`