> ## Documentation Index
> Fetch the complete documentation index at: https://docs.open-metadata.org/llms.txt
> Use this file to discover all available pages before exploring further.

# GCS Storage | OpenMetadata Cloud Storage Integration

> Connect OpenMetadata to Google Cloud Storage with our comprehensive GCS connector guide. Setup instructions, configuration options, and best practices included.

export const ConnectorDetailsHeader = ({name, icon, stage, availableFeatures, unavailableFeatures = [], availableFeaturesCollate = []}) => {
  const showSubHeading = availableFeatures?.length > 0 || unavailableFeatures?.length > 0 || availableFeaturesCollate?.length > 0;
  const totalAvailableFeatures = [...availableFeatures || [], ...availableFeaturesCollate || []];
  return <div className="container">
      <div className="Heading">
        <div className="flex items-center gap-3">
          {icon && <div className="IconContainer">
              <img src={icon} alt={name} noZoom className="ConnectorIcon" />
            </div>}
          <h1 className="ConnectorName">{name}</h1>
          <span className={`StageBadge ${stage === 'PROD' ? 'prod' : 'beta'}`}>
            {stage}
          </span>
        </div>
      </div>
      {showSubHeading && <div className="SubHeading">
          <div className="FeaturesHeading">Feature List</div>
          <div className="FeaturesList">
            {totalAvailableFeatures.map(feature => <div className="FeatureTag AvailableFeature" key={feature}>
                ✓ {feature}
              </div>)}
            {unavailableFeatures.map(feature => <div className="FeatureTag UnavailableFeature" key={feature}>
                ✕ {feature}
              </div>)}
          </div>
        </div>}
    </div>;
};

<ConnectorDetailsHeader icon="/public/images/connectors/gcs.webp" name="GCS" stage="PROD" availableFeatures={["Metadata", "Structured Containers"]} unavailableFeatures={["Unstructured Containers"]} />

This page contains the setup guide and reference information for the GCS connector.
Configure and schedule GCS metadata workflows from the OpenMetadata UI:

* [Requirements](#requirements)
* [Metadata Ingestion](#metadata-ingestion)
* [Troubleshooting](/v1.12.x/connectors/storage/gcs/troubleshooting)

## Requirements

We need the following permissions in GCP:

### GCS Permissions

For all the buckets that we want to ingest, we need to provide the following:

* `storage.buckets.get`
* `storage.buckets.list`
* `storage.objects.get`
* `storage.objects.list`

### OpenMetadata Manifest

In any other connector, extracting metadata happens automatically. In this case, we will be able to extract high-level
metadata from buckets, but in order to understand their internal structure we need users to provide an `openmetadata.json`
file at the bucket root.
`Supported File Formats: [ "csv",  "tsv", "avro", "parquet", "json", "json.gz", "json.zip" ]`
You can learn more about this [here](/v1.12.x/connectors/storage). Keep reading for an example on the shape of the manifest file.

## OpenMetadata Manifest

Our manifest file is defined as a [JSON Schema](https://github.com/open-metadata/OpenMetadata/blob/main/openmetadata-spec/src/main/resources/json/schema/metadataIngestion/storage/containerMetadataConfig.json),
and can look like this:

<CodePreview>
  <ContentPanel>
    <ContentSection id={1} title="Entries" lines="1-3">
      **Entries**: We need to add a list of `entries`. Each inner JSON structure will be ingested as a child container of the top-level one. In this case, we will be ingesting 7 children.
    </ContentSection>

    <ContentSection id={2} title="Simple Container" lines="4-9">
      **Simple Container**: The simplest container we can have would be structured, but without partitions. Note that we still need to bring information about:

      * **dataPath**: Where we can find the data. This should be a path relative to the top-level container.
      * **structureFormat**: What is the format of the data we are going to find. This information will be used to read the data.
      * **separator**: Optionally, for delimiter-separated formats such as CSV, you can specify the separator to use when reading the file. If you don't, we will use `,` for CSV and `/t` for TSV files.

      After ingesting this container, we will bring in the schema of the data in the `dataPath`.
    </ContentSection>

    <ContentSection id={3} title="Partitioned Container" lines="10-14">
      **Partitioned Container**: We can ingest partitioned data without bringing in any further details.

      By informing the `isPartitioned` field as `true`, we'll flag the container as `Partitioned`. We will be reading the source files schemas', but won't add any other information.
    </ContentSection>

    <ContentSection id={4} title="Single-Partition Container" lines="15-23">
      **Single-Partition Container**: We can bring partition information by specifying the `partitionColumns`. Their definition is based on the [JSON Schema](https://github.com/open-metadata/OpenMetadata/blob/main/openmetadata-spec/src/main/resources/json/schema/entity/data/table.json#L232) definition for table columns. The minimum required information is the `name` and `dataType`.

      When passing `partitionColumns`, these values will be added to the schema, on top of the inferred information from the files.
    </ContentSection>

    <ContentSection id={5} title="Multiple-Partition Container" lines="24-33">
      **Multiple-Partition Container**: We can add multiple columns as partitions.

      Note how in the example we even bring our custom `displayName` for the column `dataTypeDisplay` for its type.

      Again, this information will be added on top of the inferred schema from the data files.
    </ContentSection>

    <ContentSection id={6} title="Automated Container Ingestion" lines="34-37">
      **Automated Container Ingestion**: Registering all the data paths one by one can be a time consuming job, to make the automated structure container ingestion you can provide the depth at which all the data is available.

      For example, suppose following is the file hierarchy within your bucket:

      ```
      # prefix/depth1/depth2/depth3
      athena_service/my_database_a/my_schema_a/table_a/date=01-01-2025/data.parquet
      athena_service/my_database_a/my_schema_a/table_a/date=02-01-2025/data.parquet
      athena_service/my_database_a/my_schema_a/table_b/date=01-01-2025/data.parquet
      athena_service/my_database_a/my_schema_a/table_b/date=02-01-2025/data.parquet

      athena_service/my_database_b/my_schema_a/table_a/date=01-01-2025/data.parquet
      athena_service/my_database_b/my_schema_a/table_a/date=02-01-2025/data.parquet
      athena_service/my_database_b/my_schema_a/table_b/date=01-01-2025/data.parquet
      athena_service/my_database_b/my_schema_a/table_b/date=02-01-2025/data.parquet
      ```

      All table folders containing actual data are at depth 3. When you specify `depth: 3` in the manifest entry, all following paths will get registered as containers in OpenMetadata with this single entry:

      ```
      athena_service/my_database_a/my_schema_a/table_a
      athena_service/my_database_a/my_schema_a/table_b
      athena_service/my_database_b/my_schema_a/table_a
      athena_service/my_database_b/my_schema_a/table_b
      ```

      This saves effort - 1 entry instead of 4 individual entries.
    </ContentSection>

    <ContentSection id={7} title="Unstructured Container" lines="38-45">
      **Unstructured Container**: OpenMetadata supports ingesting unstructured files like images, PDFs, etc. We support fetching the file names, size, and tags associated with such files.

      * To ingest a **single unstructured file**: specify the full path of the file in `dataPath`
      * To ingest **specific file types** (e.g., `pdf` & `png`): provide the folder name in `dataPath` and list of extensions in `unstructuredFormats`
      * To ingest **all unstructured files** regardless of type: provide the folder name in `dataPath` and `["*"]` in `unstructuredFormats`
    </ContentSection>
  </ContentPanel>

  <CodePanel fileName="openmetadata.json">
    ```json theme={null}
    {
      "entries": [
        {
          "dataPath": "transactions/",
          "structureFormat": "csv",
          "separator": ","
        },
        {
          "dataPath": "orders/",
          "structureFormat": "parquet",
          "isPartitioned": true
        },
        {
          "dataPath": "users/",
          "structureFormat": "parquet",
          "isPartitioned": true,
          "partitionColumns": [
            {
              "name": "signup_date",
              "dataType": "DATE"
            }
          ]
        },
        {
          "dataPath": "events/",
          "structureFormat": "parquet",
          "isPartitioned": true,
          "partitionColumns": [
            {
              "name": "event_date",
              "dataType": "DATE"
            },
            {
              "name": "region",
              "dataType": "STRING"
            }
          ]
        },
        {
          "depth": 3,
          "structureFormat": "parquet"
        },
        {
          "dataPath": "reports/report.pdf"
        },
        {
          "dataPath": "documents/",
          "unstructuredFormats": ["pdf", "png", "jpg"]
        }
      ]
    }
    ```
  </CodePanel>
</CodePreview>

### Global Manifest

You can also manage a **single** manifest file to centralize the ingestion process for any container, named `openmetadata_storage_manifest.json`.

<CodePreview>
  <ContentPanel>
    <ContentSection id={1} title="Existing Fields" lines="1-15">
      The fields shown above (`dataPath`, `structureFormat`, `isPartitioned`, etc.) are still valid and work the same way in the global manifest.
    </ContentSection>

    <ContentSection id={2} title="Container Name" lines="1-15">
      **Container Name**: Since we are using a single manifest for all your containers, the field `containerName` will help us identify which container (or Bucket in S3, etc.) contains the presented information.

      Each entry in the global manifest must include a `containerName` to specify which bucket or container it belongs to.
    </ContentSection>
  </ContentPanel>

  <CodePanel fileName="openmetadata_storage_manifest.json">
    ```json theme={null}
    {
      "entries": [
        {
          "containerName": "my-s3-bucket-1",
          "dataPath": "transactions/",
          "structureFormat": "csv",
          "separator": ","
        },
        {
          "containerName": "my-s3-bucket-1",
          "dataPath": "orders/",
          "structureFormat": "parquet",
          "isPartitioned": true
        },
        {
          "containerName": "my-s3-bucket-2",
          "dataPath": "users/",
          "structureFormat": "parquet",
          "isPartitioned": true,
          "partitionColumns": [
            {
              "name": "signup_date",
              "dataType": "DATE"
            }
          ]
        },
        {
          "containerName": "my-s3-bucket-2",
          "dataPath": "events/",
          "structureFormat": "json"
        }
      ]
    }
    ```
  </CodePanel>
</CodePreview>

You can also keep local manifests `openmetadata.json` in each container, but if possible, we will always try to pick up the global manifest during the ingestion.

## Metadata Ingestion

<Steps>
  <Step title="Visit the Services Page">
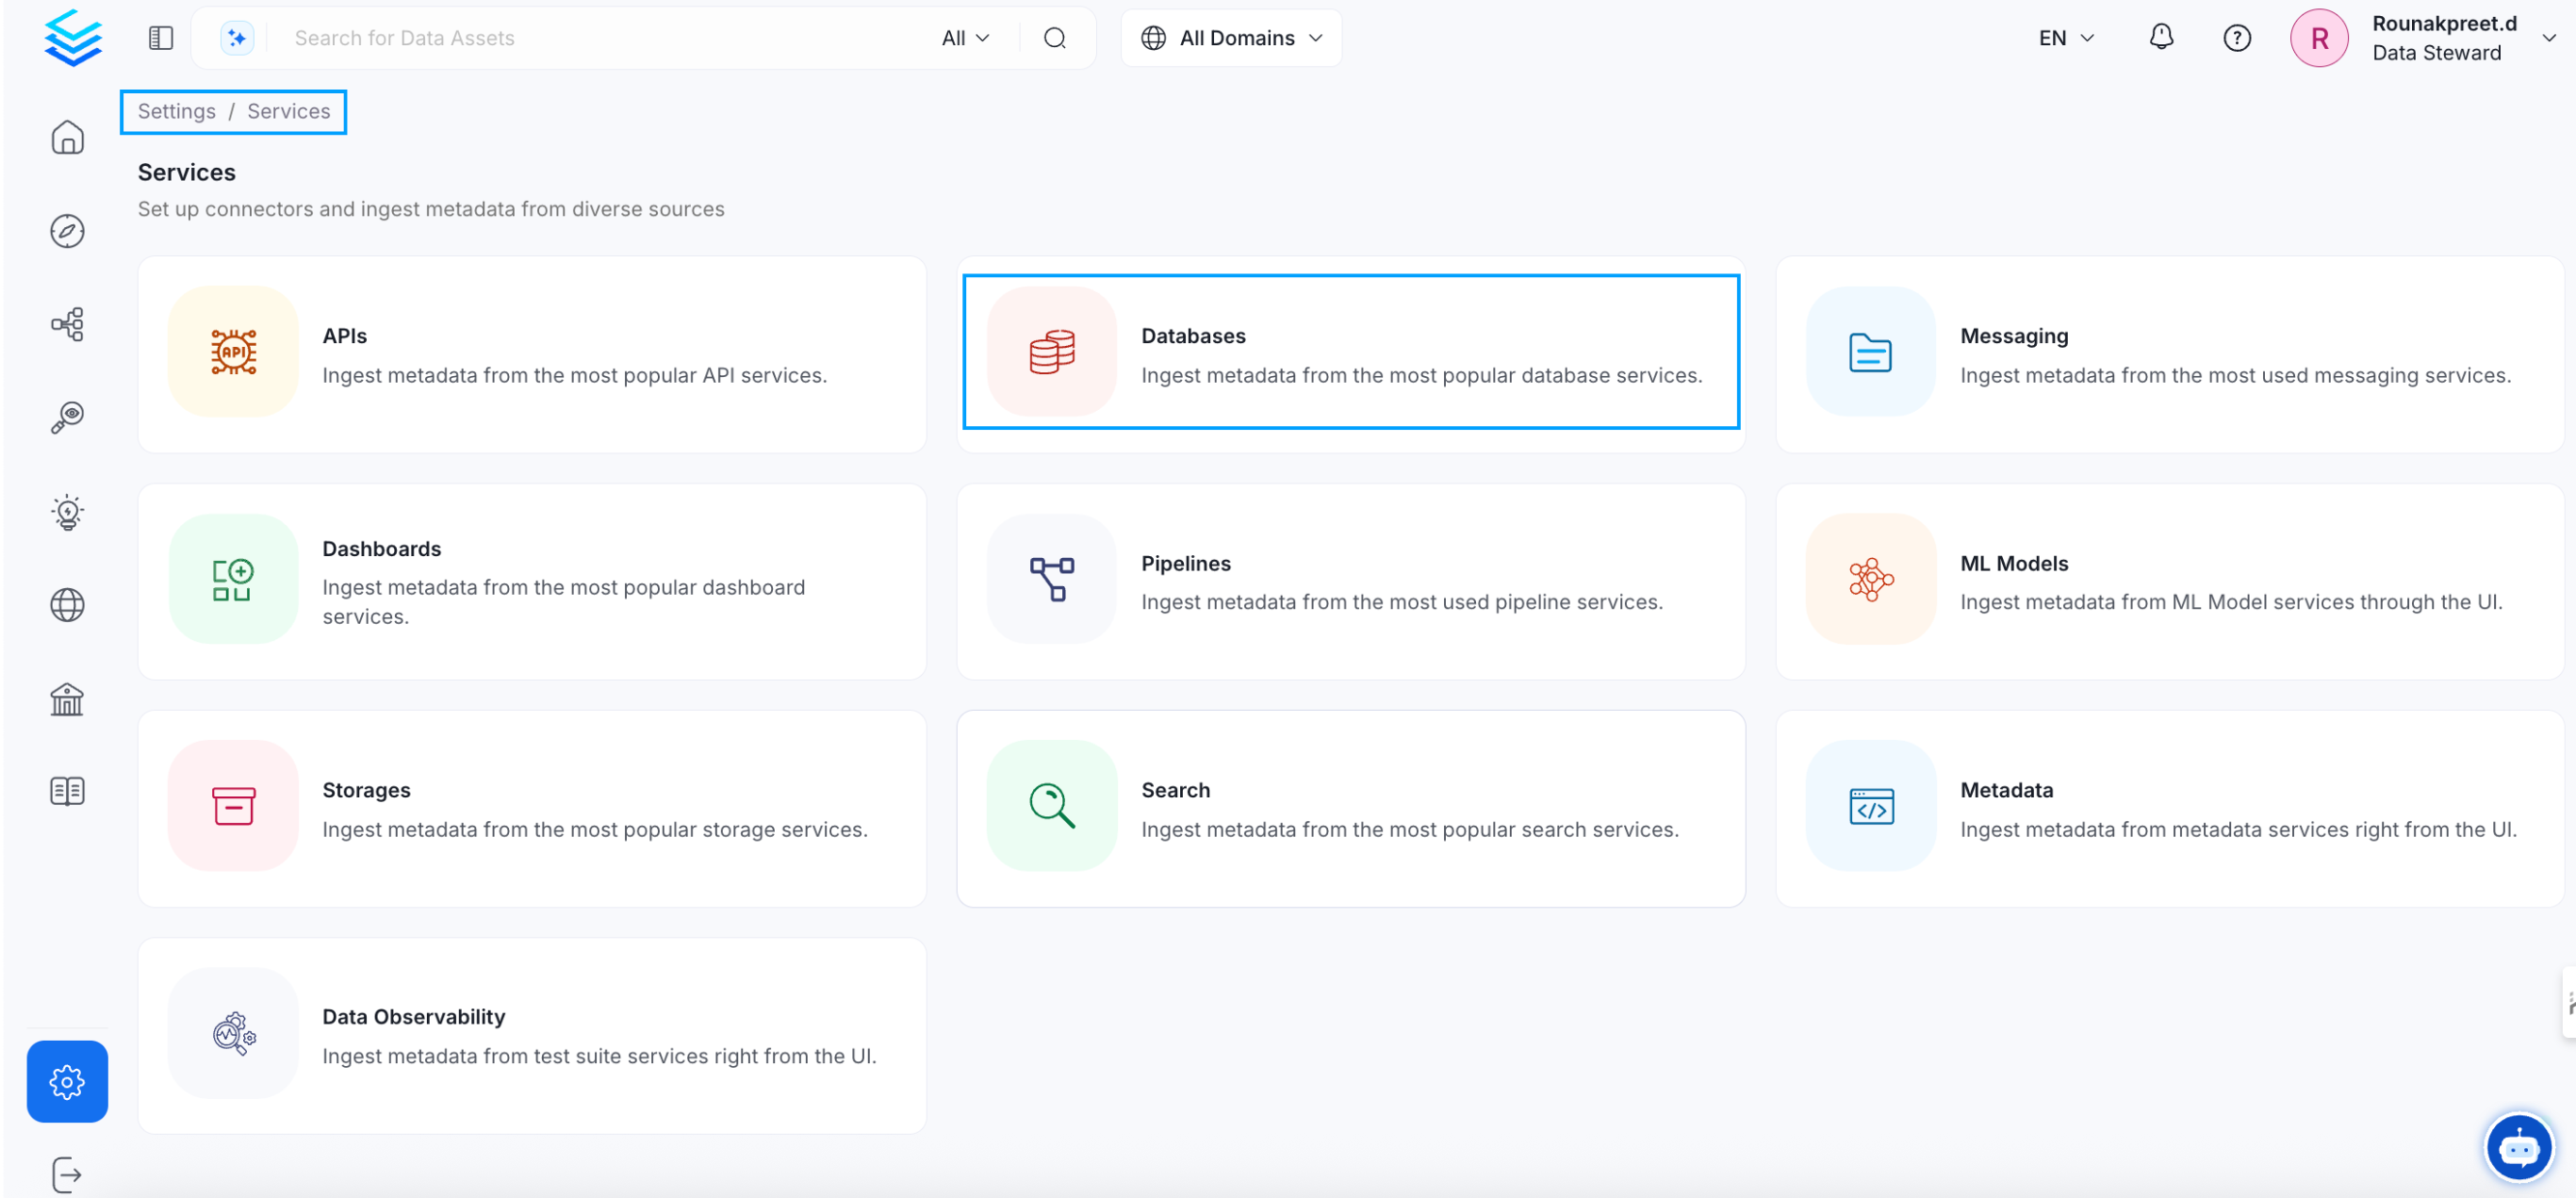
    The first step is ingesting the metadata from your sources. Under
    Settings, you will find a Services link an external source system to
    OpenMetadata. Once a service is created, it can be used to configure
    metadata, usage, and profiler workflows.
    To visit the Services page, select Services from the Settings menu.

    <img src="https://mintcdn.com/openmetadata/9G75p72jJKYgvFUQ/public/images/connectors/visit-services-page.png?fit=max&auto=format&n=9G75p72jJKYgvFUQ&q=85&s=56e39522fede65b0e727868a3a2502a4" alt="Visit Services Page" width="2733" height="1271" data-path="public/images/connectors/visit-services-page.png" />
  </Step>

  <Step title="Create a New Service">
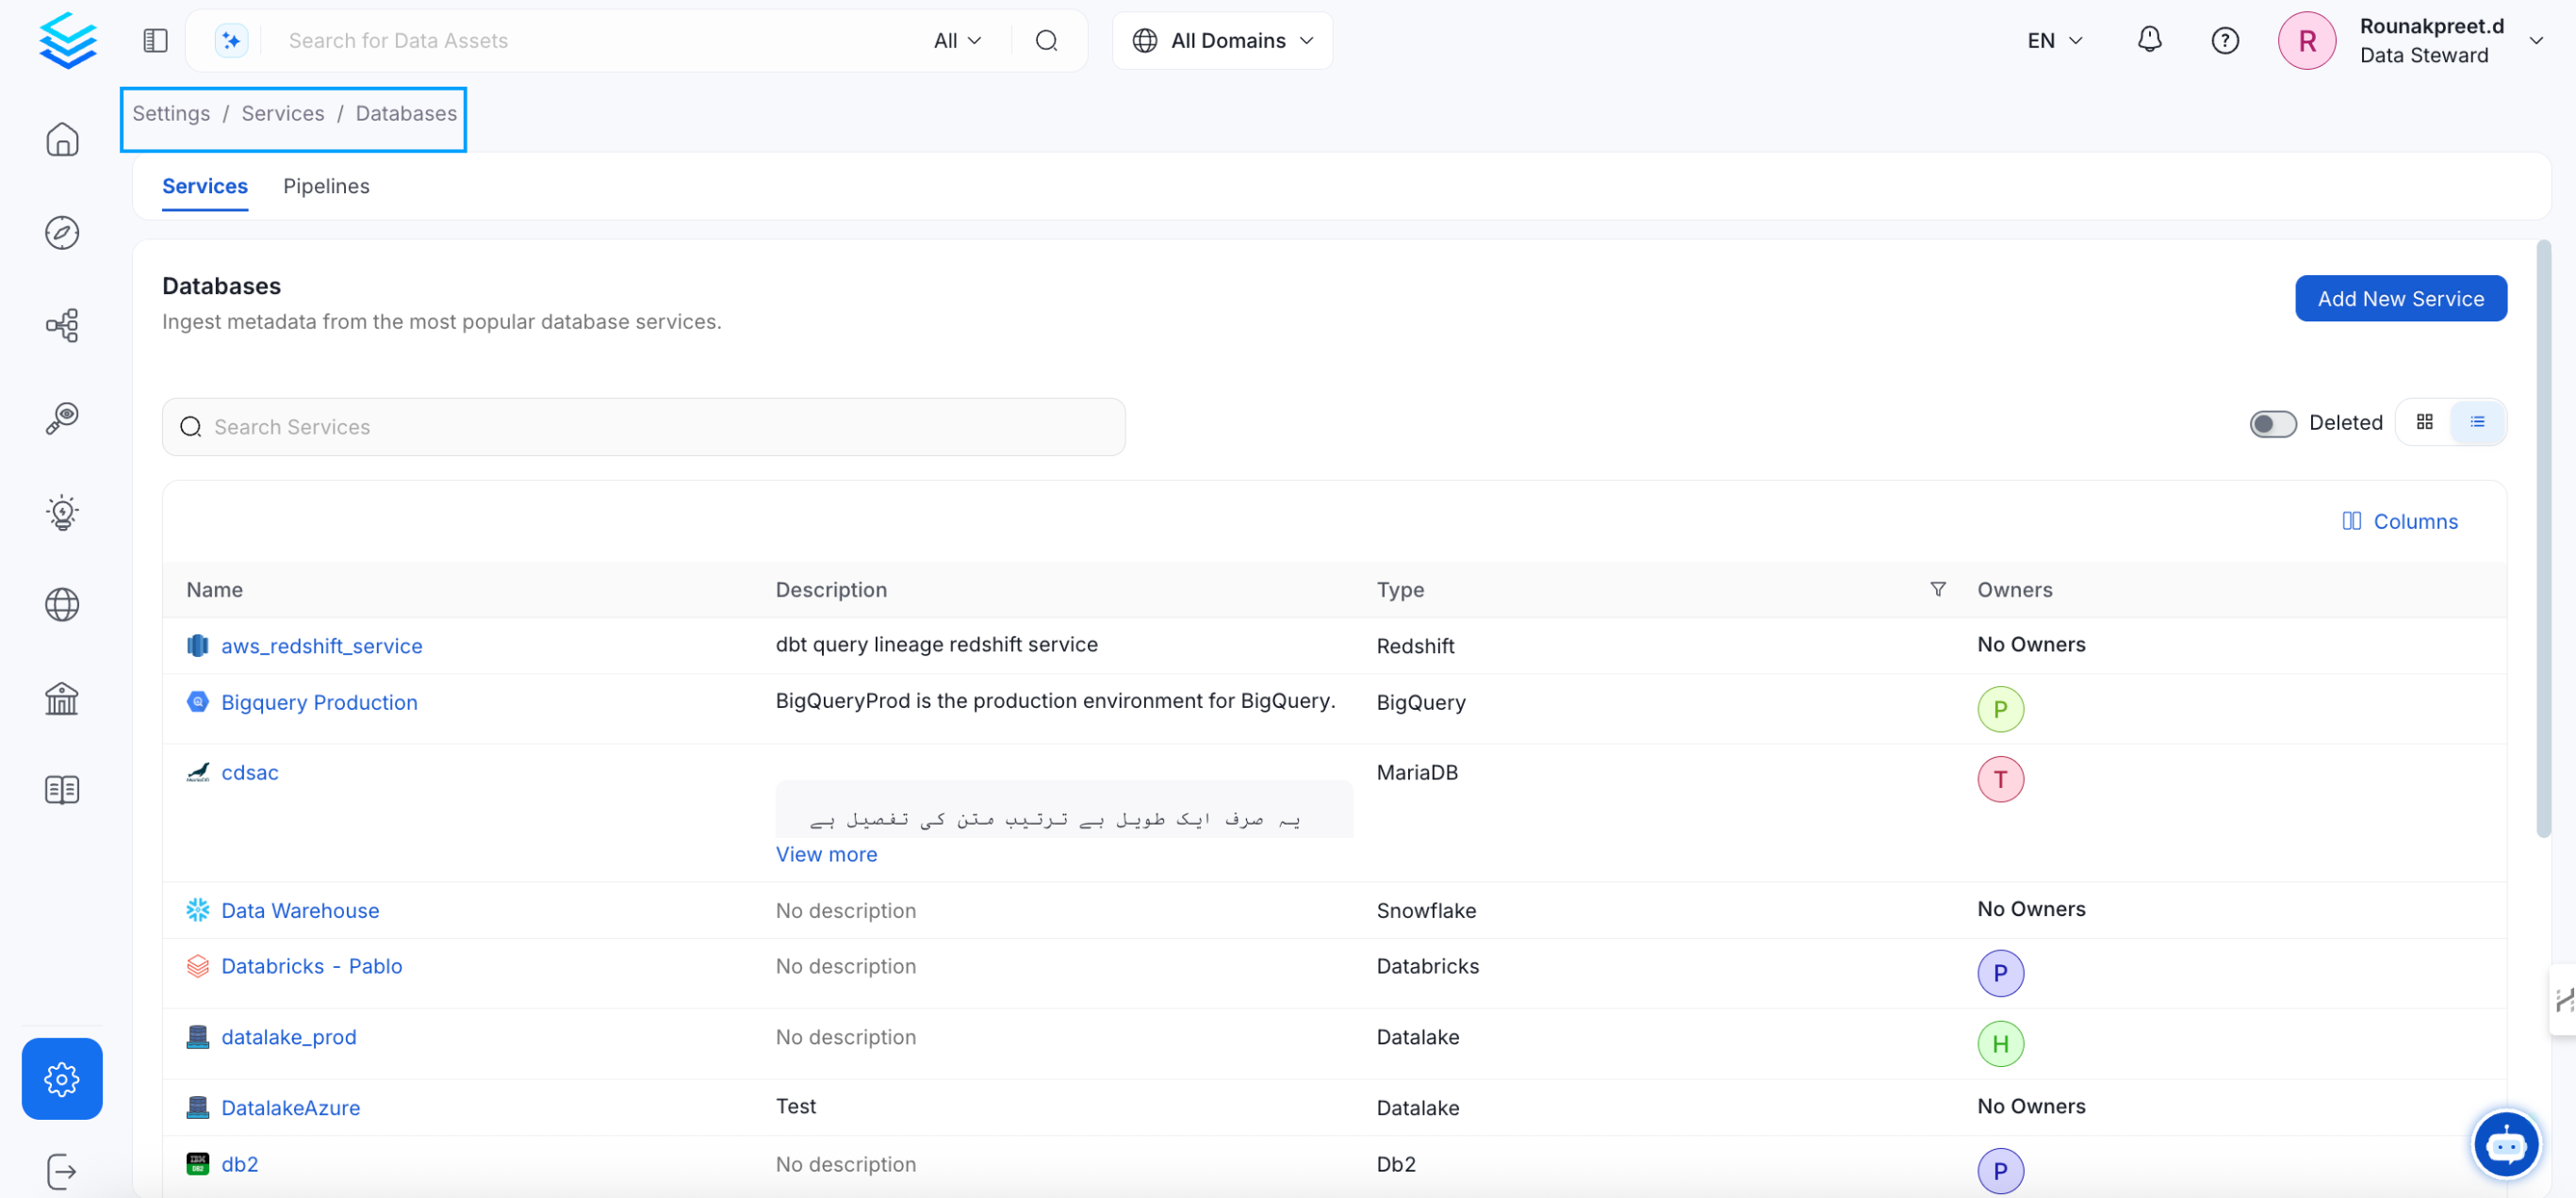
    Click on the 'Add New Service' button to start the Service creation.

    <img src="https://mintcdn.com/openmetadata/9SXjaLbGROaofLQU/public/images/connectors/create-new-service.png?fit=max&auto=format&n=9SXjaLbGROaofLQU&q=85&s=285a14232da89d8067eb1cd632458d52" alt="Create a new service" width="2733" height="1271" data-path="public/images/connectors/create-new-service.png" />
  </Step>

  <Step title="Select the Service Type">
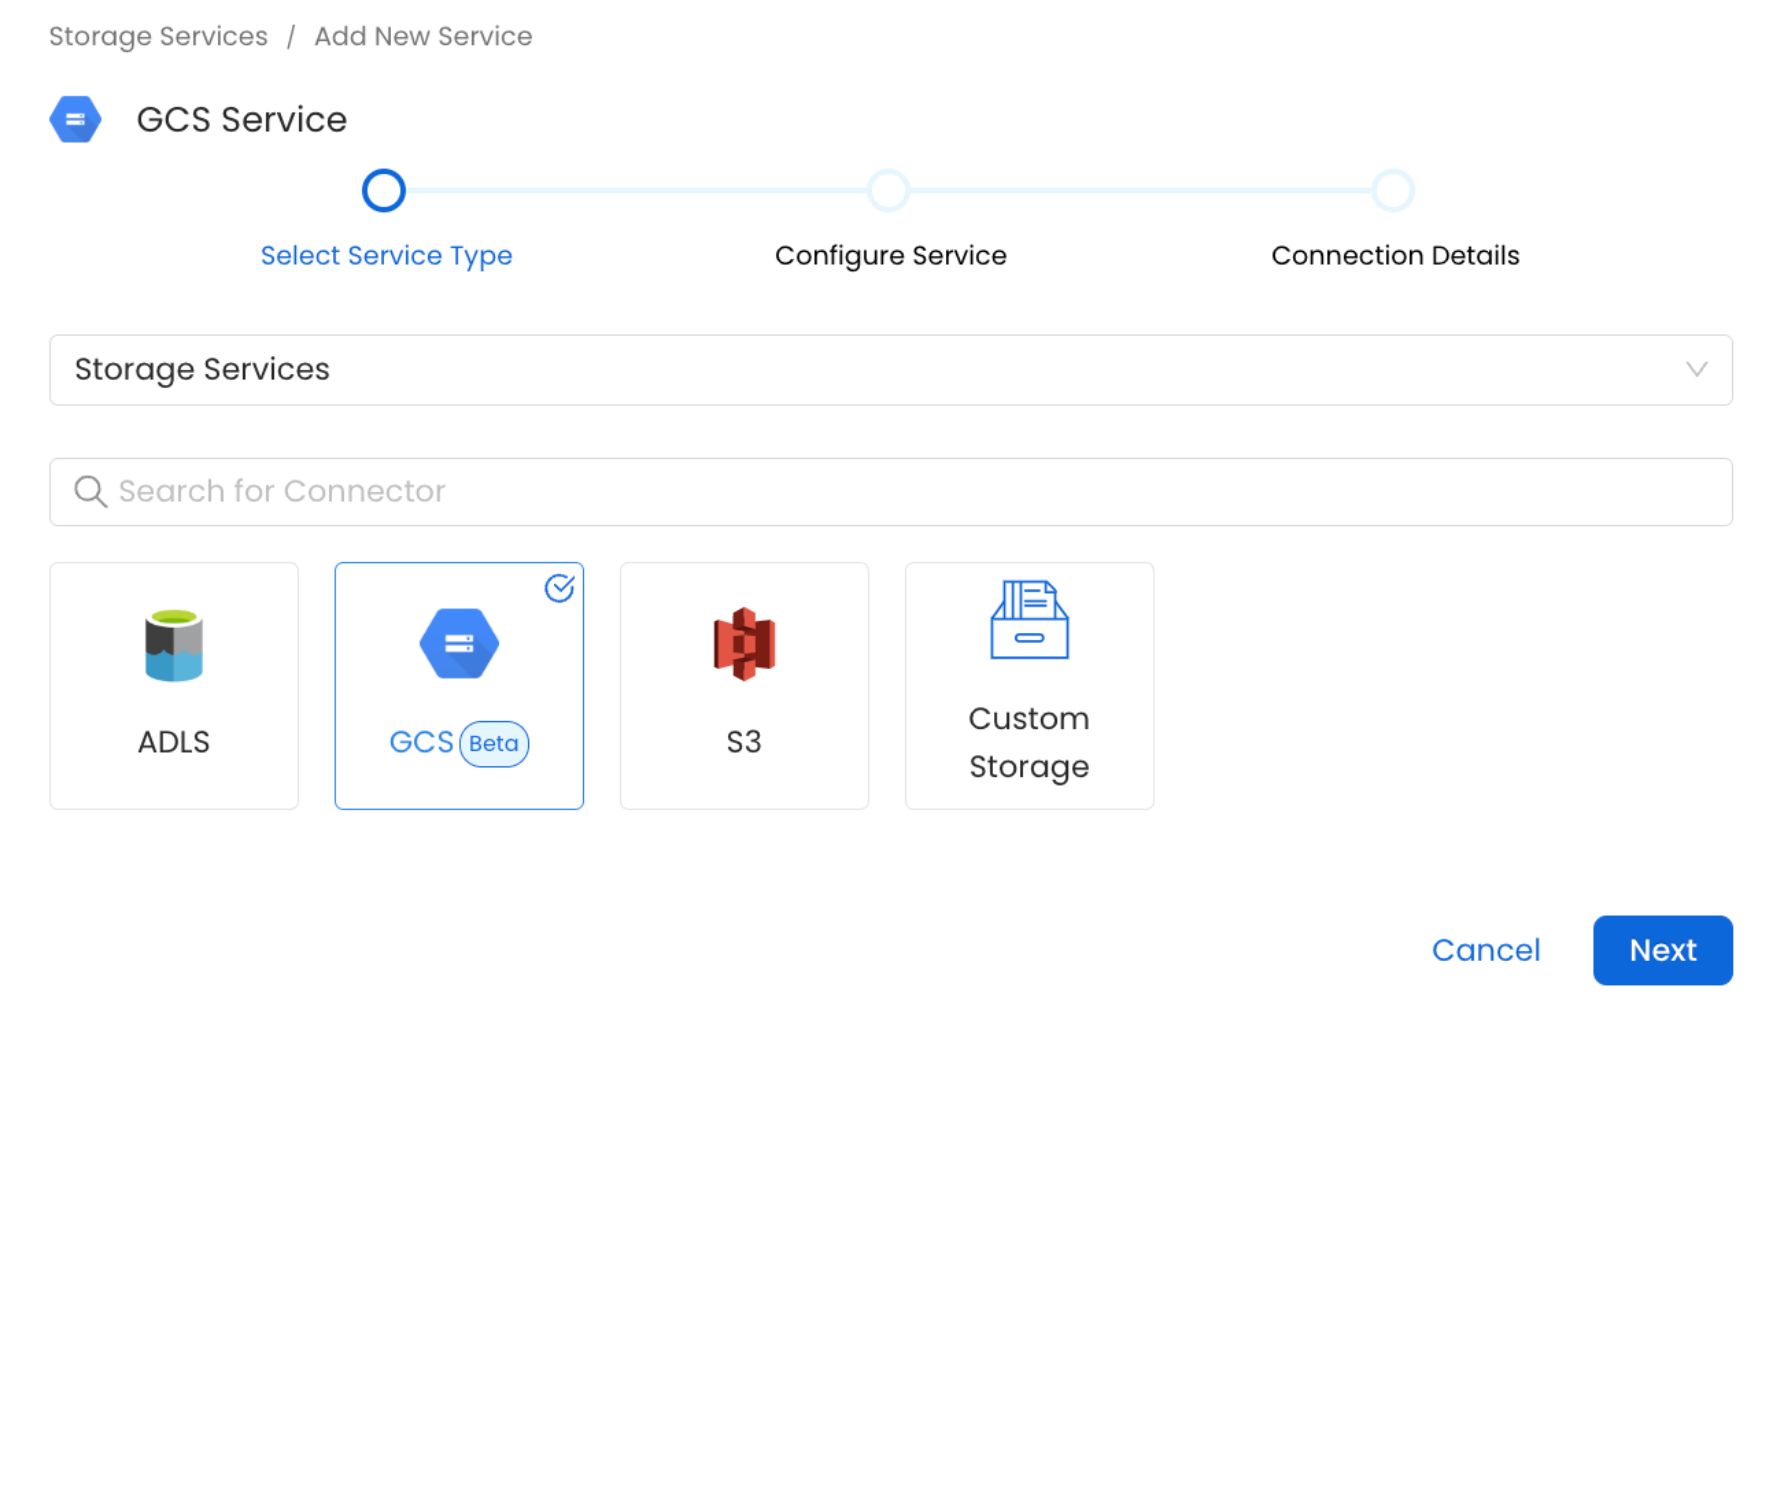
    Select GCS as the service type and click Next.

    <img src="https://mintcdn.com/openmetadata/bSeSGuVjATgAasqS/public/images/connectors/gcs/select-service.png?fit=max&auto=format&n=bSeSGuVjATgAasqS&q=85&s=d1d4a53d73b43a707d09548544d57fd7" alt="Select Service" width="1788" height="1500" data-path="public/images/connectors/gcs/select-service.png" />
  </Step>

  <Step title="Name and Describe your Service">
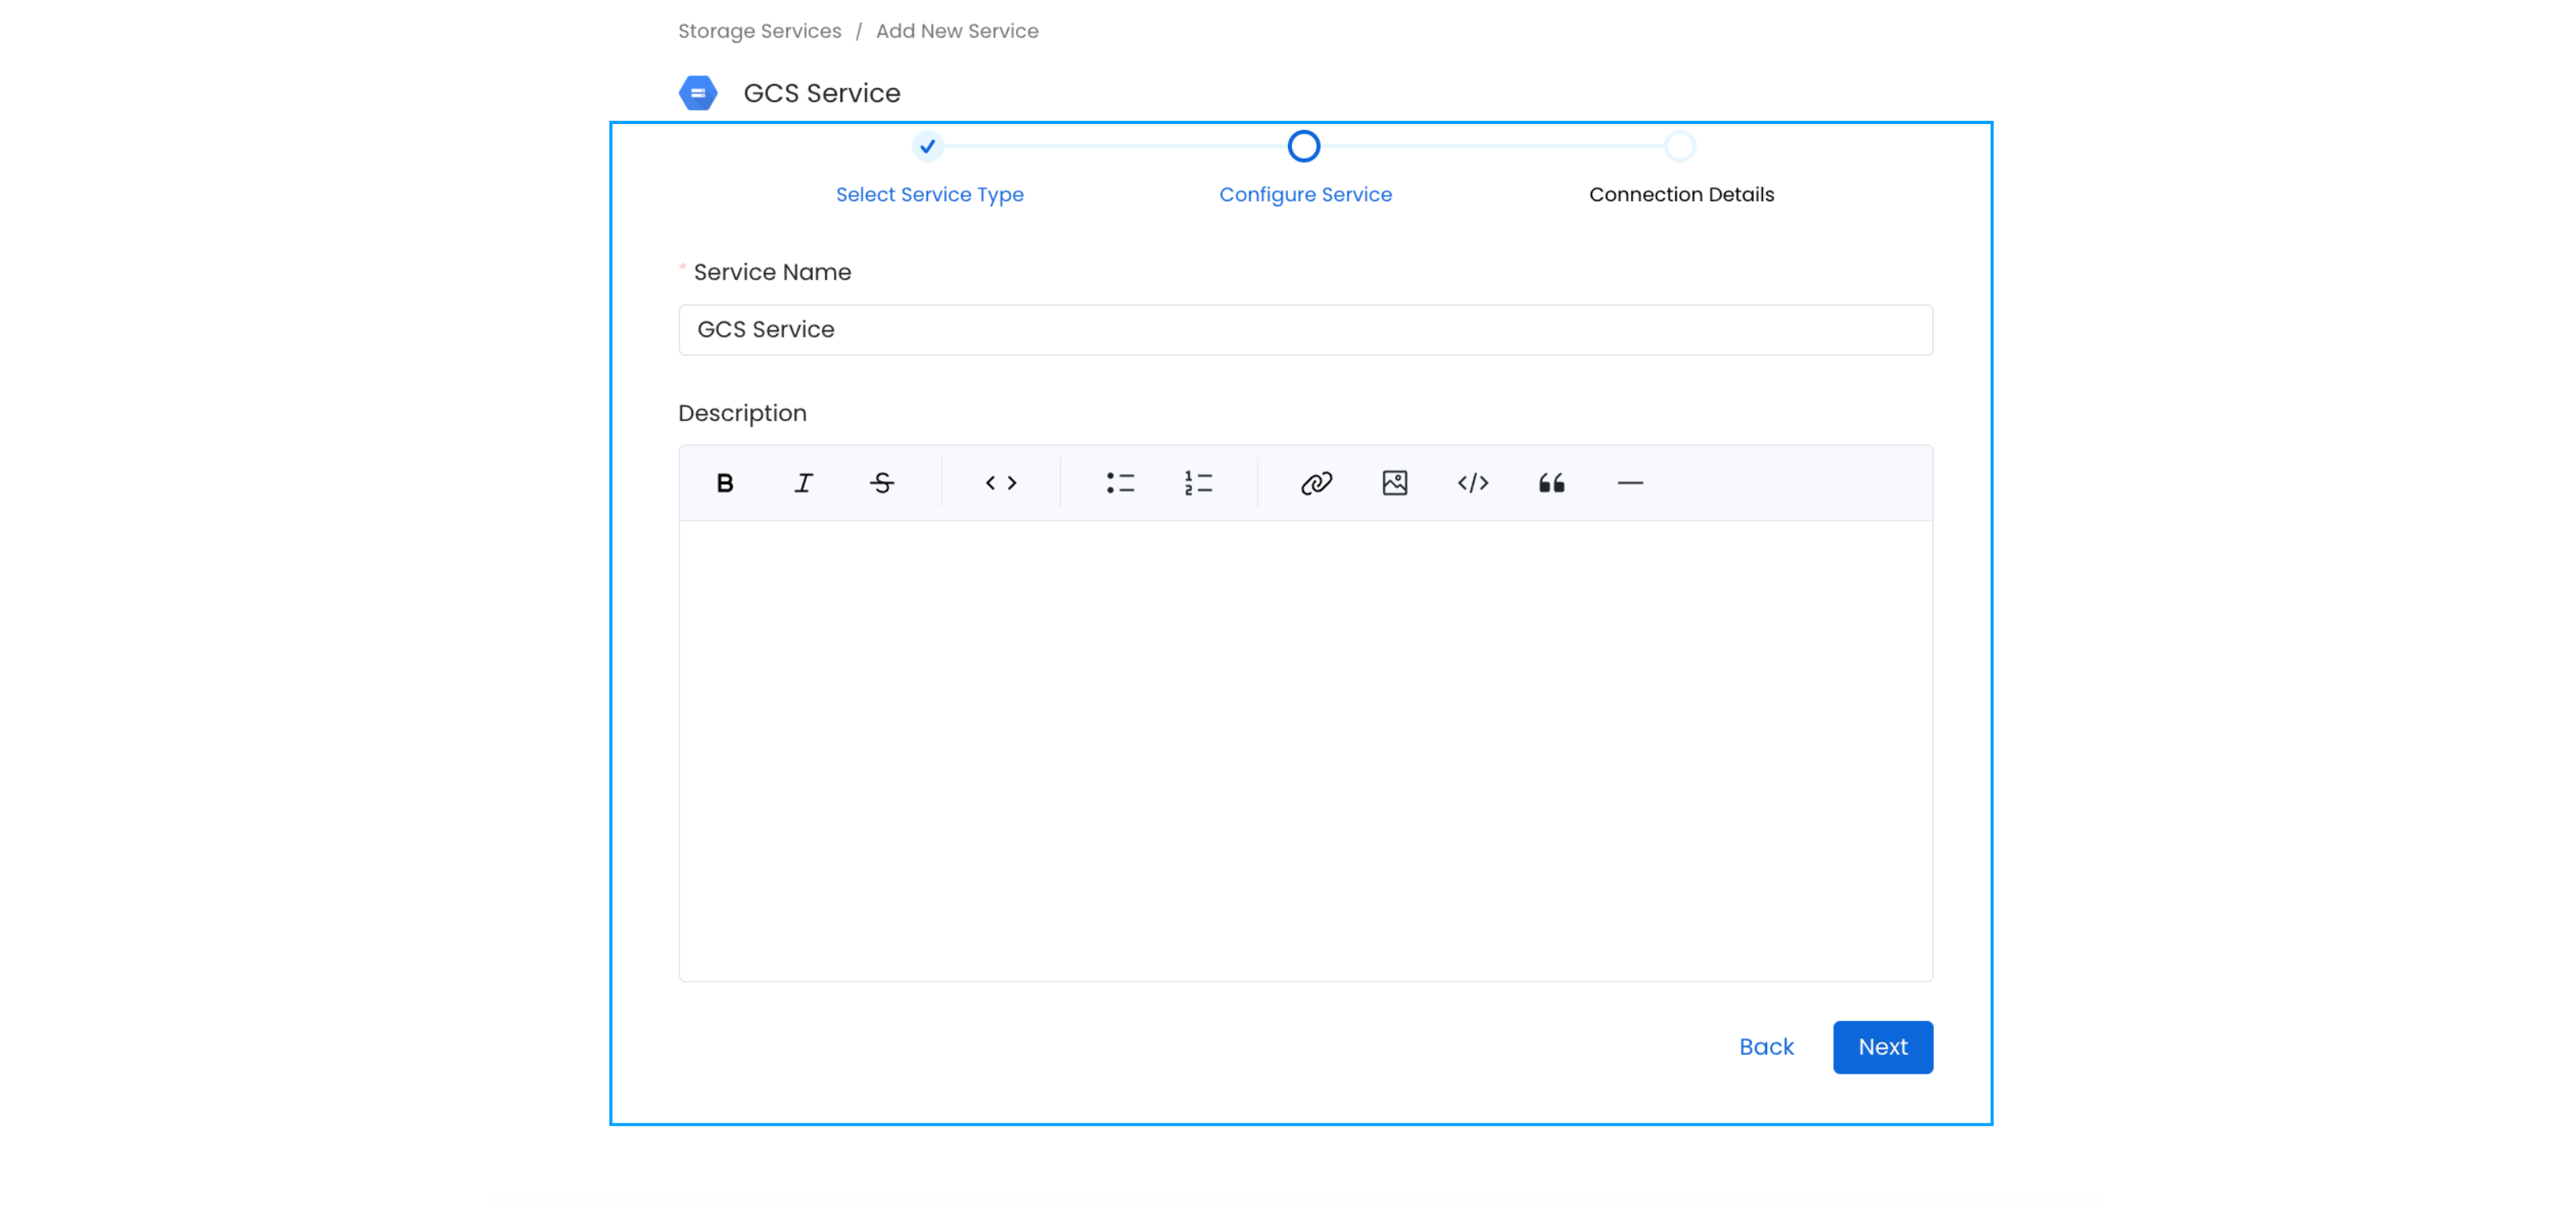
    Provide a name and description for your service.

    #### Service Name

    OpenMetadata uniquely identifies services by their Service Name. Provide
    a name that distinguishes your deployment from other services, including
    the other Storage services that you might be ingesting metadata
    from.

    <img src="https://mintcdn.com/openmetadata/bSeSGuVjATgAasqS/public/images/connectors/gcs/add-new-service.png?fit=max&auto=format&n=bSeSGuVjATgAasqS&q=85&s=ad87f2079ace731d23341249ae12c4bc" alt="Add New Service" width="3200" height="1500" data-path="public/images/connectors/gcs/add-new-service.png" />
  </Step>

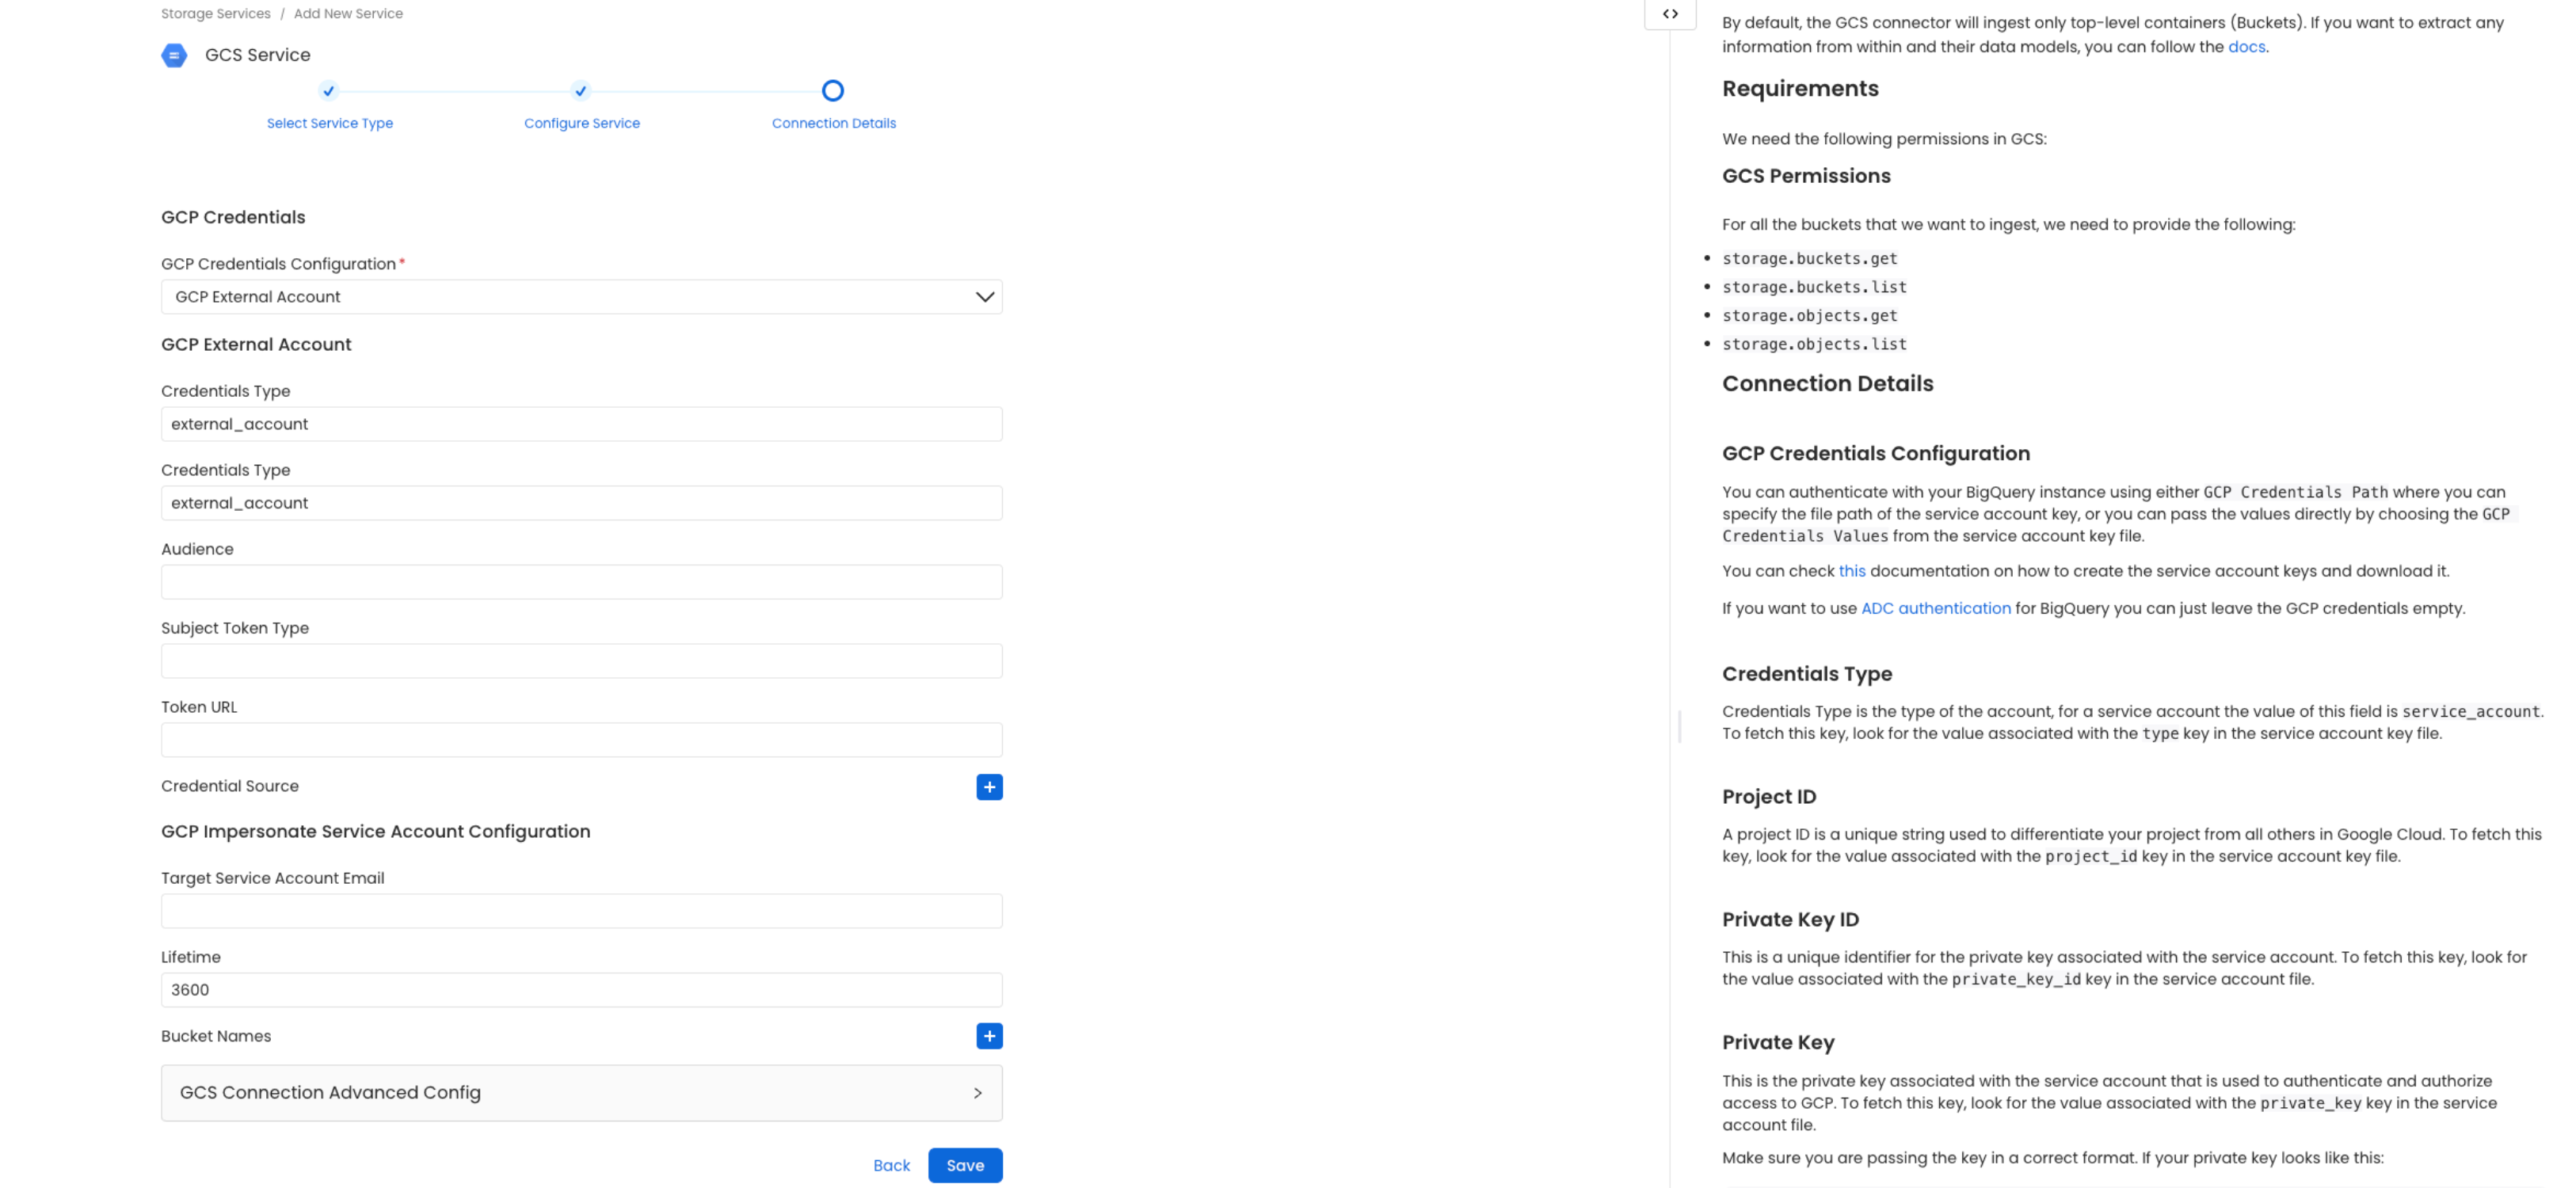
  <Step title="Configure the Service Connection">
    In this step, we will configure the connection settings required for
    this connector. Please follow the instructions below to ensure that
    you've configured the connector to read from your GCS service as
    desired.

    <img src="https://mintcdn.com/openmetadata/bSeSGuVjATgAasqS/public/images/connectors/gcs/service-connection.png?fit=max&auto=format&n=bSeSGuVjATgAasqS&q=85&s=01749ea8a59c866ceaeba32e76b8be5f" alt="Configure service connection" width="3252" height="1500" data-path="public/images/connectors/gcs/service-connection.png" />
  </Step>

  <Step title="Connection Details">
    <Tip>
      When using a **Hybrid Ingestion Runner**, any sensitive credential fields—such as passwords, API keys, or private keys—must reference secrets using the following format:

      ```
      password: secret:/my/database/password
      ```

      This applies **only to fields marked as secrets** in the connection form (these typically mask input and show a visibility toggle icon).
      For a complete guide on managing secrets in hybrid setups, see the [Hybrid Ingestion Runner Secret Management Guide](https://docs.getcollate.io/getting-started/day-1/hybrid-saas/hybrid-ingestion-runner#3.-manage-secrets-securely).
    </Tip>
  </Step>

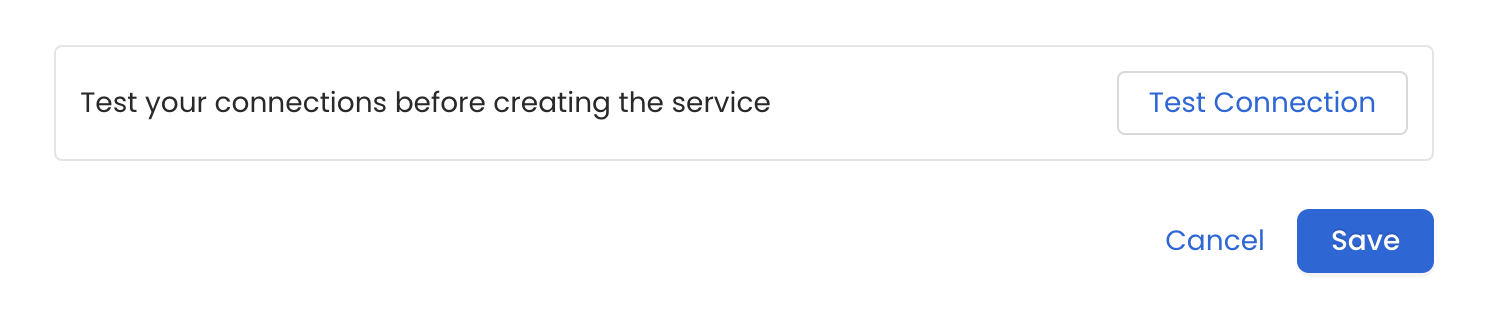
  <Step title="Test the Connection">
    Once the credentials have been added, click on *Test Connection* and *Save* the changes.

    <img src="https://mintcdn.com/openmetadata/9G75p72jJKYgvFUQ/public/images/connectors/test-connection.png?fit=max&auto=format&n=9G75p72jJKYgvFUQ&q=85&s=4ac71a56e30fa3dd1be86f82c1f07068" alt="Test Connection" width="1494" height="310" data-path="public/images/connectors/test-connection.png" />
  </Step>

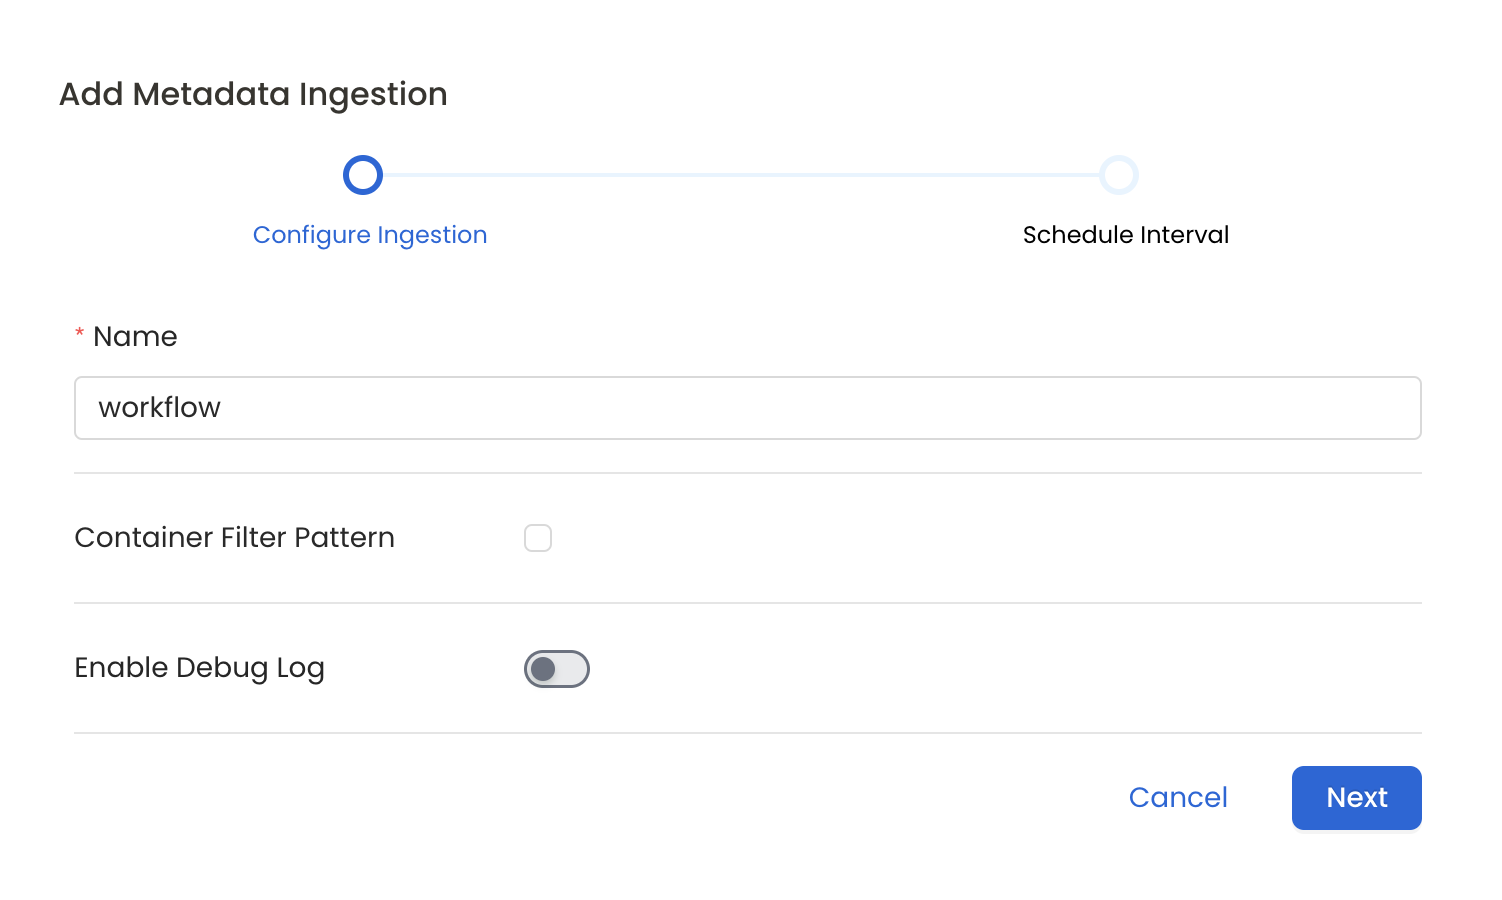
  <Step title="Configure Metadata Ingestion">
    In this step we will configure the metadata ingestion pipeline,
    Please follow the instructions below

    <img src="https://mintcdn.com/openmetadata/9SXjaLbGROaofLQU/public/images/connectors/configure-metadata-ingestion-storage.png?fit=max&auto=format&n=9SXjaLbGROaofLQU&q=85&s=525194f0af1b137116be15e89ac50bf2" alt="Configure Metadata Ingestion" width="1502" height="900" data-path="public/images/connectors/configure-metadata-ingestion-storage.png" />

    #### Metadata Ingestion Options

    * **Name**: This field refers to the name of ingestion pipeline, you can customize the name or use the generated name.
    * **Container Filter Pattern (Optional)**: To control whether to include a container as part of metadata ingestion.
      * **Include**: Explicitly include containers by adding a list of comma-separated regular expressions to the Include field. OpenMetadata will include all containers with names matching one or more of the supplied regular expressions. All other containers will be excluded.
      * **Exclude**: Explicitly exclude containers by adding a list of comma-separated regular expressions to the Exclude field. OpenMetadata will exclude all containers with names matching one or more of the supplied regular expressions. All other containers will be included.
    * **Enable Debug Log (toggle)**: Set the Enable Debug Log toggle to set the default log level to debug.
    * **Storage Metadata Config Source**: Here you can specify the location of your global manifest `openmetadata_storage_manifest.json` file. It can be located in S3, a local path or HTTP.
  </Step>

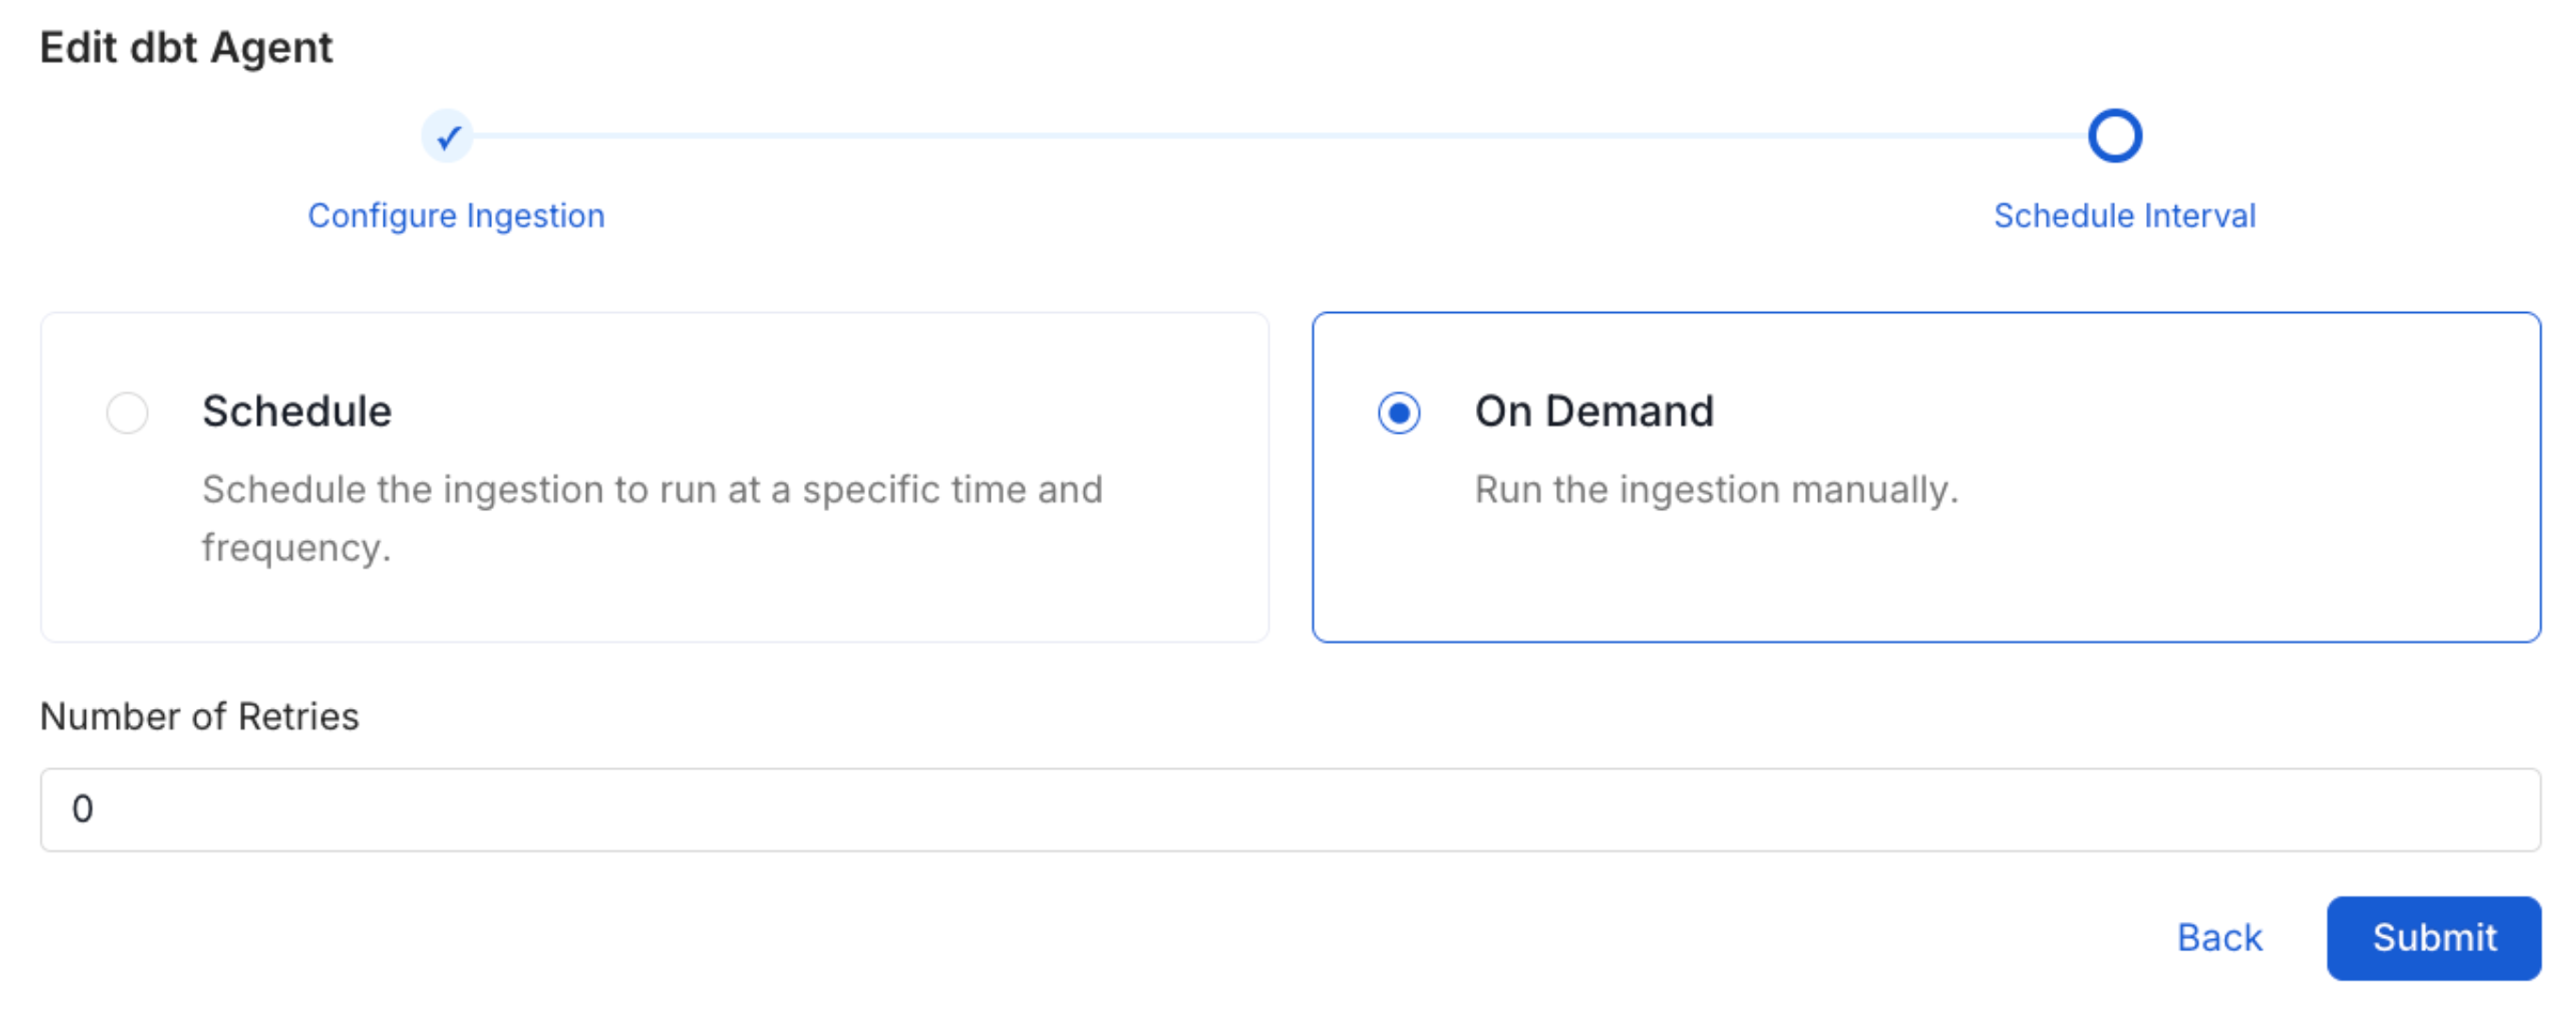
  <Step title="Schedule the Ingestion and Deploy">
    Scheduling can be set up at an hourly, daily, weekly, or manual cadence. The
    timezone is in UTC. Select a Start Date to schedule for ingestion. It is
    optional to add an End Date.

    Review your configuration settings. If they match what you intended,
    click Deploy to create the service and schedule metadata ingestion.

    If something doesn't look right, click the Back button to return to the
    appropriate step and change the settings as needed.

    After configuring the workflow, you can click on Deploy to create the
    pipeline.

    <img src="https://mintcdn.com/openmetadata/j50Bw6ZBiFbbFFnF/public/images/connectors/schedule.png?fit=max&auto=format&n=j50Bw6ZBiFbbFFnF&q=85&s=24b0c2f55f803efde5fb3b3bc24ed3ae" alt="Schedule the Workflow" width="2733" height="1083" data-path="public/images/connectors/schedule.png" />
  </Step>

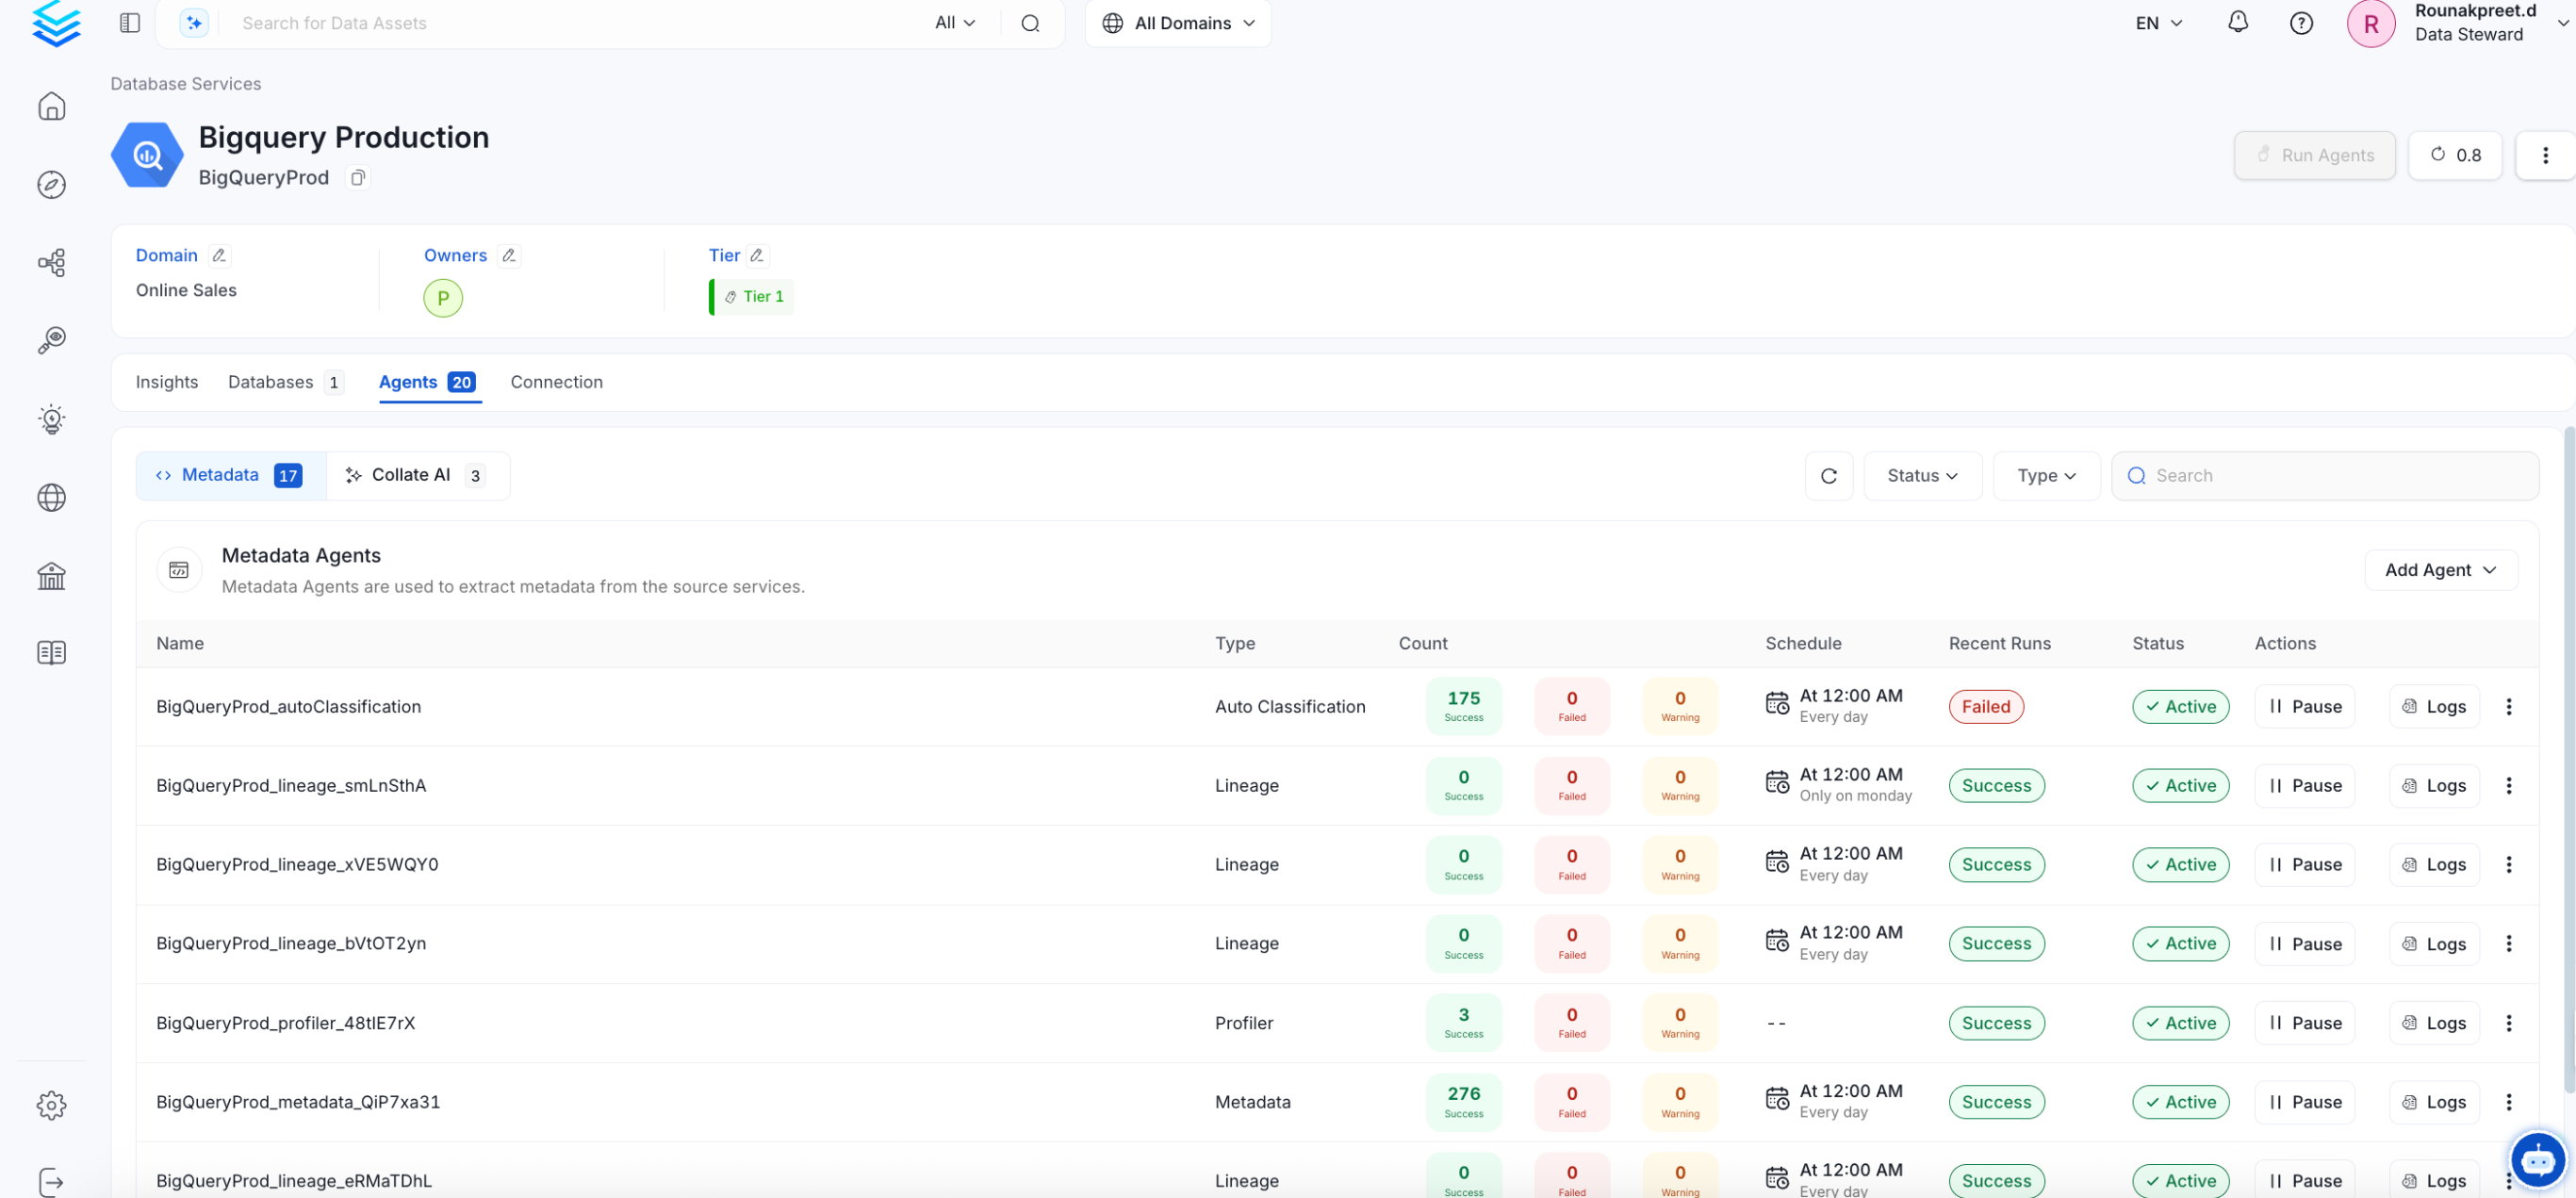
  <Step title="View the Ingestion Pipeline">
    Once the workflow has been successfully deployed, you can view the
    Ingestion Pipeline running from the Service Page.

    <img src="https://mintcdn.com/openmetadata/9G75p72jJKYgvFUQ/public/images/connectors/view-ingestion-pipeline.png?fit=max&auto=format&n=9G75p72jJKYgvFUQ&q=85&s=7c4e411977371617cb1312efb9f9bfee" alt="View Ingestion Pipeline" width="2733" height="1271" data-path="public/images/connectors/view-ingestion-pipeline.png" />

    <Tip>
      If AutoPilot is enabled, workflows like usage tracking, data lineage, and similar tasks will be handled automatically. Users don’t need to set up or manage them - AutoPilot takes care of everything in the system.
    </Tip>
  </Step>
</Steps>