> ## Documentation Index
> Fetch the complete documentation index at: https://docs.open-metadata.org/llms.txt
> Use this file to discover all available pages before exploring further.
# Auth0 SSO | OpenMetadata Security Integration
> Set up Auth0 as an identity provider to manage secure, token-based authentication across web apps, APIs, and user-facing services.
# Auth0 SSO
Follow the sections in this guide to set up Auth0 SSO.
Security requirements for your **production** environment:
* **DELETE** the admin default account shipped by OM in case you had [Basic Authentication](/v1.12.x/deployment/security/basic-auth)
enabled before configuring the authentication with Auth0 SSO.
* **UPDATE** the Private / Public keys used for the [JWT Tokens](/v1.12.x/deployment/security/enable-jwt-tokens). The keys we provide
by default are aimed only for quickstart and testing purposes. They should NEVER be used in a production installation.
## Create Server Credentials
### Step 1: Create the Account
* If you don't have an account, [Sign up](https://auth0.com/signup) to create one.
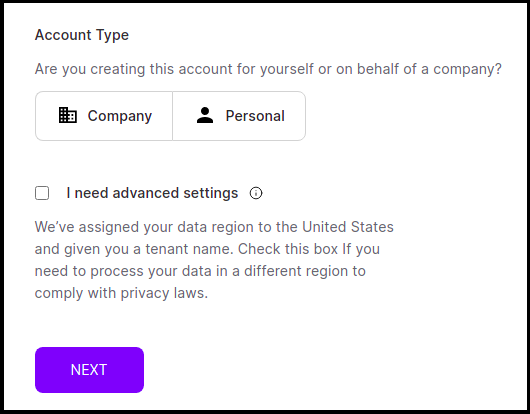
* Select the Account Type, i.e., Company or Personal
* Click I need advanced settings and click next.
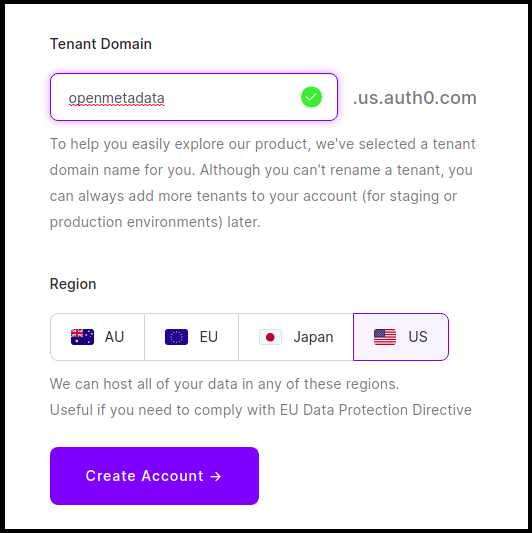
 * Provide the Tenant Domain, select the region and click on Create Account.
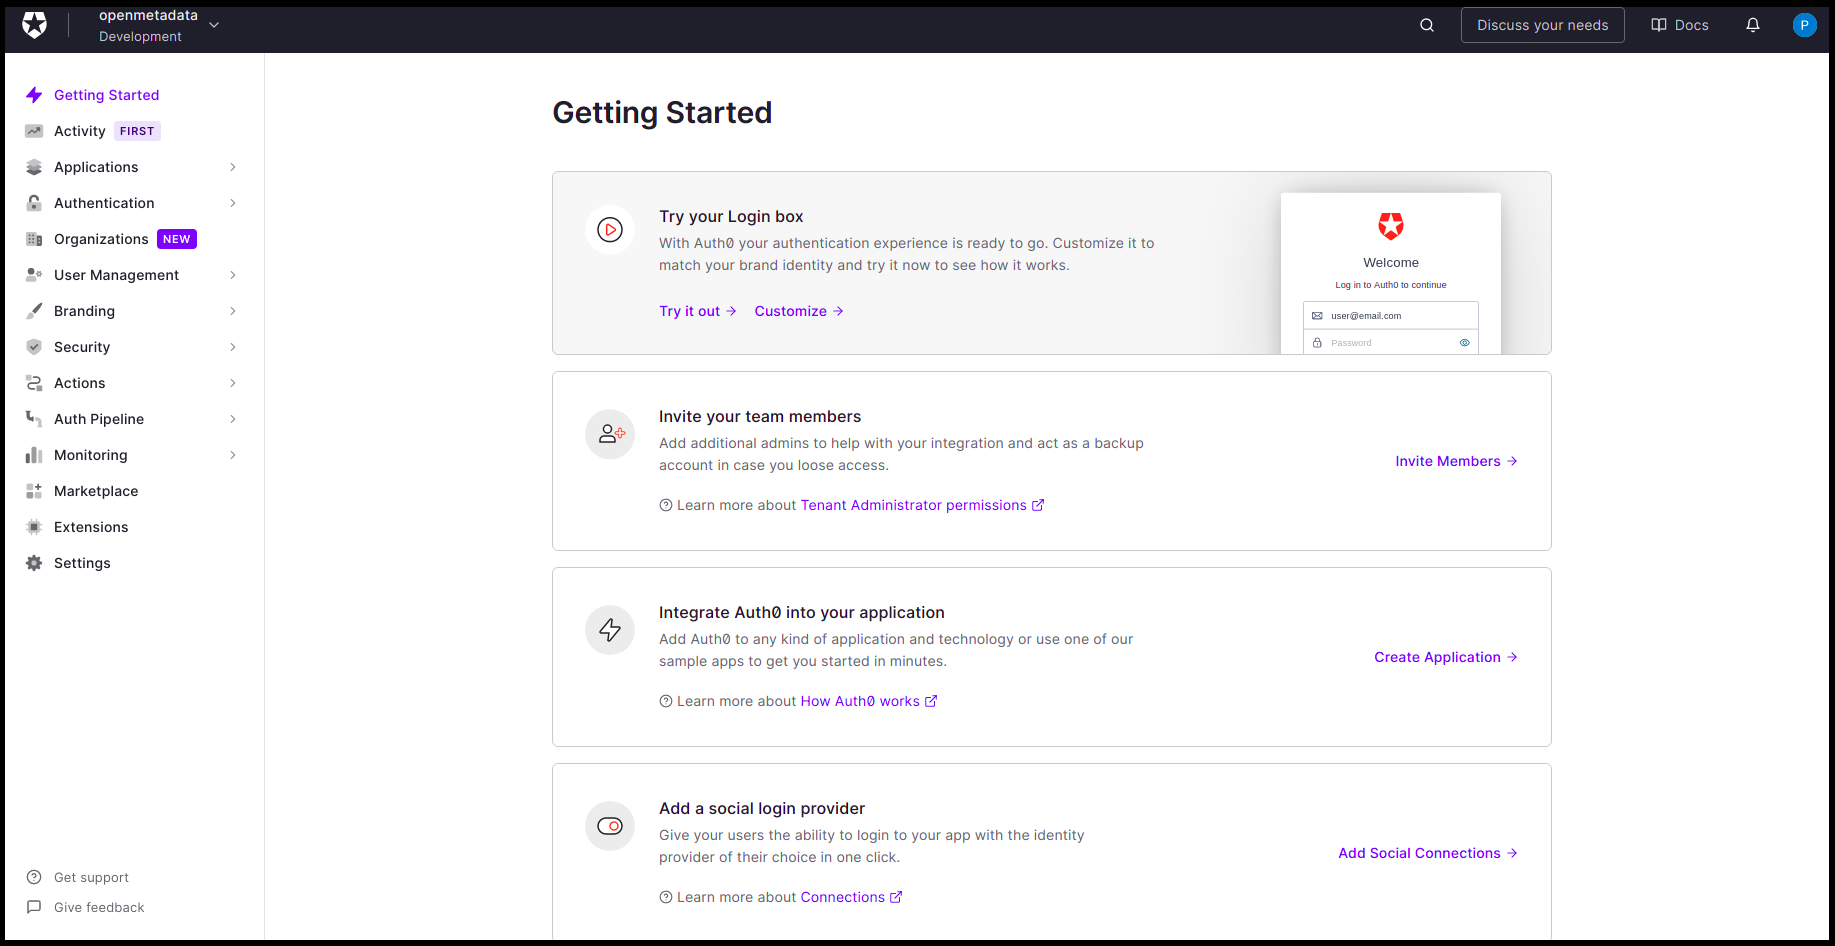
 * Once done, you will land on the dashboard page.
 ## Step 2: Create Server Credentials
## Choose Your Authentication Flow
After creating the account, choose the authentication flow you want to use:
* [Implicit Flow](/v1.12.x/deployment/security/auth0/implicit-flow) (Public)
* [Auth Code Flow](/v1.12.x/deployment/security/auth0/auth-code-flow) (Confidential)
- **SPA (Single Page Application):**
This type is designed for implicit flows. In this case, providing both the client ID and client secret will result in a failure because the implicit flow only requires the client ID for authentication.
- **Web:**
This type is intended for confidential clients. If you select this option, you must provide both the client ID and client secret. Simply passing the client ID will cause the authorization process to fail, as the Authorization Code flow requires both credentials for successful authentication.
The [OIDC Authorization Code Flow](/v1.12.x/deployment/security/oidc) is used in this case, where the client secret is required to securely exchange the authorization code for tokens.
### Recommendation:
* Use the **Web** type for confidential clients that require both a client ID and secret.
* Use the **SPA** type for applications using implicit flows where only a client ID is needed.
## Configure Ingestion
Once your server security is set, it's time to review the ingestion configuration. Our bots support JWT tokens
to authenticate to the server when sending requests.
Find more information on [**Enabling JWT Tokens**](/deployment/security/enable-jwt-tokens) and [**JWT Troubleshooting**](/deployment/security/jwt-troubleshooting) to ensure seamless authentication.
## Step 2: Create Server Credentials
## Choose Your Authentication Flow
After creating the account, choose the authentication flow you want to use:
* [Implicit Flow](/v1.12.x/deployment/security/auth0/implicit-flow) (Public)
* [Auth Code Flow](/v1.12.x/deployment/security/auth0/auth-code-flow) (Confidential)
- **SPA (Single Page Application):**
This type is designed for implicit flows. In this case, providing both the client ID and client secret will result in a failure because the implicit flow only requires the client ID for authentication.
- **Web:**
This type is intended for confidential clients. If you select this option, you must provide both the client ID and client secret. Simply passing the client ID will cause the authorization process to fail, as the Authorization Code flow requires both credentials for successful authentication.
The [OIDC Authorization Code Flow](/v1.12.x/deployment/security/oidc) is used in this case, where the client secret is required to securely exchange the authorization code for tokens.
### Recommendation:
* Use the **Web** type for confidential clients that require both a client ID and secret.
* Use the **SPA** type for applications using implicit flows where only a client ID is needed.
## Configure Ingestion
Once your server security is set, it's time to review the ingestion configuration. Our bots support JWT tokens
to authenticate to the server when sending requests.
Find more information on [**Enabling JWT Tokens**](/deployment/security/enable-jwt-tokens) and [**JWT Troubleshooting**](/deployment/security/jwt-troubleshooting) to ensure seamless authentication.