> ## Documentation Index
> Fetch the complete documentation index at: https://docs.open-metadata.org/llms.txt
> Use this file to discover all available pages before exploring further.
# Google SSO | OpenMetadata Authentication Integration
> Set up Google OAuth as your identity provider to enable secure login, token exchange, and scoped user access in deployments.
# Google SSO
Follow the sections in this guide to set up Google SSO.
Security requirements for your **production** environment:
* **DELETE** the admin default account shipped by OM in case you had [Basic Authentication](/v1.12.x/deployment/security/basic-auth)
enabled before configuring the authentication with Google SSO.
* **UPDATE** the Private / Public keys used for the [JWT Tokens](/v1.12.x/deployment/security/enable-jwt-tokens). The keys we provide
by default are aimed only for quickstart and testing purposes. They should NEVER be used in a production installation.
## Create Server Credentials
### Step 1: Create the Account
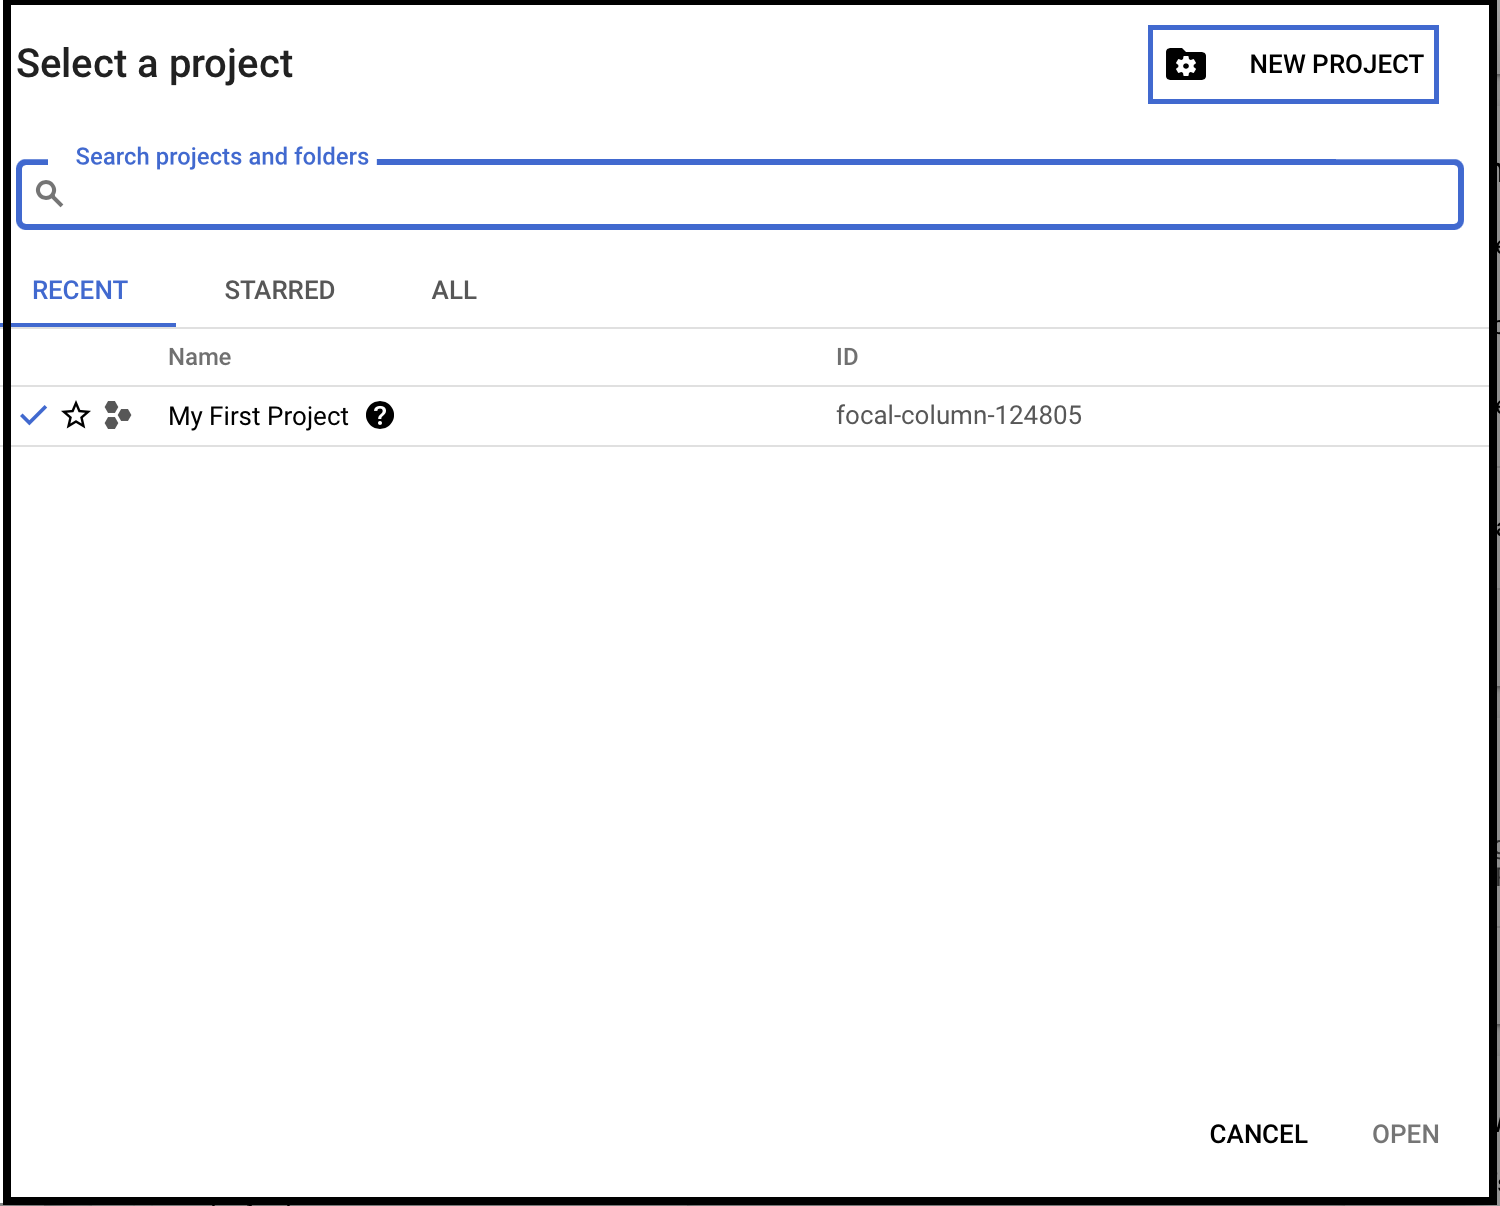
* Go to [Create Google Cloud Account](https://console.cloud.google.com/)
* Click on `Create Project`
 ### Step 2: Create a New Project
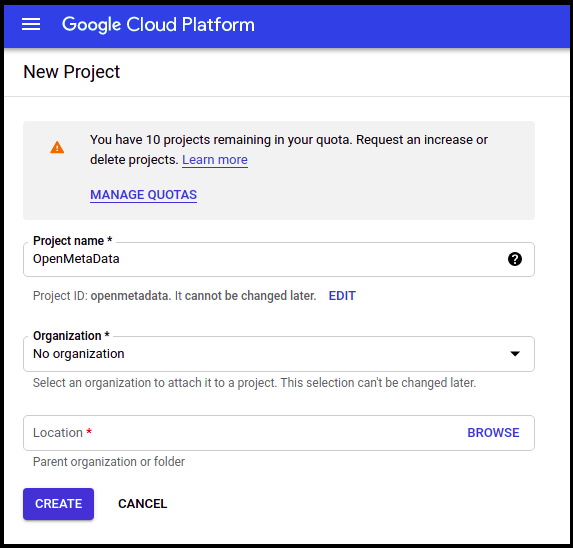
Enter the **Project name**.
Enter the parent organization or folder in the **Location box**. That resource will be the hierarchical parent of the new project.
Click **Create**.
### Step 2: Create a New Project
Enter the **Project name**.
Enter the parent organization or folder in the **Location box**. That resource will be the hierarchical parent of the new project.
Click **Create**.
 ### Step 3: How to Configure OAuth Consent
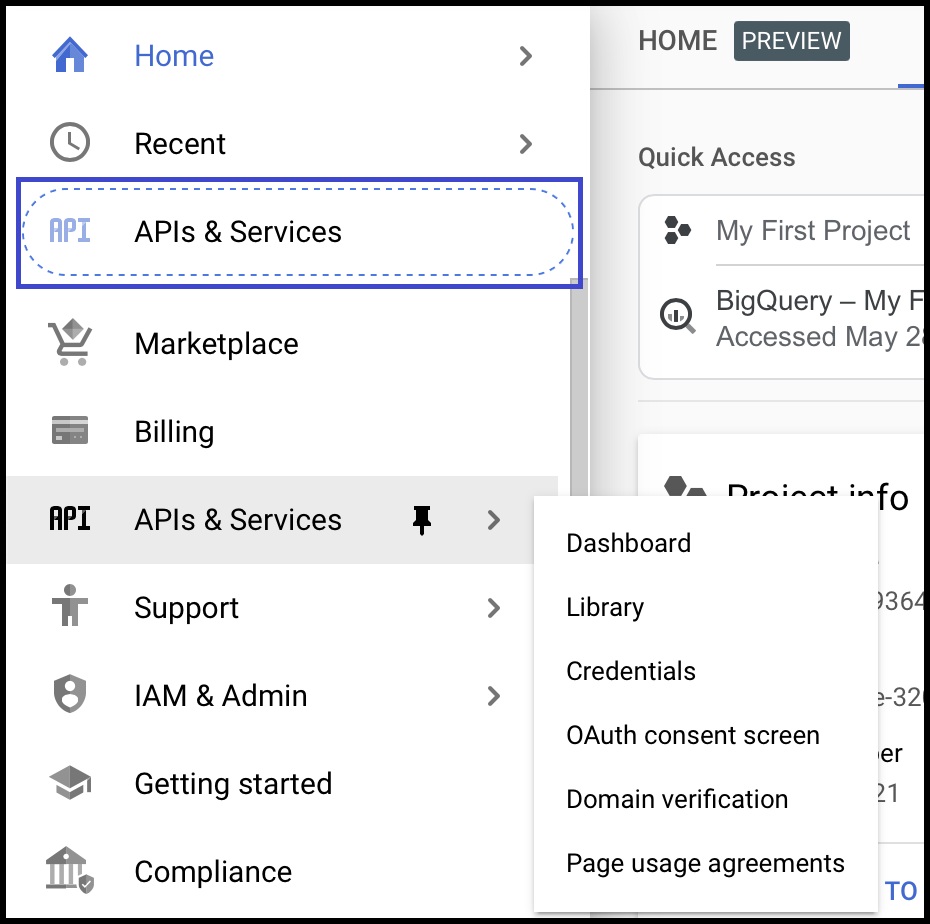
* Select the project you created above and click on **APIs & Services** on the left-side panel.
### Step 3: How to Configure OAuth Consent
* Select the project you created above and click on **APIs & Services** on the left-side panel.
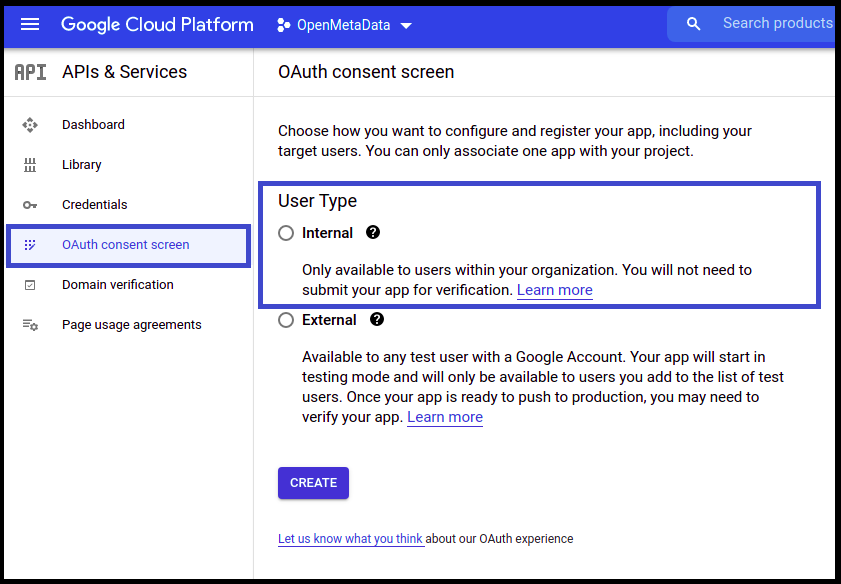
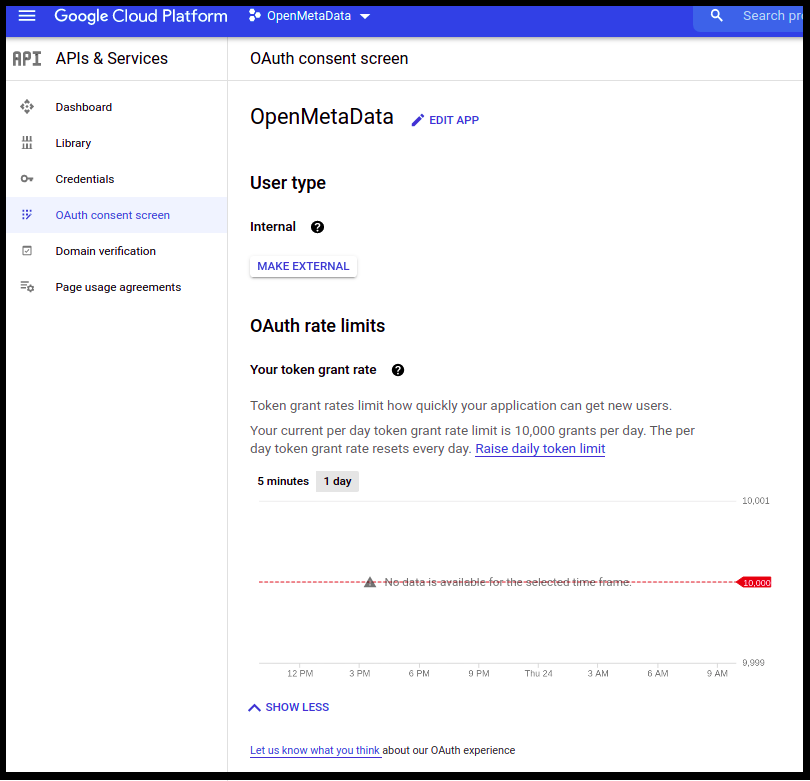
 * Click on the **OAuth Consent Screen** available on the left-hand side panel.
* Choose User Type **Internal**.
* Click on the **OAuth Consent Screen** available on the left-hand side panel.
* Choose User Type **Internal**.
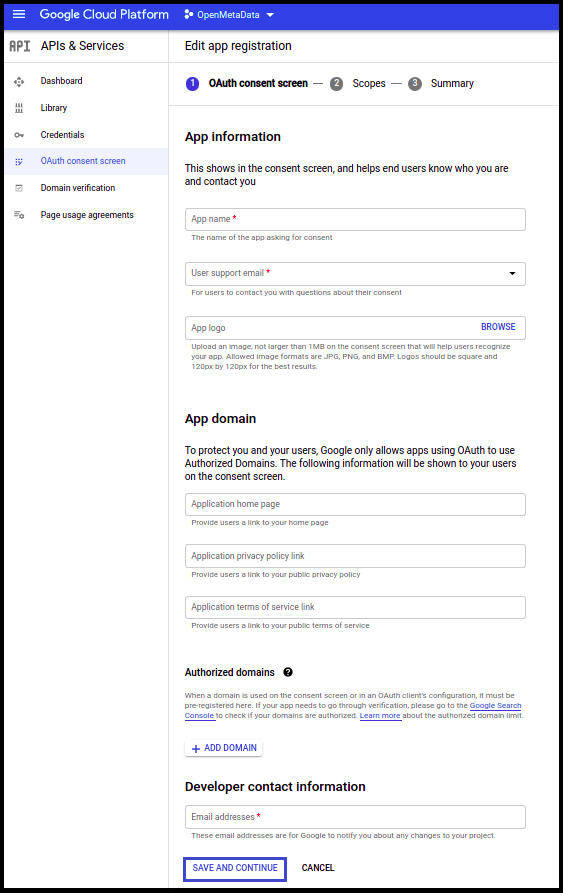
 * Once the user type is selected, provide the **App Information** and other details.
* Click **Save and Continue**.
* Once the user type is selected, provide the **App Information** and other details.
* Click **Save and Continue**.
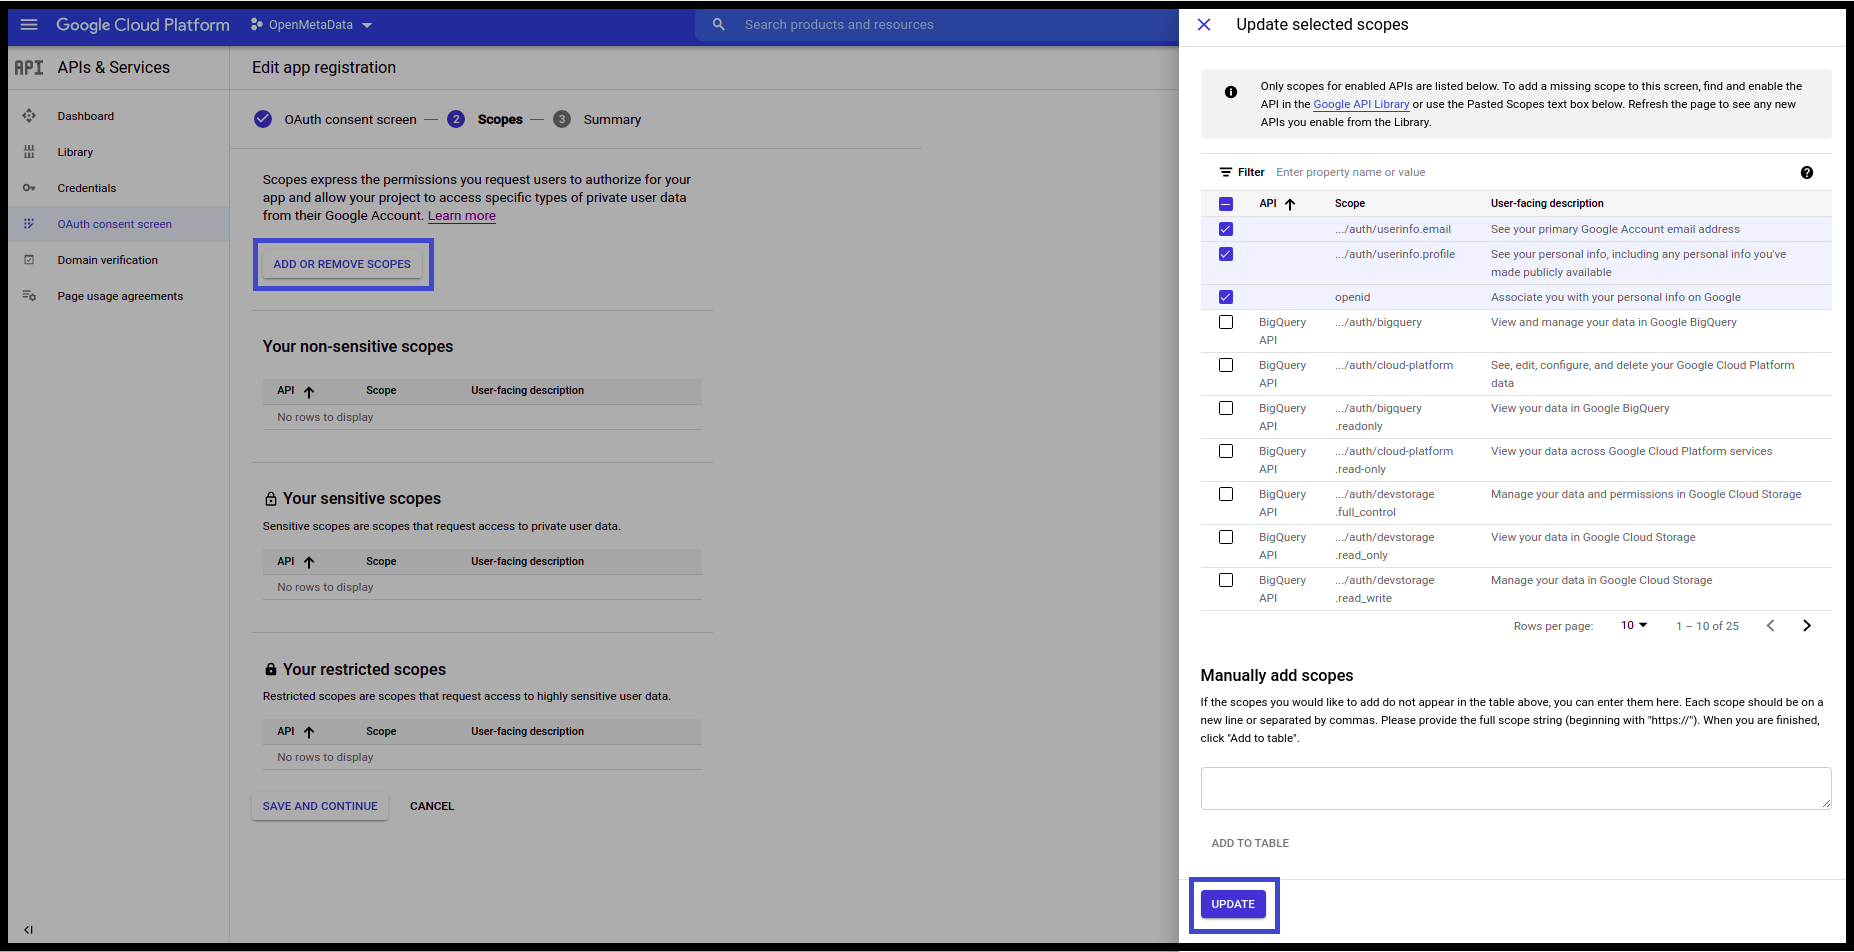
 * On the **Scopes Screen**, Click on **ADD OR REMOVE SCOPES** and select the scopes.
* Once done click on **Update**.
* On the **Scopes Screen**, Click on **ADD OR REMOVE SCOPES** and select the scopes.
* Once done click on **Update**.
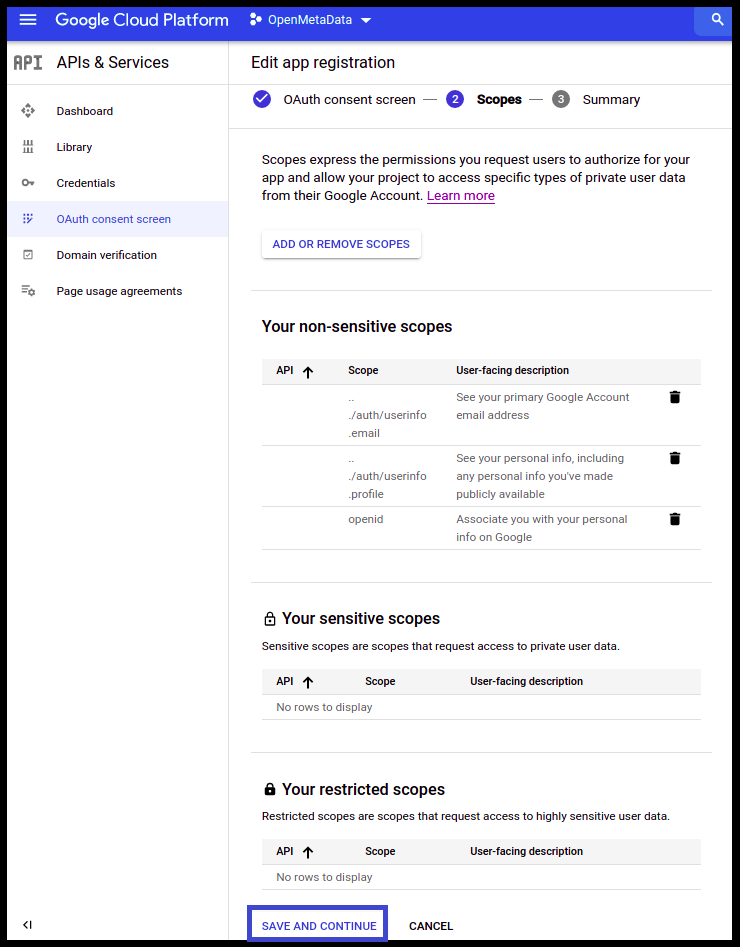
 * Click **Save and Continue**.
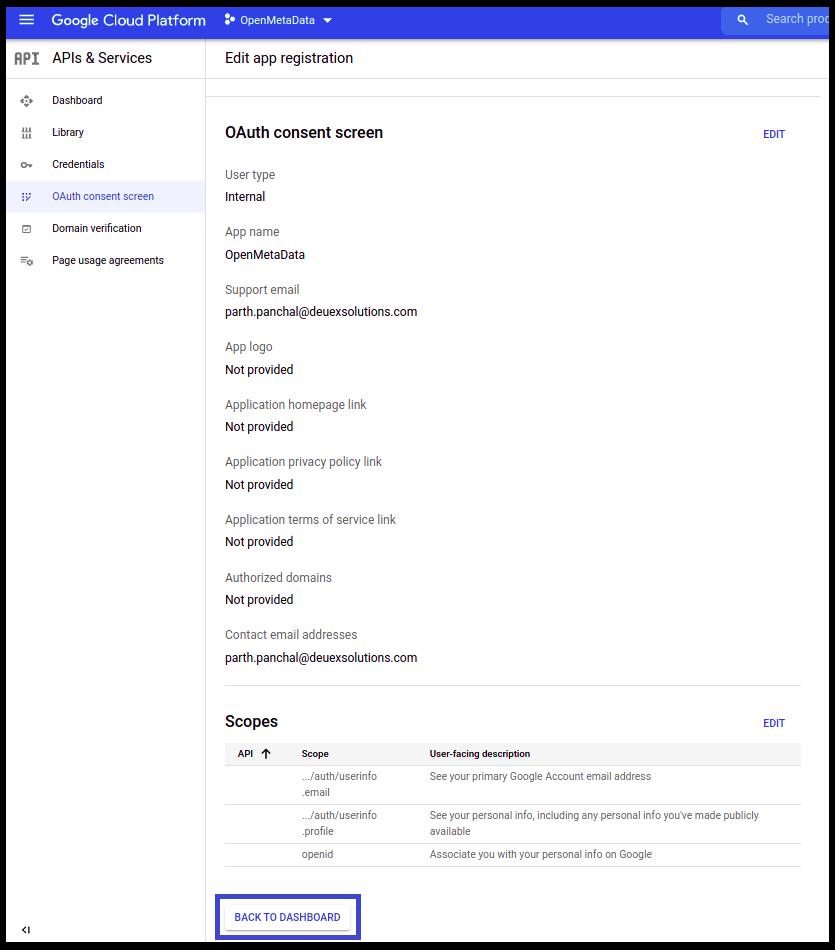
 * Click on **Back to Dashboard**.
 ### Step 4: Create Credentials for the Project
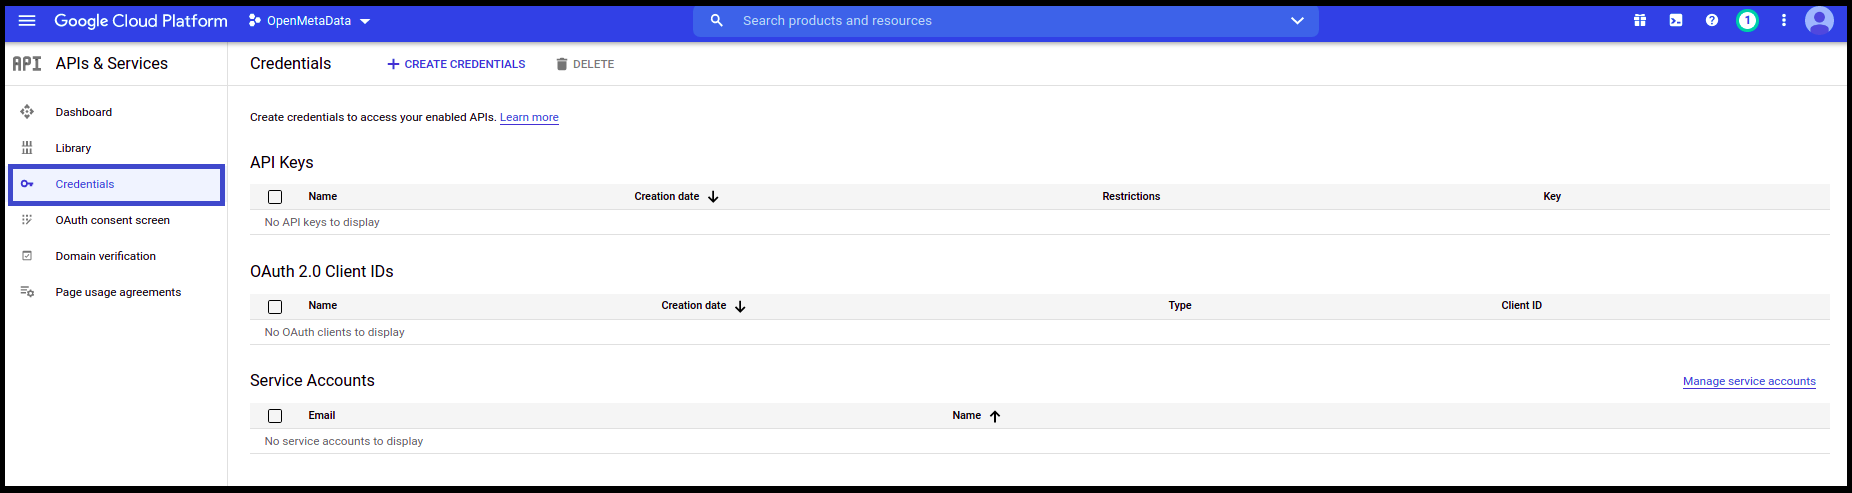
* Once the OAuth Consent is configured, click on **Credentials** available on the left-hand side panel.
### Step 4: Create Credentials for the Project
* Once the OAuth Consent is configured, click on **Credentials** available on the left-hand side panel.
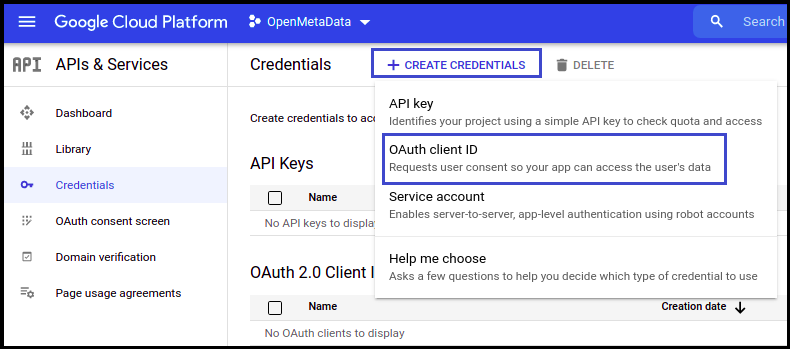
 * Click on **Create Credentials**
* Select **OAuth client ID** from the dropdown.
* Click on **Create Credentials**
* Select **OAuth client ID** from the dropdown.
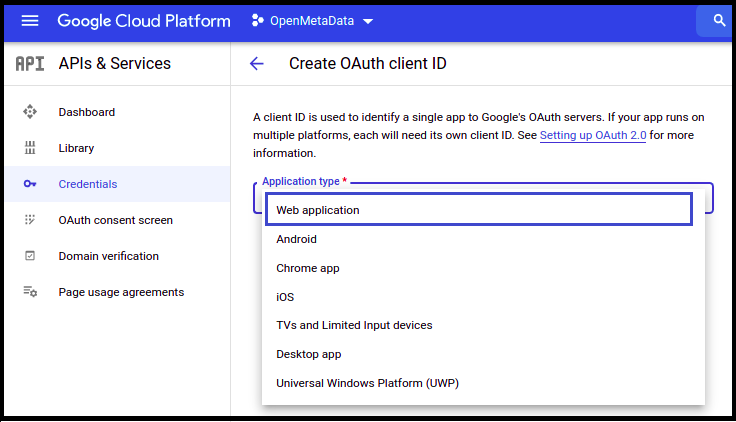
 * Once selected, you will be asked to select the **Application type**. Select **Web application**.
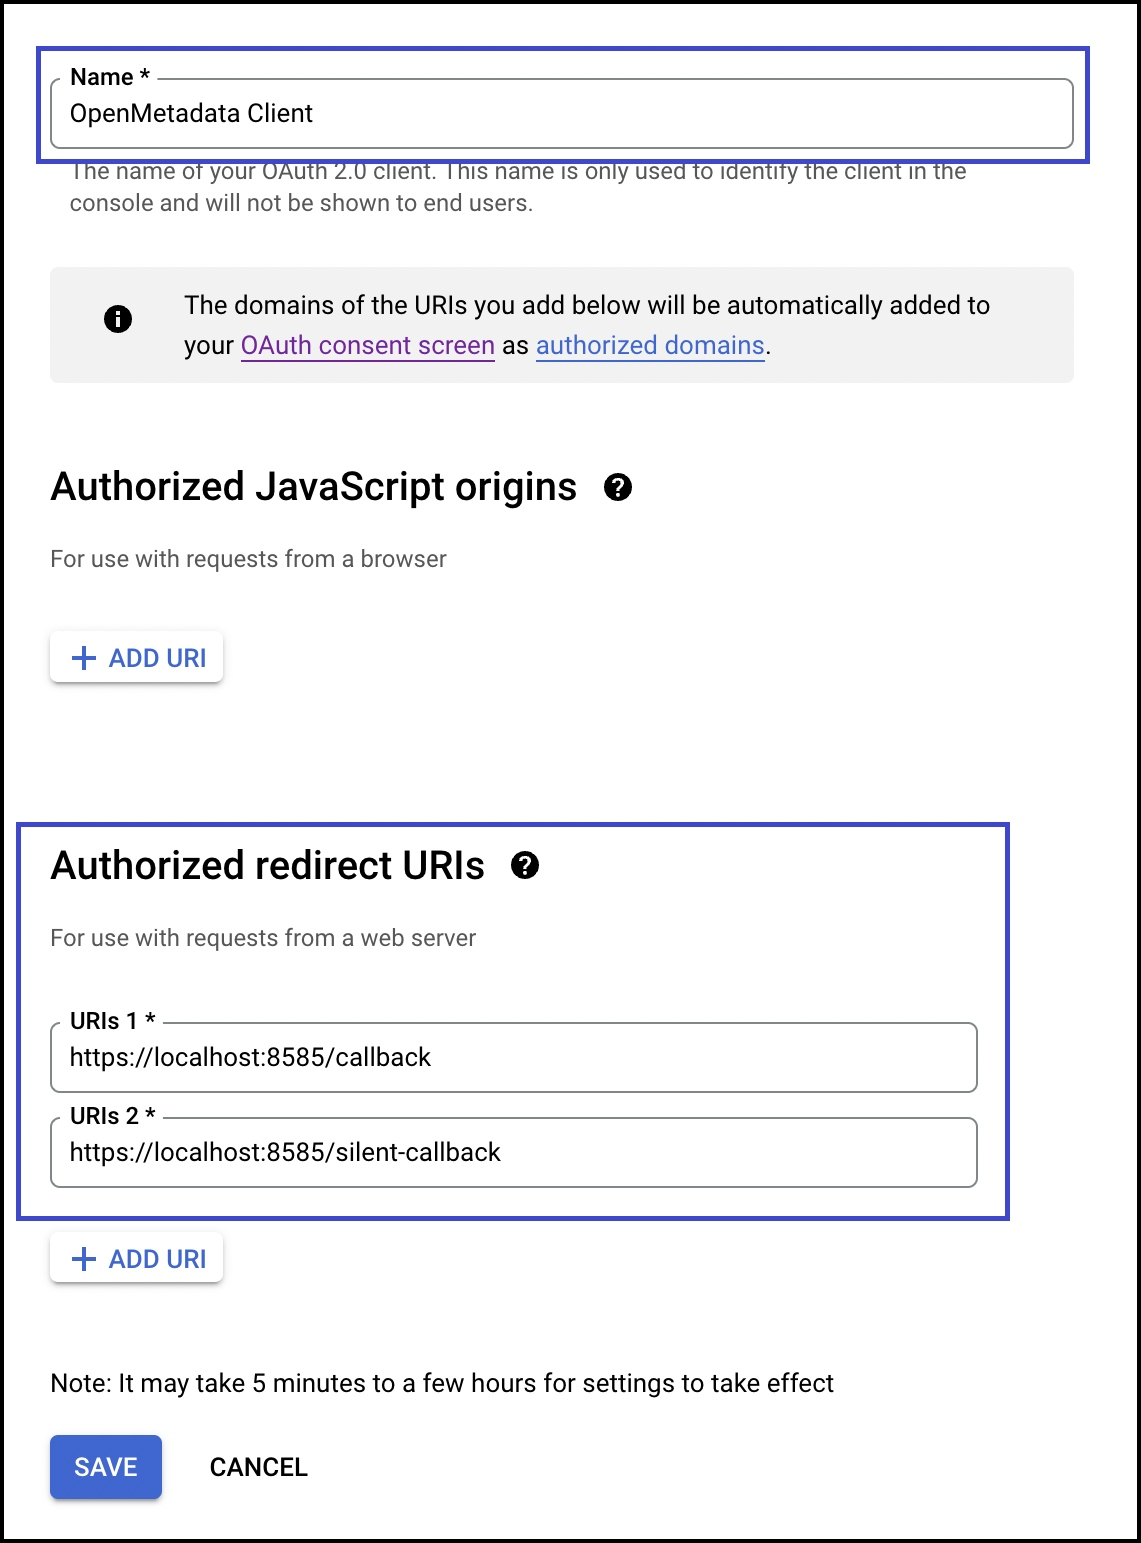
 After selecting the **Application Type**, name your project and give the authorized URIs:
* domain/callback
* domain/silent-callback
After selecting the **Application Type**, name your project and give the authorized URIs:
* domain/callback
* domain/silent-callback
 * Click **Create**
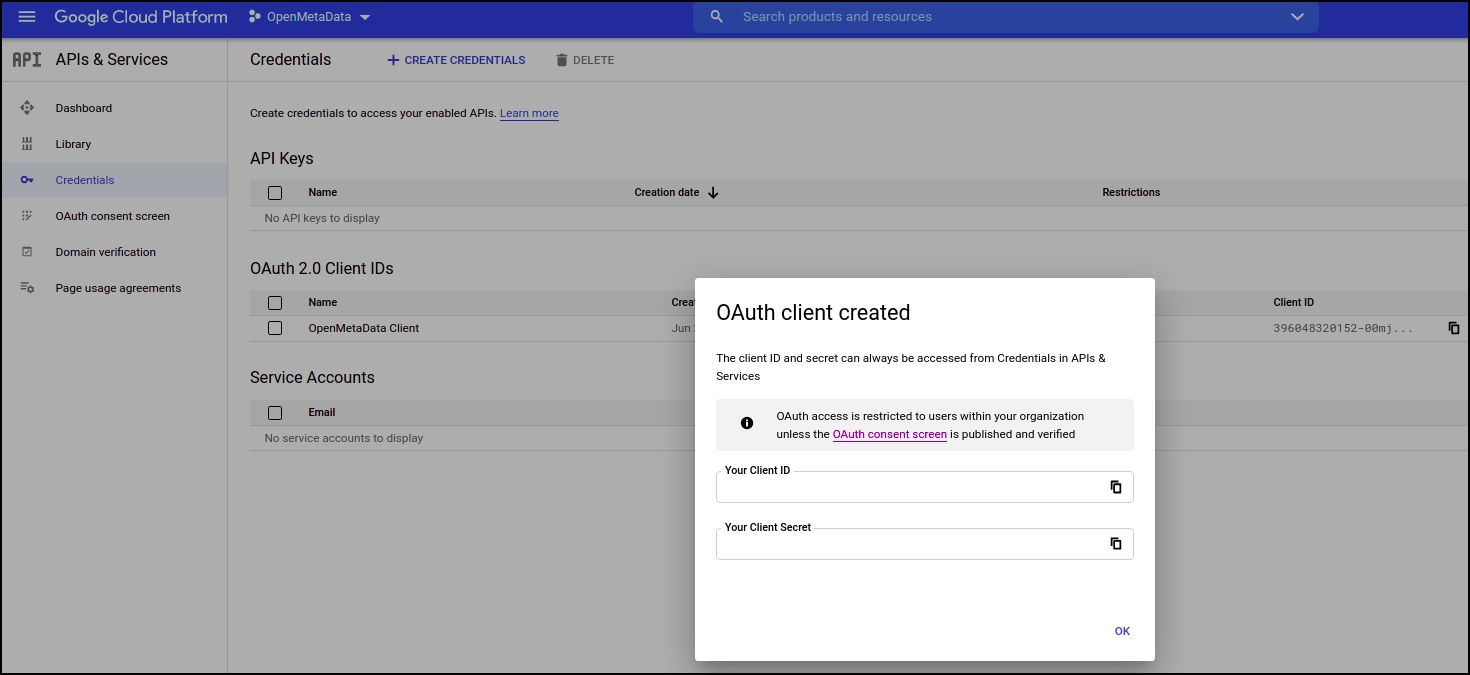
* You will get the credentials
* Click **Create**
* You will get the credentials
 ### Step 5: Where to Find the Credentials
* Go to **Credentials**
* Click on the **pencil icon (Edit OAuth Client)** on the right side of the screen
### Step 5: Where to Find the Credentials
* Go to **Credentials**
* Click on the **pencil icon (Edit OAuth Client)** on the right side of the screen
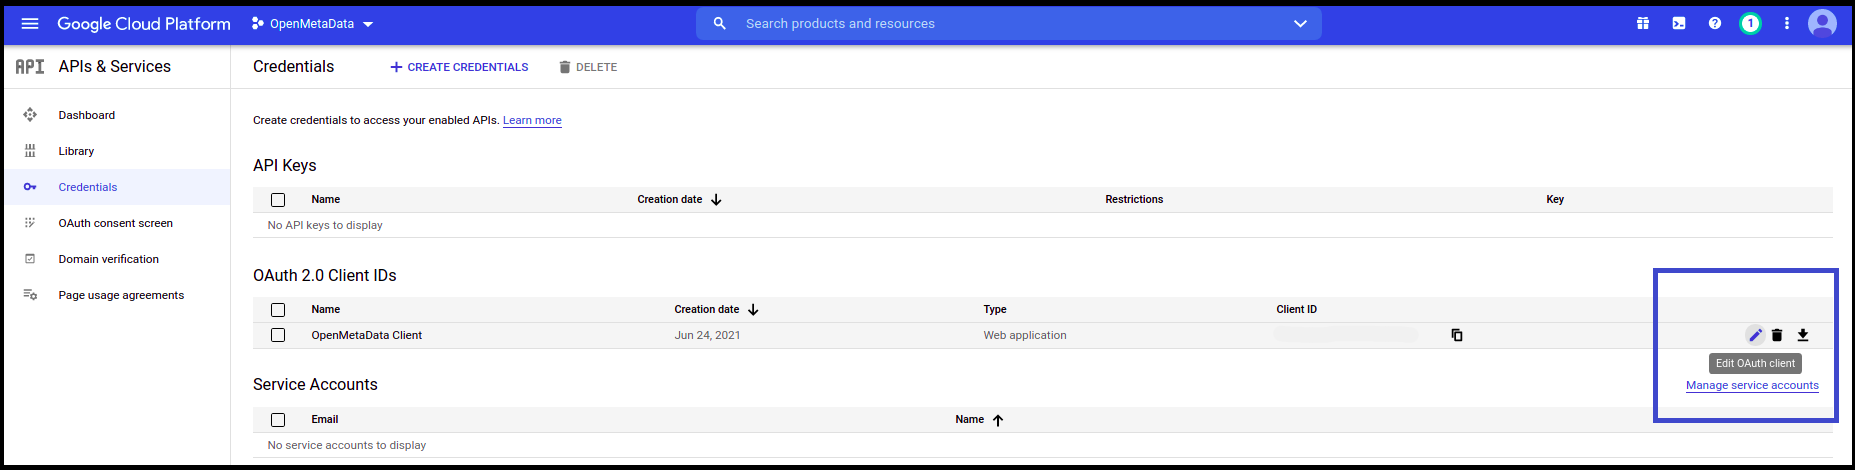 * You will find the **Client ID** in the top right corner
 After the applying these steps, you can update the configuration of your deployment:
Configure Google SSO for Docker deployment.
Configure Google SSO for Kubernetes deployment.
Configure Google SSO for Bare Metal deployment.
## Configure Ingestion
Once your server security is set, it's time to review the ingestion configuration. Our bots support JWT tokens
to authenticate to the server when sending requests.
Find more information on [**Enabling JWT Tokens**](/deployment/security/enable-jwt-tokens) and [**JWT Troubleshooting**](/deployment/security/jwt-troubleshooting) to ensure seamless authentication.
After the applying these steps, you can update the configuration of your deployment:
Configure Google SSO for Docker deployment.
Configure Google SSO for Kubernetes deployment.
Configure Google SSO for Bare Metal deployment.
## Configure Ingestion
Once your server security is set, it's time to review the ingestion configuration. Our bots support JWT tokens
to authenticate to the server when sending requests.
Find more information on [**Enabling JWT Tokens**](/deployment/security/enable-jwt-tokens) and [**JWT Troubleshooting**](/deployment/security/jwt-troubleshooting) to ensure seamless authentication.