> ## Documentation Index
> Fetch the complete documentation index at: https://docs.open-metadata.org/llms.txt
> Use this file to discover all available pages before exploring further.
# Adding Auto Classification Workflow through UI
# Adding Auto Classification Agent through the UI
Follow these steps to configure Auto Classification Agent via the OpenMetadata UI:
## 1. Navigate to the Database Service
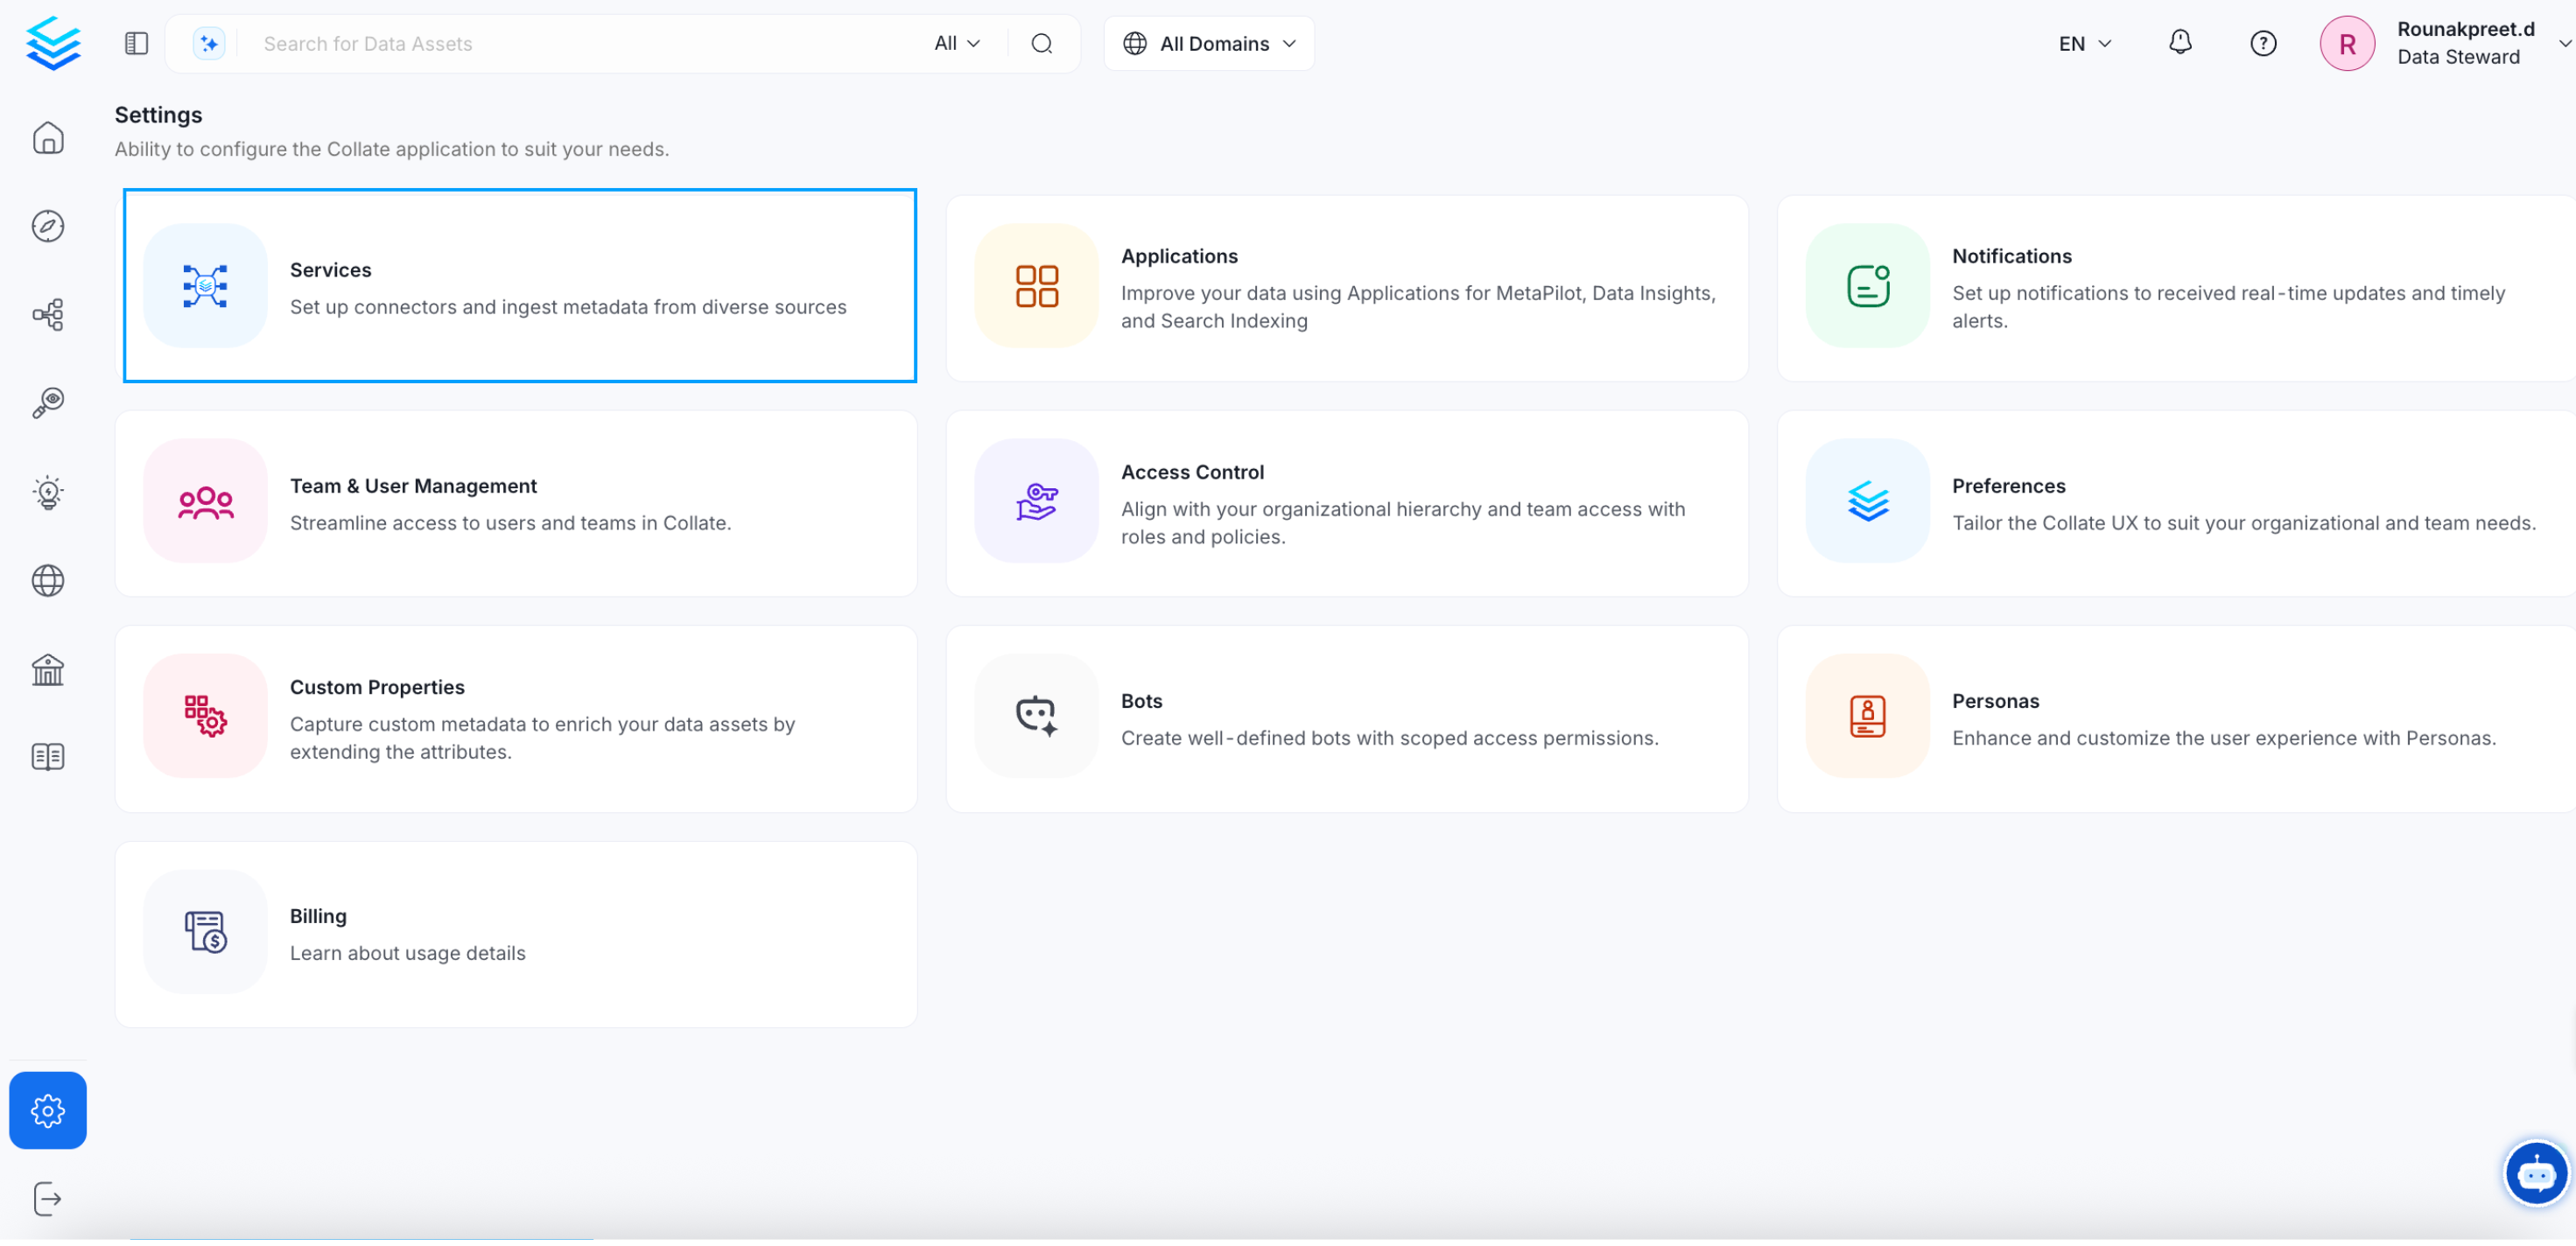
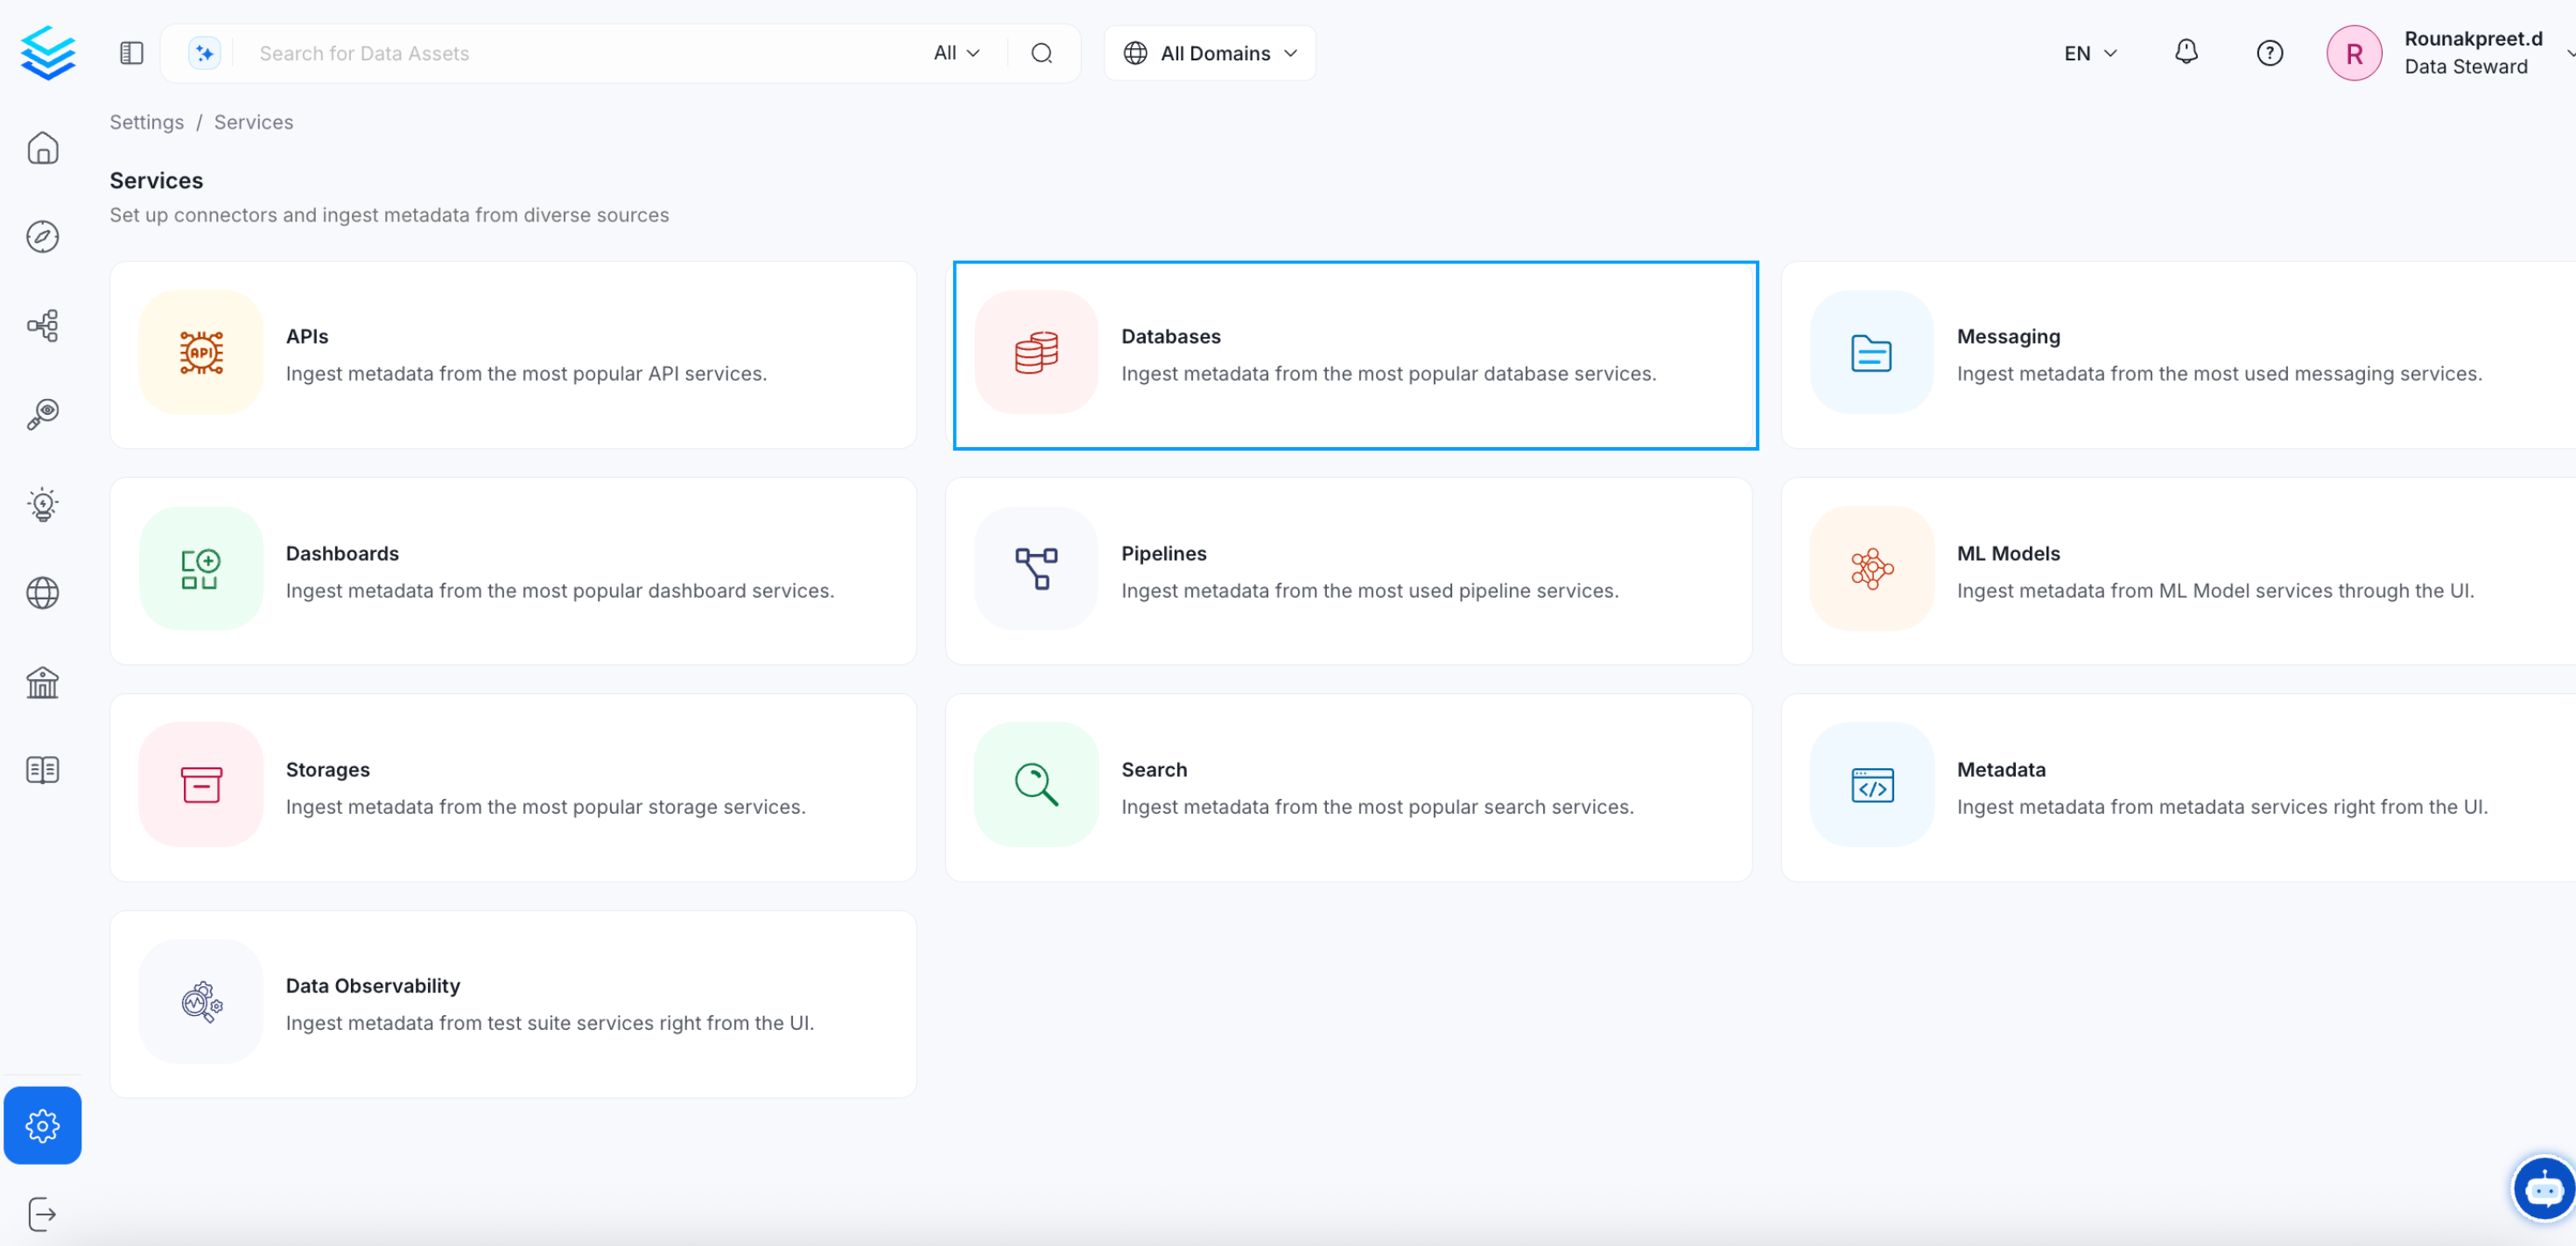
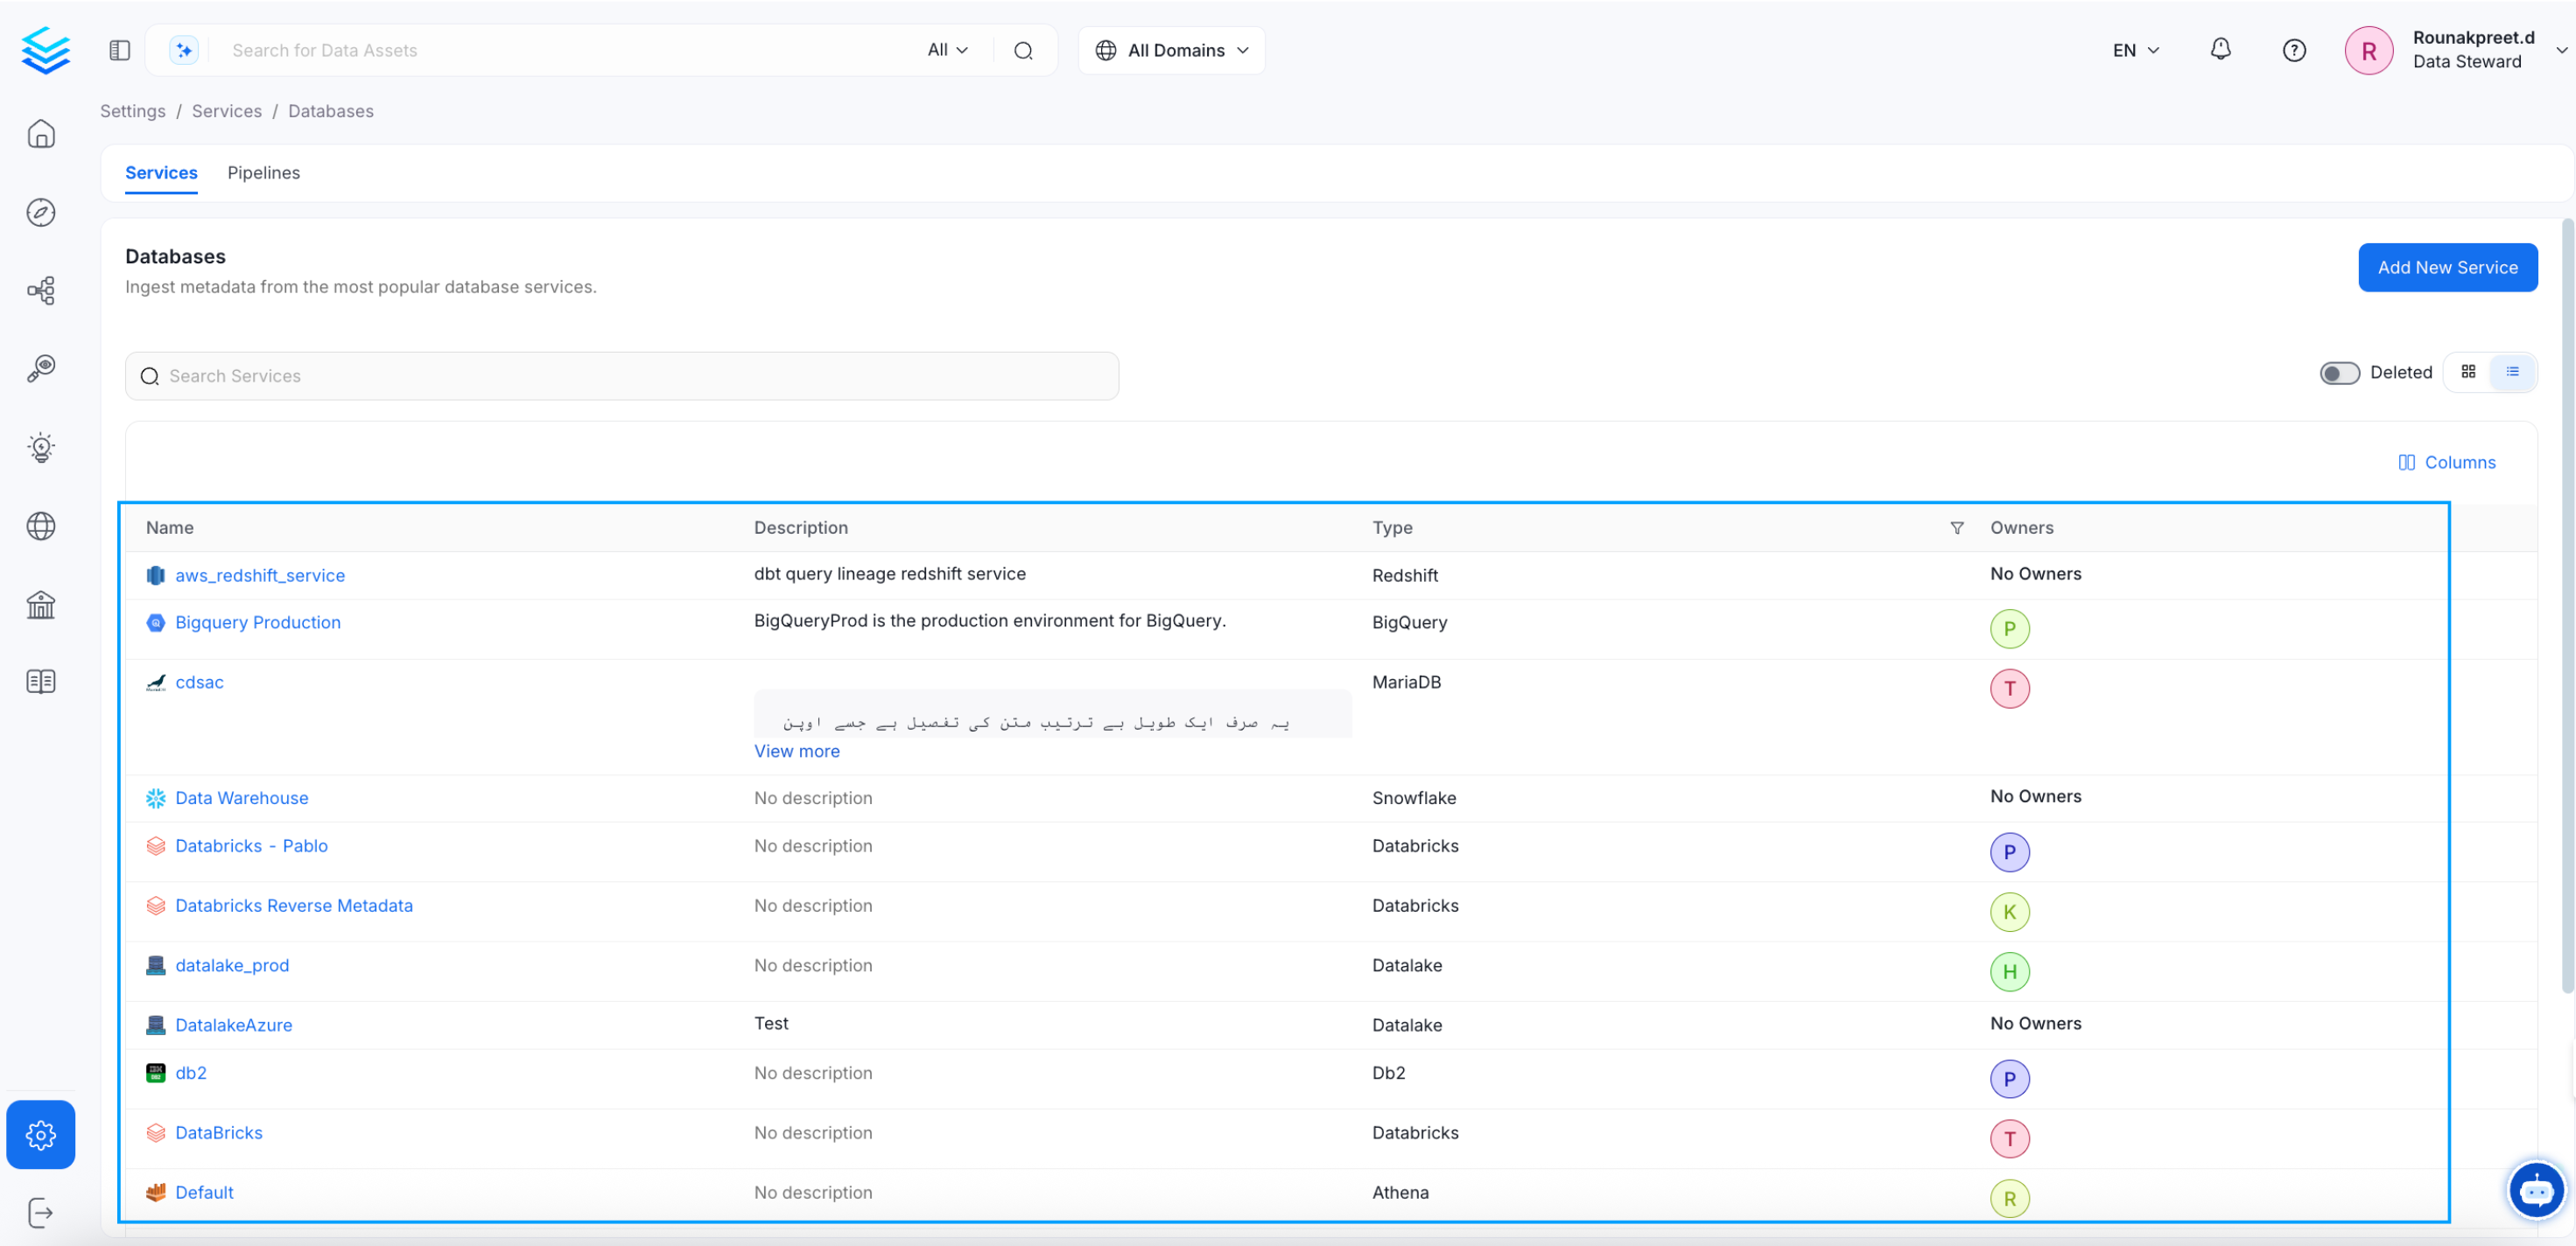
* Go to **Settings > Services > Databases** in the OpenMetadata UI.
* Select the database for which you want to configure Auto Classification Agent.
 ## 2. Access the Agents Tab
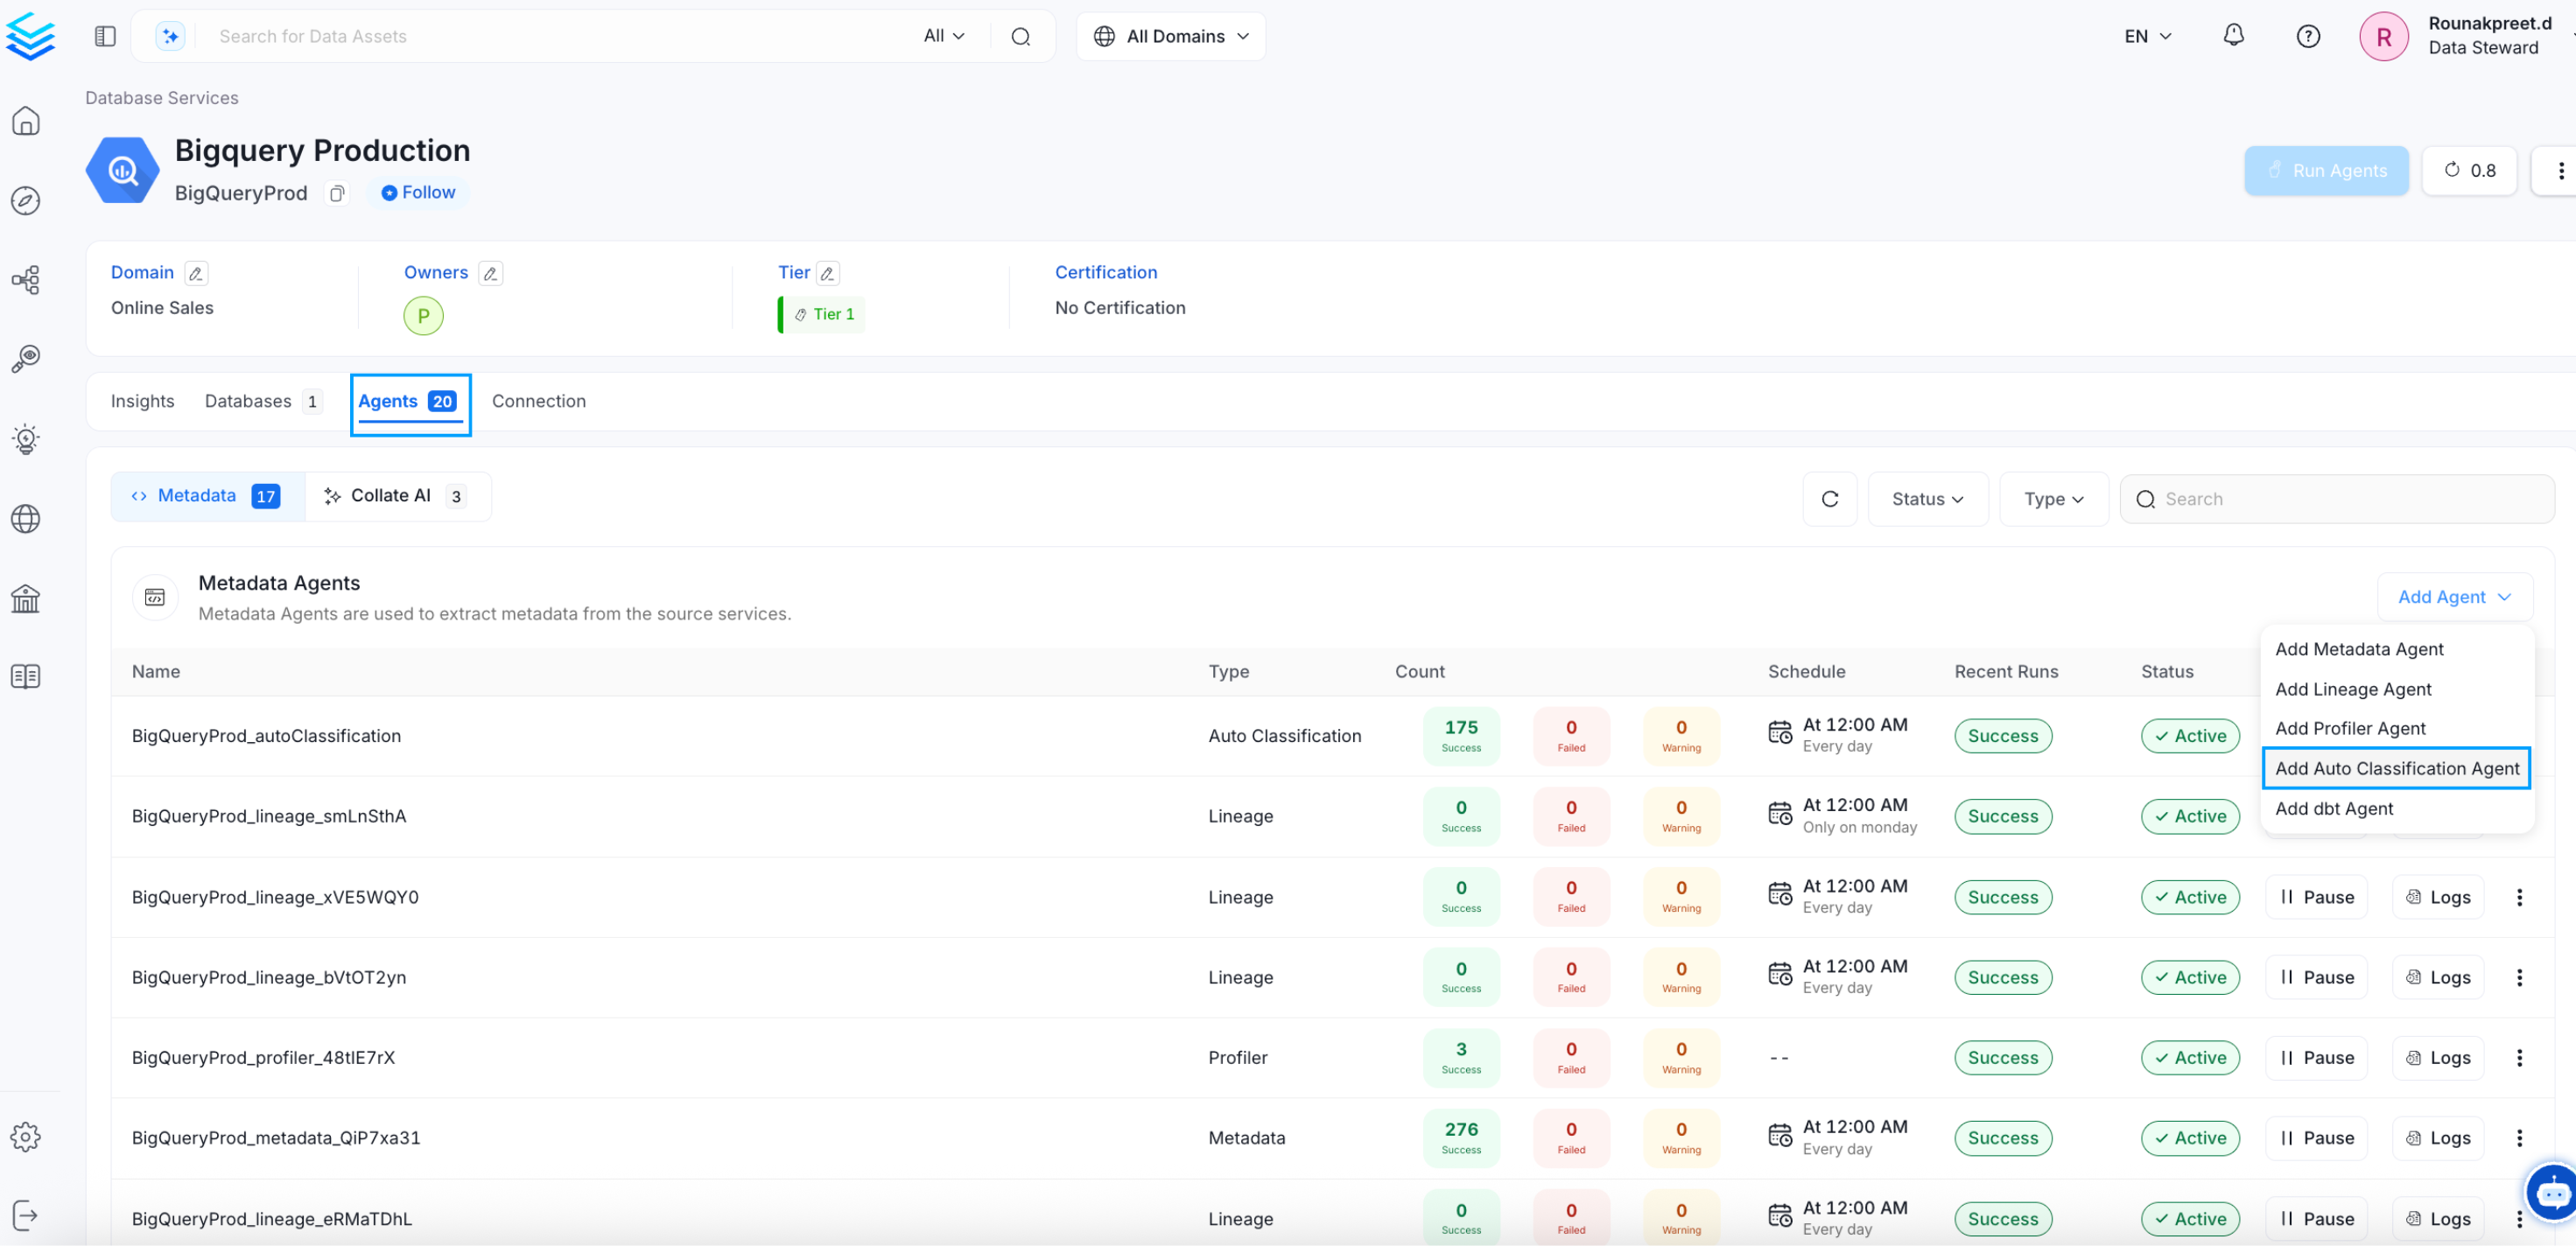
* In the selected database, navigate to the **Agents** tab.
* Click on the option to **Add Auto Classification Agent**, as shown in the example image.
## 2. Access the Agents Tab
* In the selected database, navigate to the **Agents** tab.
* Click on the option to **Add Auto Classification Agent**, as shown in the example image.
 ## 3. Configure Auto Classification Details
* Fill in the details for your Auto Classification Agent workflow.
* Each field's purpose is explained directly in the UI, allowing you to customize the configuration based on your requirements.
## 3. Configure Auto Classification Details
* Fill in the details for your Auto Classification Agent workflow.
* Each field's purpose is explained directly in the UI, allowing you to customize the configuration based on your requirements.
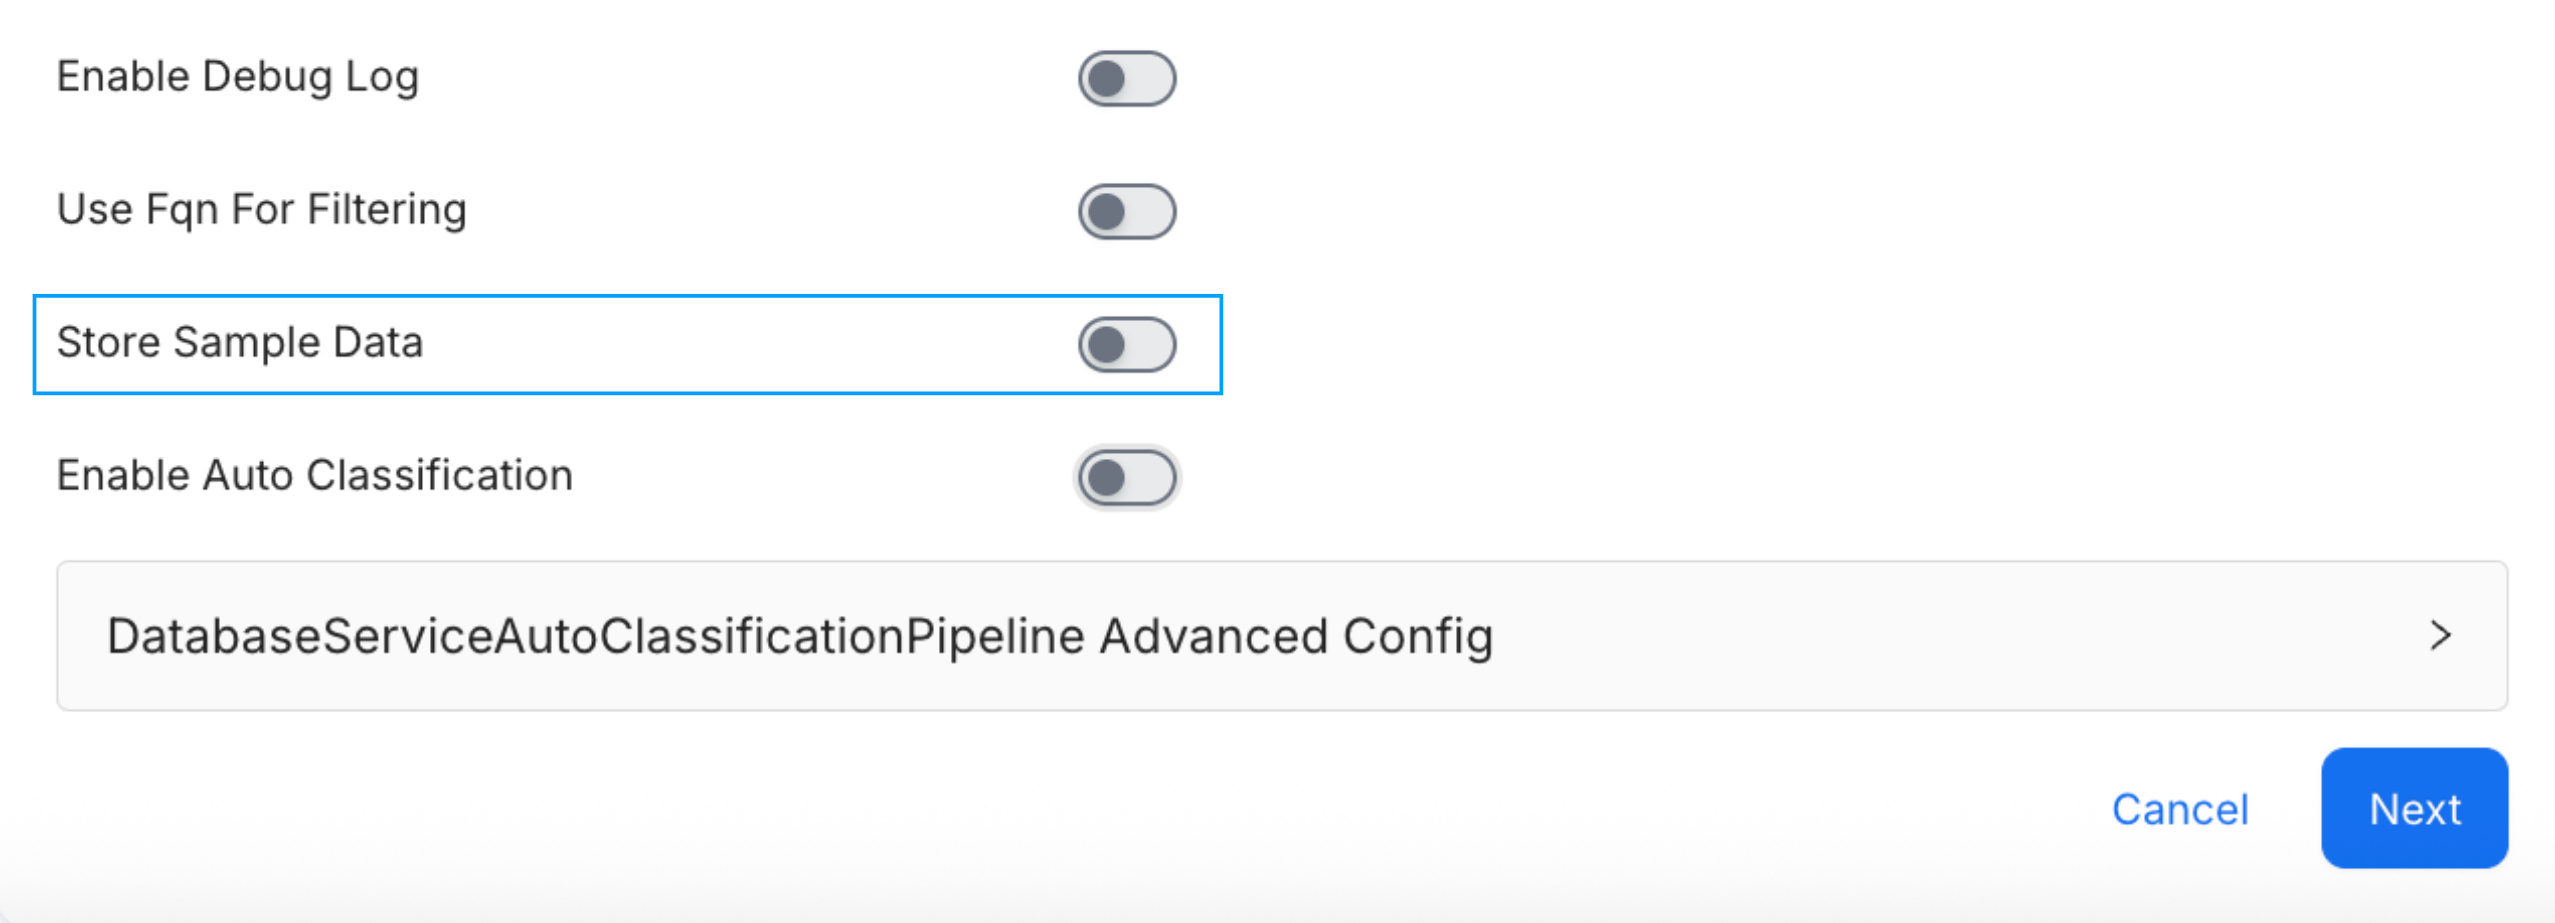
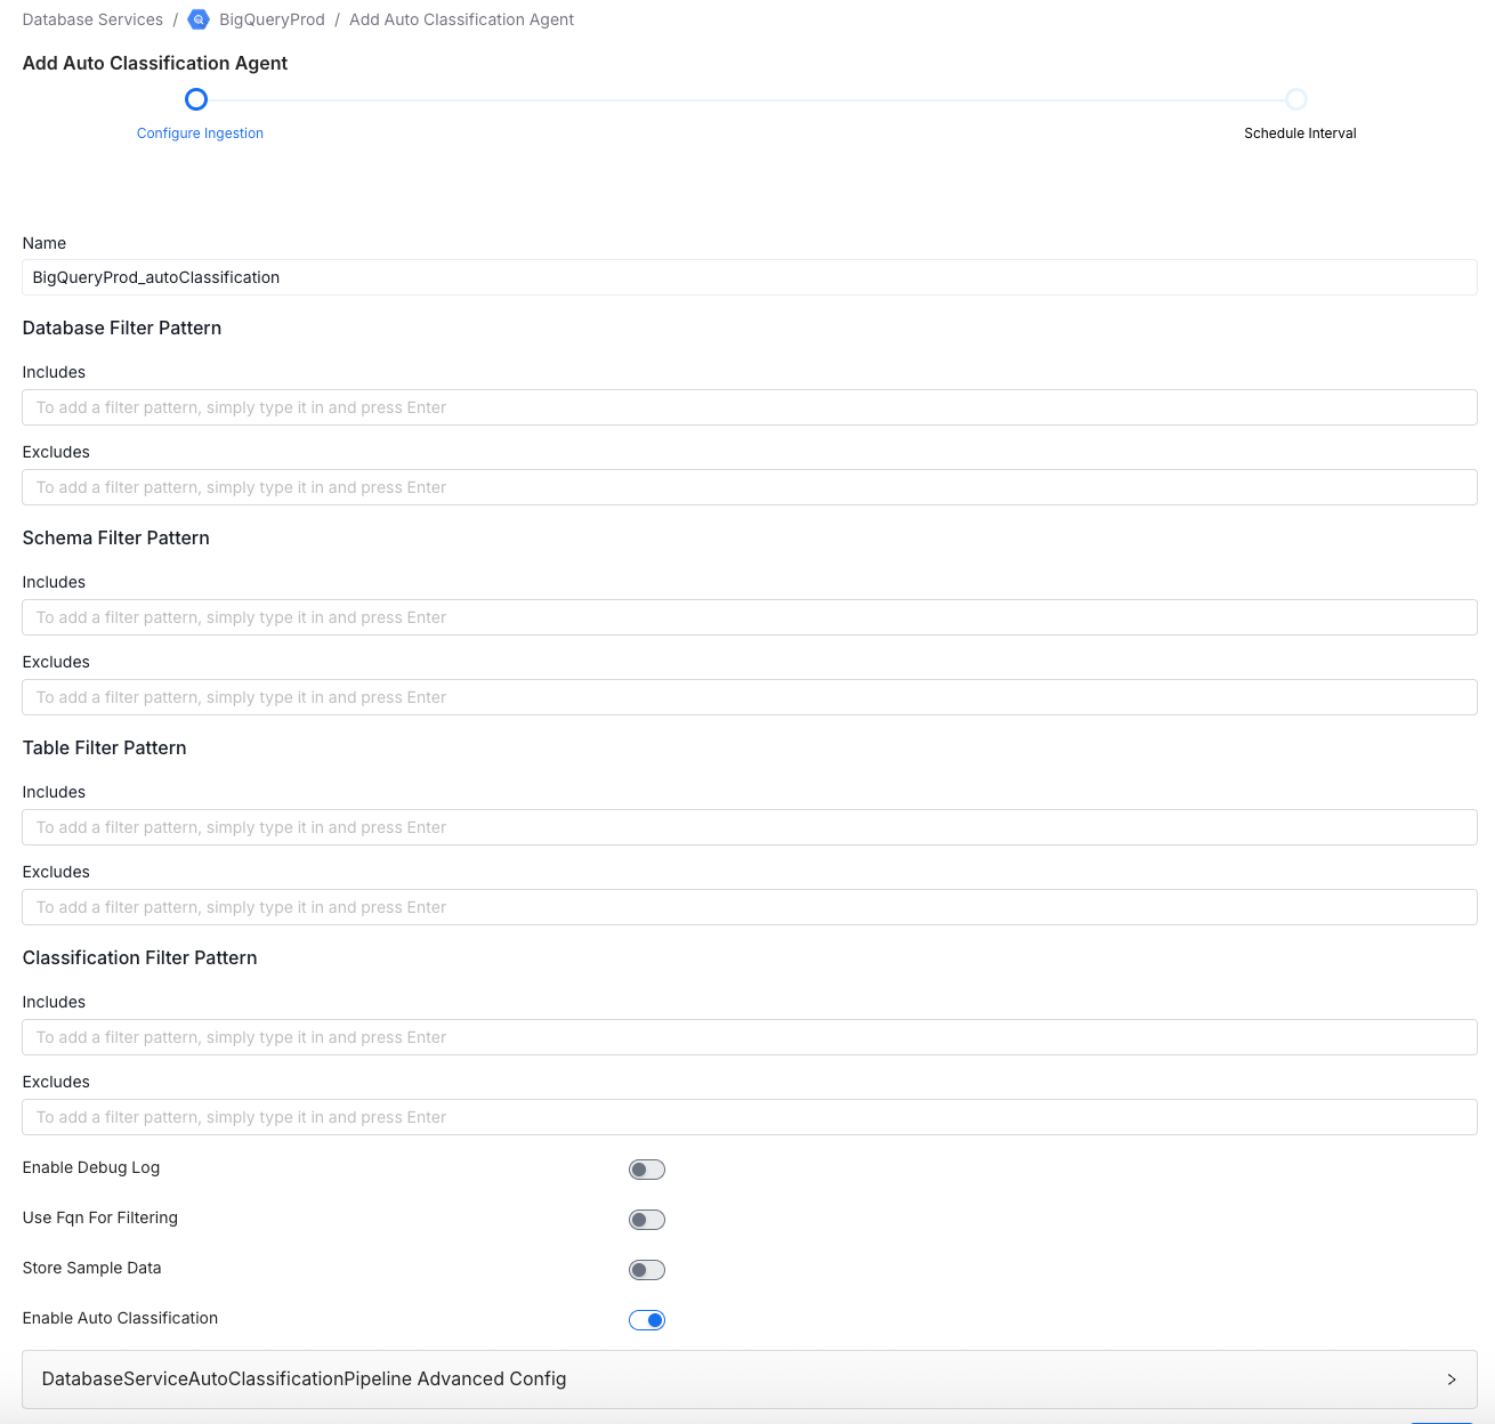 * By default, the store sample data option is enabled. If you prefer not to ingest sample data during a scheduled run, please ensure that this option is disabled in the Agent configuration.
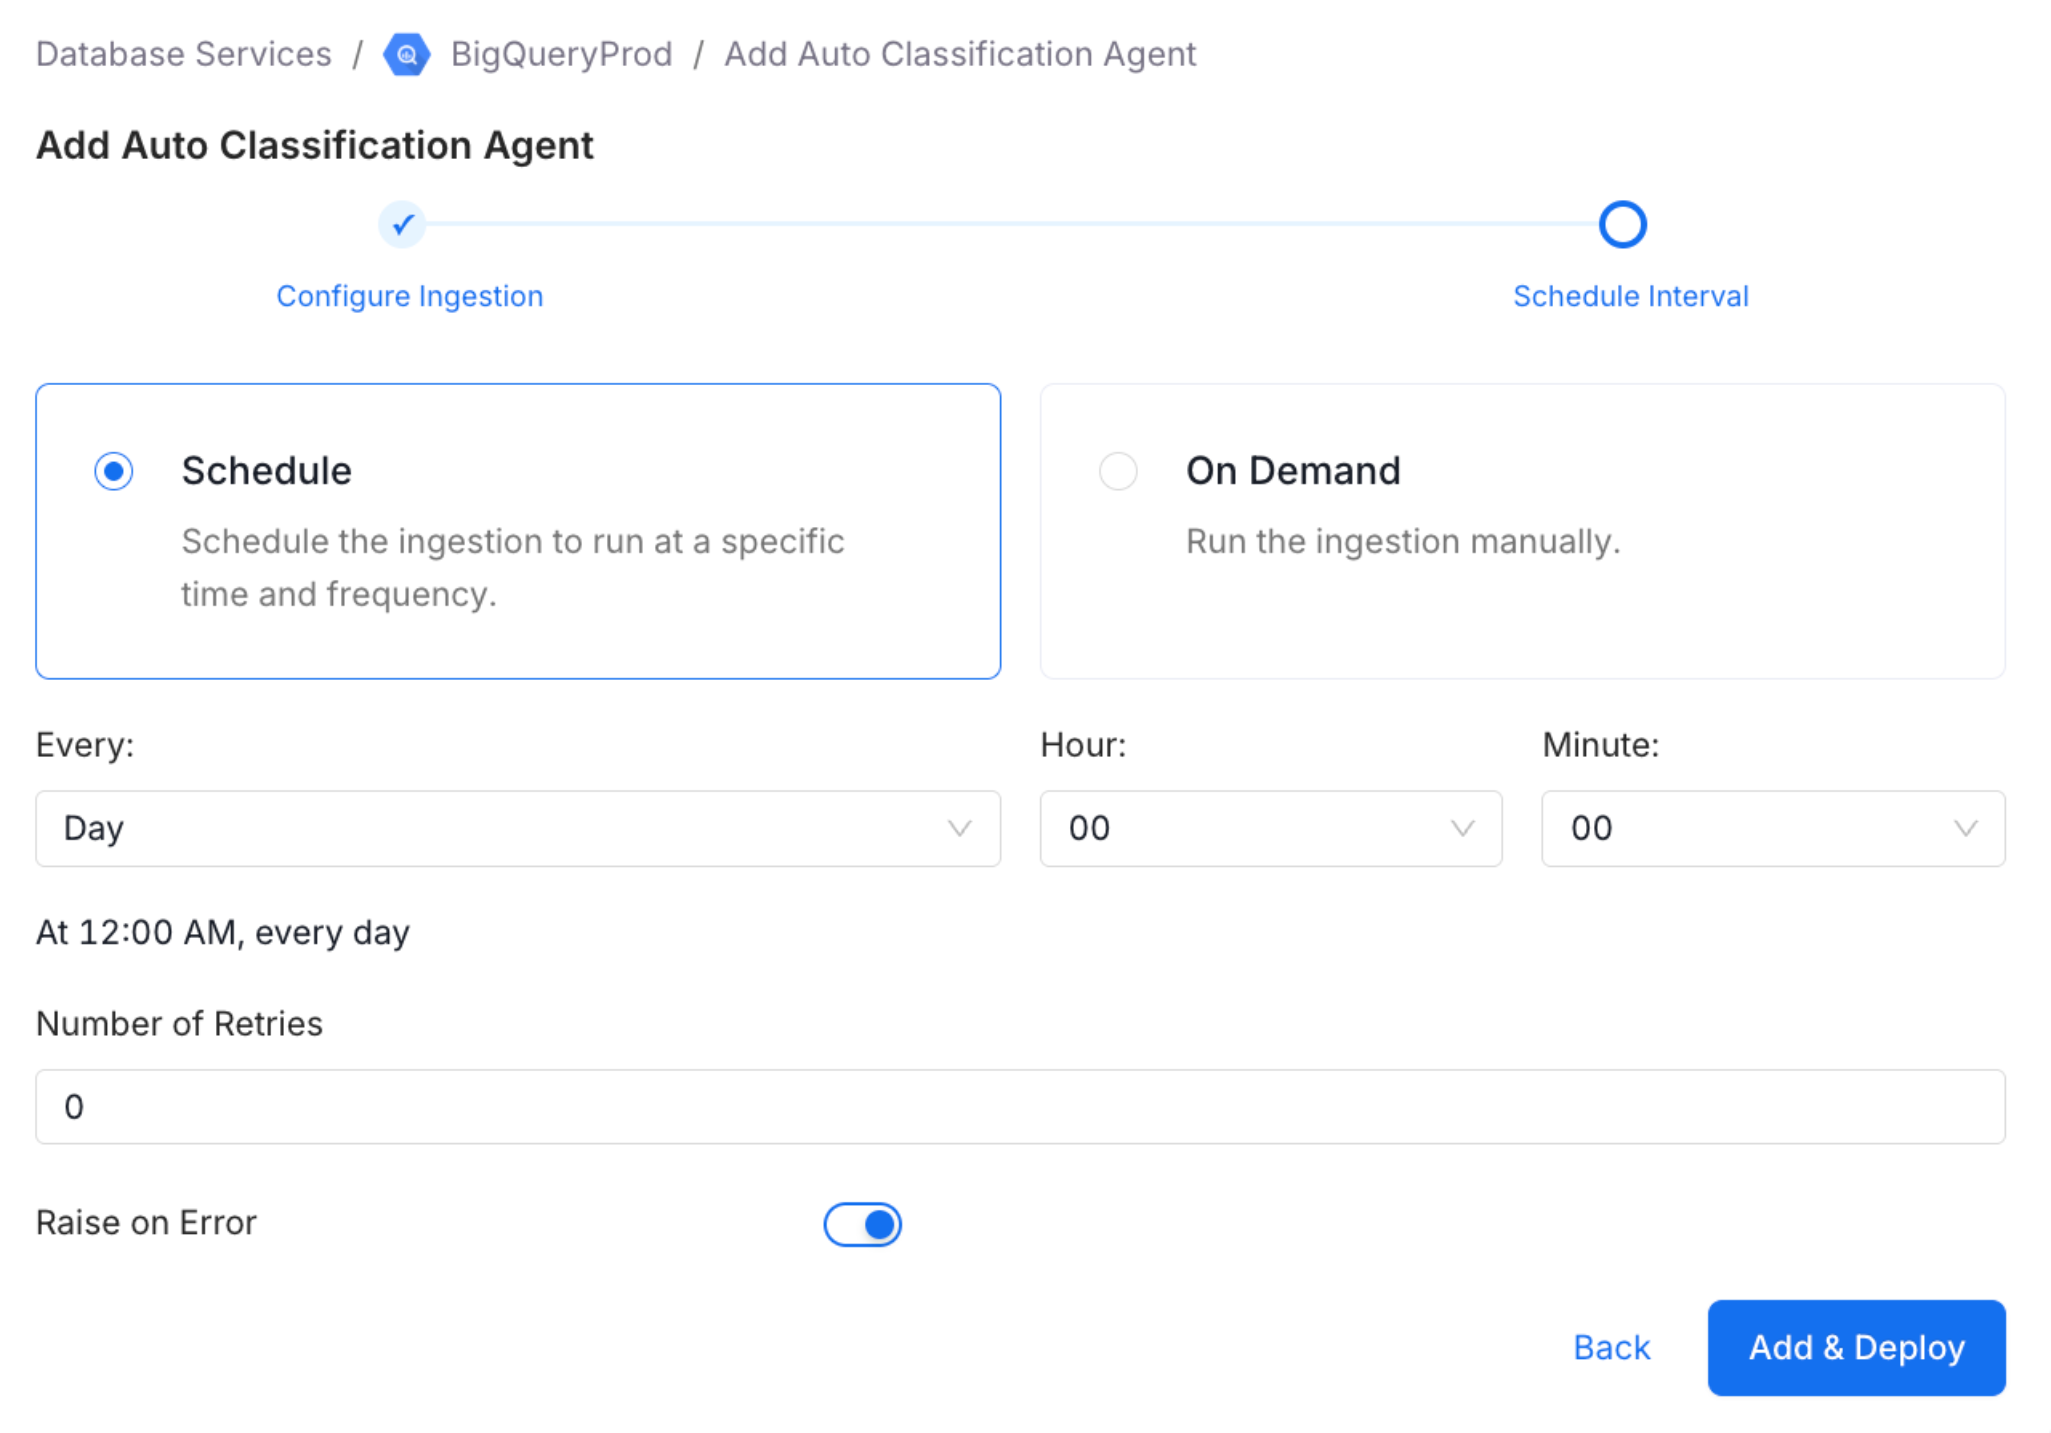
 ## 4. Set the Schedule
* Specify the time interval at which the Auto Classification Agent should run.
## 4. Set the Schedule
* Specify the time interval at which the Auto Classification Agent should run.
 ## 5. Add the Agent Workflow
* Once all details are configured, click **Add Auto Classification Agent** to save and activate the workflow.
## 5. Add the Agent Workflow
* Once all details are configured, click **Add Auto Classification Agent** to save and activate the workflow.
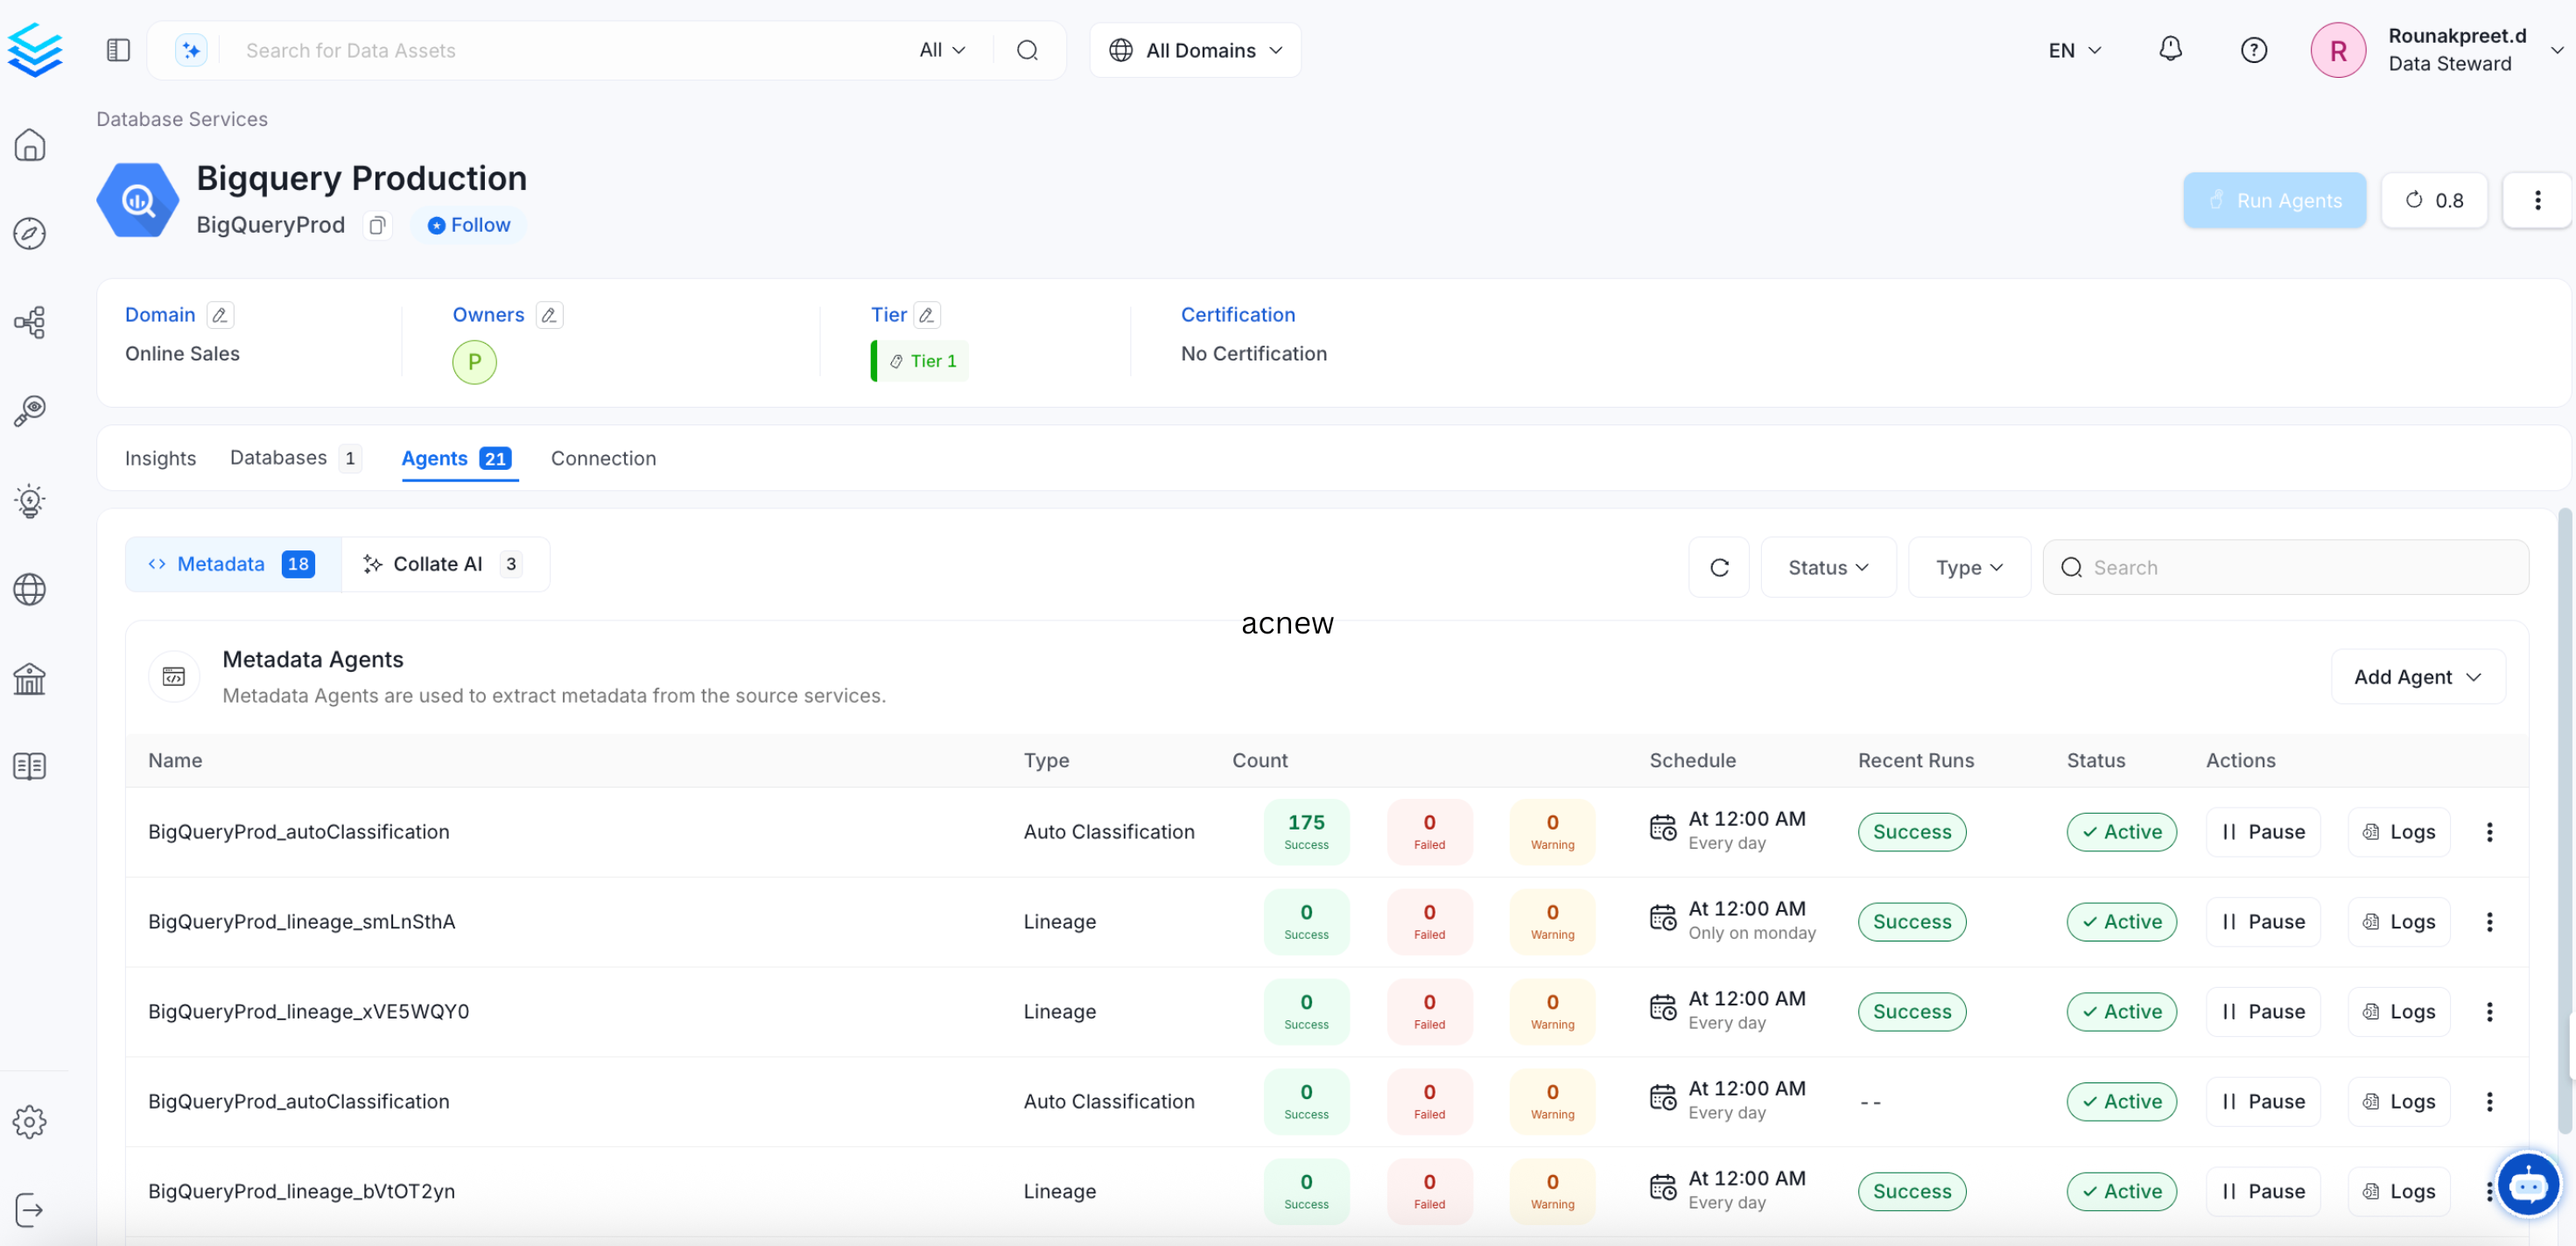 By following these steps, you can set up an Auto Classification Agent workflow to automatically identify and tag sensitive data in your databases.