Set up Data Observability Alerts and Notifications
OpenMetadata has been providing alerts right from the start to notify users of important data lifecycle events: schema modifications, ownership shifts, and tagging updates. Users can define fine-grained alerts and notifications.
Starting from the 1.3 release, Data Observability alerts have been completely revamped, simplifying the process of monitoring data. Users can quickly create alerts for:
- Changes in the Metadata: such as schema changes,
- Data Quality Failures: to filter by Test Suite,
- Pipeline Status Failures: when ingesting runs from your ETL systems, and
- Ingestion Pipeline Monitoring: for OpenMetadata’s ingestion workflows
Depending on your use cases, notifications can be sent to owners, admins, teams, or users, providing a more personalized and informed experience. Teams can configure their dedicated Slack, MS Teams, or Google Chat channels to receive notifications related to their data assets, streamlining communication and collaboration. With the alerts and notifications in OpenMetadata, users can send Announcements over email, Slack, or Teams. Alerts are sent to a user when they are mentioned in a task or an activity feed.
- Create Observability Alerts
- Add Notifications for Change Events
- Additional Details for the Configuration of Destinations
Create Observability Alerts
Step 1
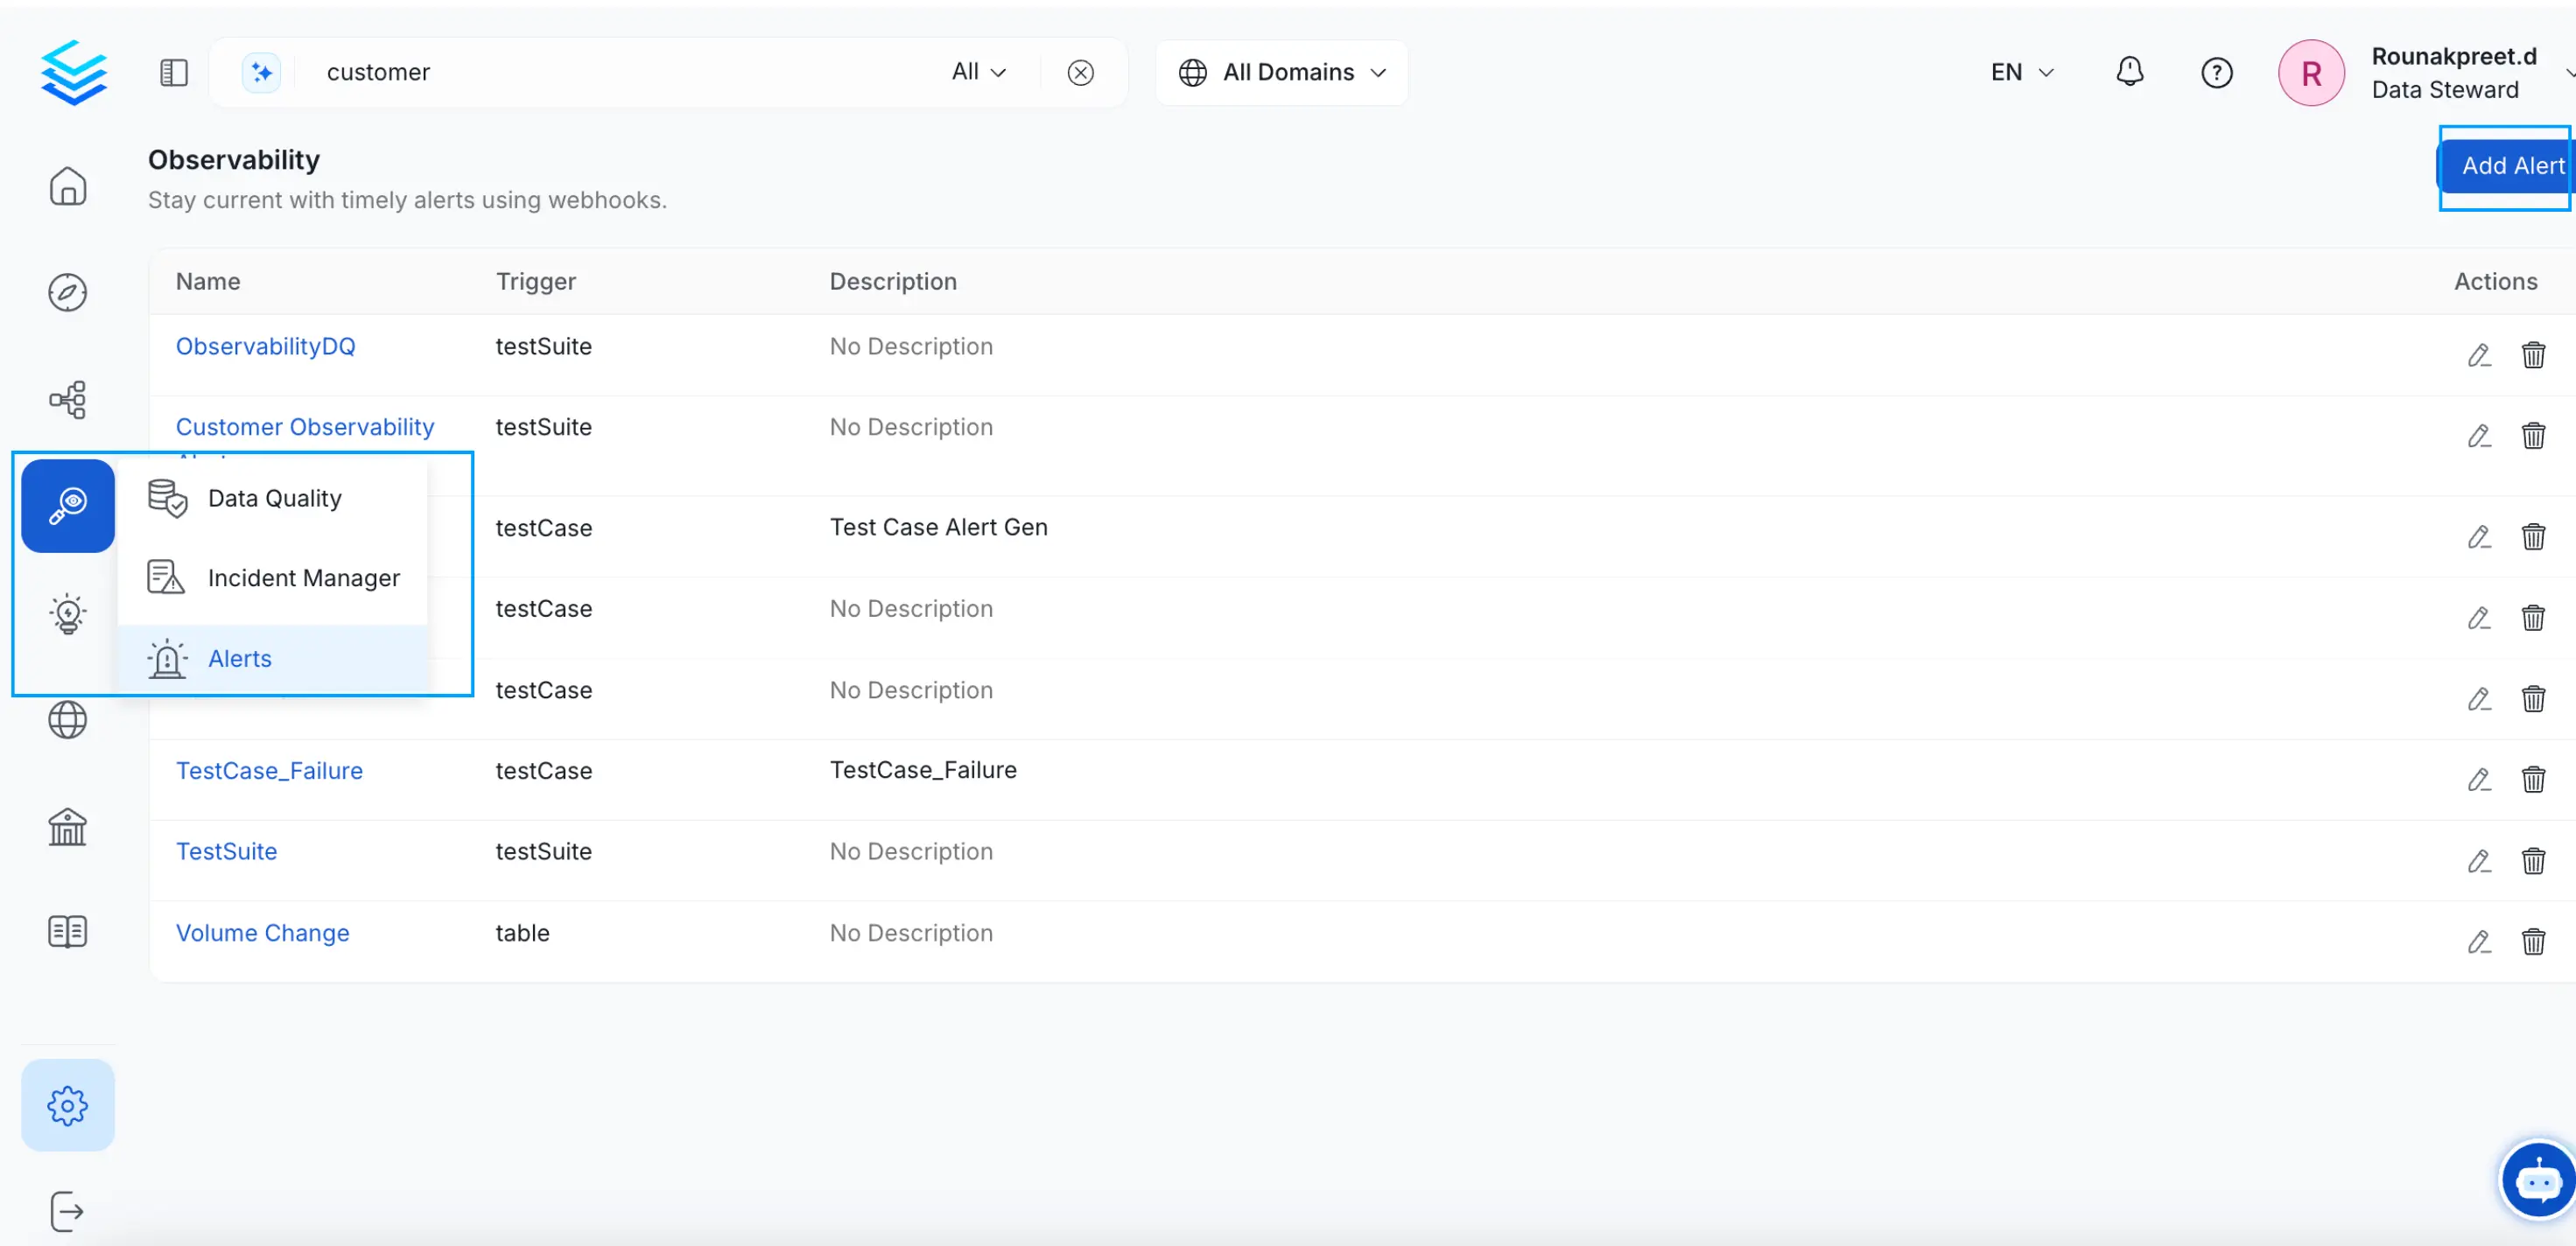
Navigate to Observability > Alerts.
Once on the Observability alerts page, click on button Add Alert in the top right corner.
Create Observability Alerts
Step 2
Configure your alert.
As with most configuration in OpenMetadata you will first need to add a Name and Description for your alert. Once this is completed, we can move on to the configuration. You have 4 steps to configure your alert:
- Source: Specify the data asset for which the alert must be set up. Alerts can be set up for Container, Ingestion Pipeline, Pipeline, Table, Test Case, Test Suite, and Topic.
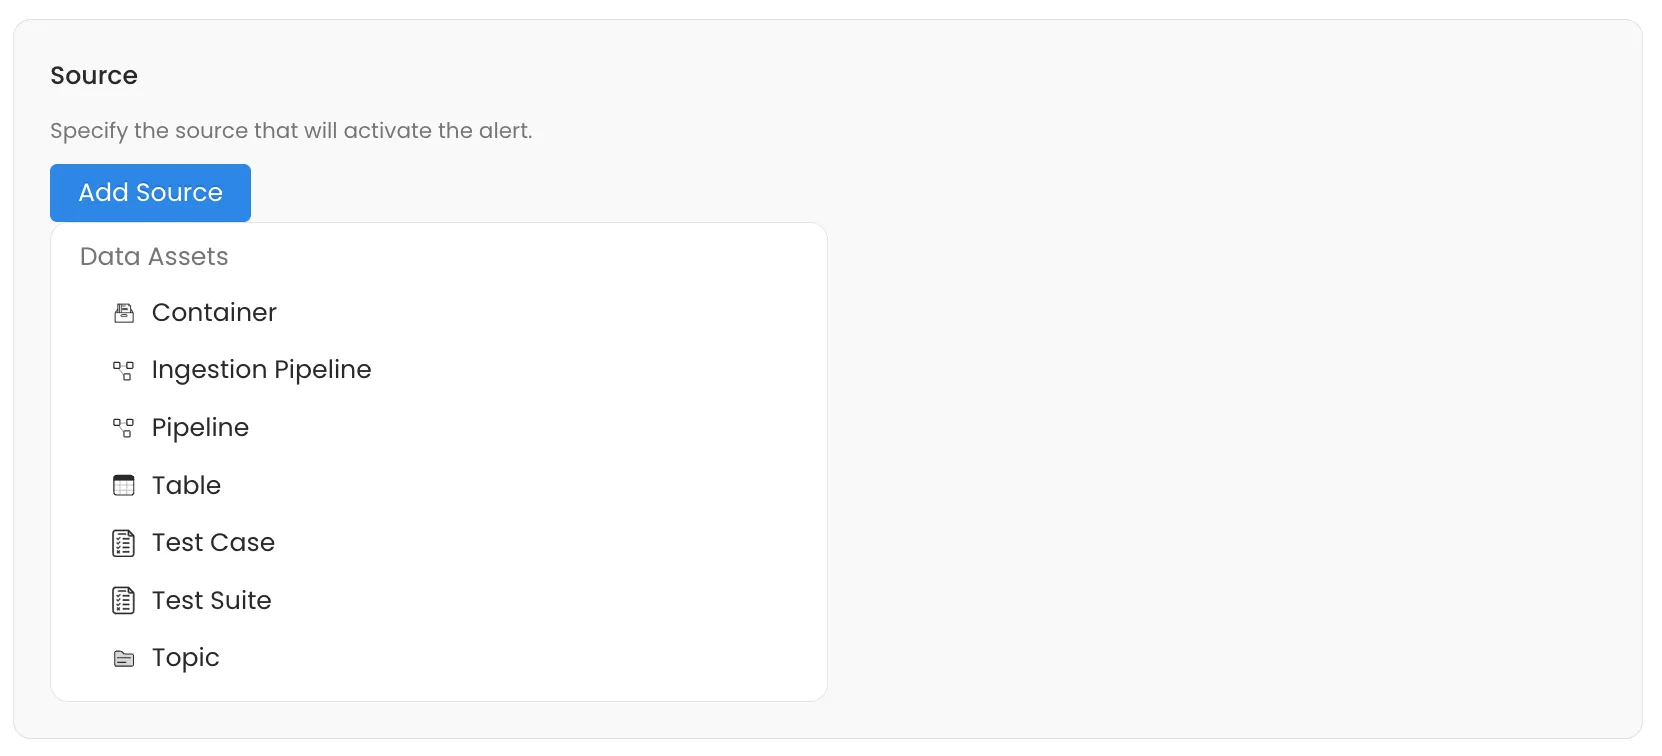
Specify the Data Asset
- Filter: Specify the change events to narrow the scope of your alerts. Filters are based on source selected. For example, if the source is a Table, then you can filter by Table Name, Domain, or Owner Name. Use the toggle button to Include or Exclude the selected filter option. Selecting Include will result in an alert being sent if the condition is met. If the Include toggle is turned off, then the condition will be silenced and an alert will not be sent for the denied event. You can add multiple filters.
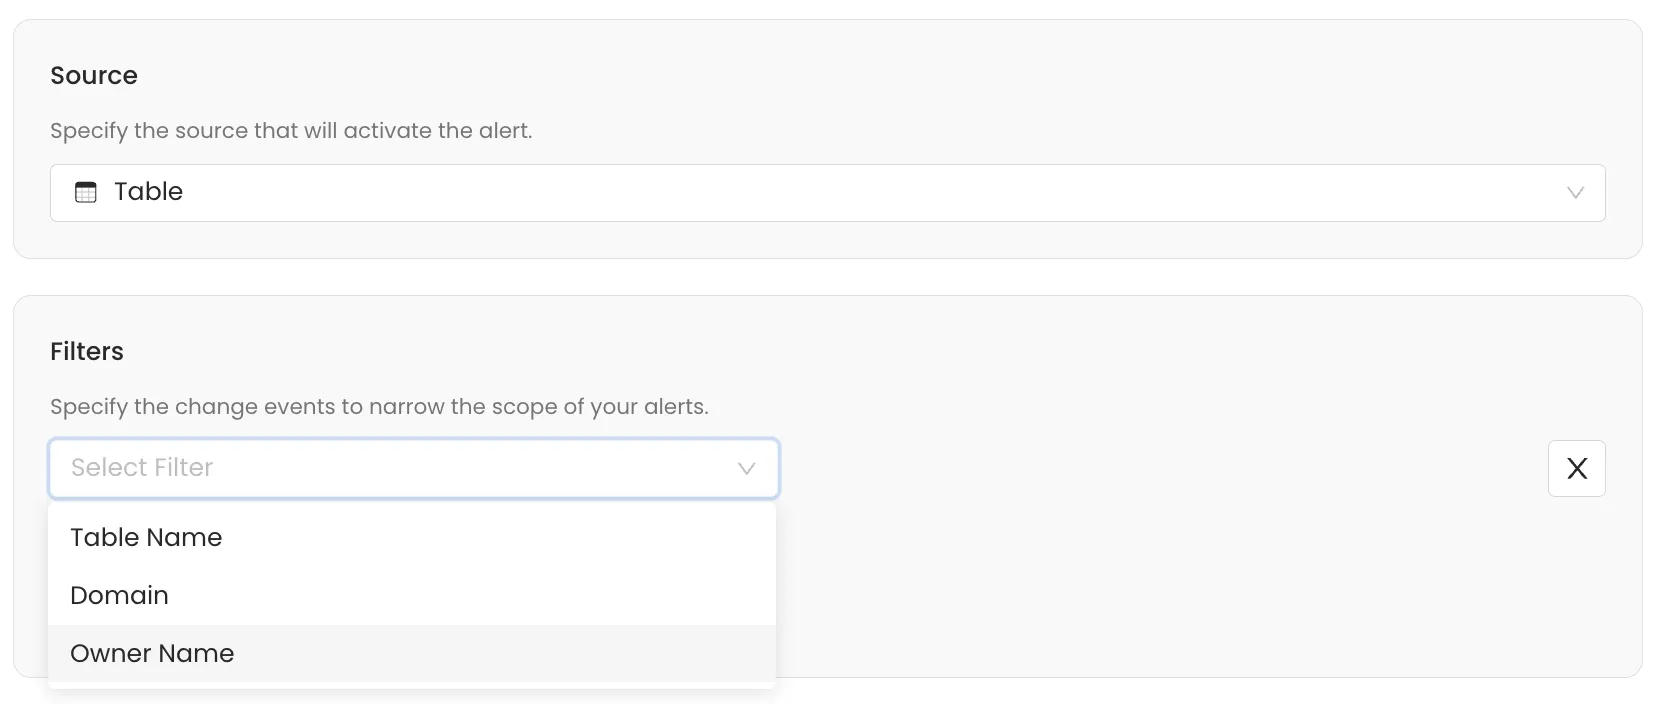
Define the Filter
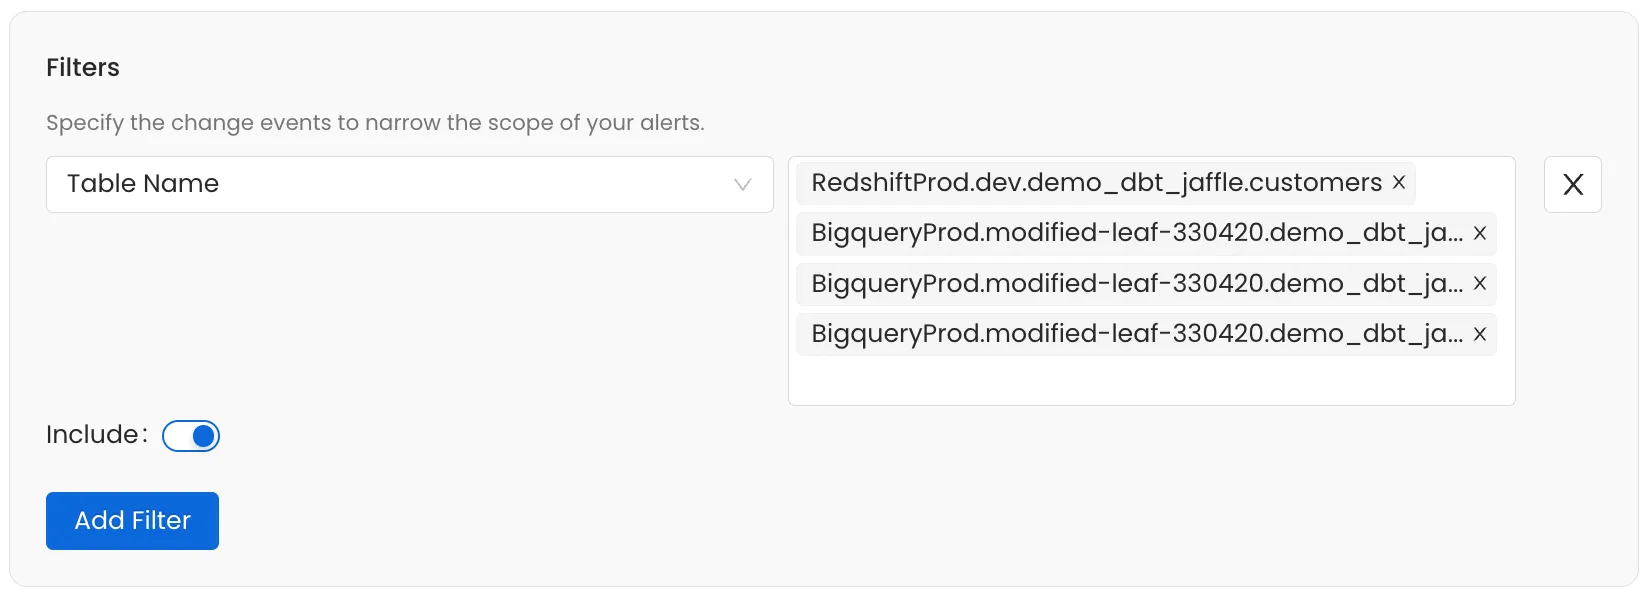
Include/Exclude the Filter
- Trigger: Select important trigger events like 'Schema Change' or 'Test Failure' to generate an alert. Triggers are based on the source selected. For example,
- Schema changes,
- Ingestion pipeline status update (Failed, Partial Success, Queued, Running, Success),
- Pipeline status update (Failed, Pending, Skipped, Successful),
- Table metrics update,
- Test case status updates (Aborted, Failed, Queued, Success)
- Test case status belonging to a test suite (Aborted, Failed, Queued, Success)
Multiple triggers can be added.
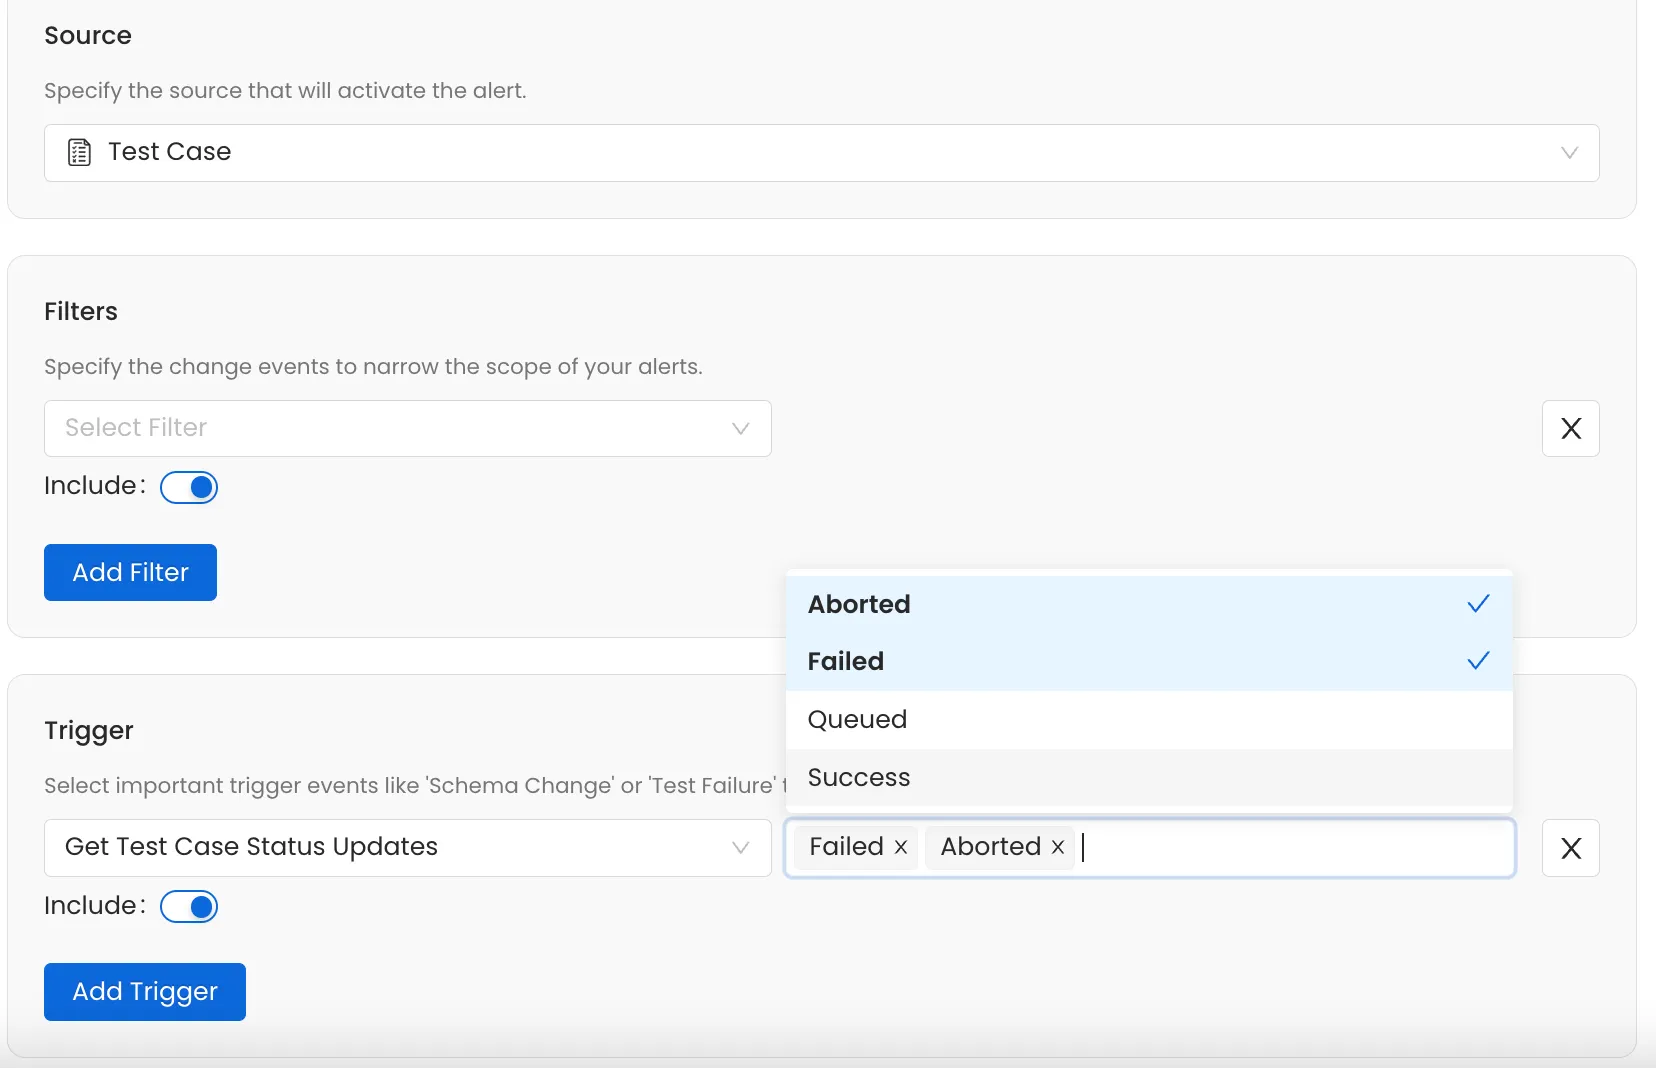
Select Important Trigger Events
- Destination: Specify the destination for the alerts. OpenMetadata supports sending alerts to the users within OpenMetadata, i.e., Internal such as Admins, Followers, Owners, Teams and Users.
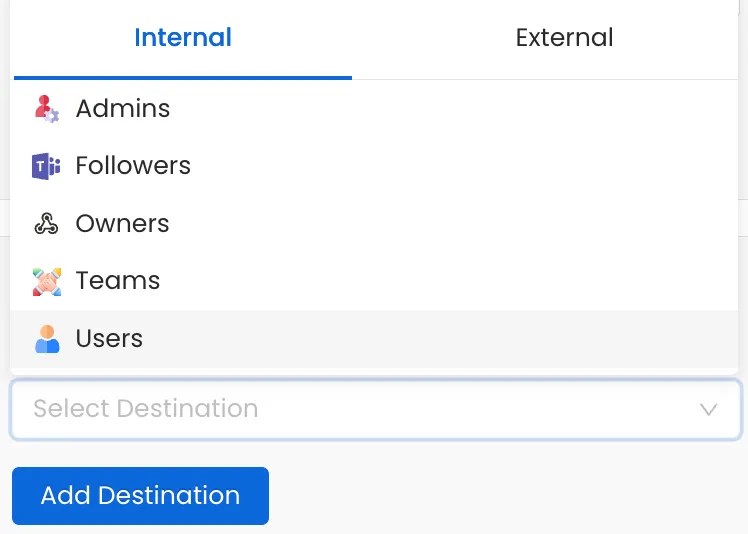
Send Alerts to the Users and Teams within OpenMetadata
Alerts can be sent to External sources like Email, G Chat, Generic Webhooks, MS Teams, and Slack. Add the endpoint URL for the destinations. Alerts can be sent to multiple destinations.
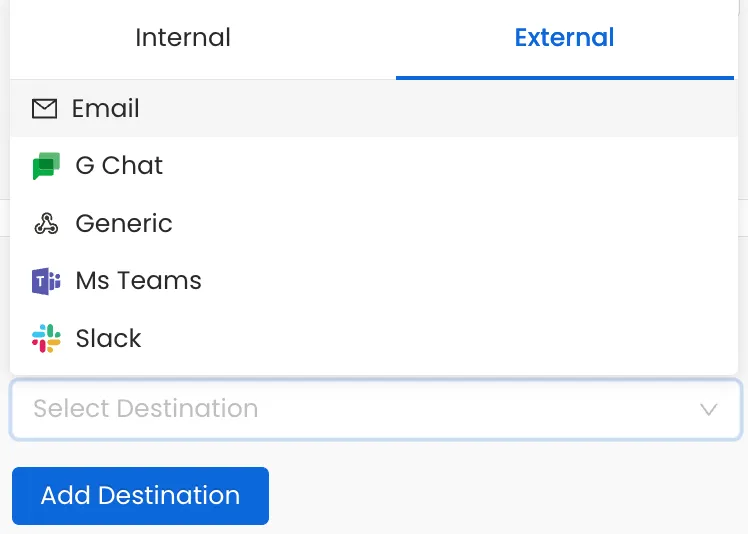
Send Alerts to Email, Slack, Teams, G Chat, & Webhooks
Add Notifications for Change Events
In addition to setting up observability alerts, you can also set up notifications to get timely alerts on various change events.
Step 1
Navigate to Settings > Notifications. Once on the Notifications page, click on button Add Alert in the top right corner.
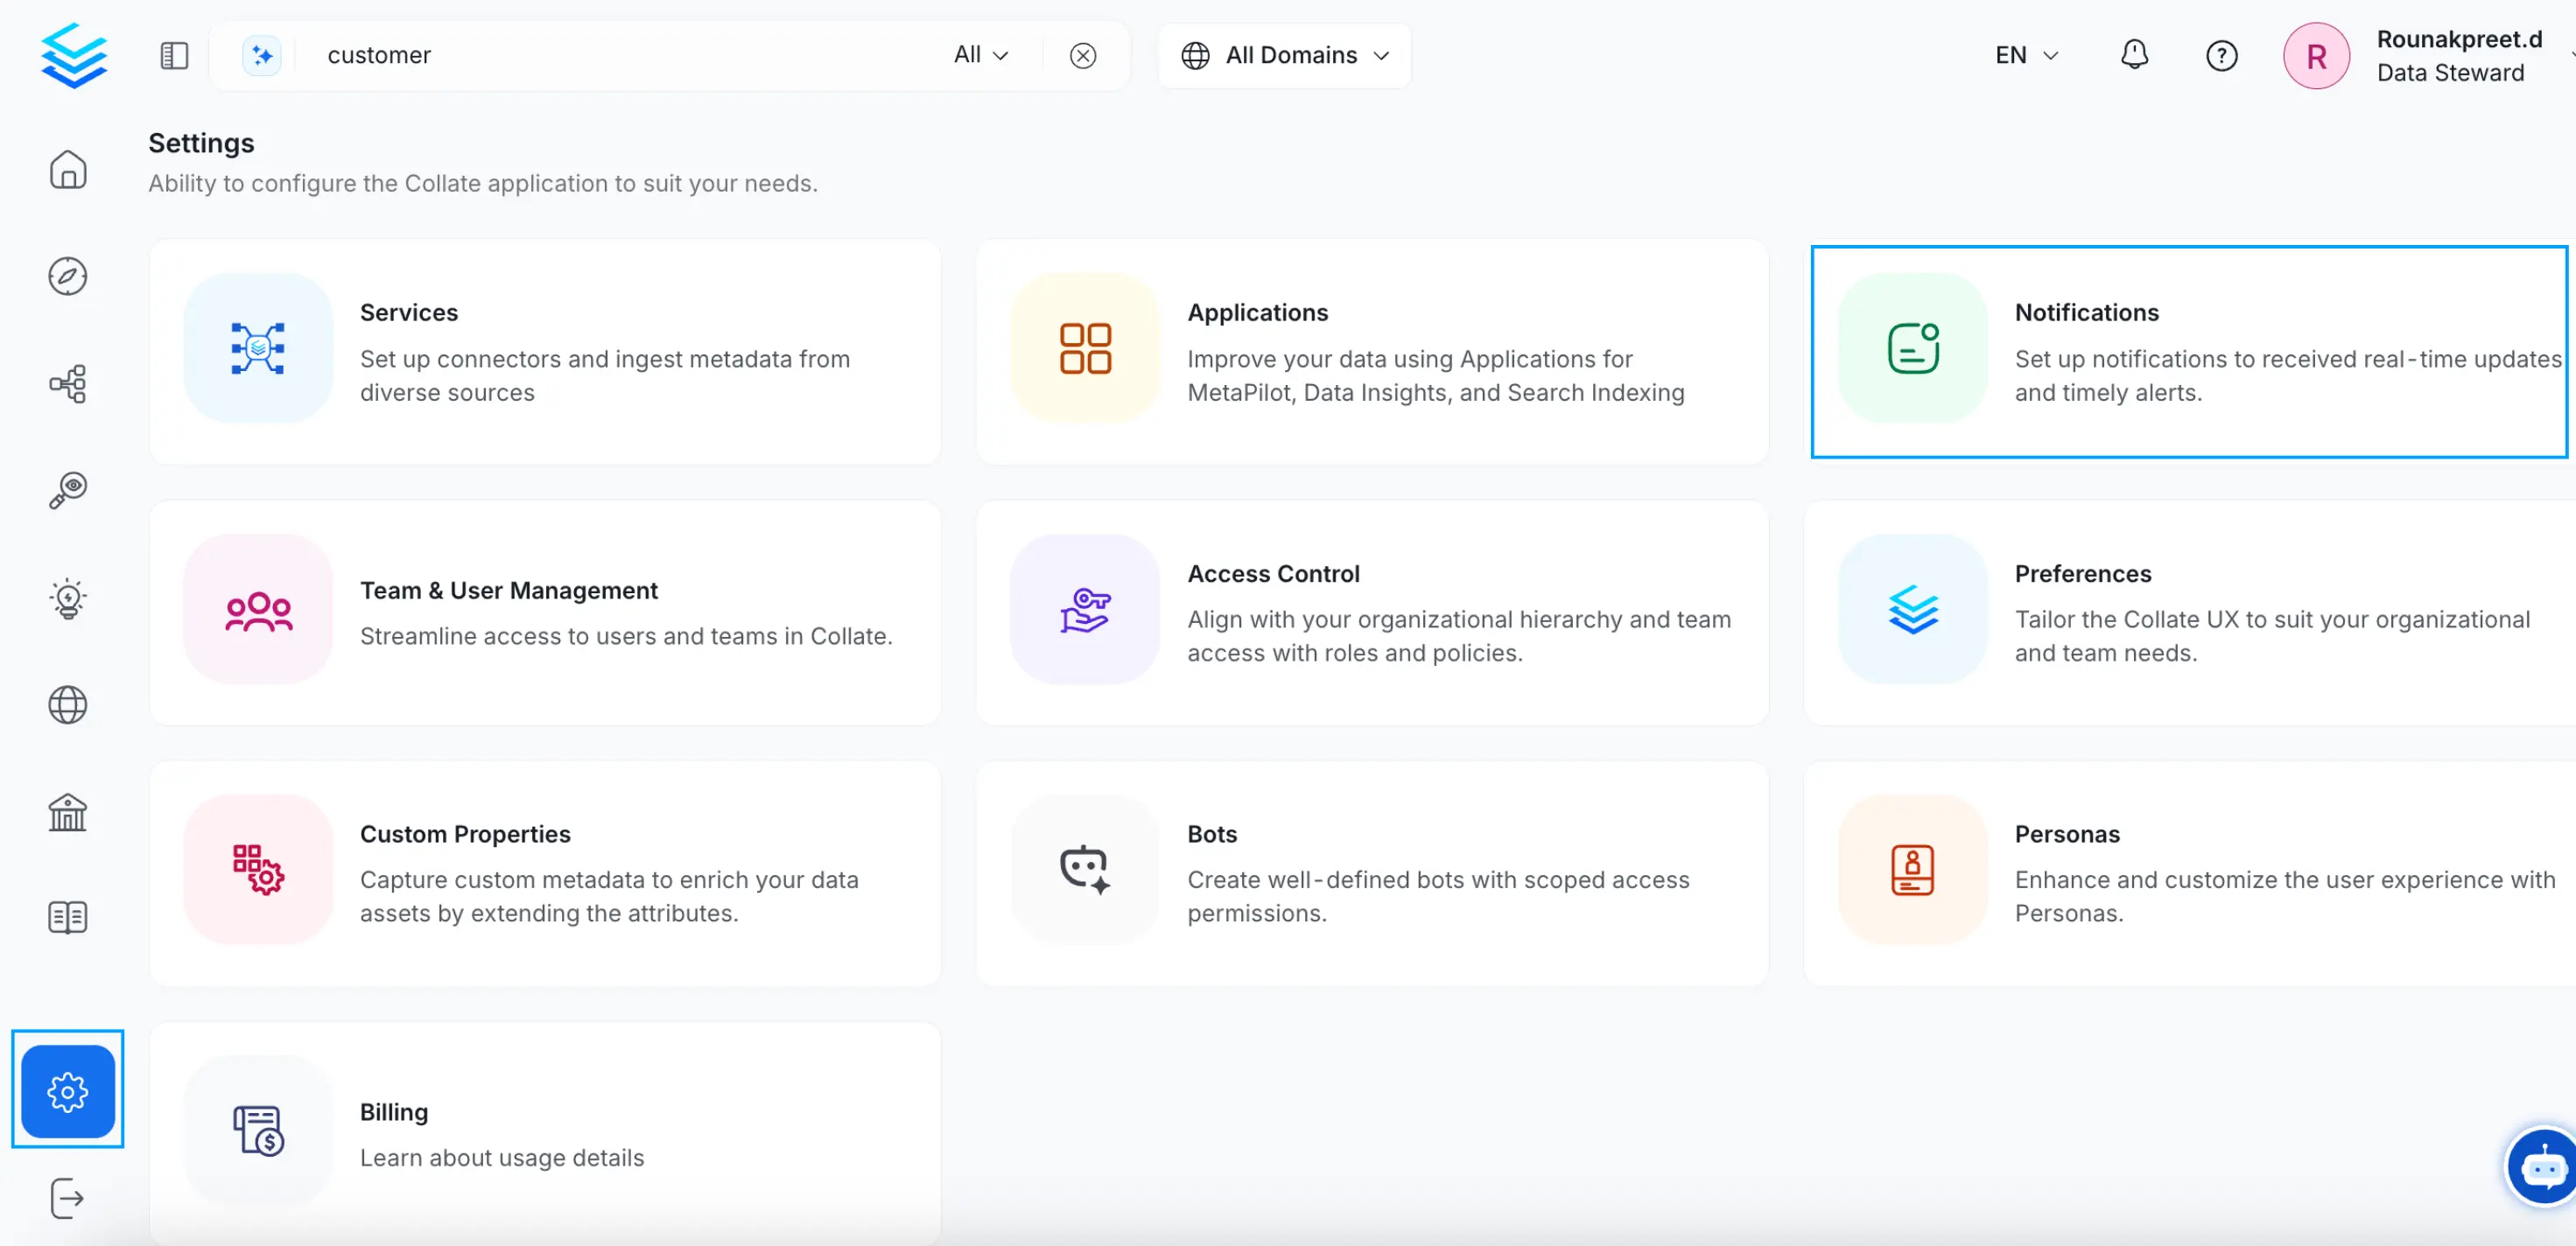
Add Notifications for Change Events
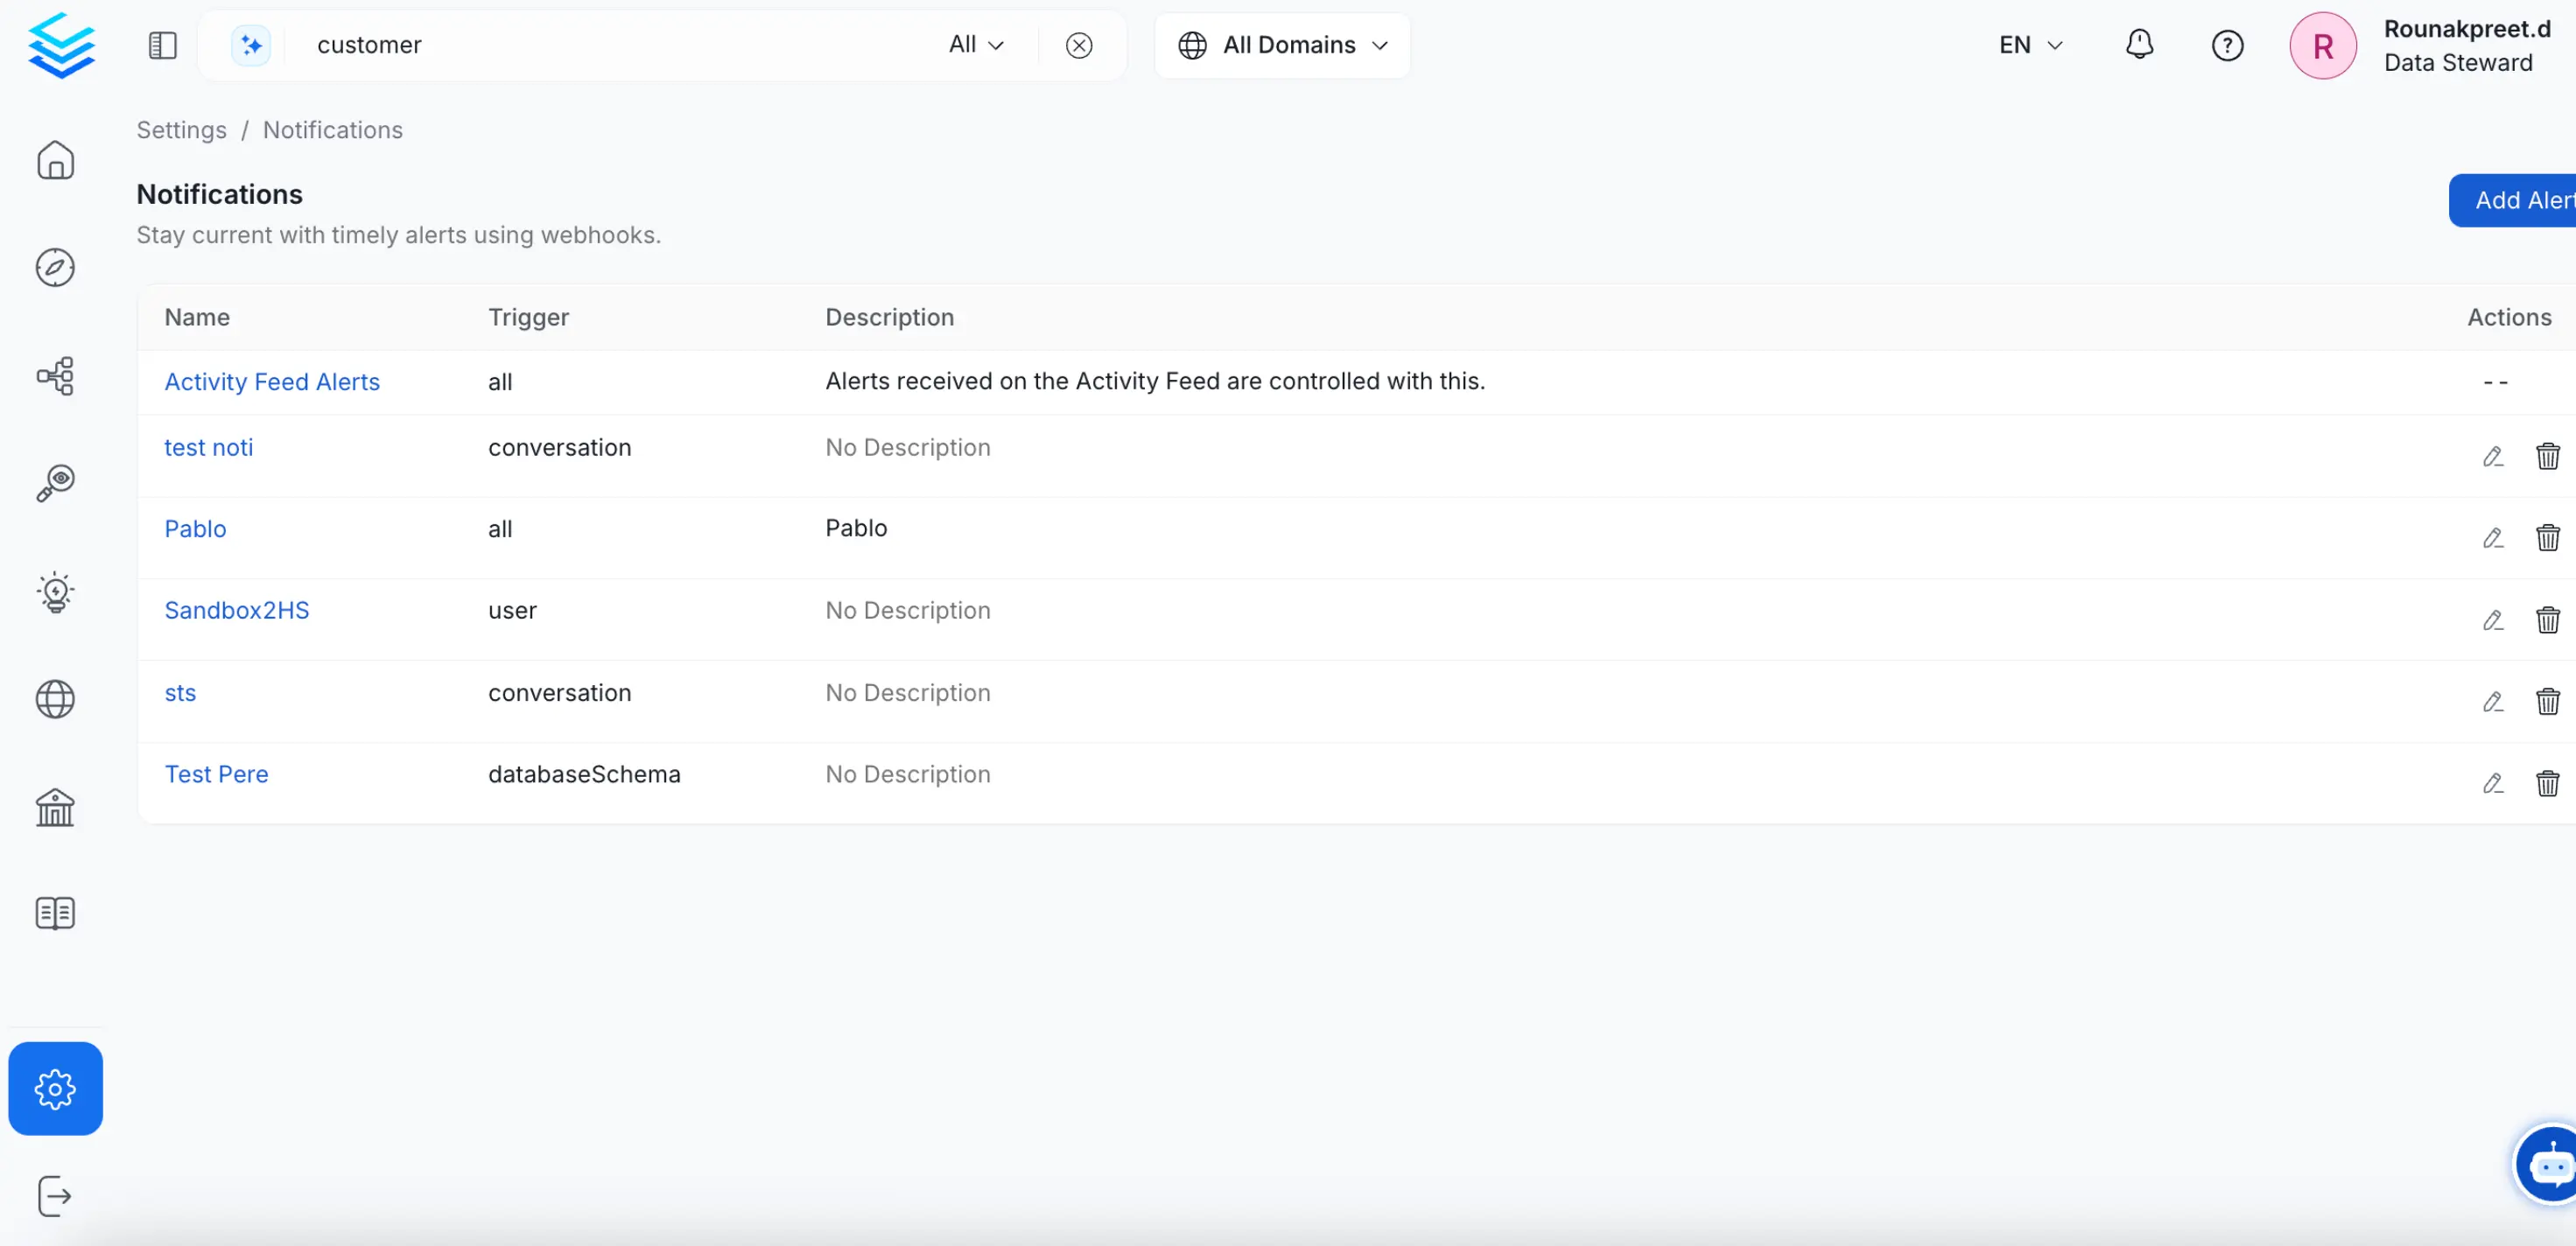
Add an Alert
Step 2
Configure your notifications.
Add a Name and Description for your notification. Configure the notification by adding the details for the below 3 steps:
- Source: Specify the data asset for which the notification must be set up. Notifications can be set up for Announcements, Chart, Conversation, Dashboard, Dashboard Data Model, Dashboard Service, Database, Database Schema, Database Service, Glossary, Glossary Term, Ingestion Pipeline, Location, Messaging Service, Metadata Service, ML Model, ML Model Service, Pipeline, Pipeline Service, Storage Service, Table, Tag, Tag Category, Task, Topic, or for all the data assets.
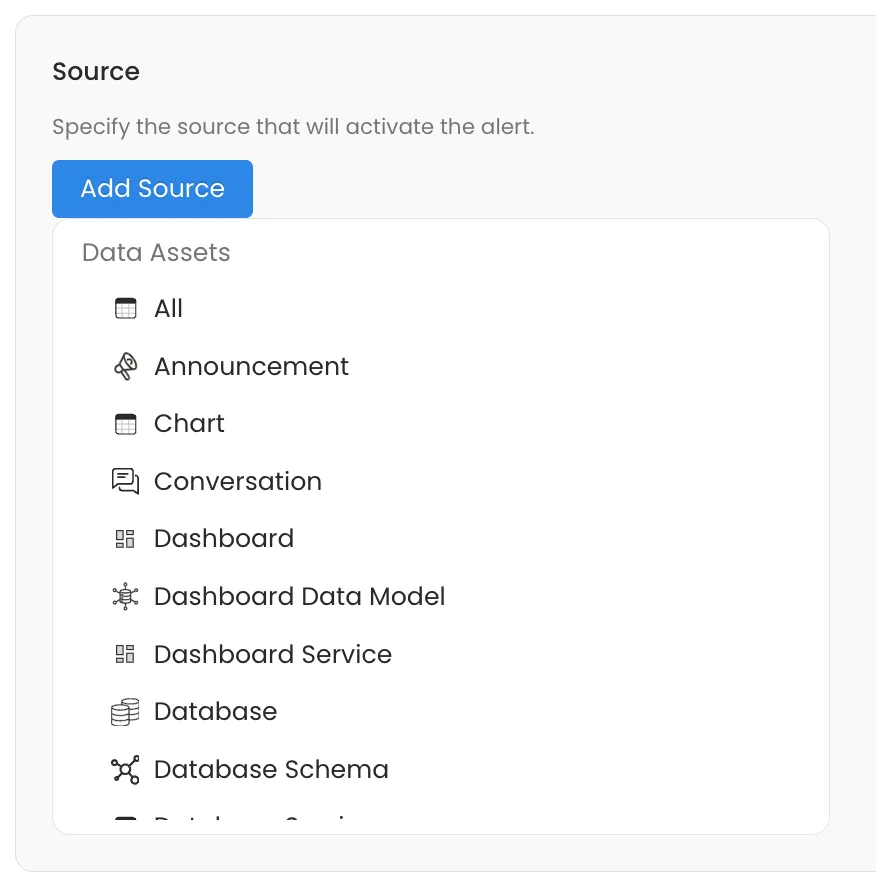
Specify the Data Asset
- Filter: Specify the change events to narrow the scope of your alerts. Filters are based on source selected. For example, Owner, Entity FQN, Event Type, Updater Name, Domain, General Metadata Events, or Mentioned Users.
Use the toggle button to Include or Exclude the selected filter option. Selecting Include will result in a notification being sent if the condition is met. If the Include toggle is turned off, then the condition will be silenced and a notification will not be sent for the denied event. You can add multiple filters.
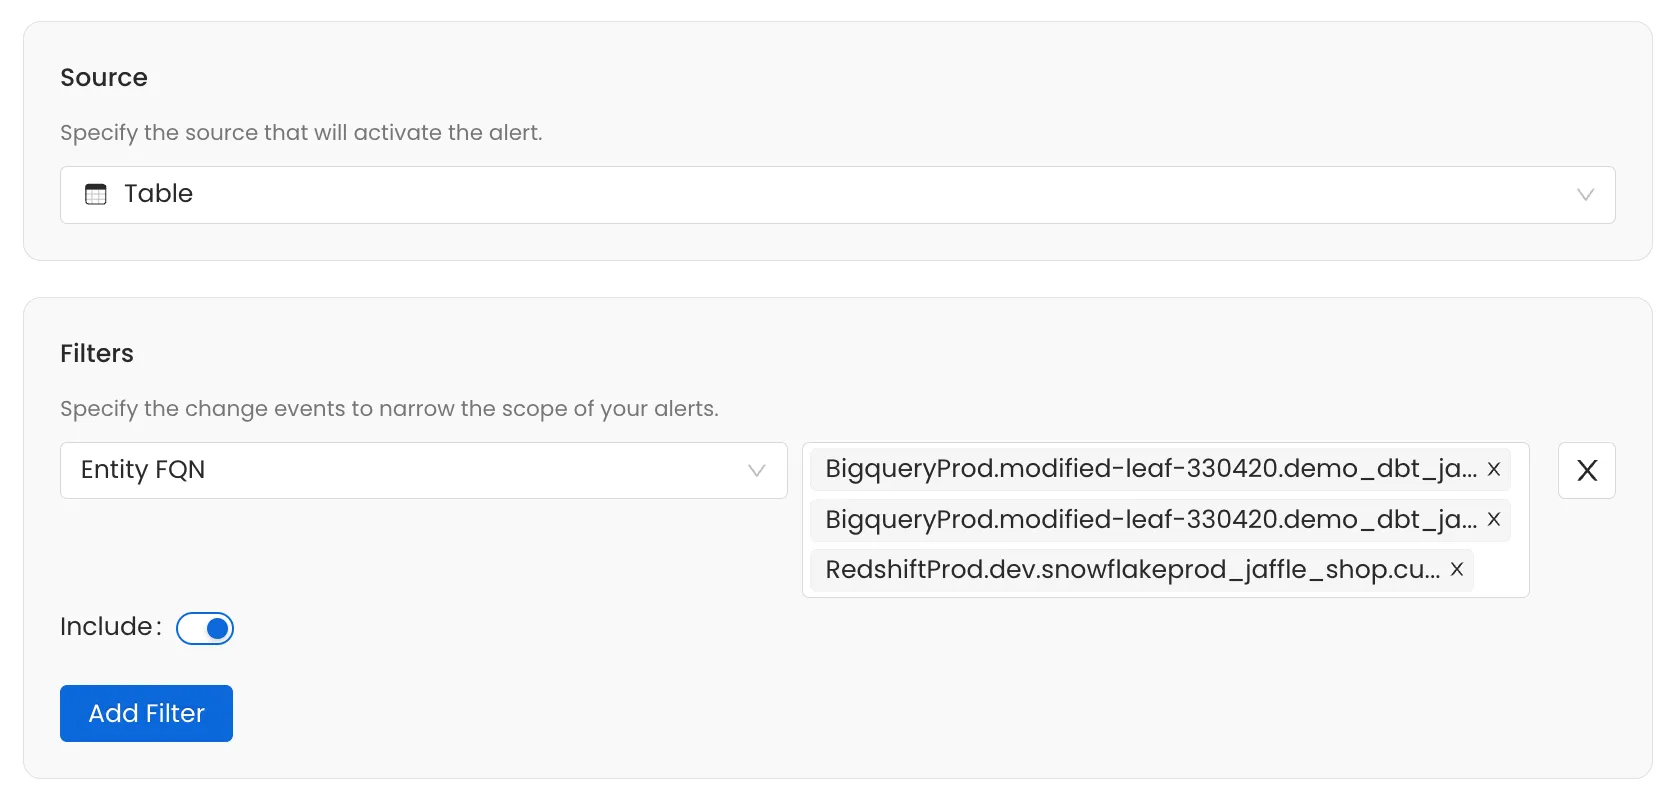
Define the Filter
- Destination: Specify the destination for the notifications. OpenMetadata supports sending notifications to the users within OpenMetadata, i.e., Internal such as Admins, Followers, Owners, Teams and Users. Notifications can be sent to External sources like Email, G Chat, Generic Webhooks, MS Teams, and Slack. Add the endpoint URL for the destinations. Notifications can be sent to multiple destinations.
Additional Details for the Configuration of Destinations
To enable email alerts you will need to ensure that you have an SMTP server available. With the information for your SMTP server you can configure OpenMetadata to send email alerts either by updating the details from the UI or by updating the below section of the operations.yaml file.
To update the details from the UI, navigate to Settings > Preferences > Email
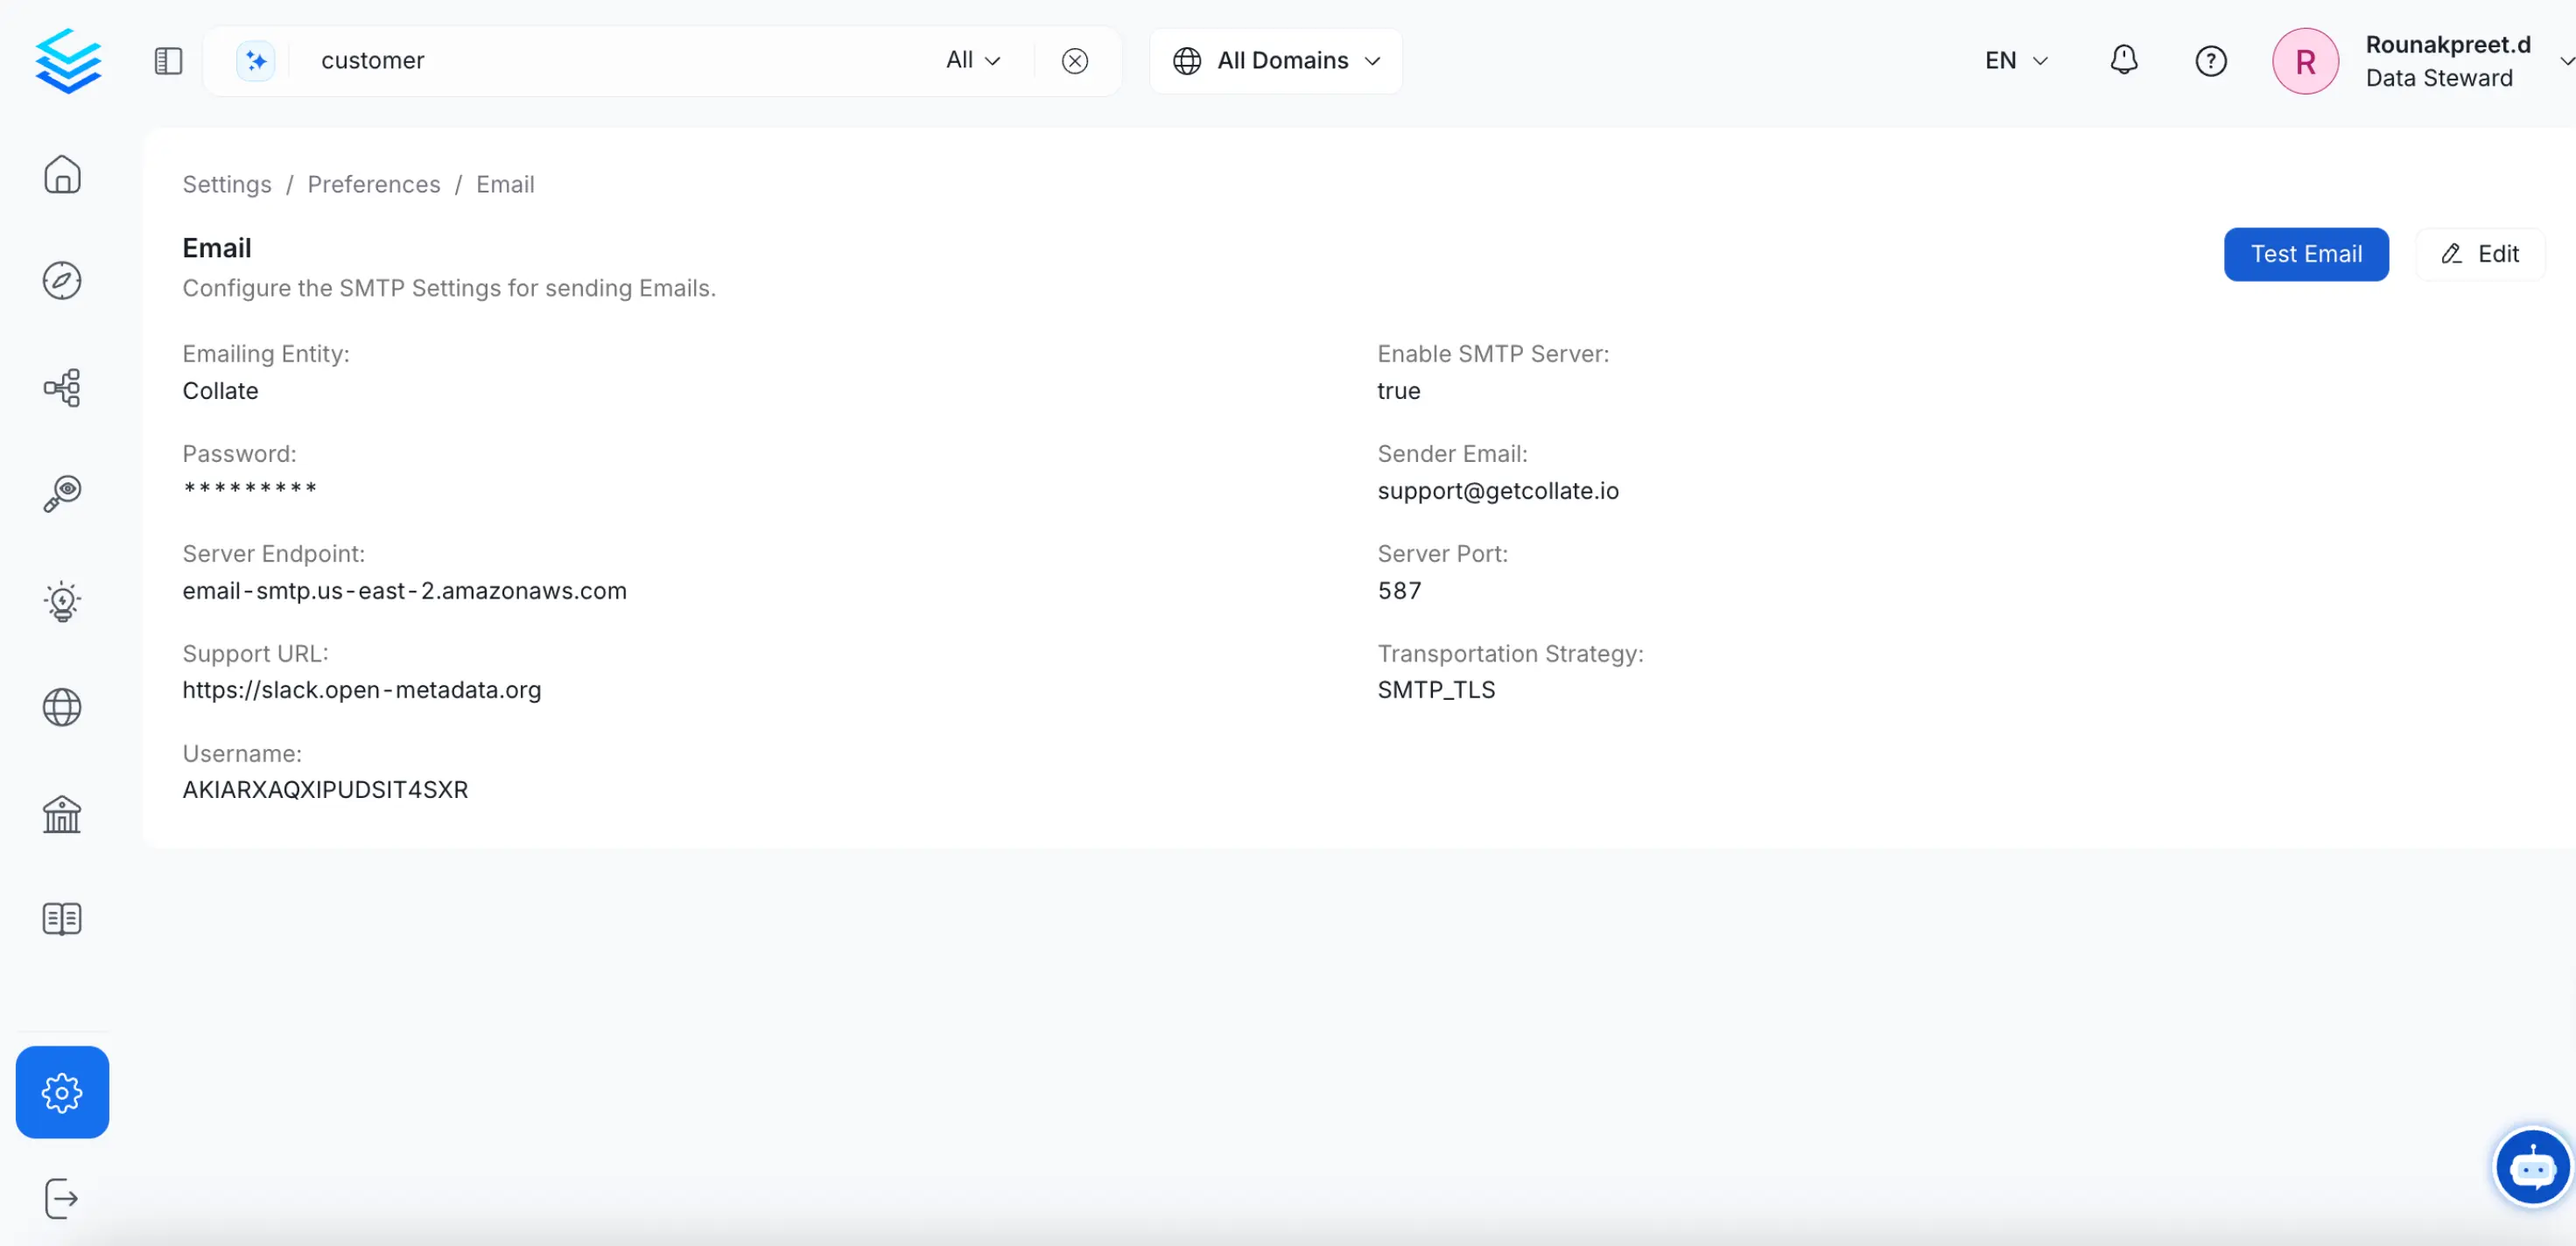
Email Configuration
Slack
For Slack configuration you will need to get the endpoint URL of the channel where you wish to send the alerts. Additionally, you can configure the following parameters:
- Batch Size: Size of the batch that will be sent to the endpoint.
- Connection Timeout: Timeout for the connection.
- Secret Key: Secret key can be used to secure the webhook connection.
MS Teams
For MS Teams configuration you will need to get the endpoint URL of the channel where you wish to send the alerts. You can find this by going to the Teams channel where you want the posts to appear. Click on the three dots ..., and click on "Connectors". Then add the "Incoming Webhook" connector. Copy this connector's URL and add it in OpenMetadata. It may be in the form of https://your-domain.webhook.office.com/webhookb2/...@.../IncomingWebhook/.../.... For more on MS Teams webhooks, see Create an Incoming Webhook. Additionally, you can configure the following parameters:
- Batch Size: Size of the batch that will be sent to the endpoint.
- Connection Timeout: Timeout for the connection.
- Secret Key: Secret key can be used to secure the webhook connection.
Webhook
To set up a webhook you can simply use the endpoint URL where you want your alert to be sent. Additionally, you can configure the following parameters:
- Batch Size: Size of the batch that will be sent to the endpoint.
- Connection Timeout: Timeout for the connection.
- Secret Key: Secret key can be used to secure the webhook connection.