Auth Code Flow
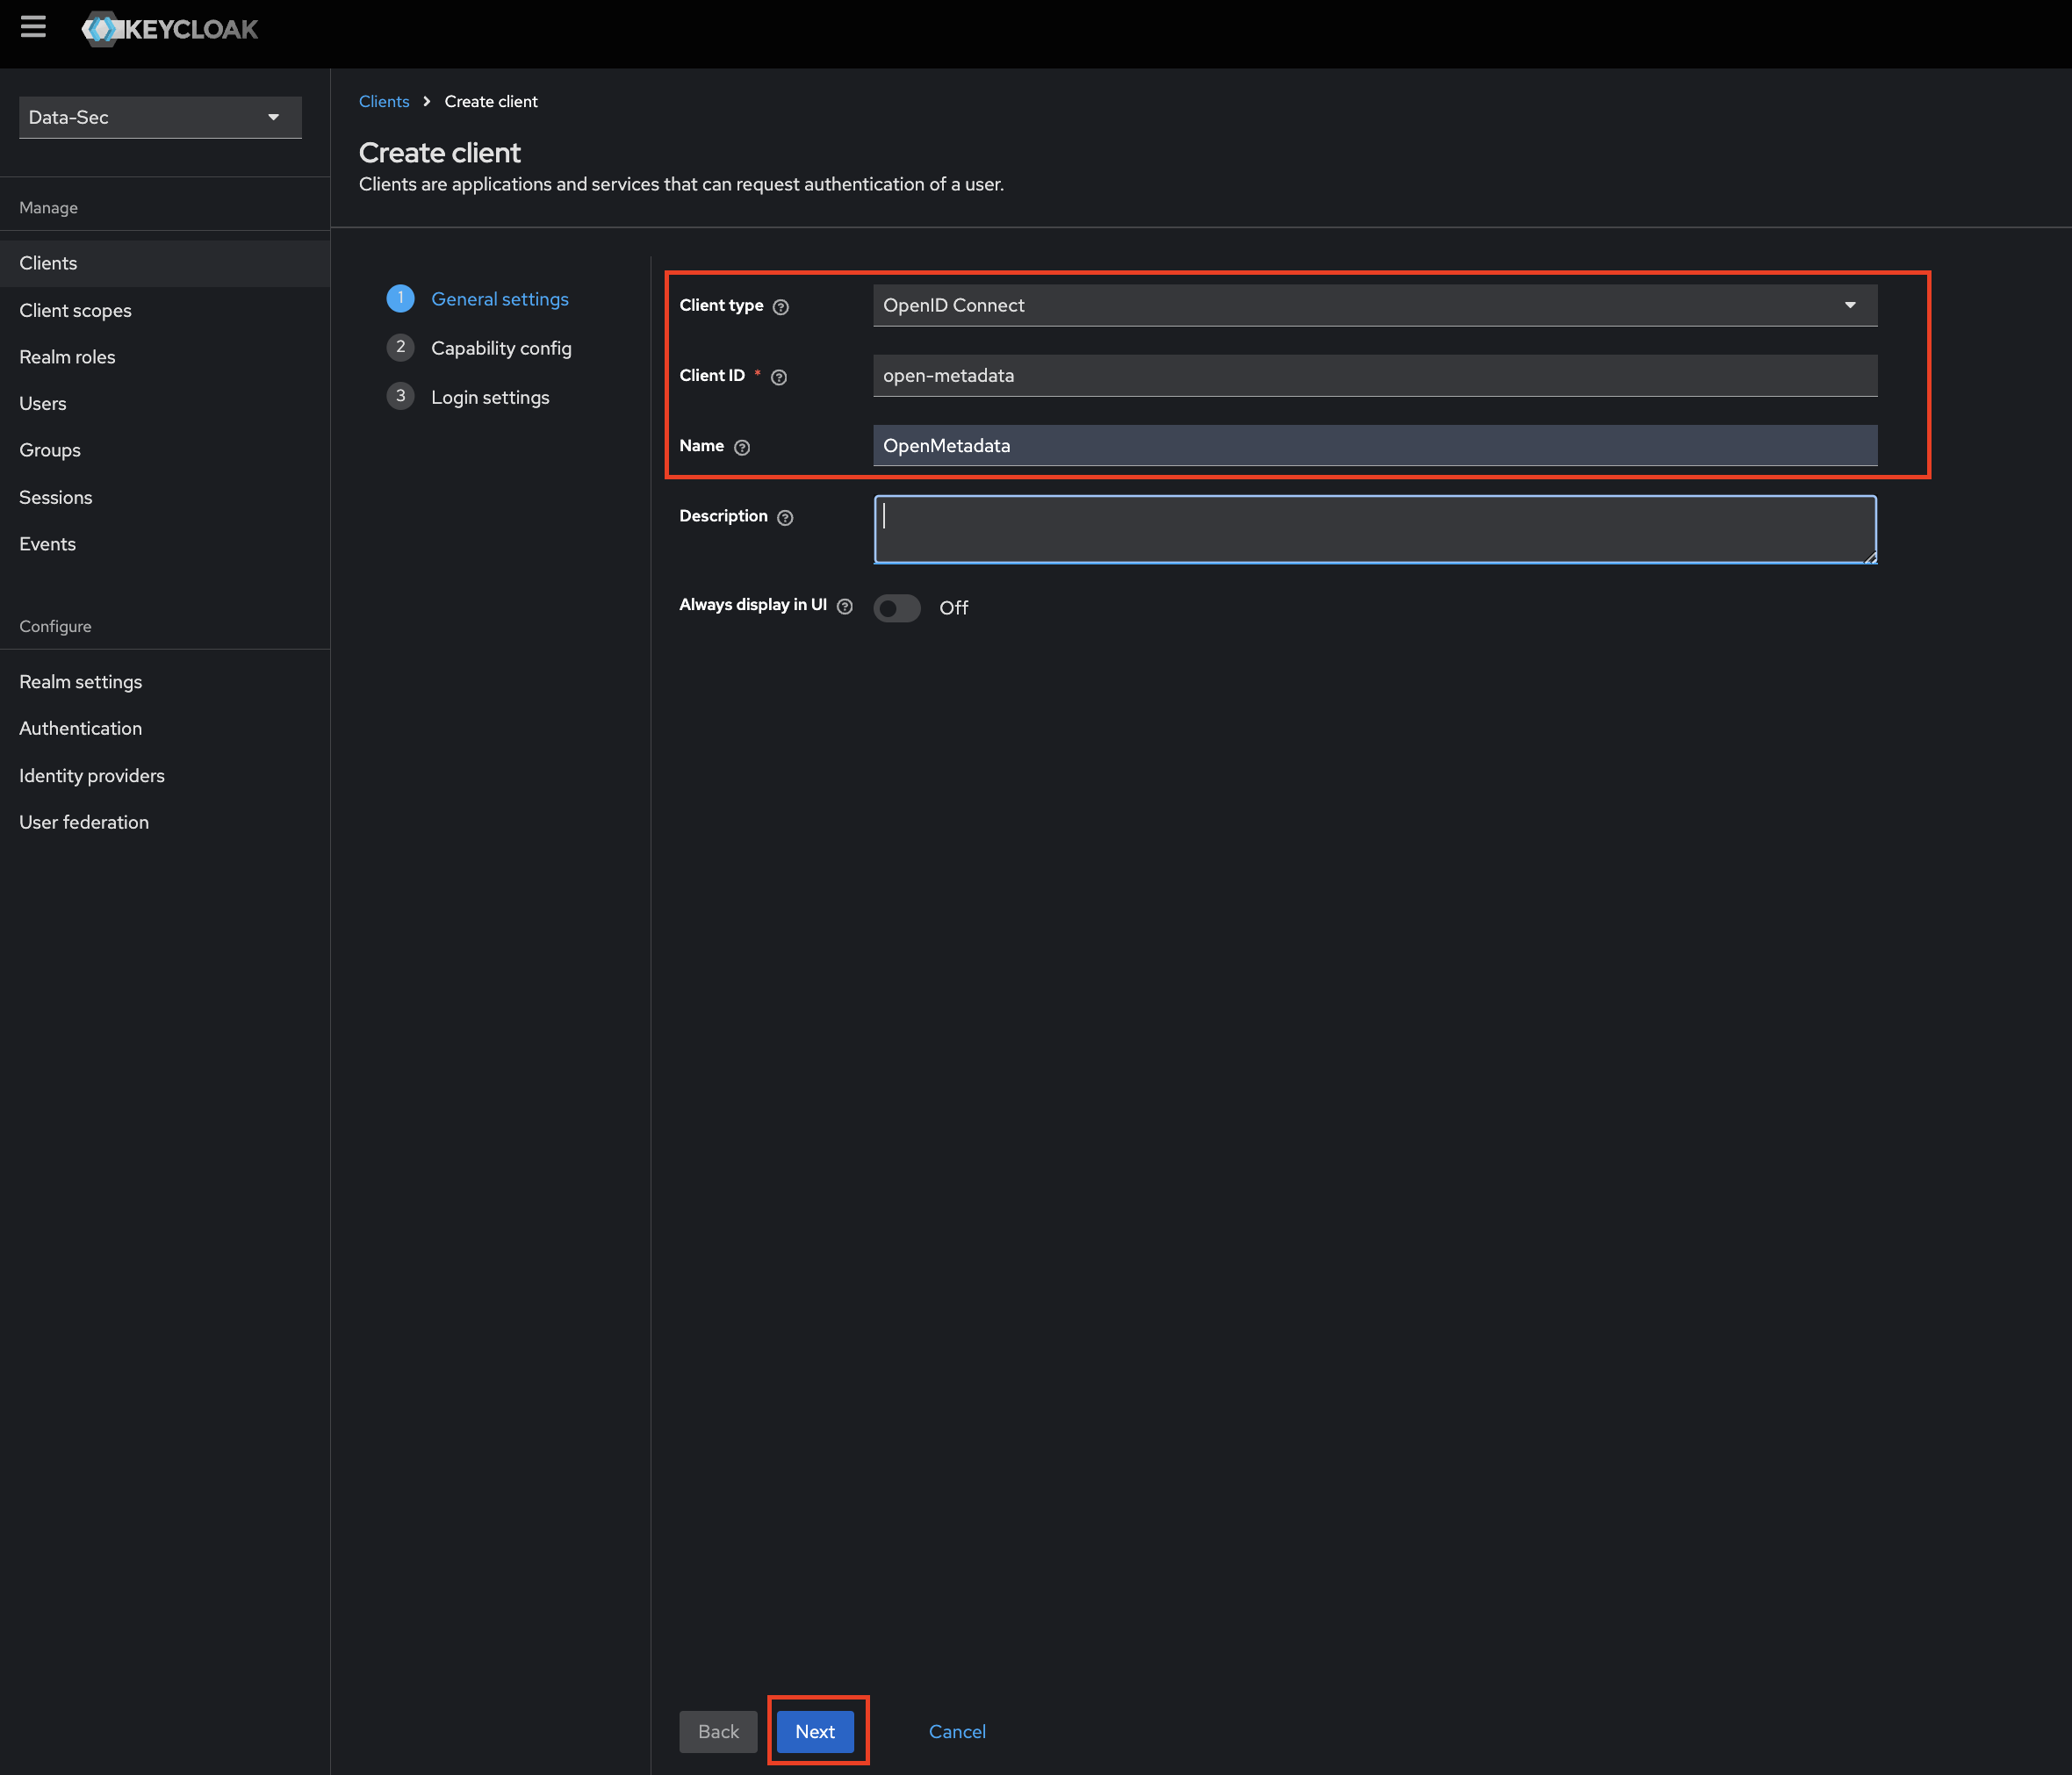
Step 1: Create OpenMetadata as a new Client
- Click on
Clientsin the menu. - Click on
Create Clientbutton. - Select the
Client type. - Enter the
Client ID. - Enter the Name and Description
(Optional). - Click on
Nextbutton.
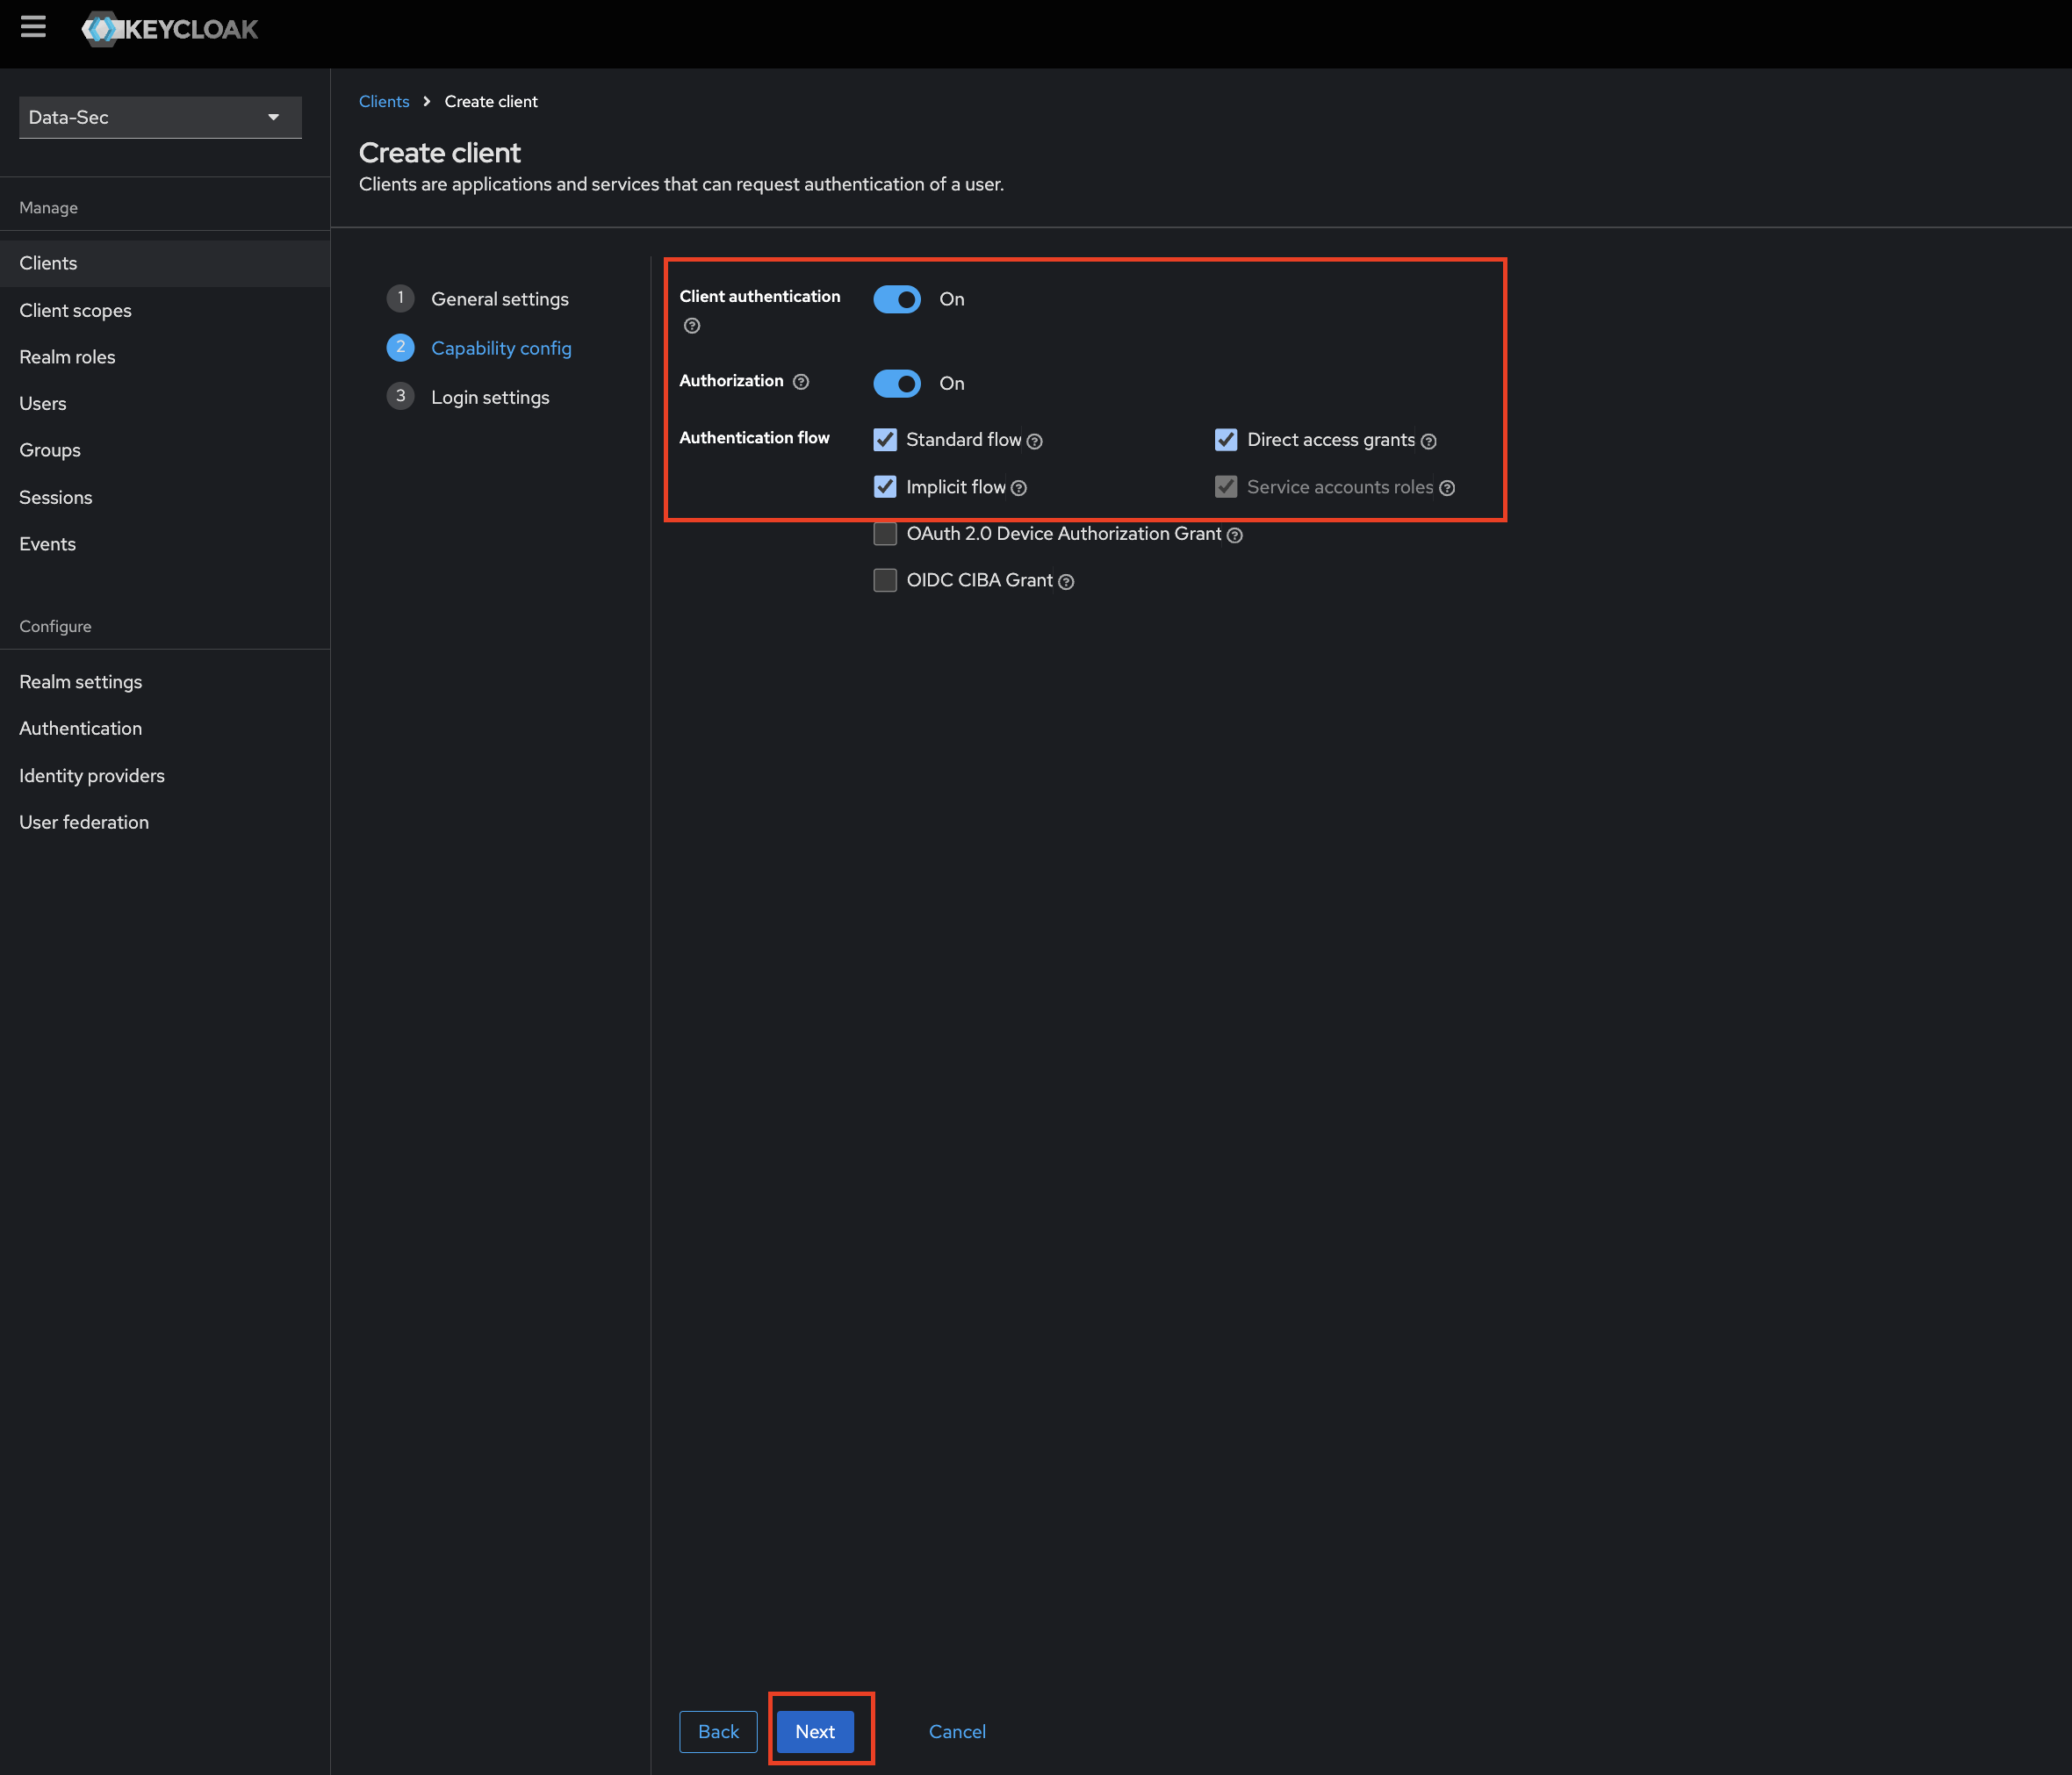
Step 2: Edit Configs of the client
- Enable
Client authenticationandAuthorization. - Select
Standard flowas anAuthentication flow. - Click
Next.
Step 3: Add Login Settings
- fill the required options
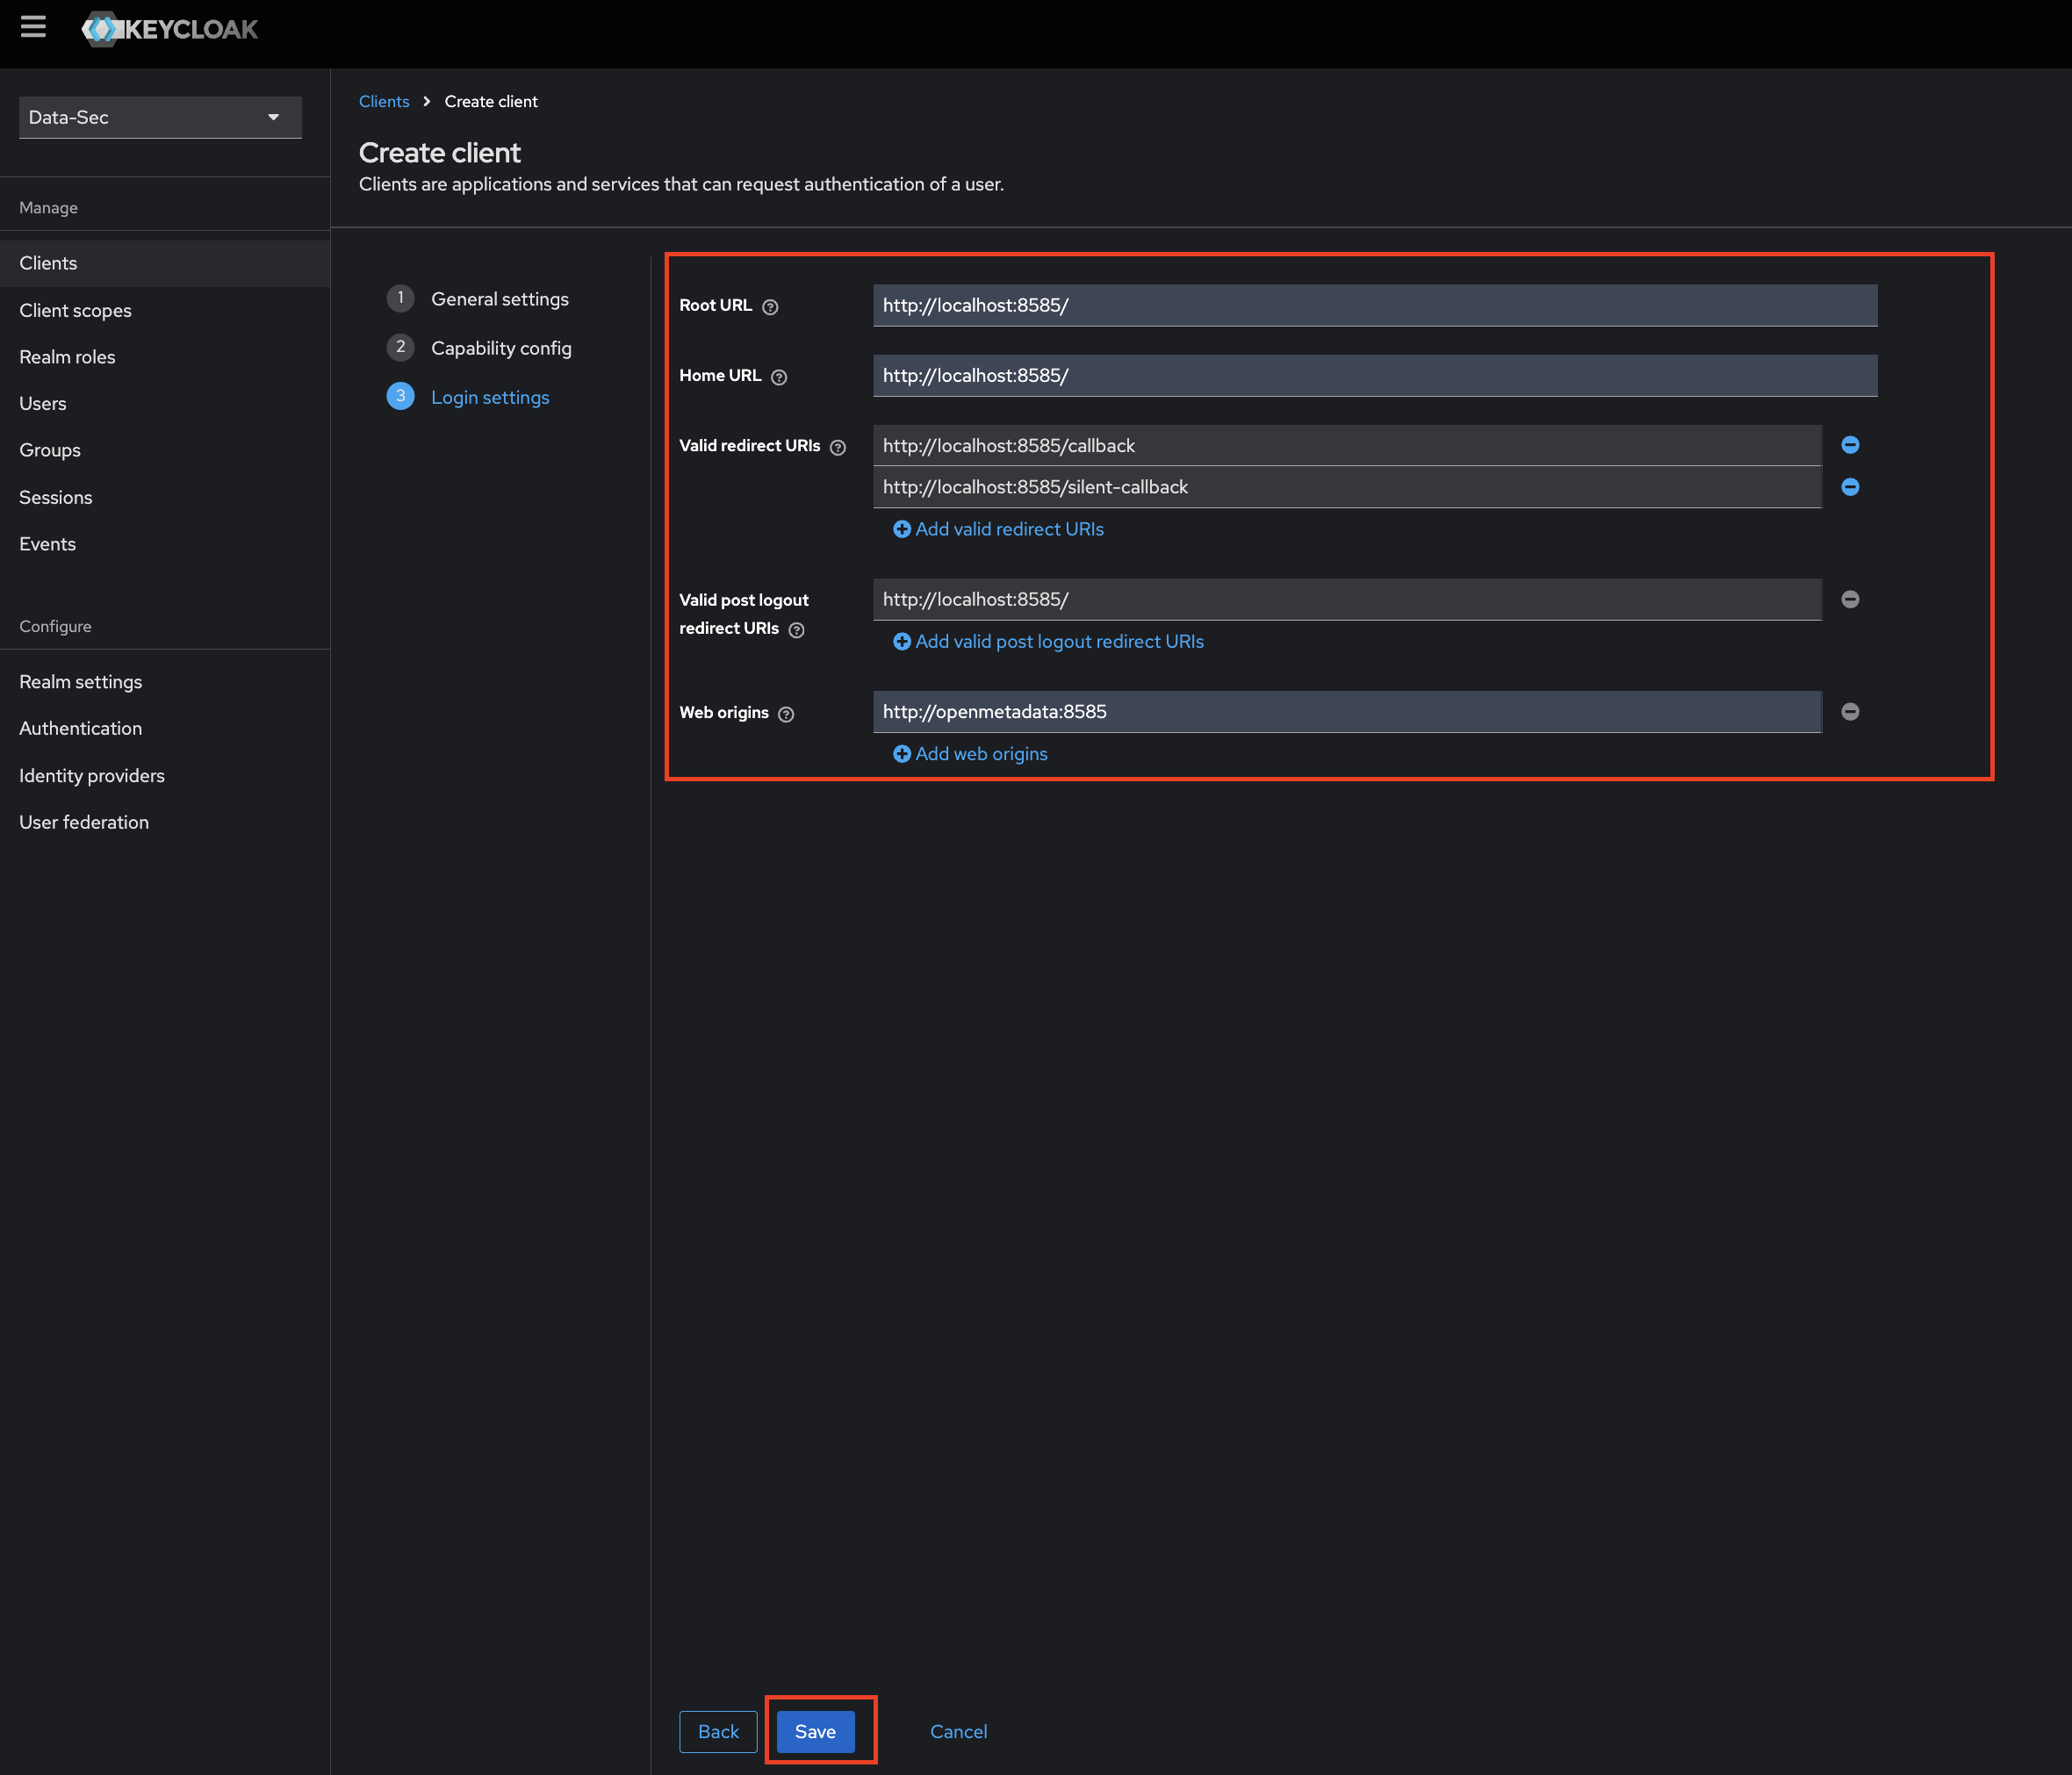
- Click on
Savebutton.
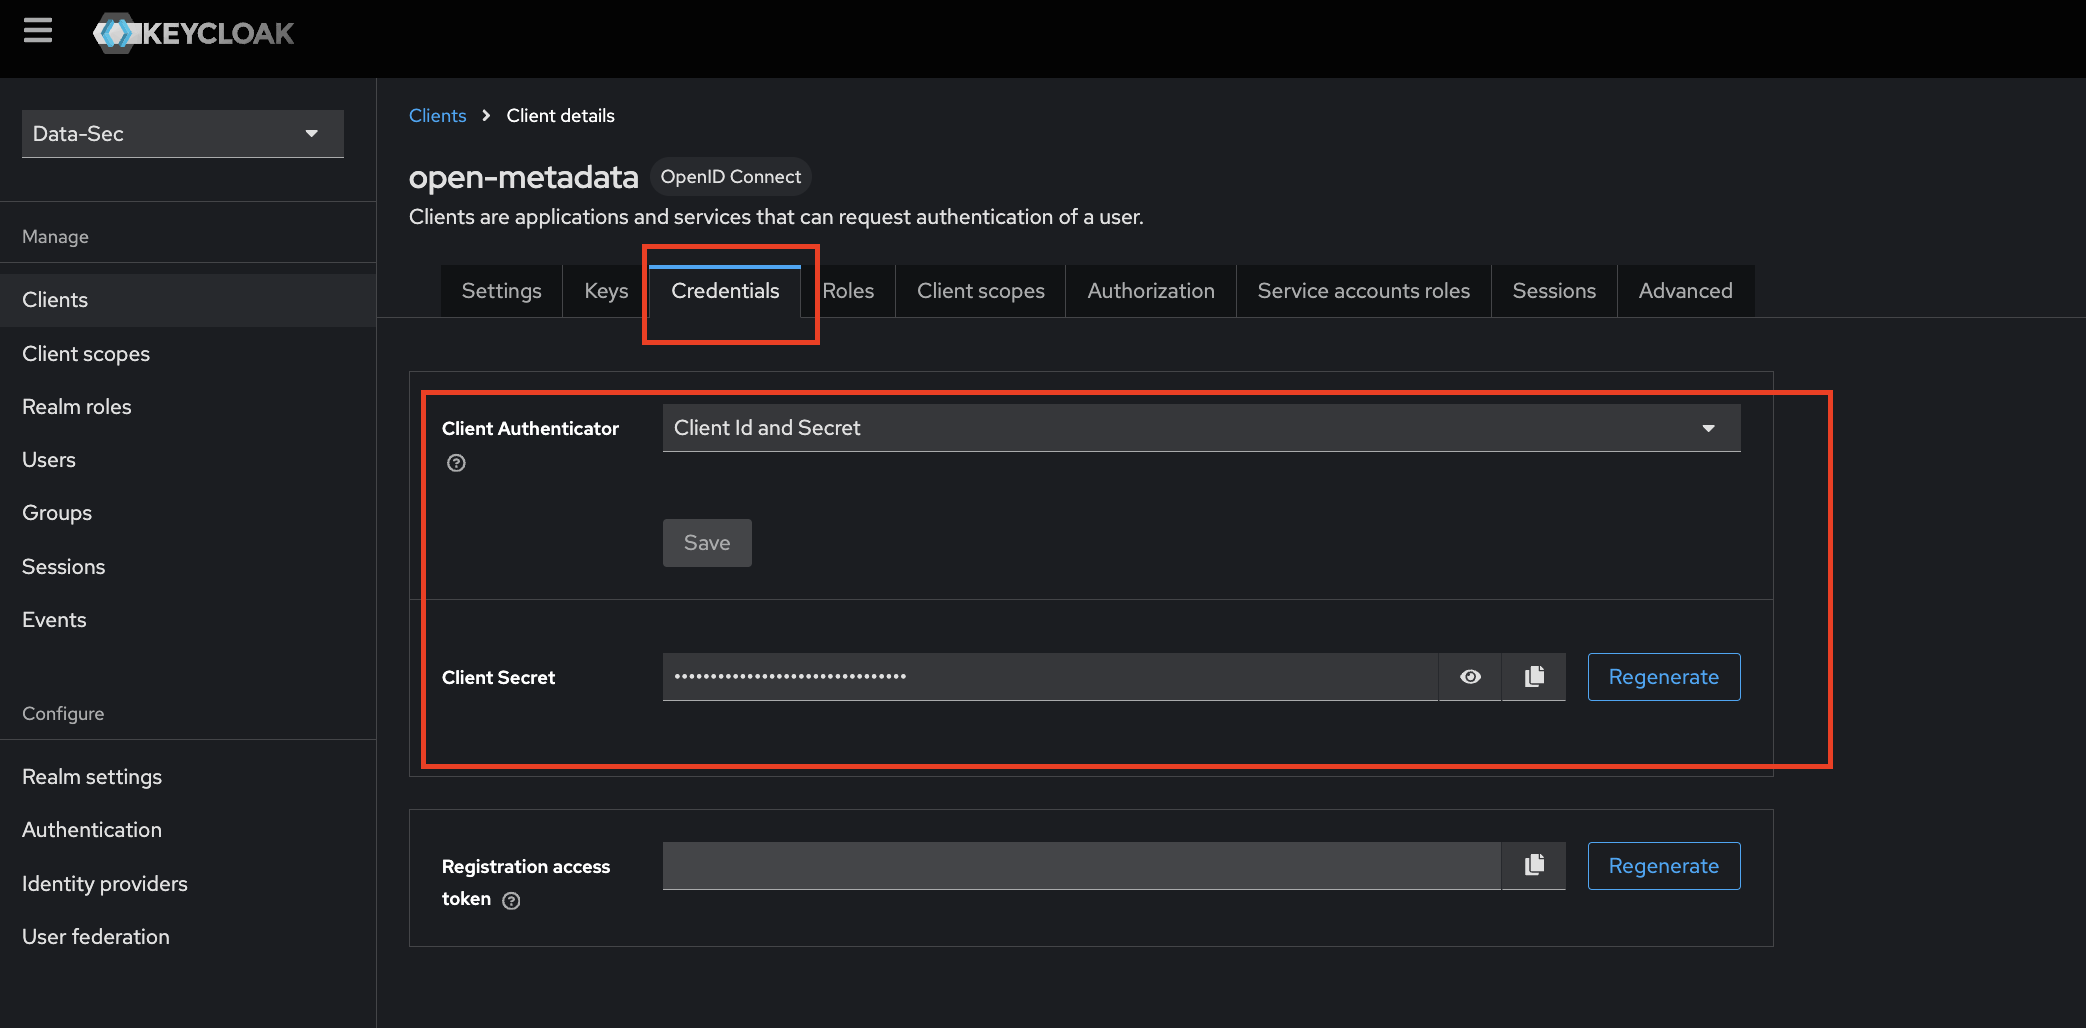
Step 3: Where to Find the Credentials
- Navigate to the
Credentialstab. - You will find your
Client Secretrelated to the Client id “open-metadata”
Docker Security
Configure Keycloak SSO for your Docker Deployment.
Bare Metal Security
Configure Keycloak SSO for your Bare Metal Deployment.
Kubernetes Security
Configure Keycloak SSO for your Kubernetes Deployment.
KeyCloak
Go to KeyCloak Configuration