
Manage Classification
Add and manage classifications in OpenMetadata to organize how data assets are tagged across your organization. This includes creating a new classification, editing its details, deleting one you no longer need, and exporting or importing its tags in bulk using a CSV file.Add a Classification
To create a new classification:-
Navigate to Govern > Classification.
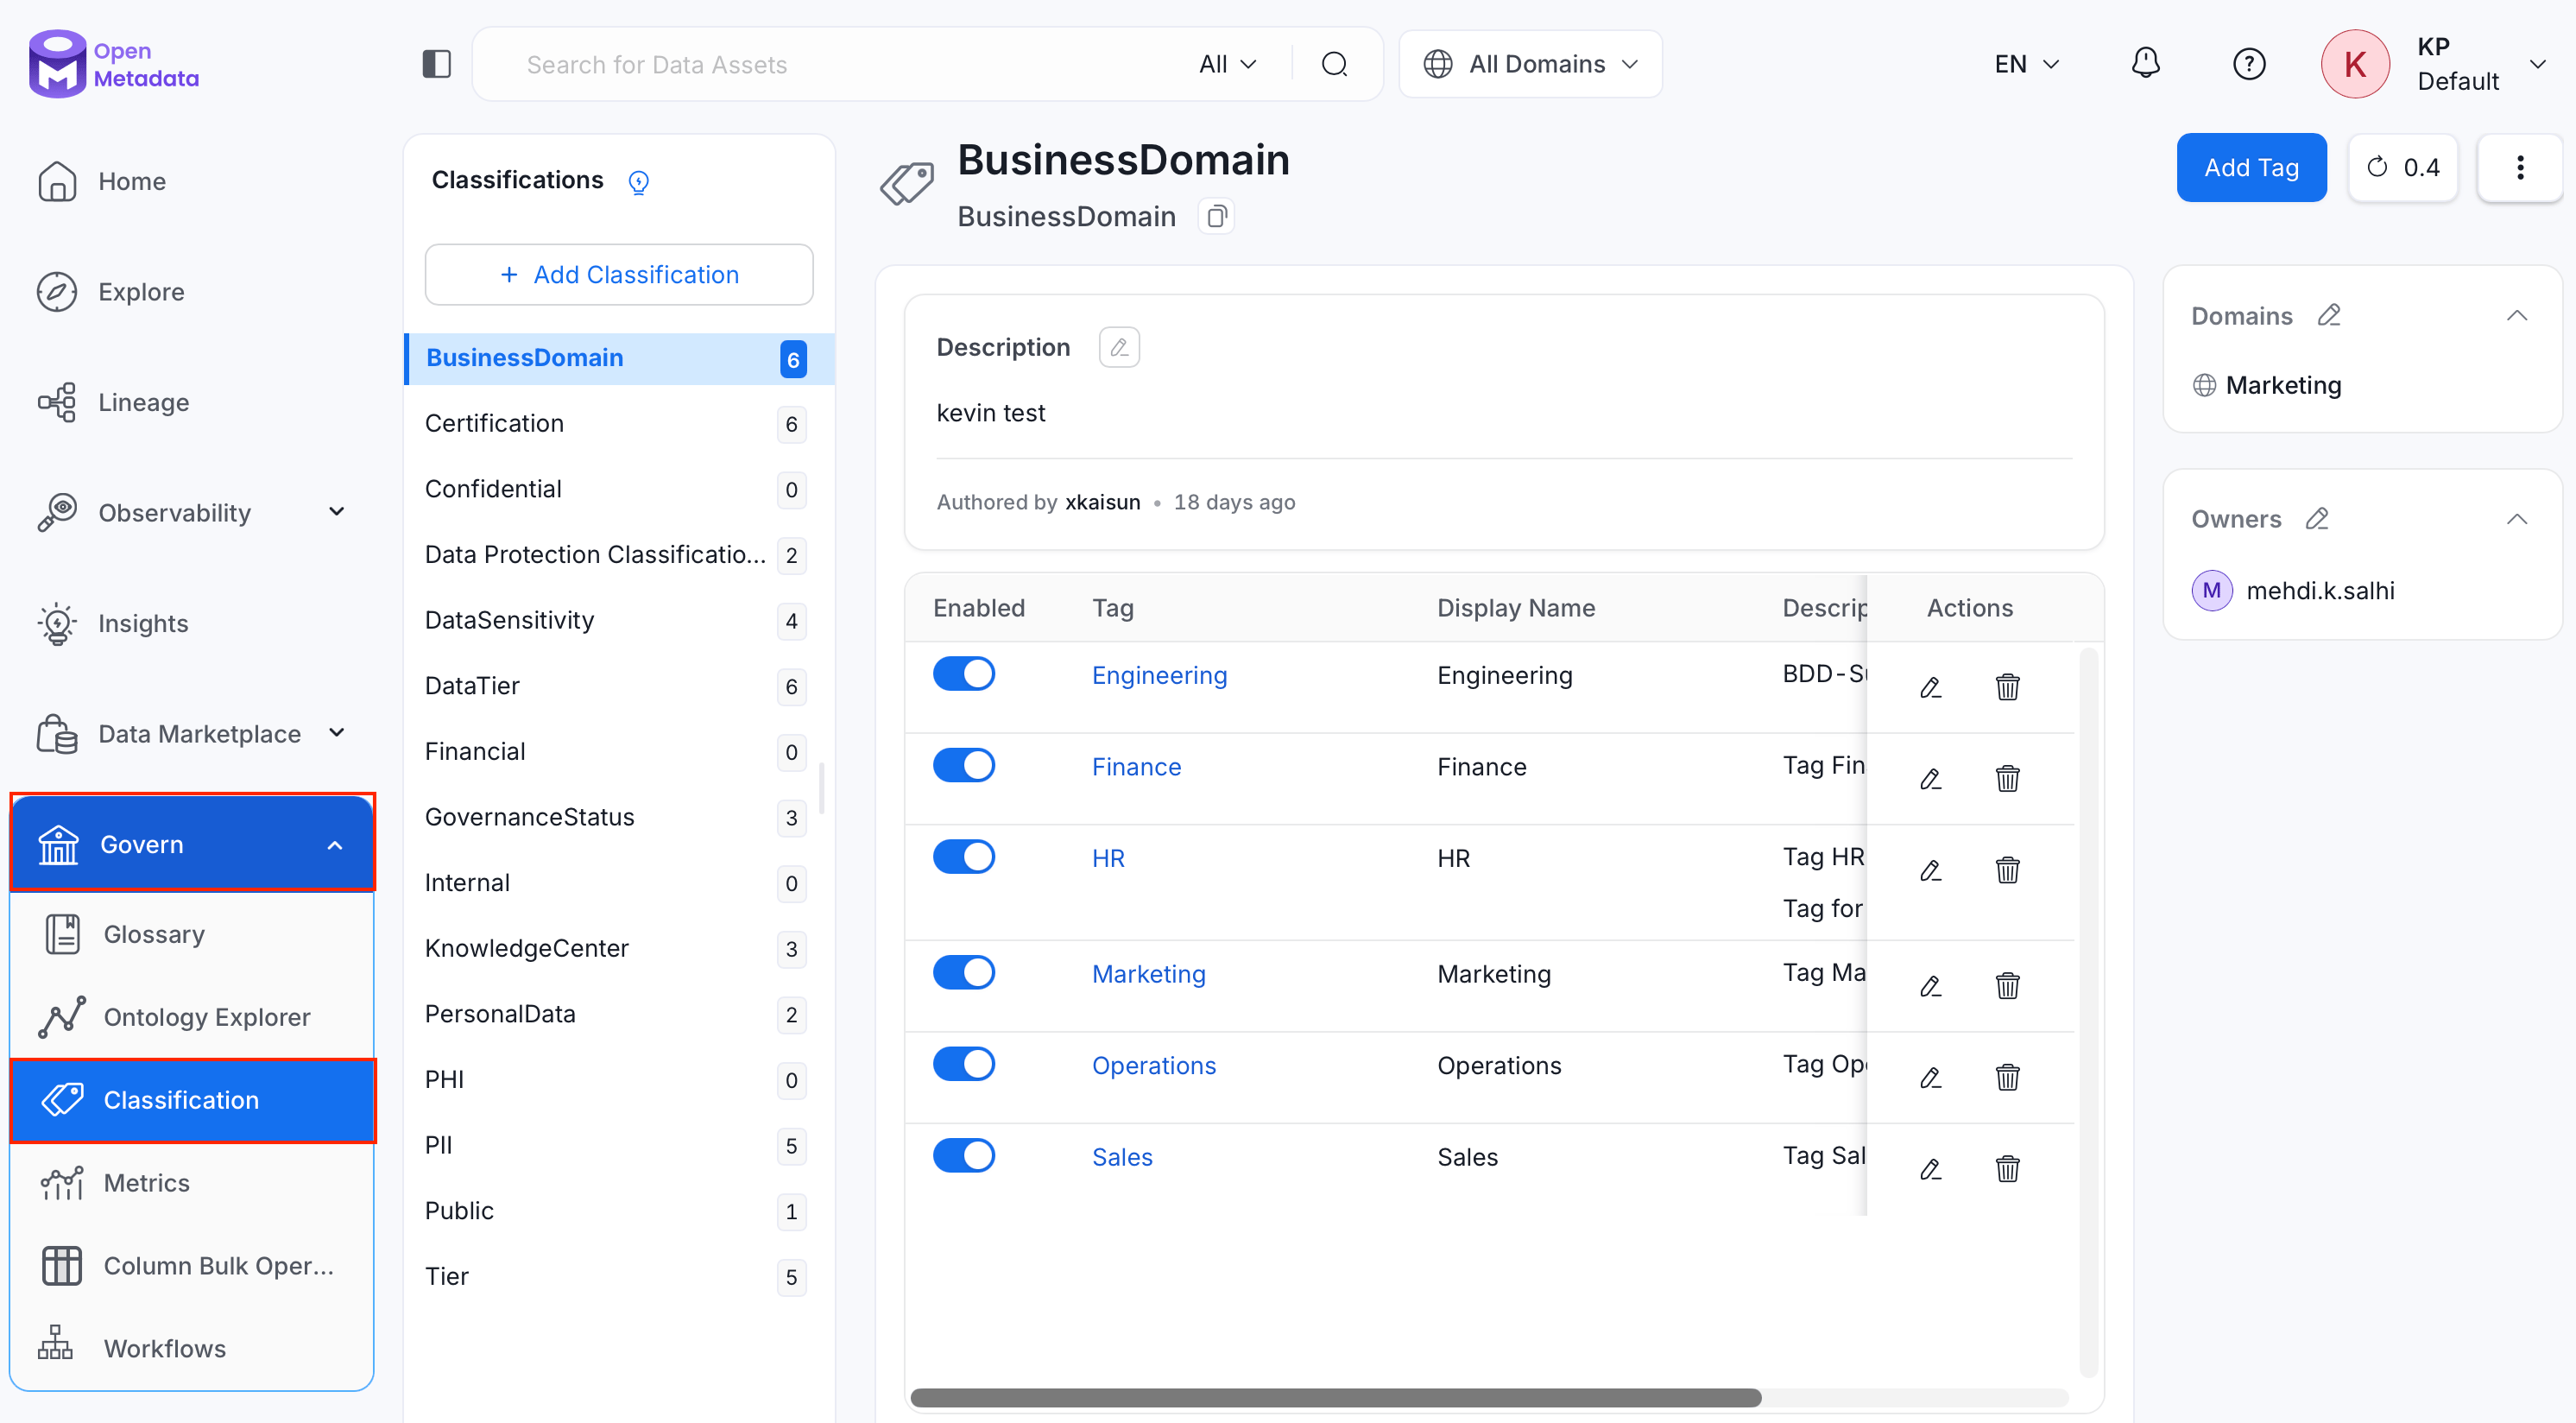
-
Click Add Classification.
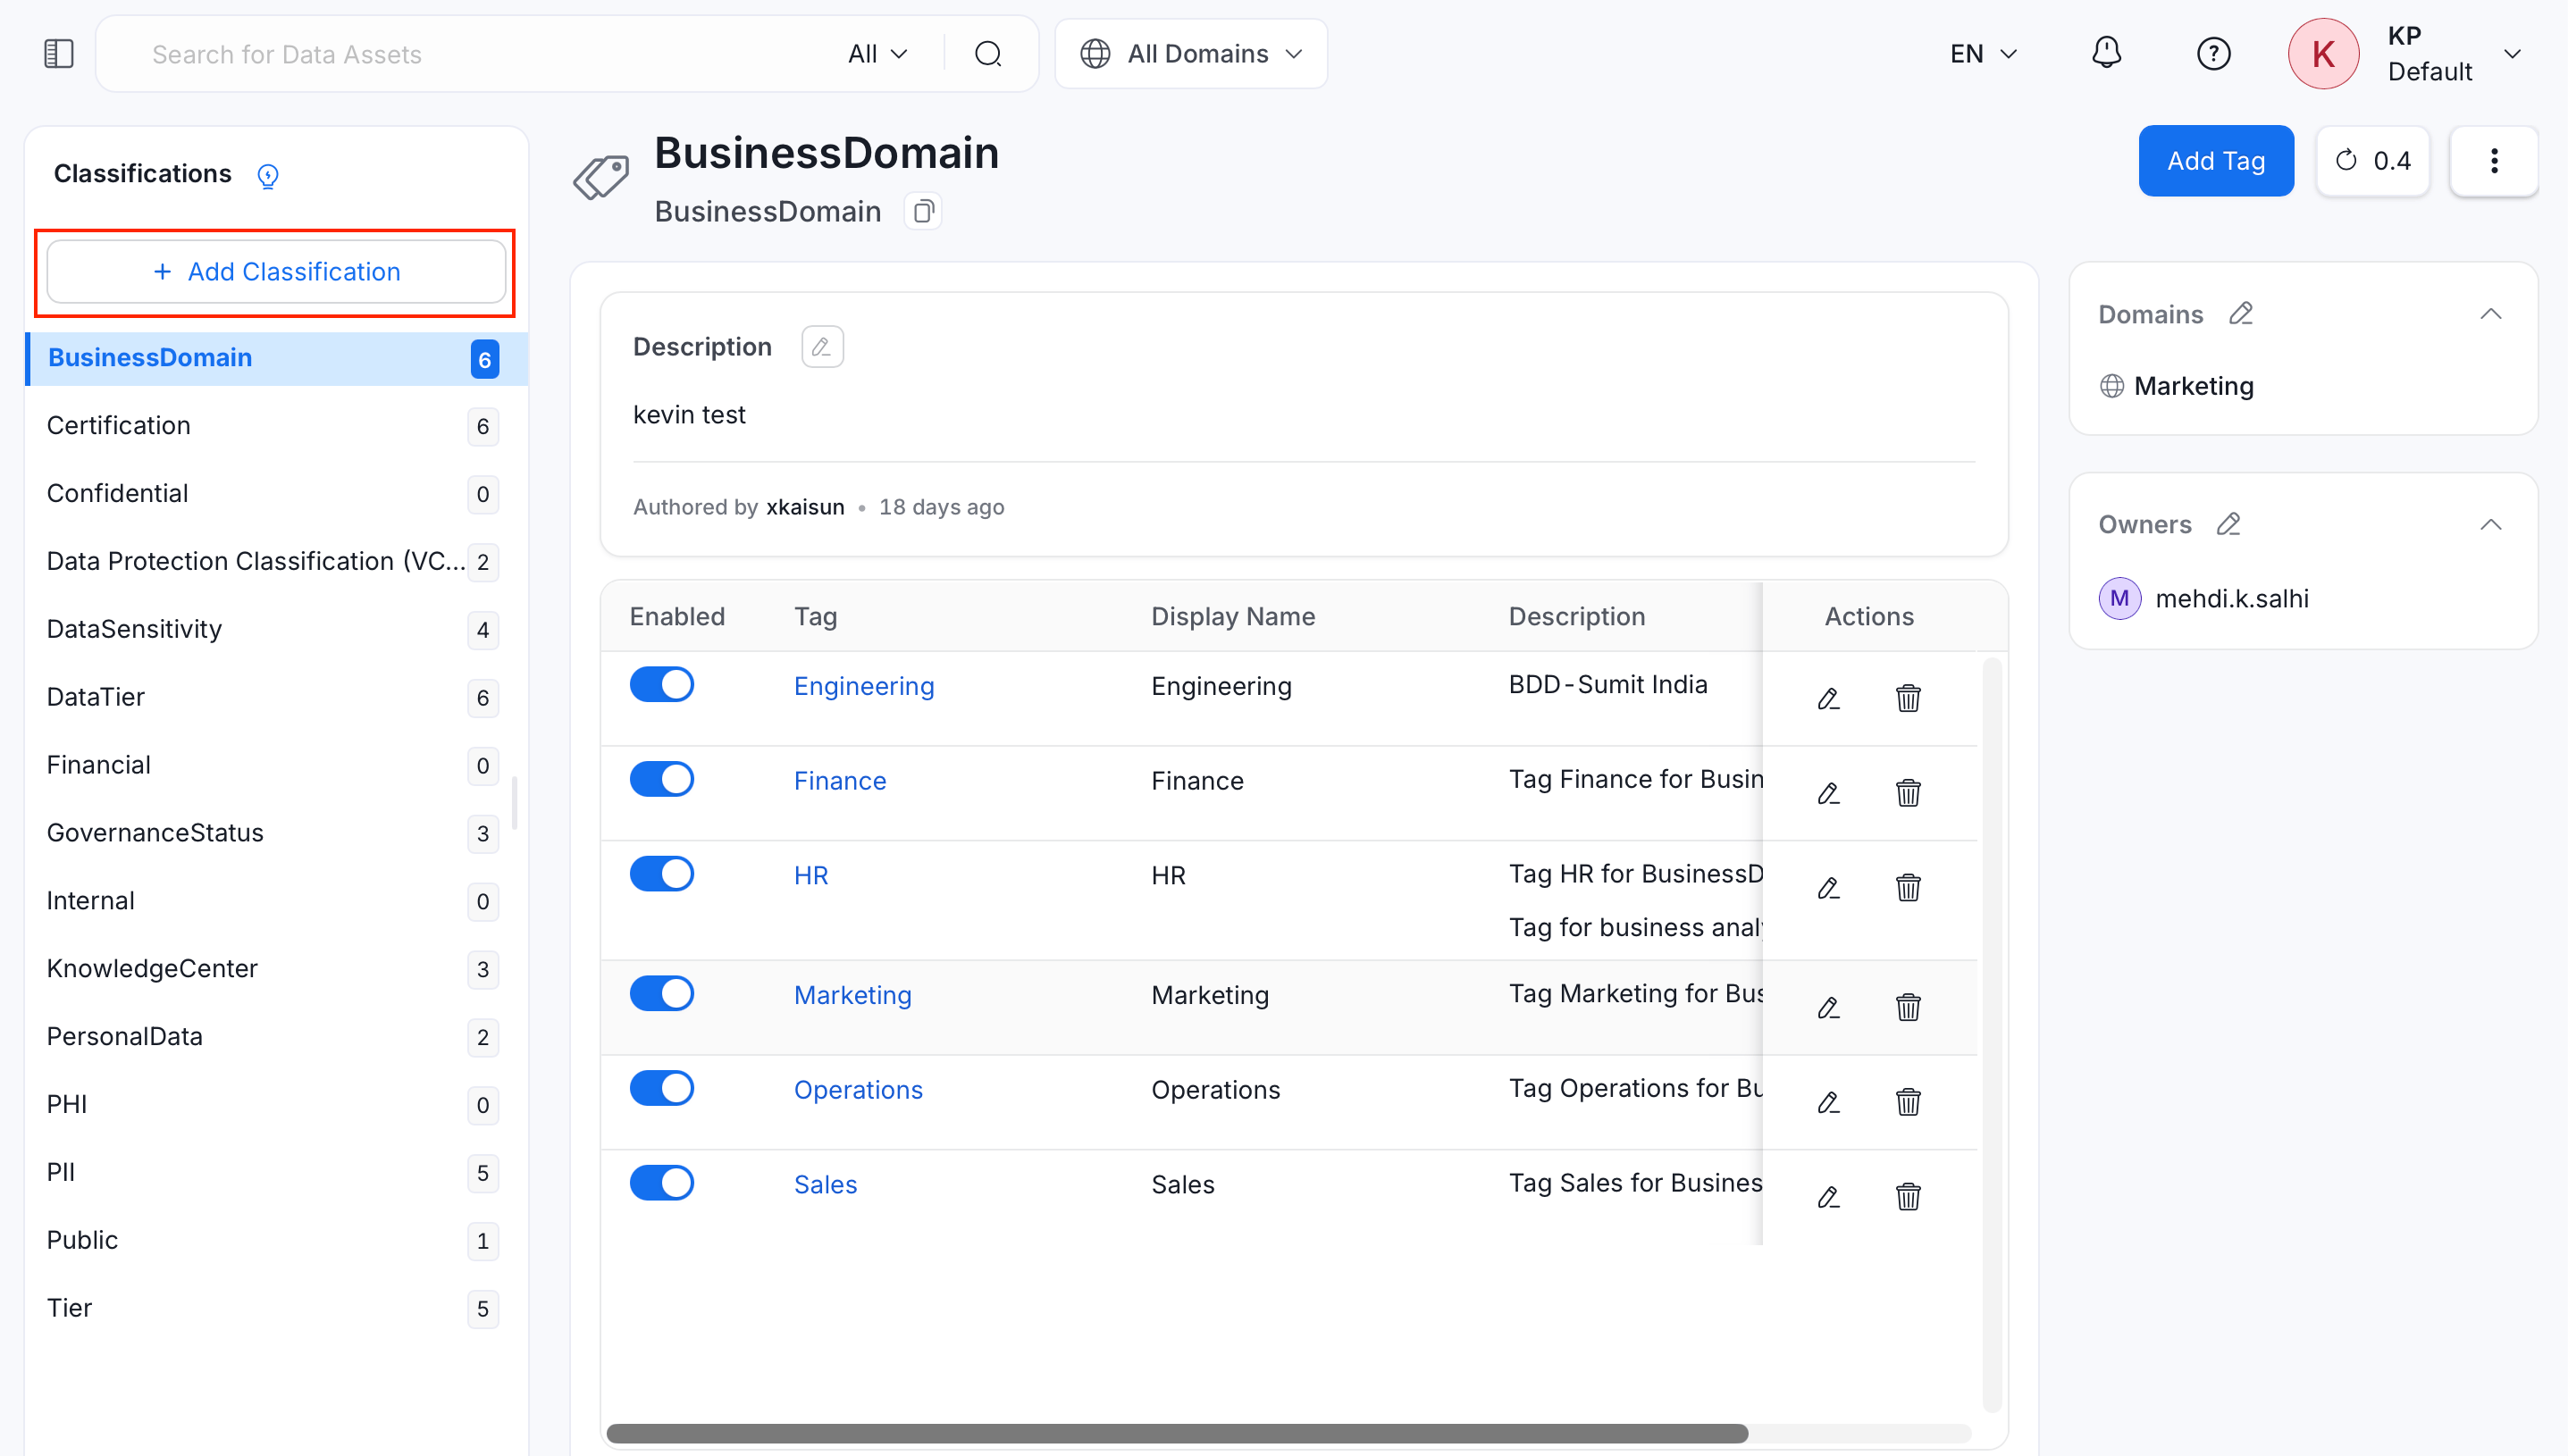
-
Fill in the following details:
- Name (required): A unique name for the classification.
- Display Name: A human-friendly label shown in the UI.
- Description (required): Describe what this classification is used for.
- Mutually Exclusive: When enabled, only one tag from this classification can be assigned to a data asset at a time. For example, an asset can be tagged as either
PII-SensitiveorPII-NonSensitive, but not both. - Owners: Search for and assign one or more teams or users as owners of the classification.
- Domains: Search for and assign one or more domains to the classification.
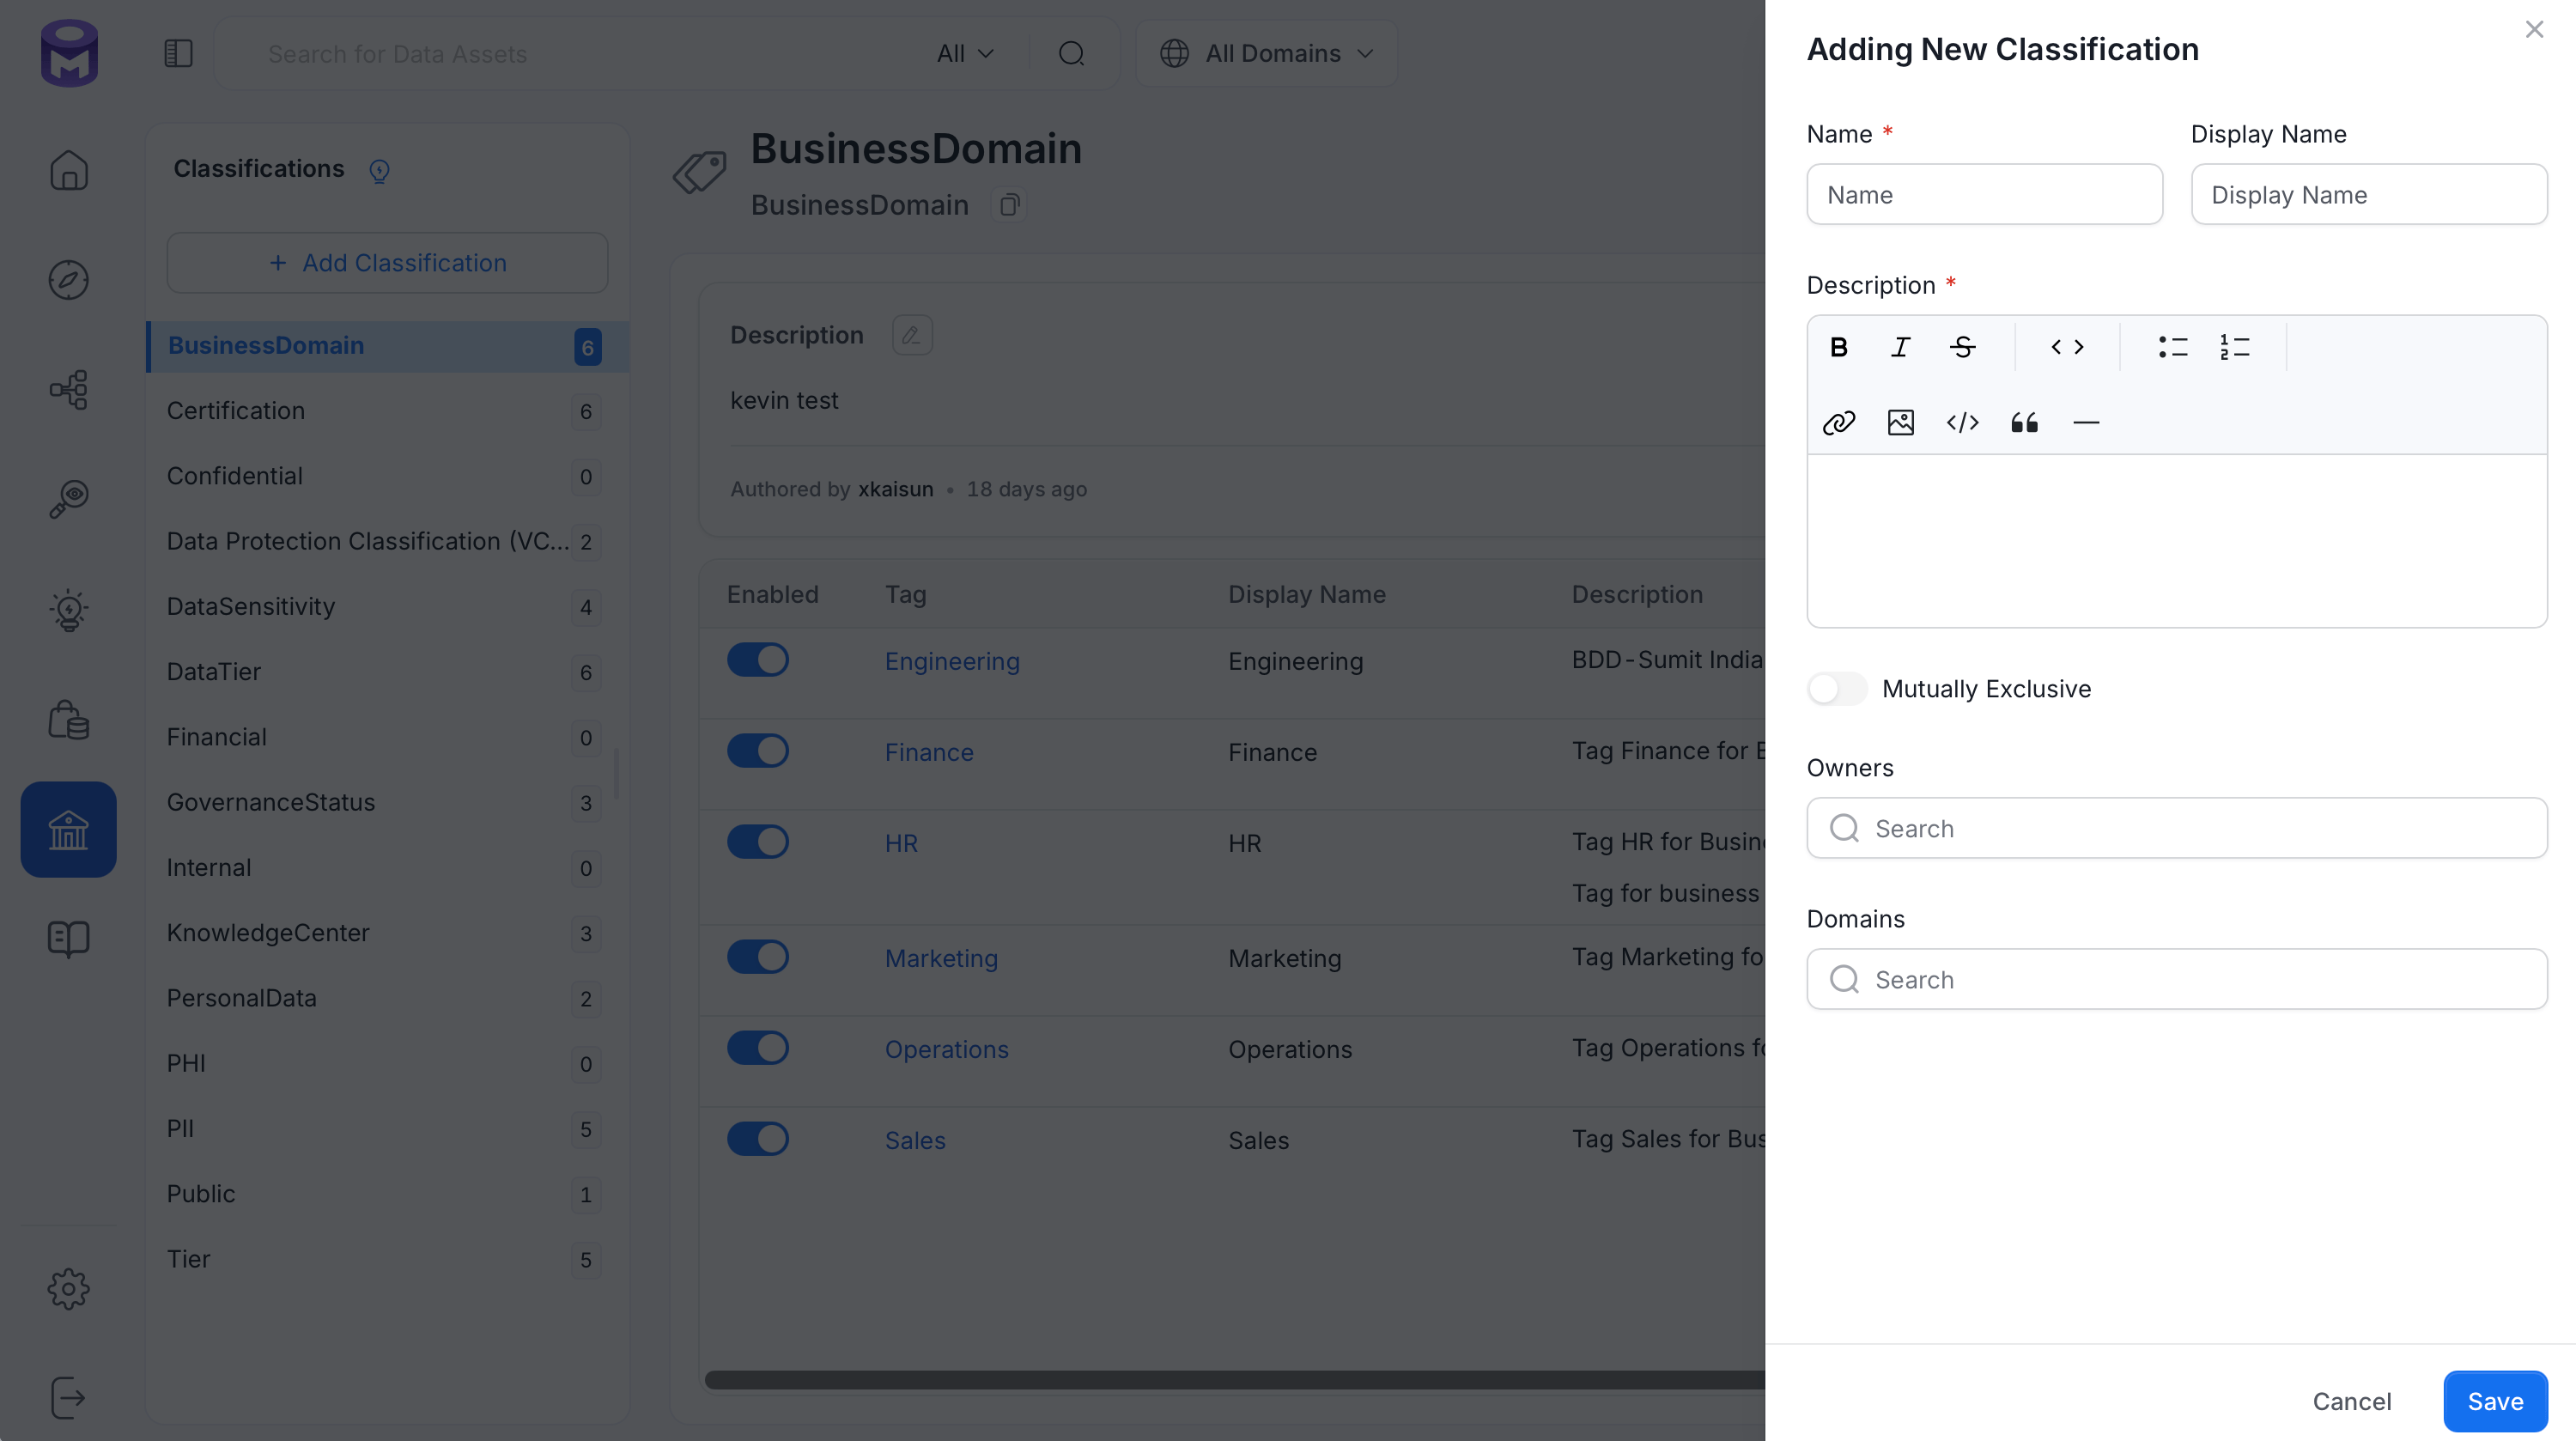
- Click Save.
Add Tags to a Classification
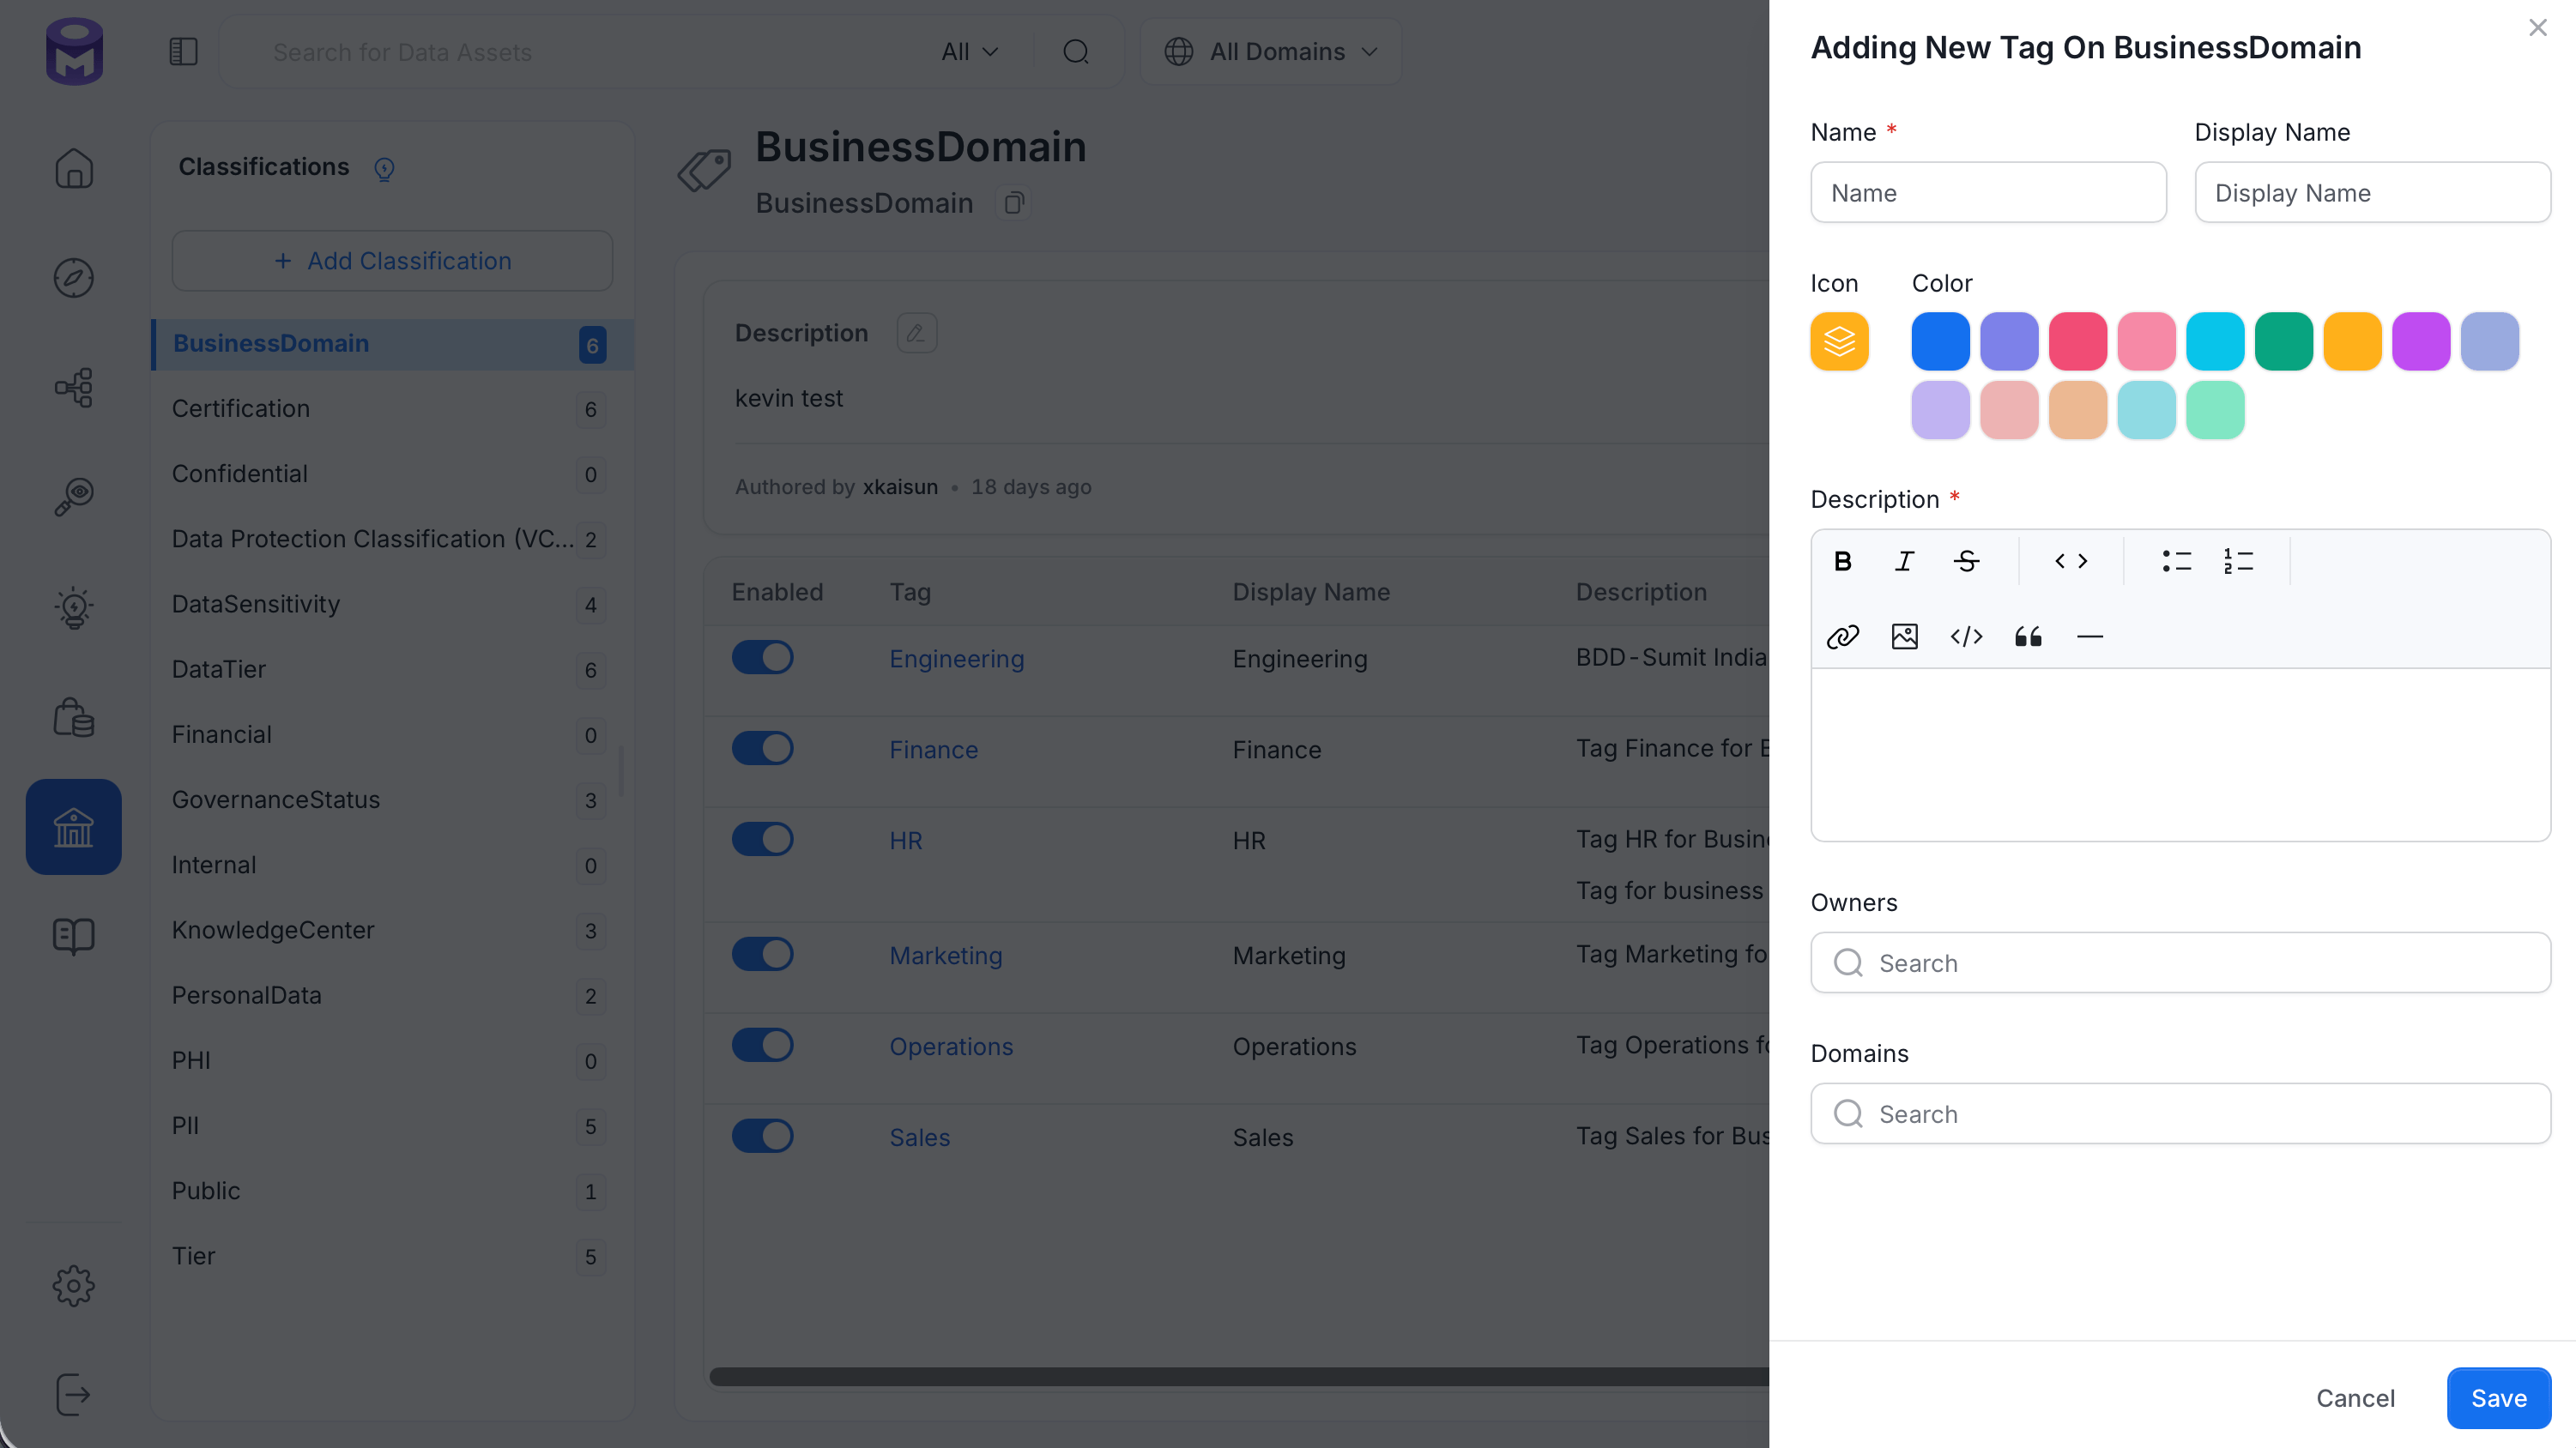
After a classification is created, add tags under it:- Select the Classification from the Classification page.
-
Click Add Tag.
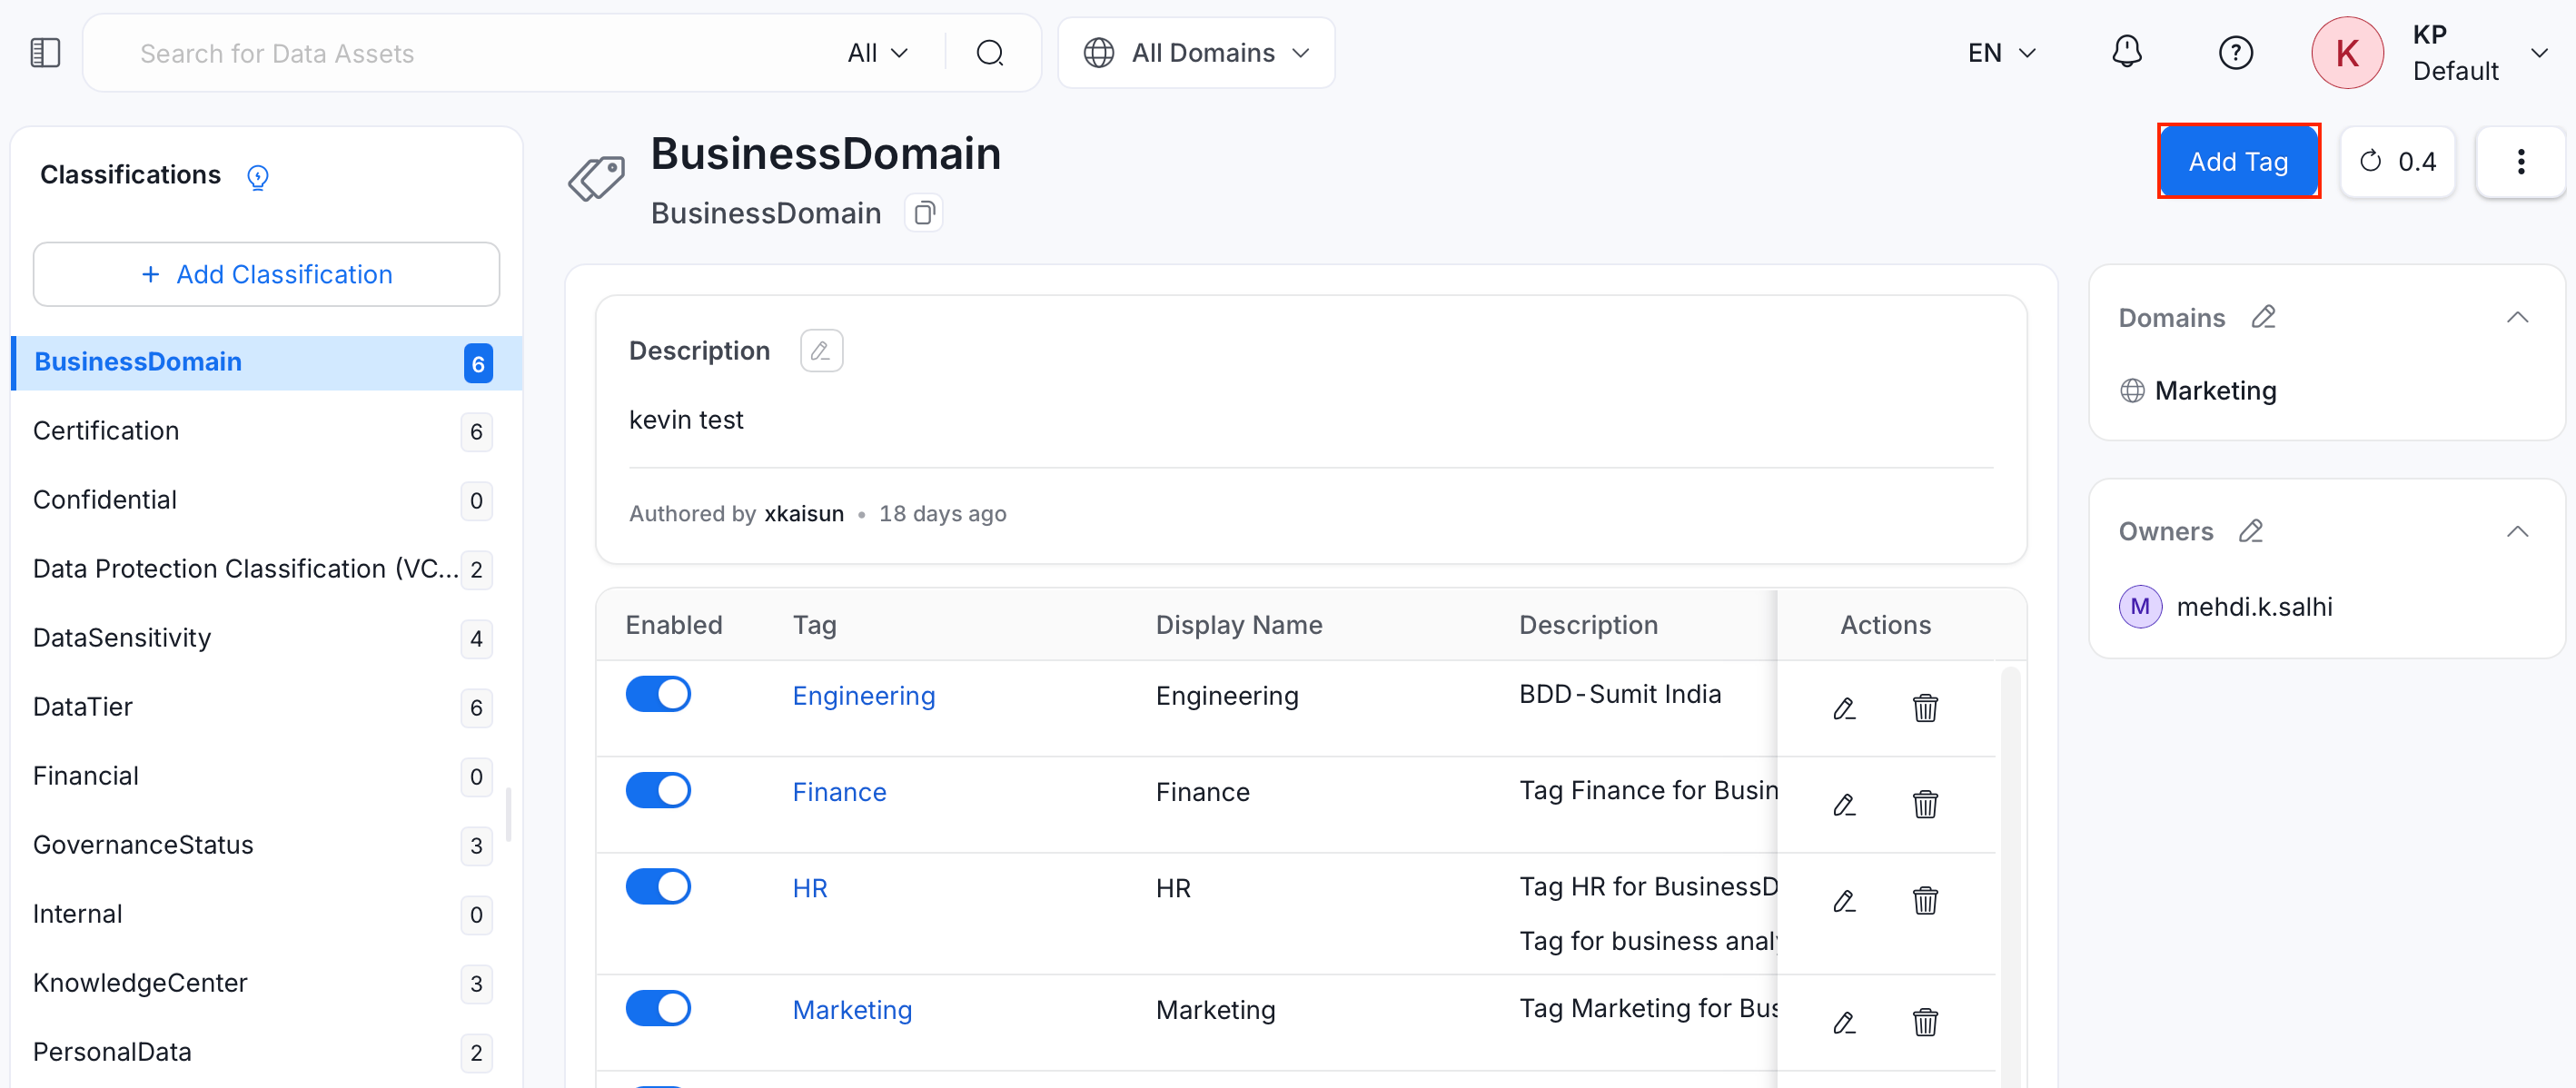
-
Fill in the following details:
- Name (required): A unique name for the tag.
- Display Name: A human-friendly label shown in the UI.
- Icon: Pick an icon to represent the tag.
- Color: Pick a color swatch for the tag’s icon.
- Description (required): Describe what the tag means, using the rich text editor.
- Owners: Search for and assign one or more teams or users as owners of the tag.
- Domains: Search for and assign one or more domains to the tag.
- Click Save.
Edit a Classification
Update a classification’s details after it’s created:- Select the Classification you want to update.
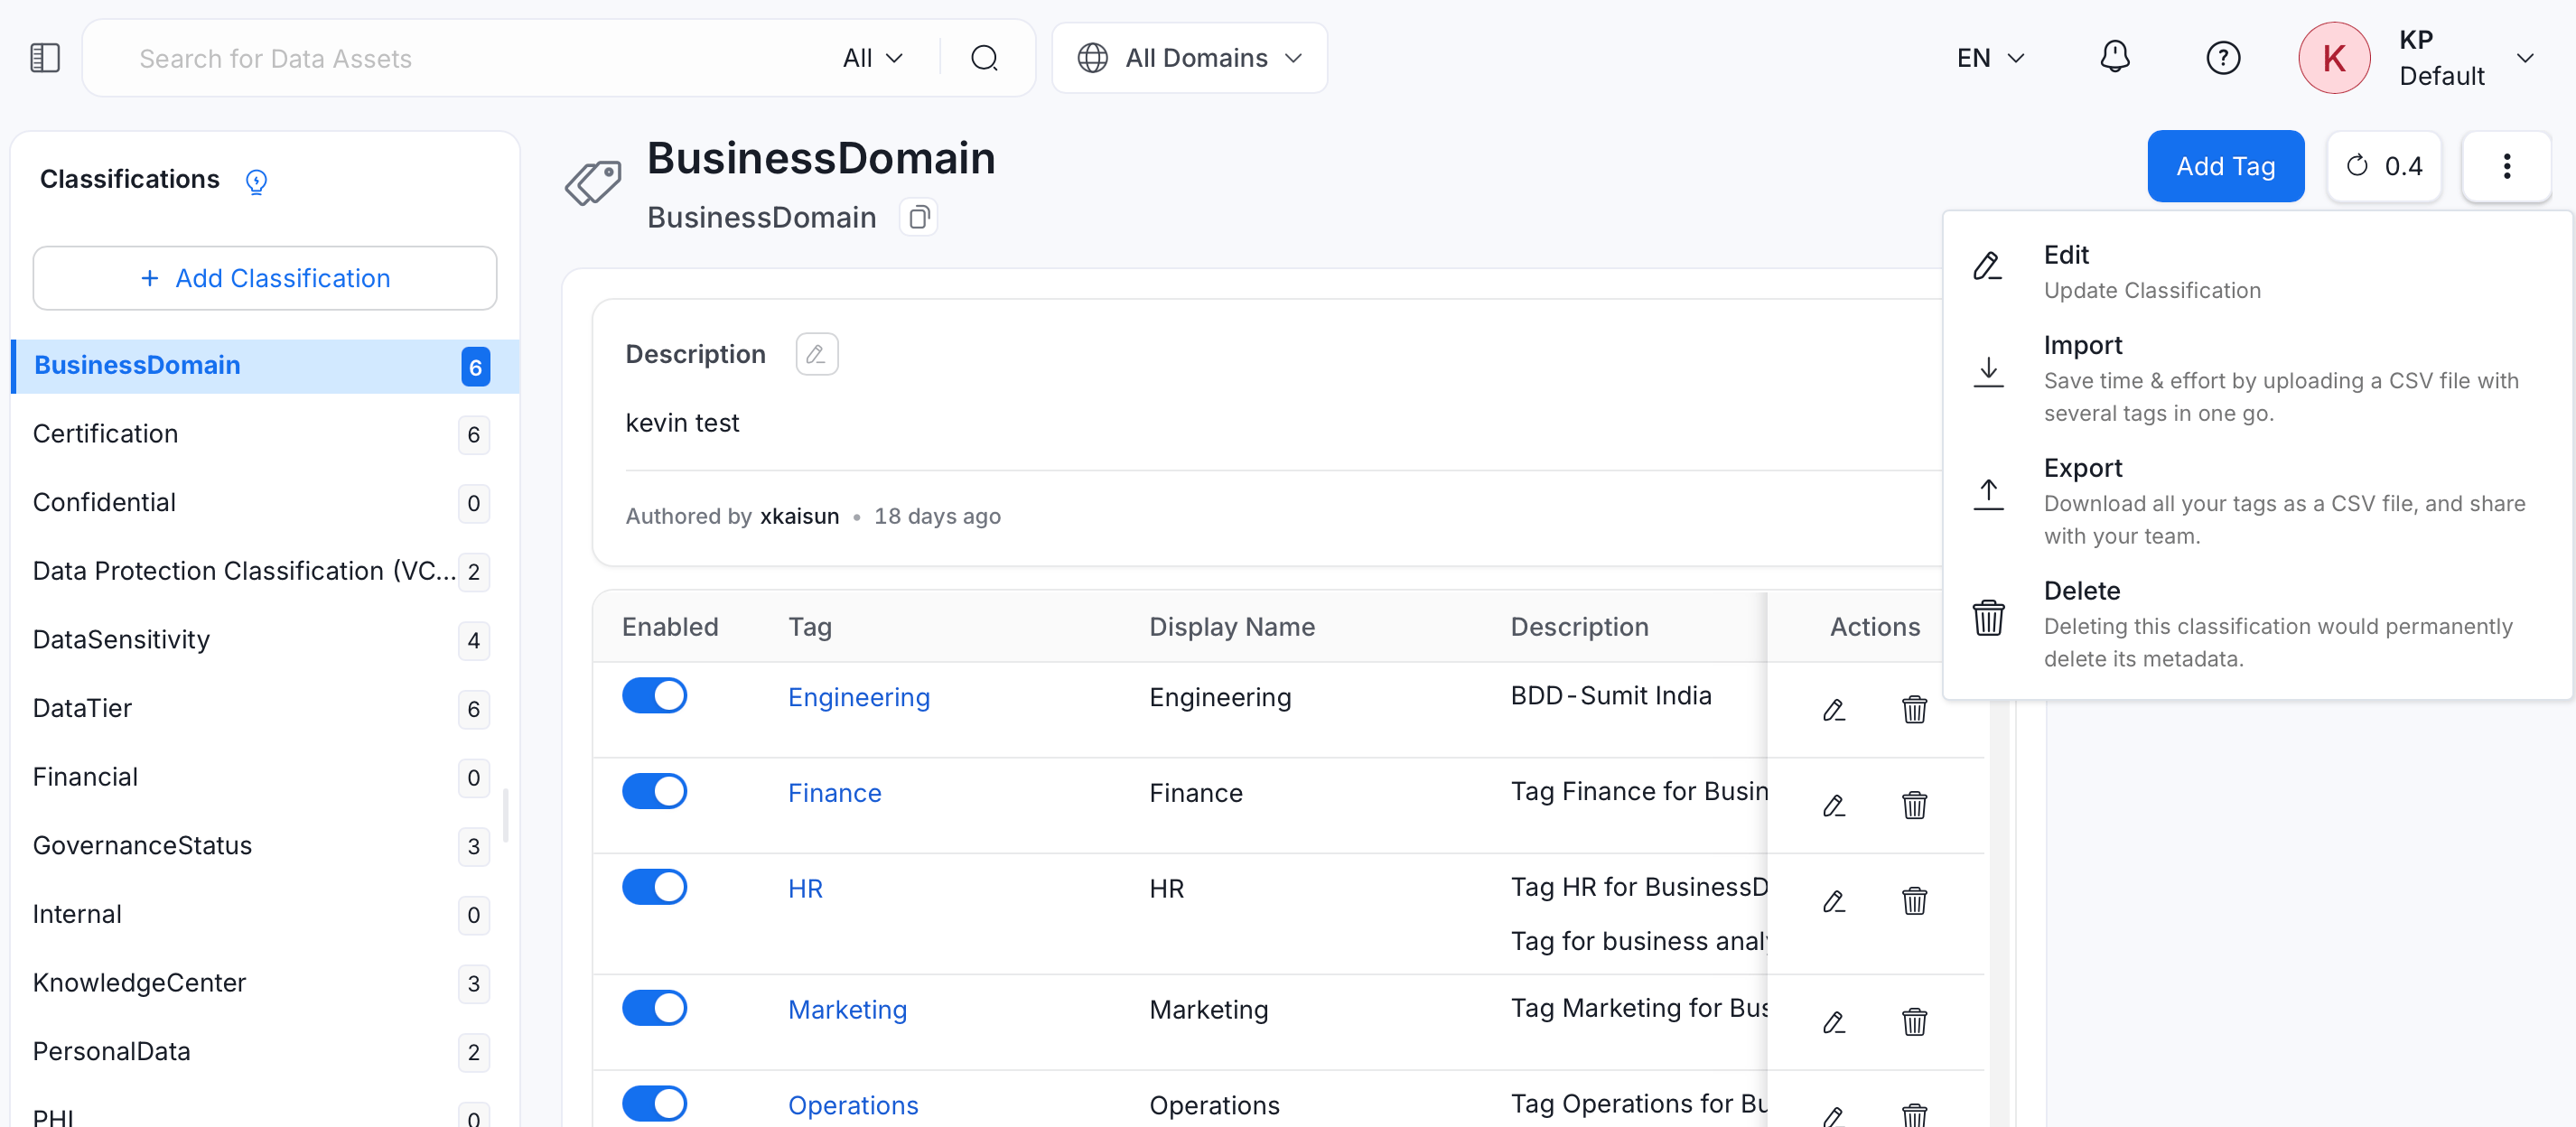
- Click the ⋮ icon and select Edit. This opens the same form as Add a Classification, pre-filled with the current values.
- Update any field and click Save.
Import Tags into a Classification
OpenMetadata supports classification import to save time and effort by uploading a CSV with several tags in one go, creating or updating multiple tags simultaneously. Each row in the CSV creates or updates one Tag under the selected Classification. To import tags into a classification:- Navigate to Govern > Classification.
- Select the classification you want to import tags into.
- Click the ⋮ icon and select Import.
-
Drag and drop a file, or click Browse to upload your tags. Click Download CSV Template for a starter file, or View Column References for the full list of supported columns.
 Leaving
mutuallyExclusiveblank on an update keeps the tag’s current value. Leaving any other optional column blank clears that field instead — for example, a blanktagStatusresets the tag toDraft. - Click Next: Preview.
- Preview and validate your uploaded data. Make any additions or corrections directly in the table if needed. A Passed and Failed count is displayed above the table to help you quickly identify any rows with validation errors before proceeding.
- Click Next to import the tags.
Export a Classification
Download a classification’s tags as a CSV file to share with your team:- Select the classification you want to export.
- Click the ⋮ icon and select Export.
Delete a Classification
Removing a classification permanently deletes its metadata:- Select the classification you want to remove.
- Click the ⋮ icon and select Delete.
- Click Confirm to delete the classification.
How to Classify Data Assets
Add tags to data assets, or request them and discuss about the same, all within OpenMetadata.