
Ontologies
An ontology is a standalone model that lives in Ontology Studio in its own right. It has its own concepts, properties, and constraints, and it is published as a series of numbered releases. You don’t need a glossary to create one.Note: Users with edit permission read and query the ontology’s working Draft by default and can switch to the Published version. Users without edit permission always read the active published release. Concepts you haven’t published don’t appear to them. For more information, see Draft and Published Views.
Choose an Ontology
The Ontology selector is the button at the top right of the Ontology Studio header. It decides what the whole Studio shows.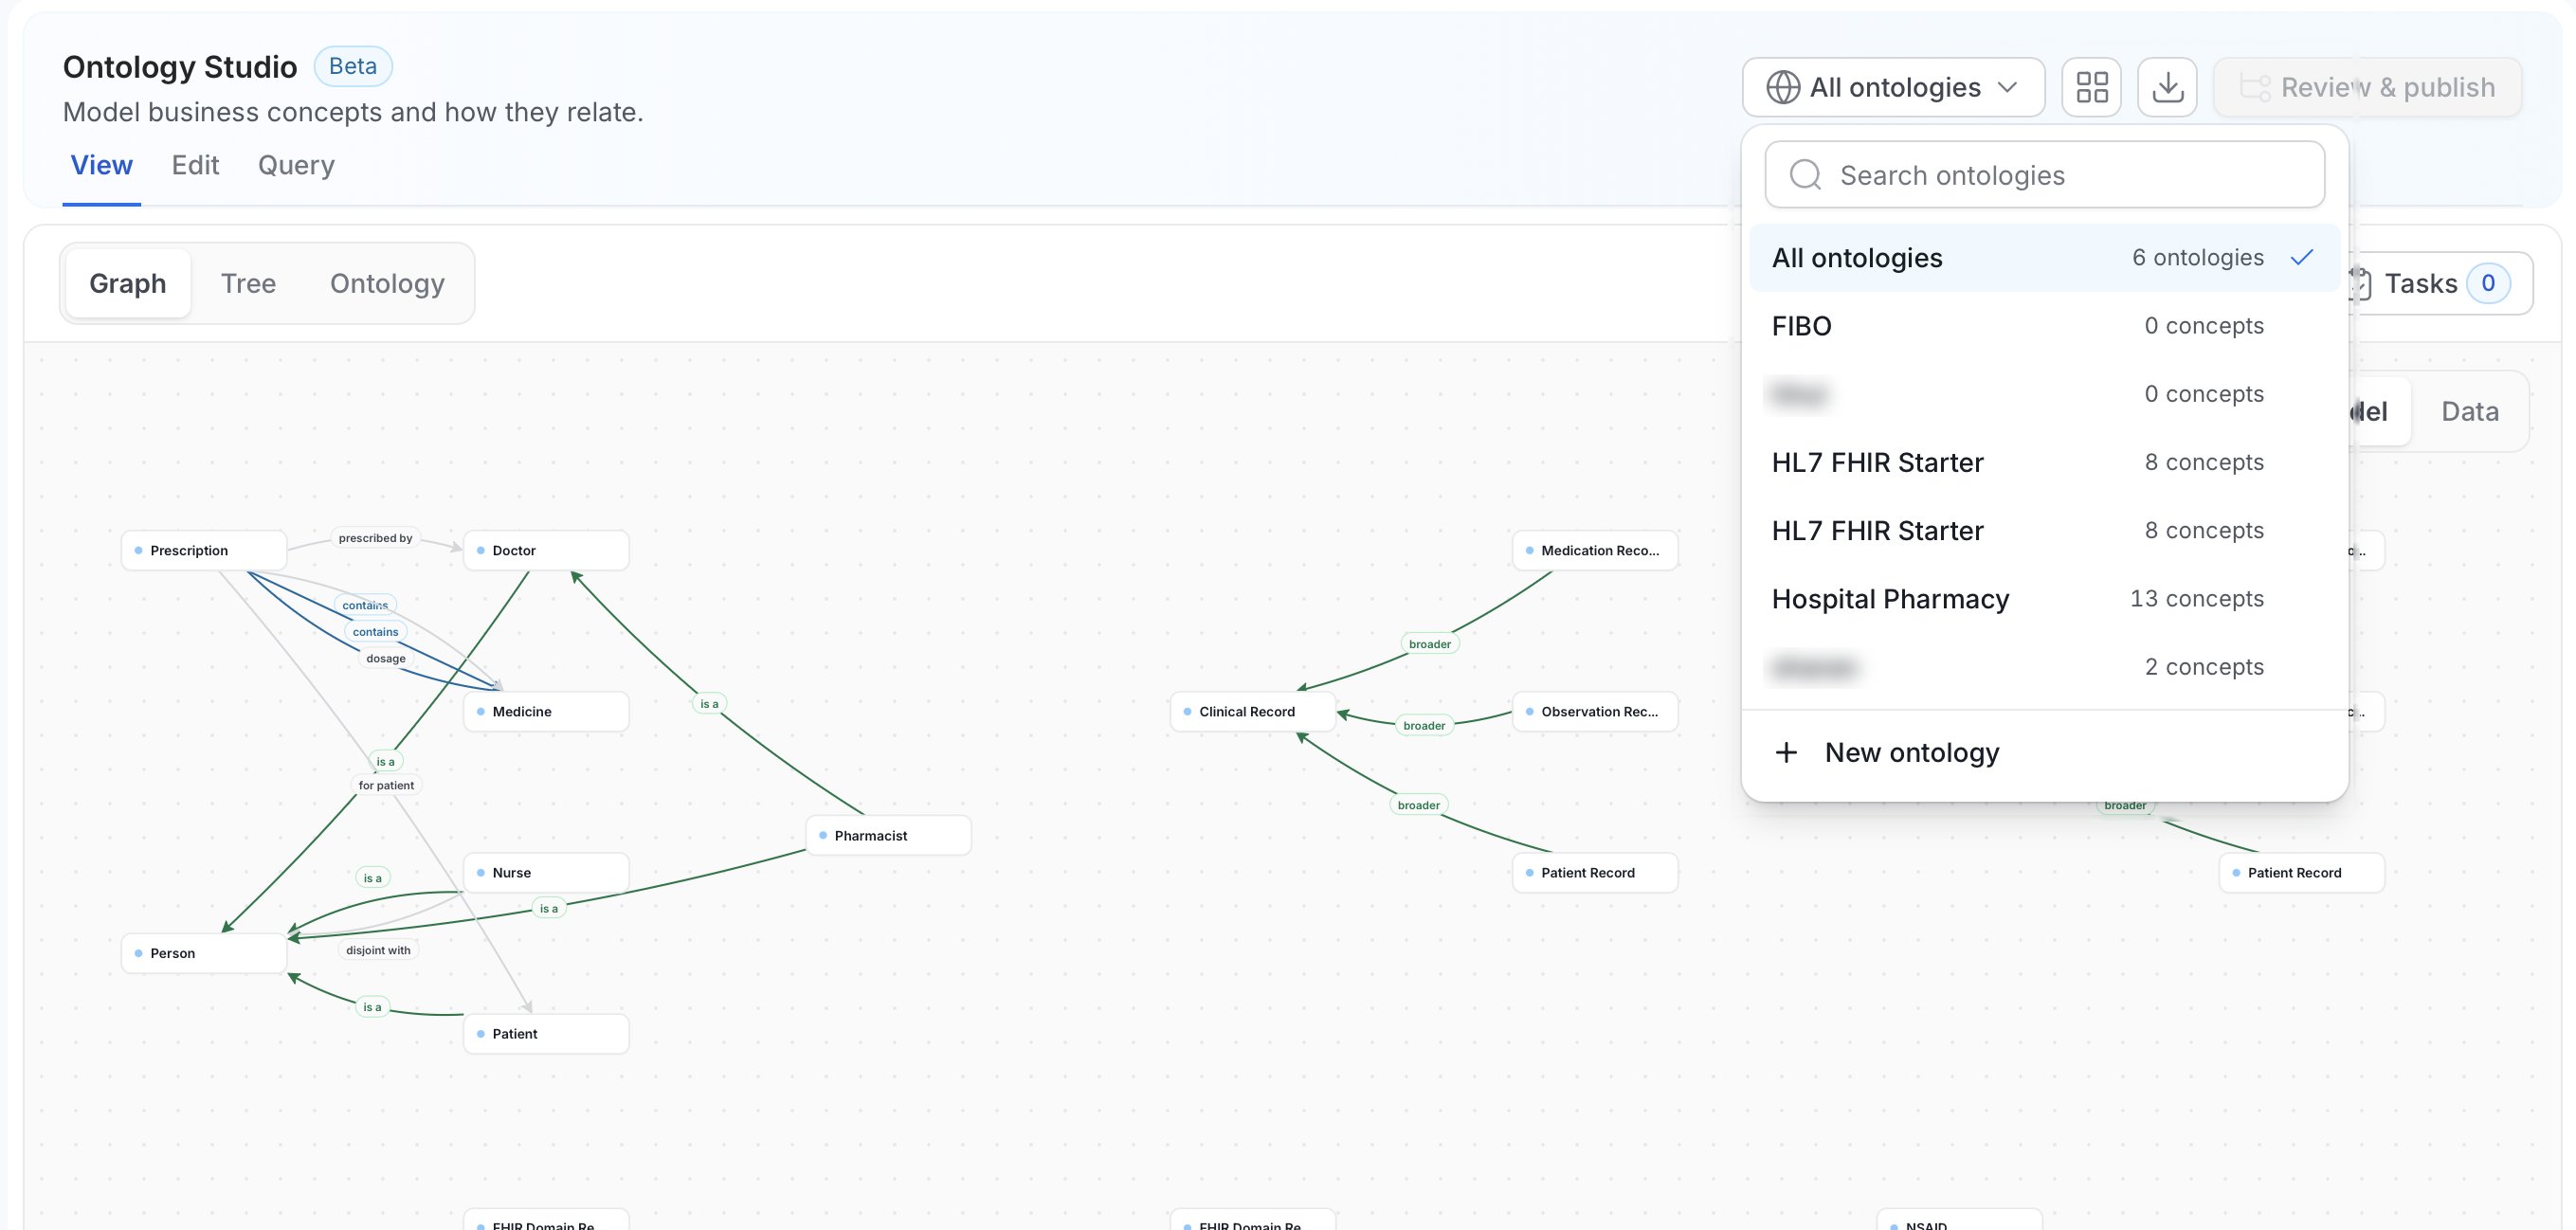
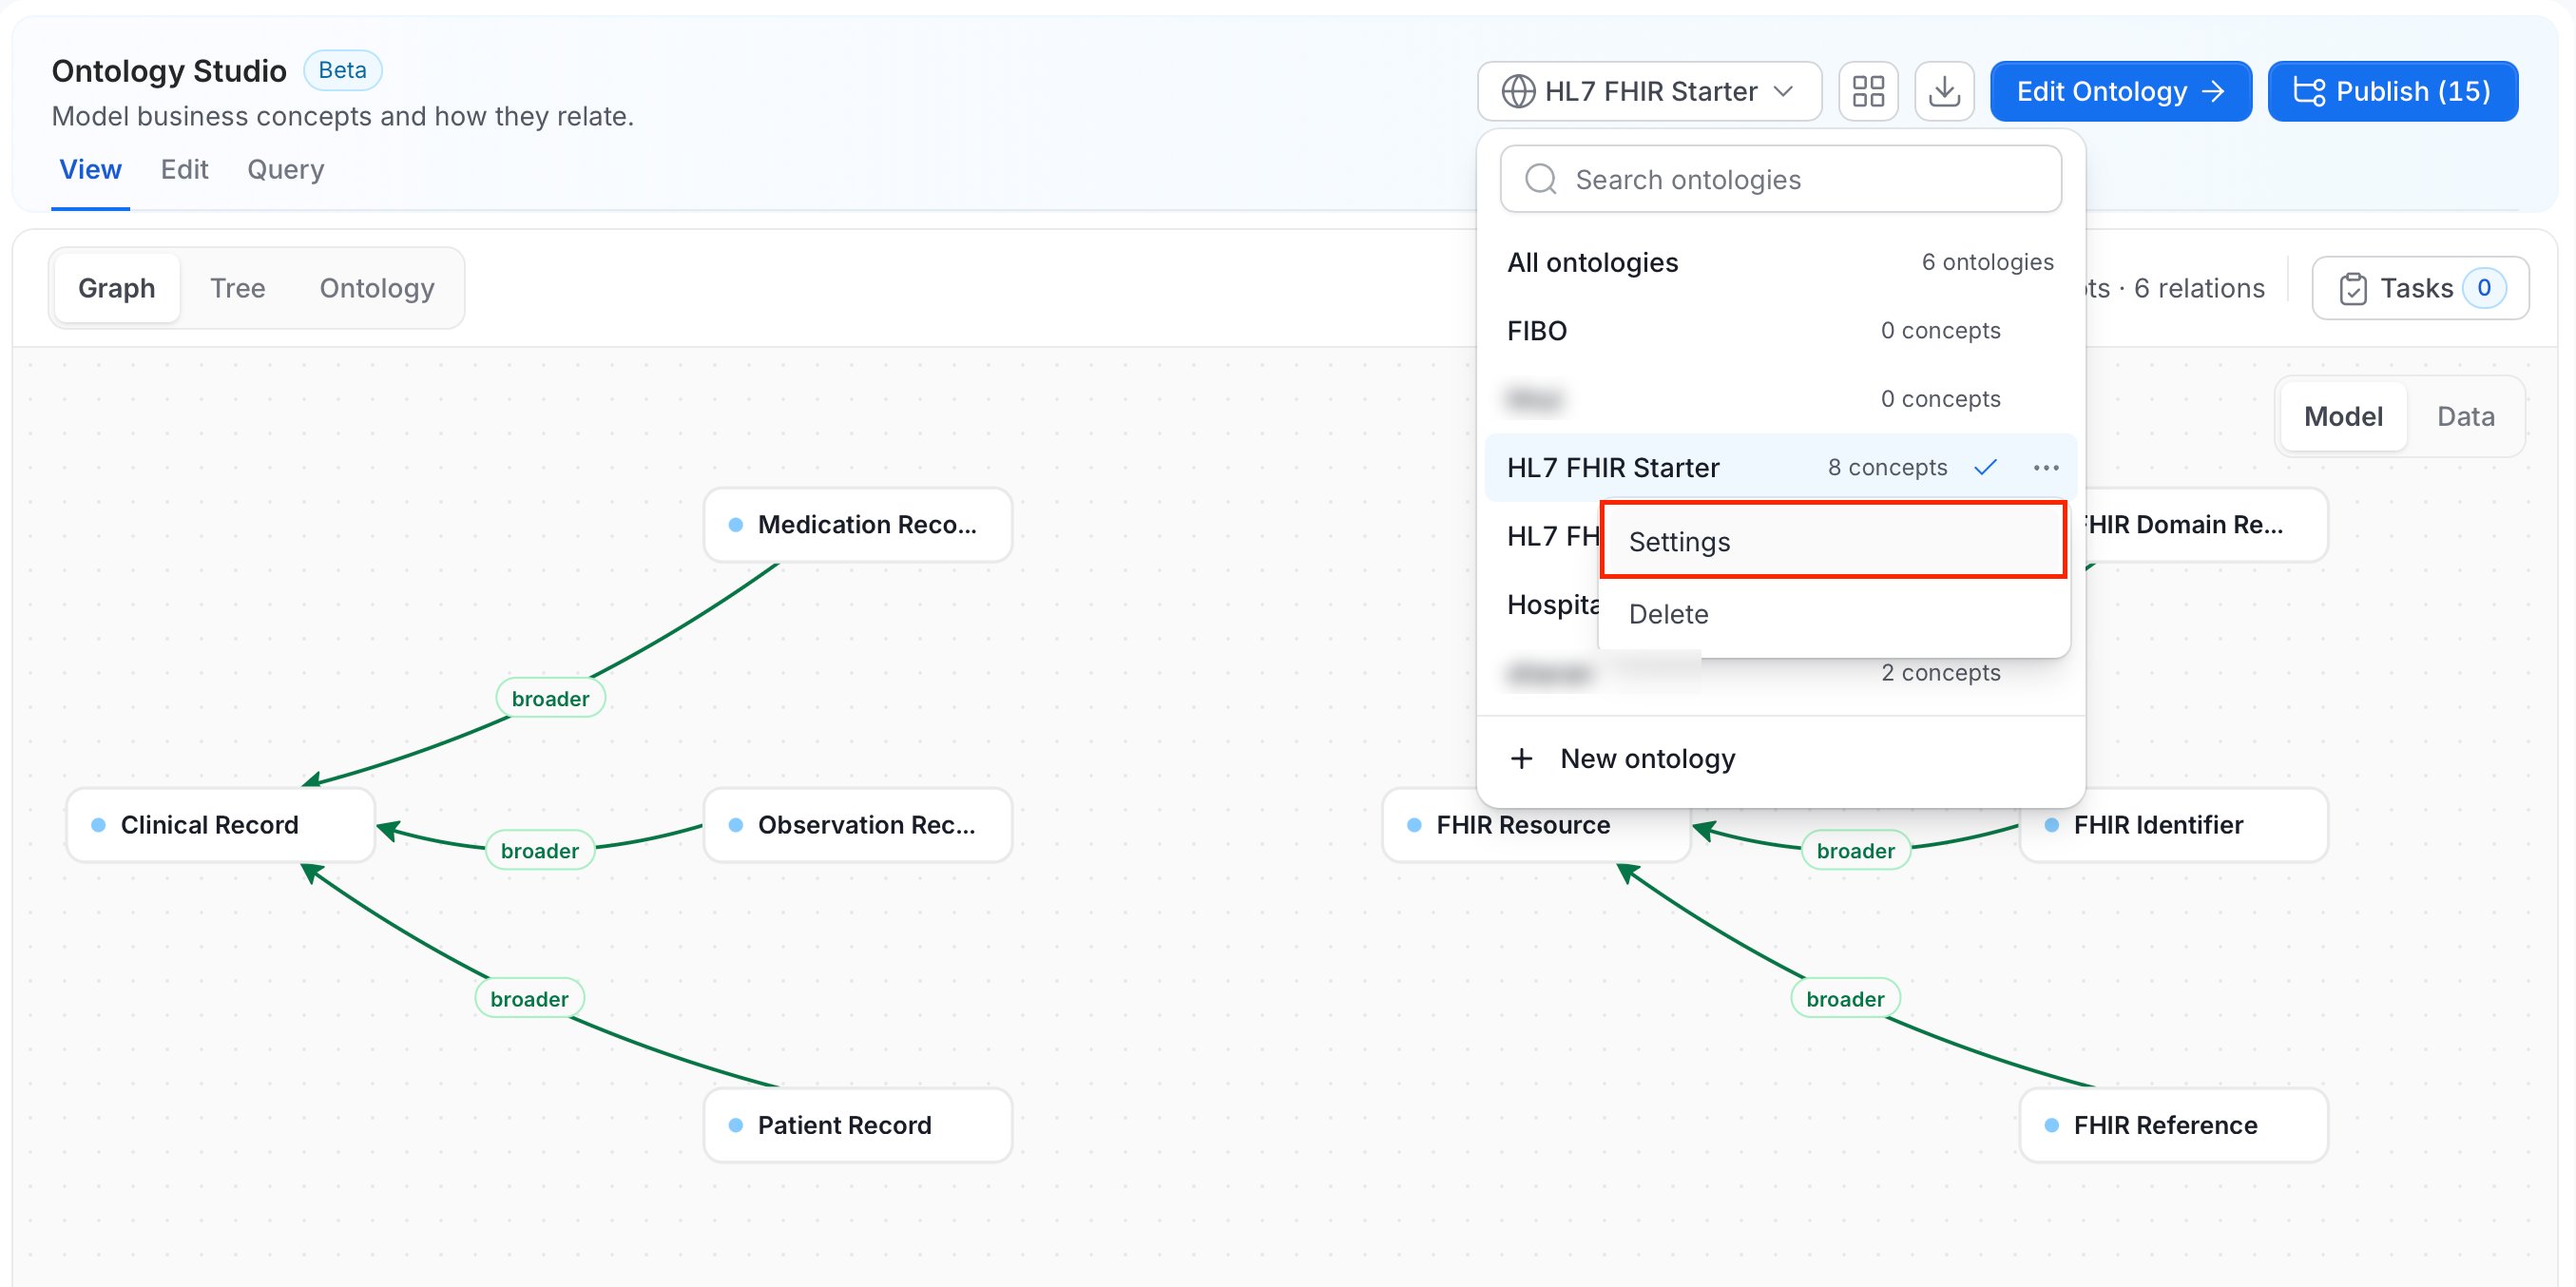
Hover an ontology row to show its More actions menu, which has Settings and Delete.
- View shows the combined graph, with Graph and Tree surfaces.
- Edit and Query first ask you to pick a single ontology.
- If the catalog has too many concepts for one graph (more than 20 ontologies or 2,000 combined definitions), Studio asks you to pick one ontology instead.
First Run
If there are no ontologies yet, Studio shows No ontologies yet with three cards: Install from library, Import a file, and Create from scratch. For more information, see First Run.Create an Ontology
-
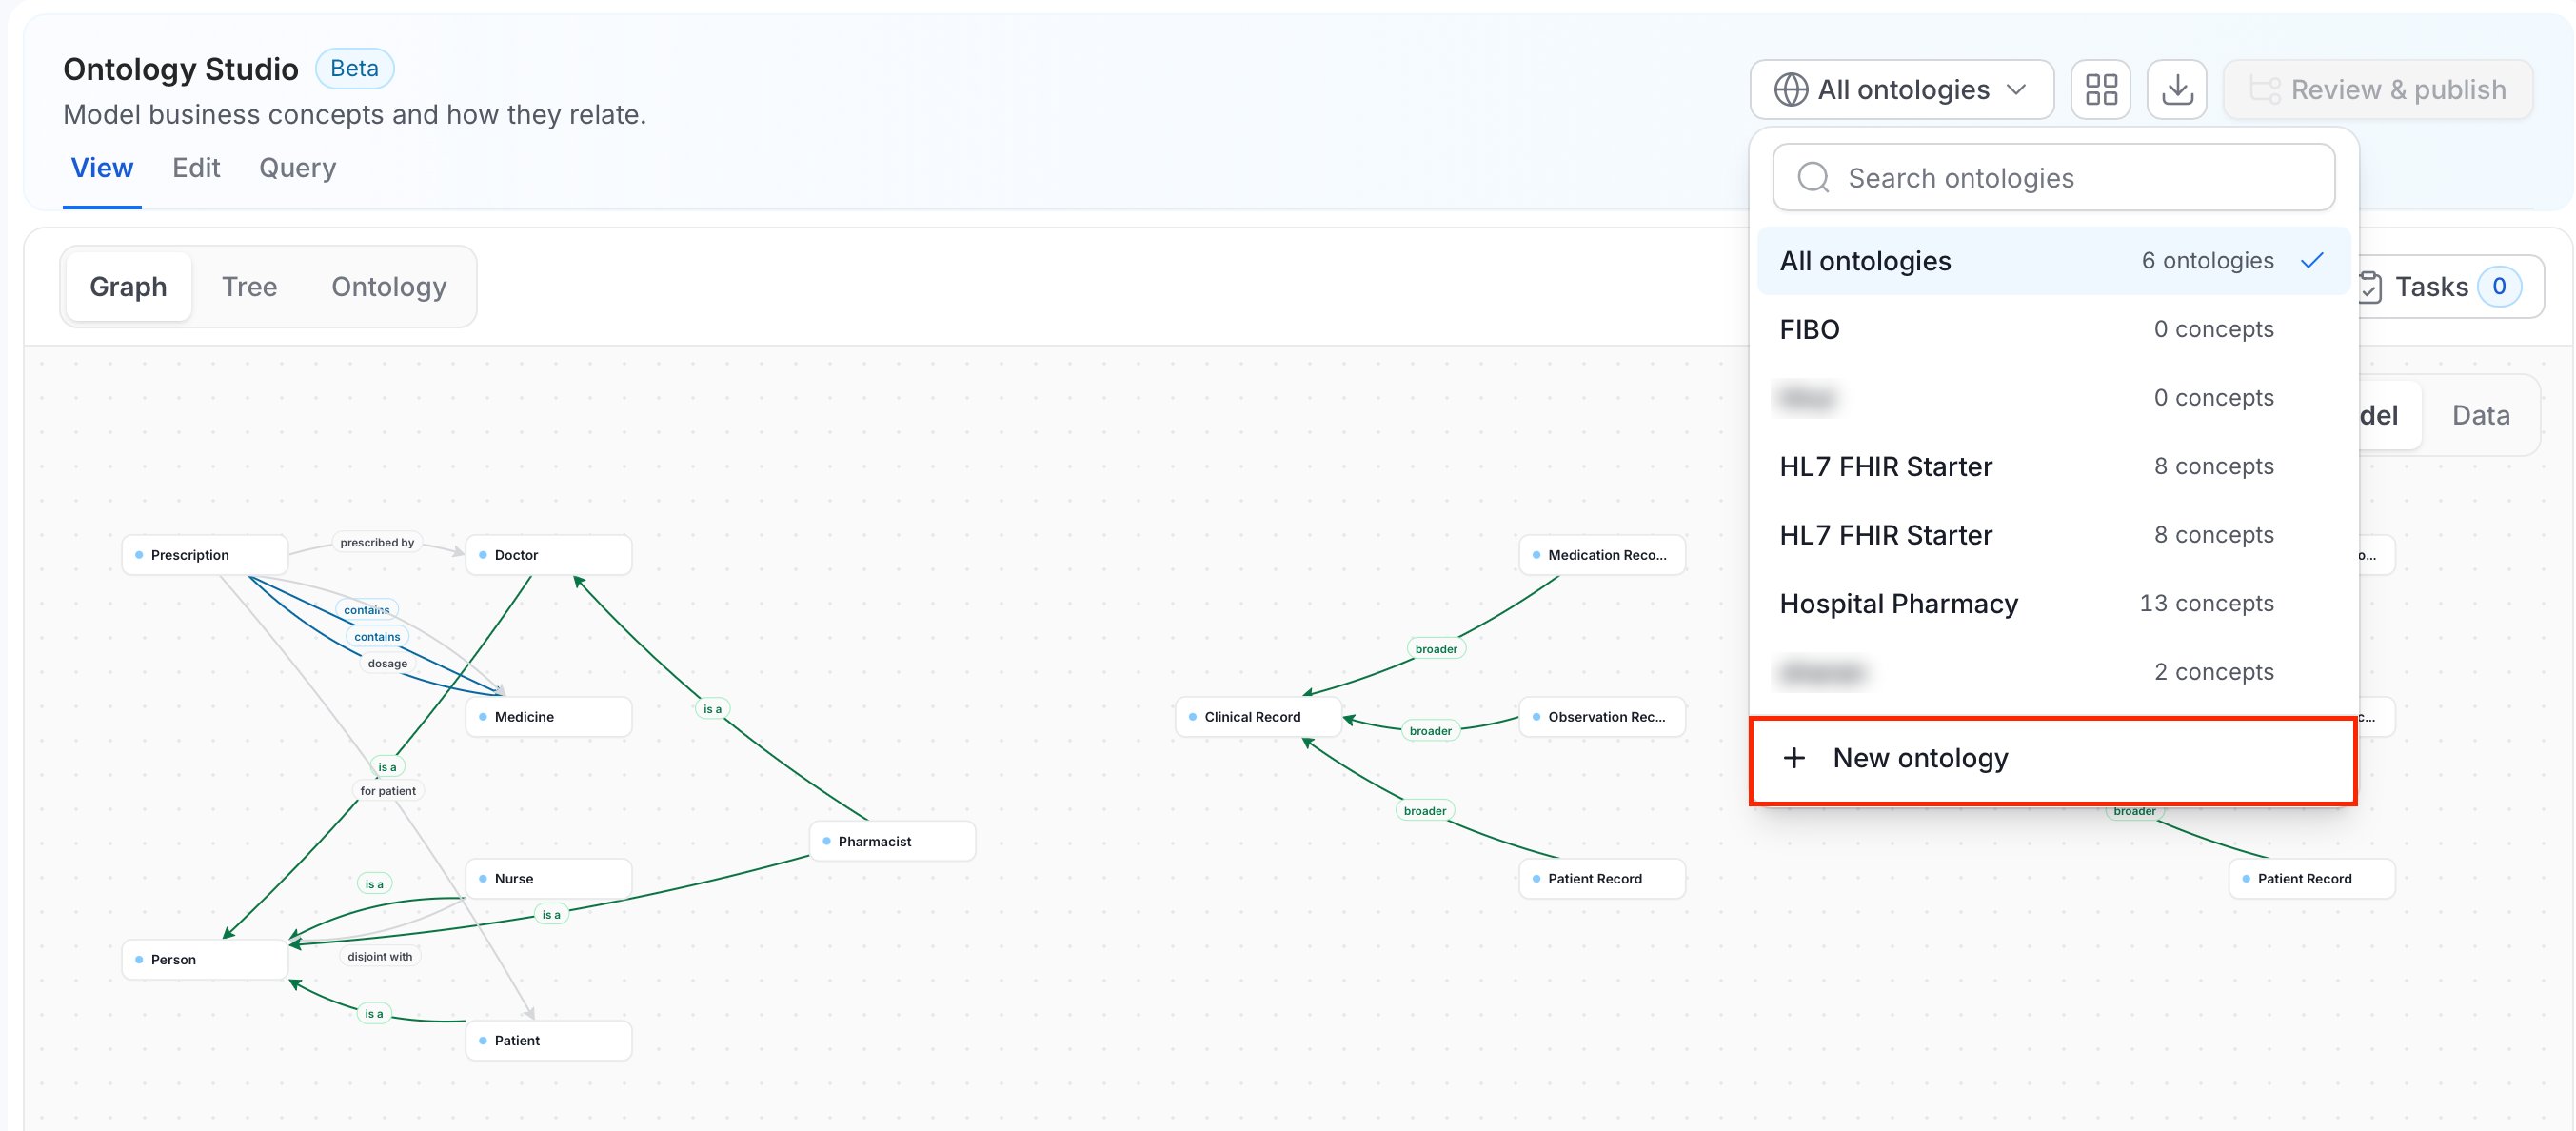
Open the Ontology selector and click New ontology. The item appears only if you can create ontologies. For more information, see Permissions. On the first-run screen, click Create from scratch instead.
-
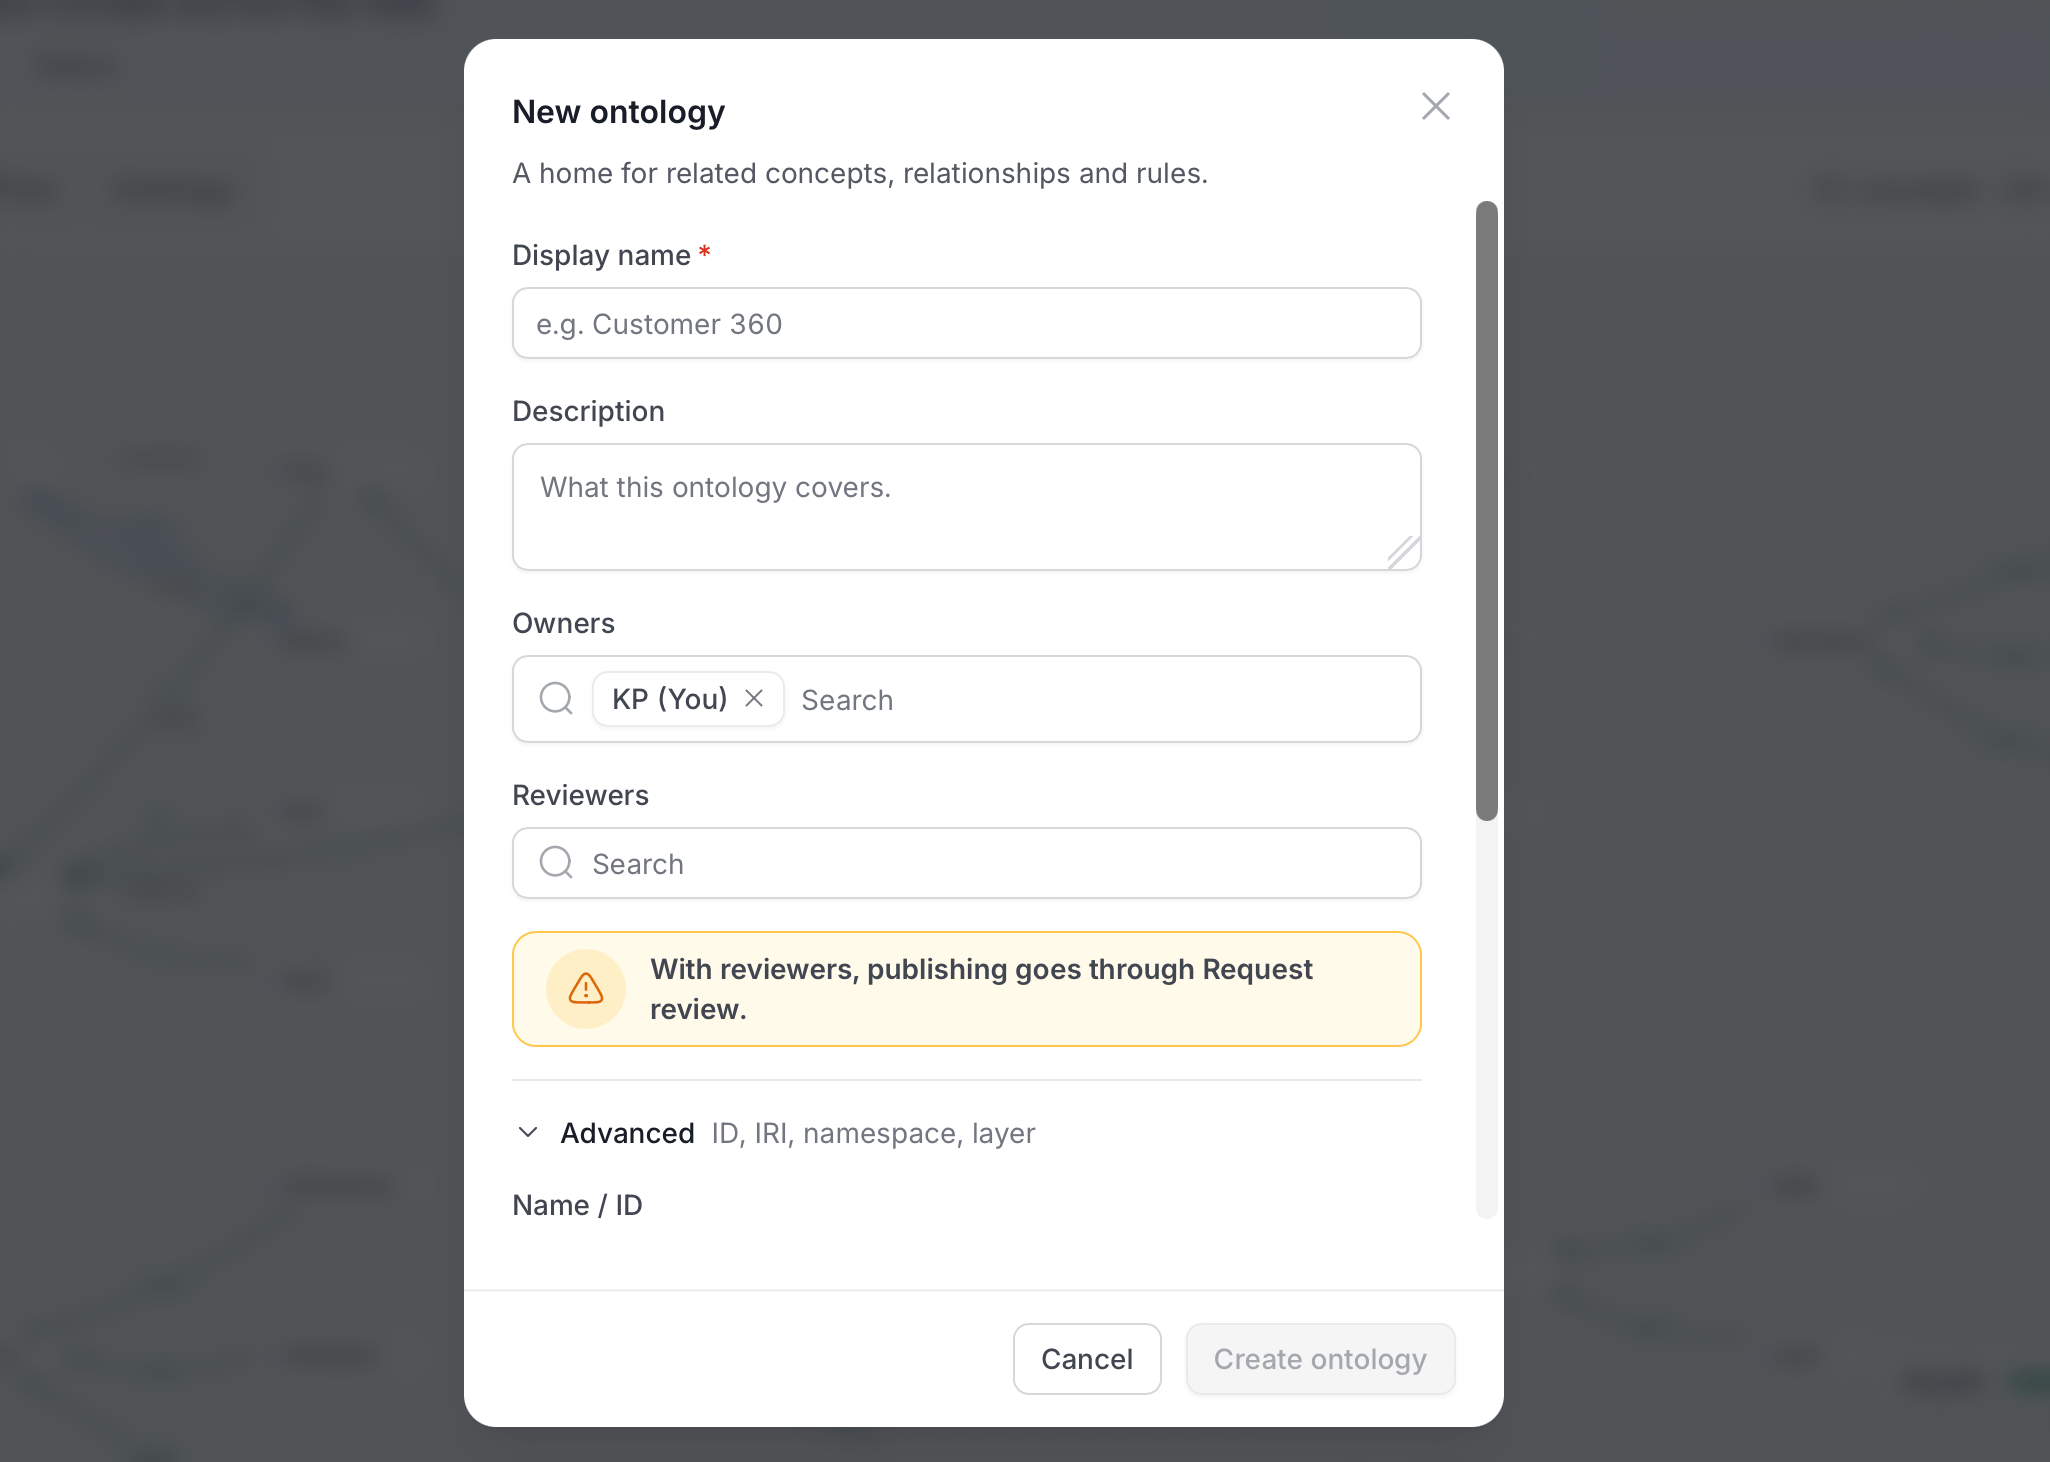
In the New ontology dialog, complete the fields. Create ontology stays disabled until Display name is valid and the namespace has loaded.
-
Optional: Expand Advanced to review or change the generated identifiers.
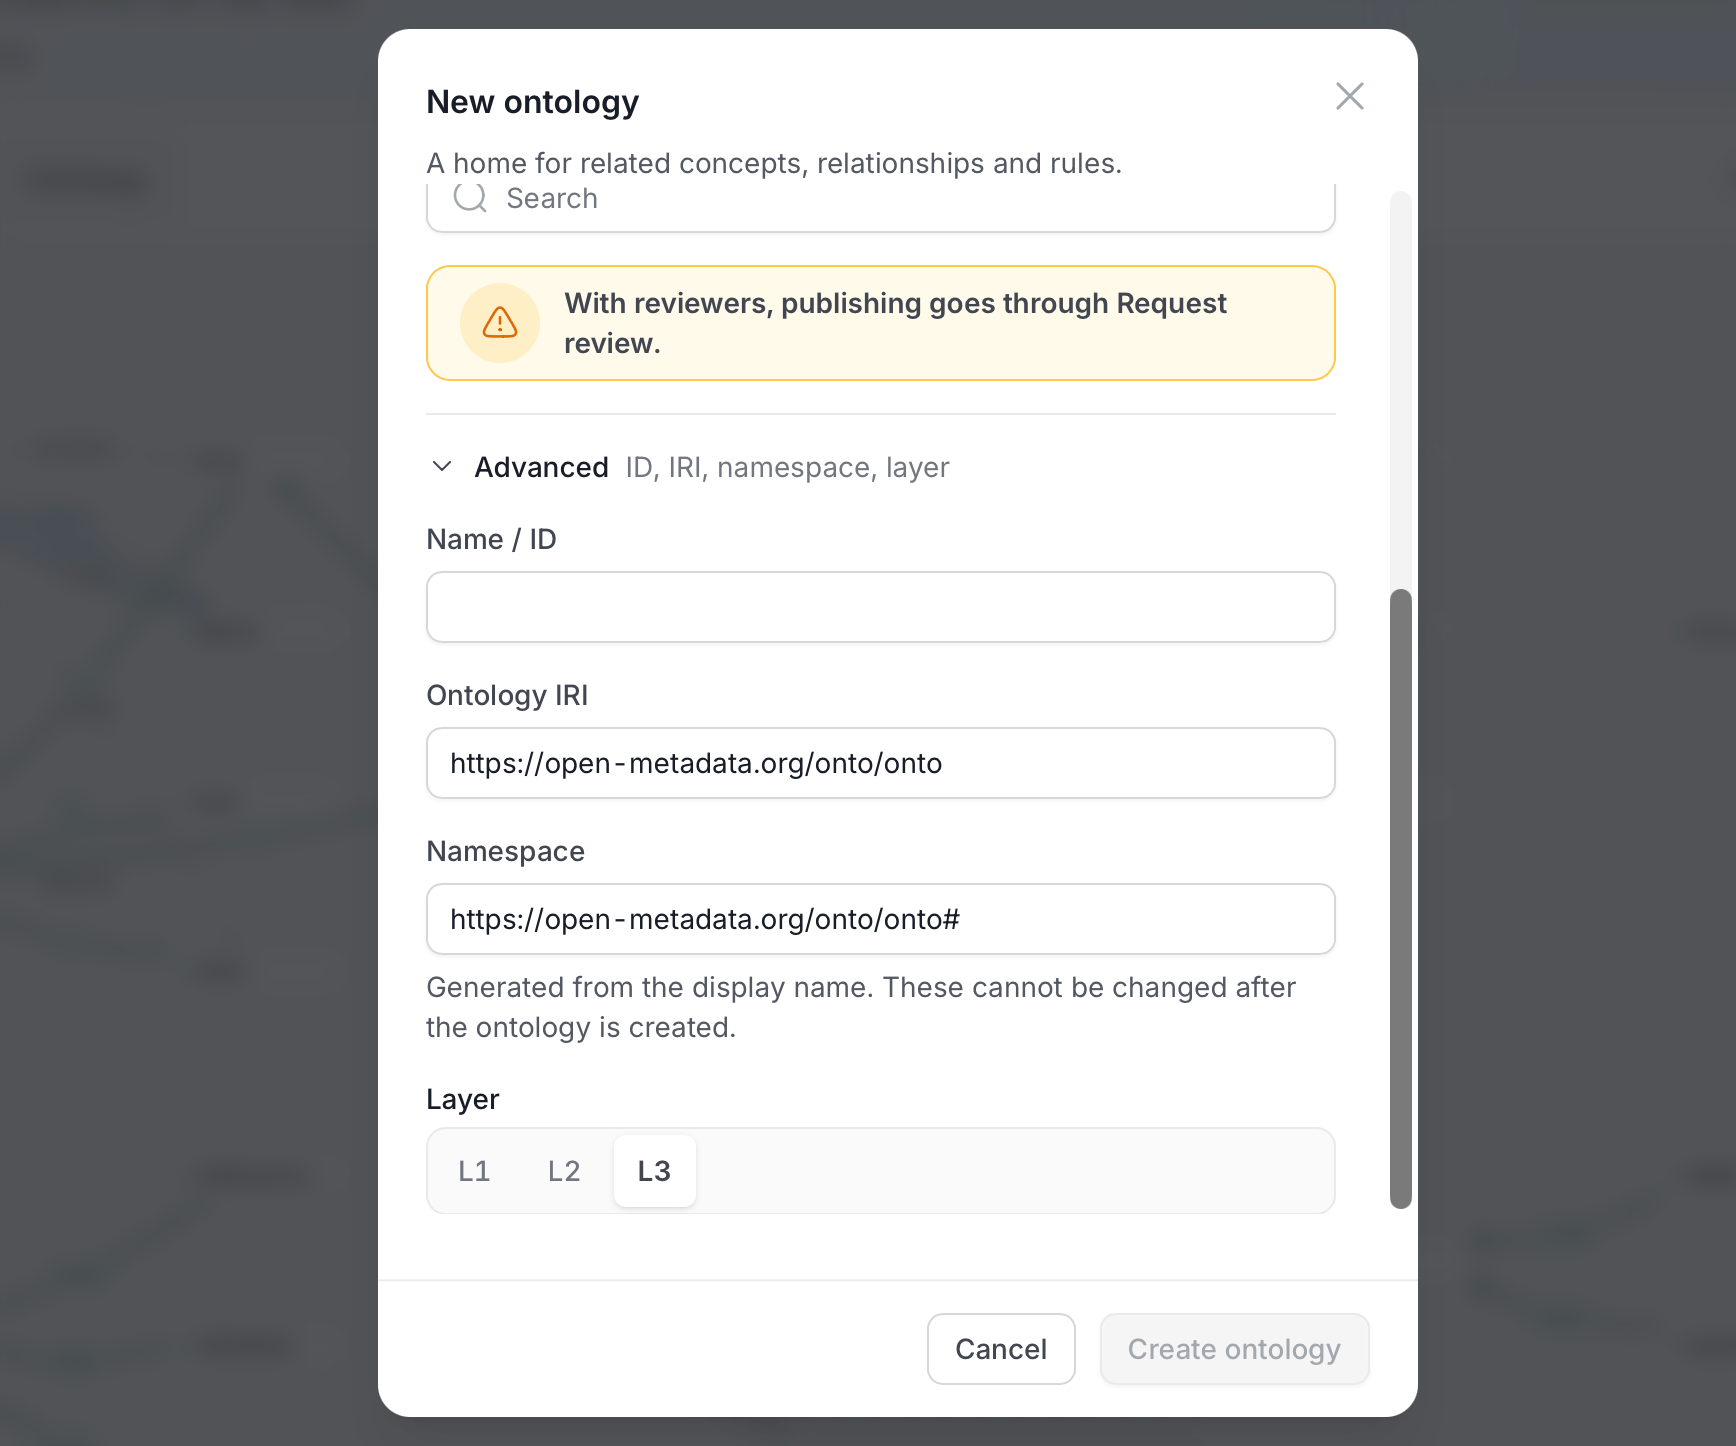
ontowhen nothing is left. If another ontology already uses it, Studio appends a number. For the name Finance Core, the IRI ishttps://open-metadata.org/onto/financec. The base URI comes from the server’s RDF base URI setting (RDF_BASE_URI), which defaults tohttps://open-metadata.org/. If the base URI can’t be loaded, the dialog shows an error with a Retry button.Note: What is an IRI? An IRI (Internationalized Resource Identifier) is a unique, permanent name for a thing, written like a web address or aurn:string. It identifies a concept even if you rename it later. IRIs must be absolute, meaning they start with a scheme such ashttps:orurn:. A value likerelative/pathis rejected with the message Enter a valid concept IRI. - Click Create ontology. The new ontology opens in Edit mode, appears in the selector, and Studio prompts you to add the first concept.
urn:openmetadata:ontology:<id> instead of the onto namespace.
Edit Ontology Settings
To edit an ontology’s settings, use either of the following methods. From the Ontology selector- Click the Ontology selector in the header.
-
Hover the ontology row, click More actions, and then click Settings. The Ontology settings dialog opens.
- Pick the ontology in the Ontology selector.
-
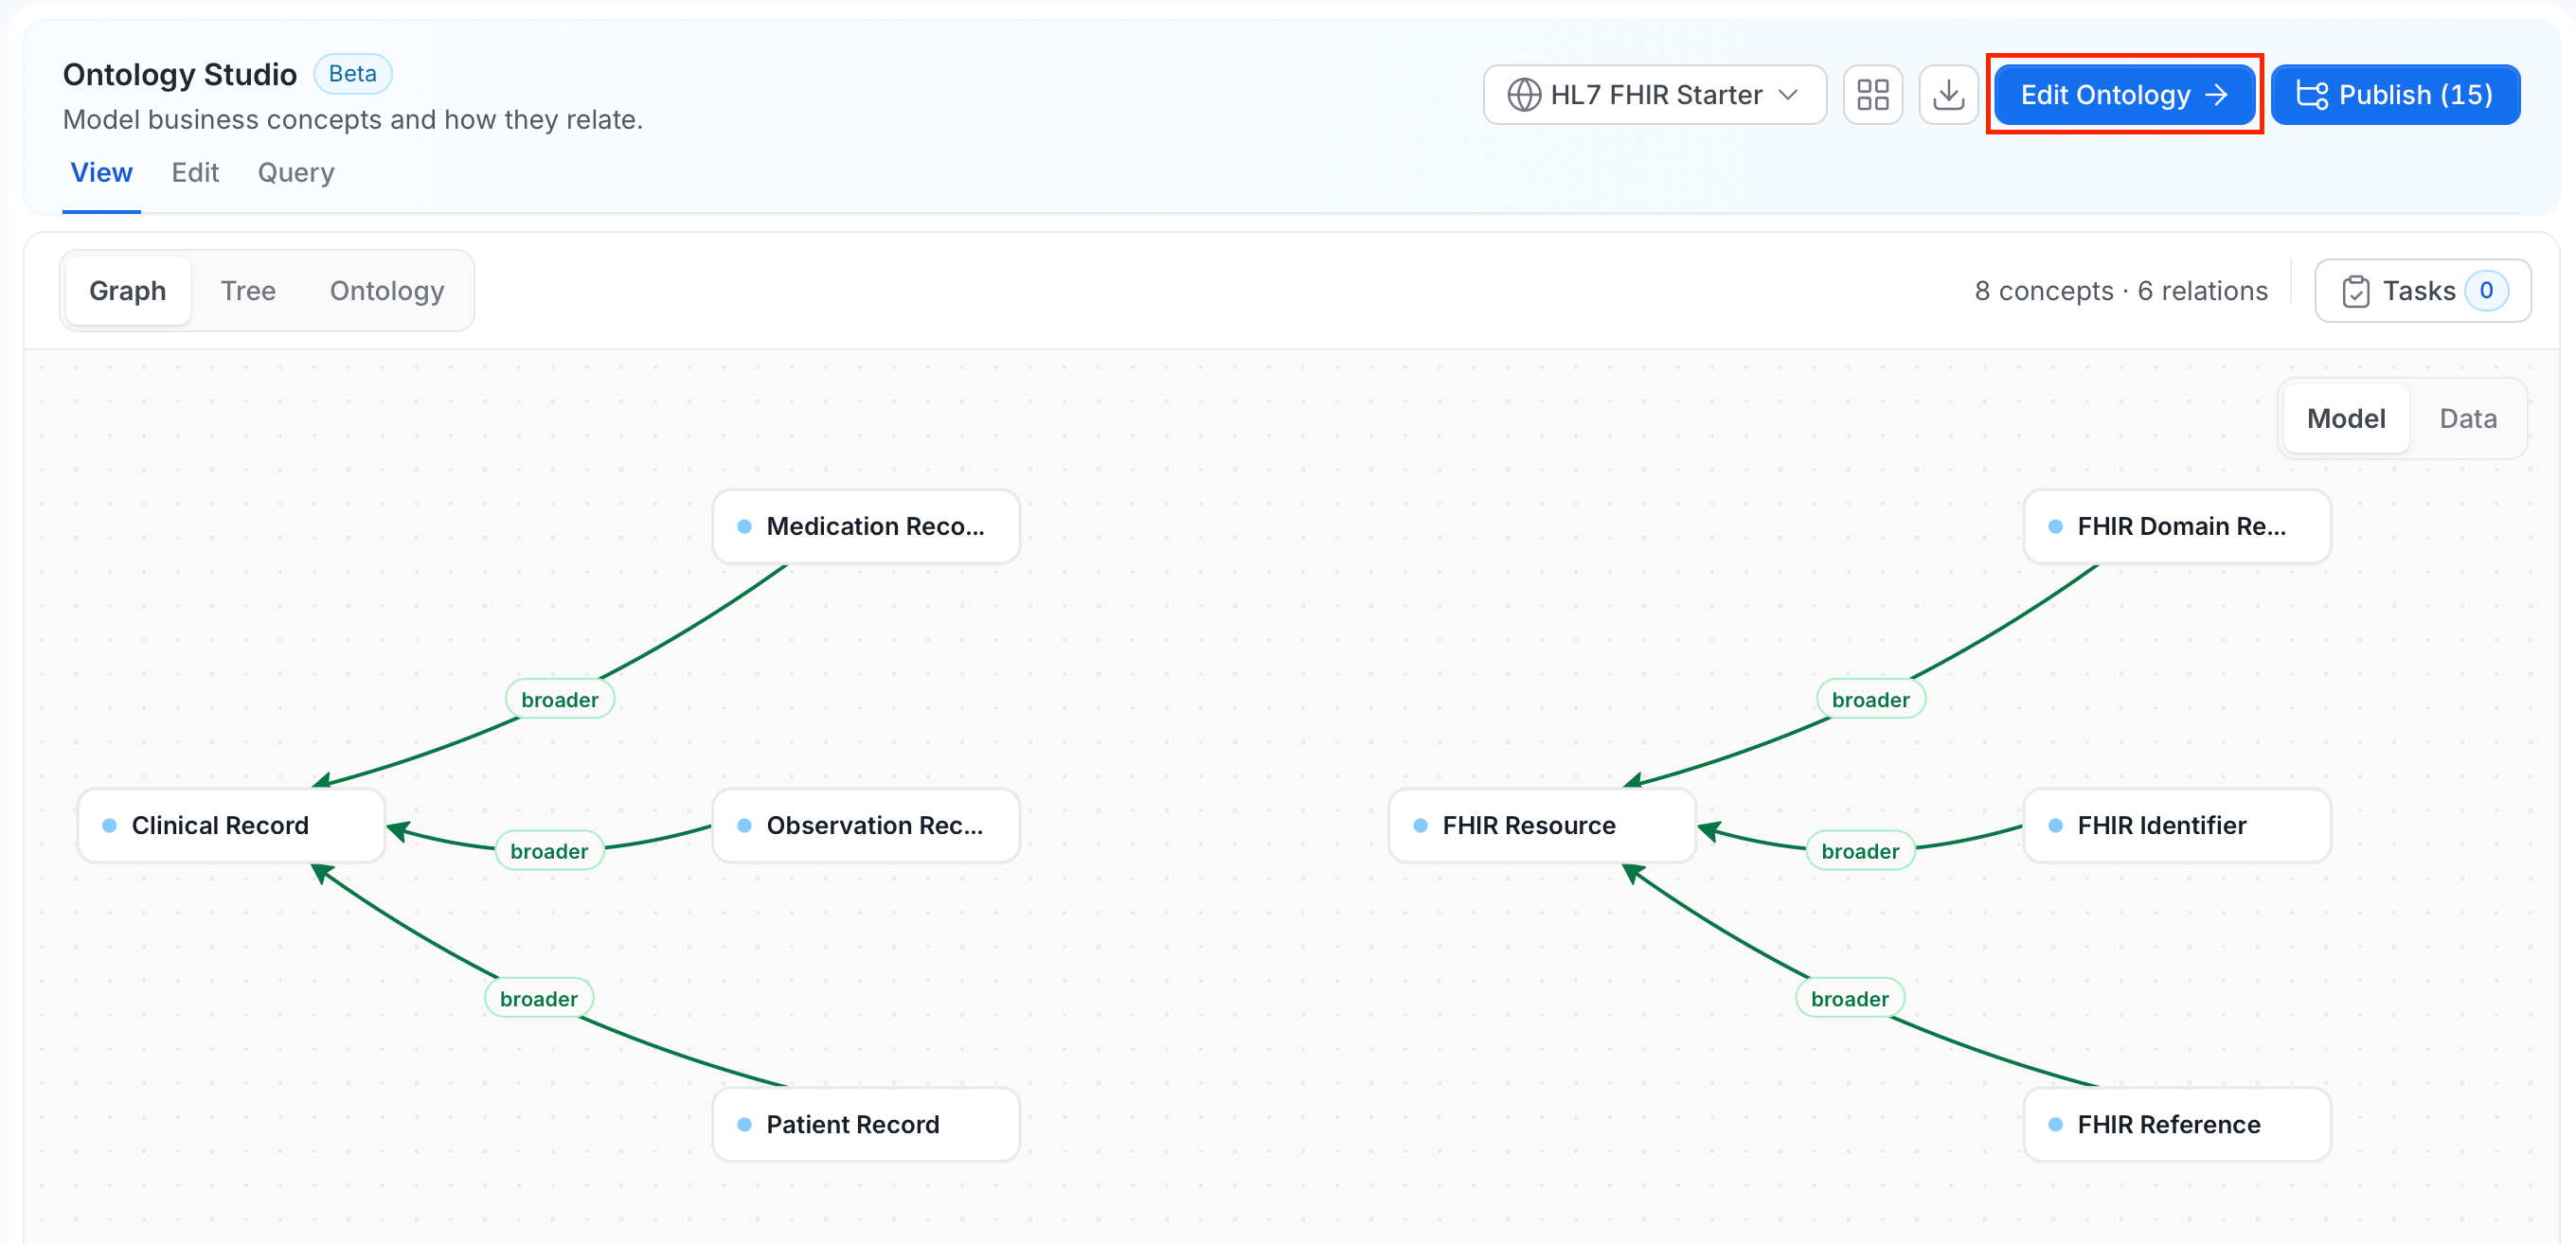
In View mode, click Edit Ontology. Alternatively, click the Edit tab.
-
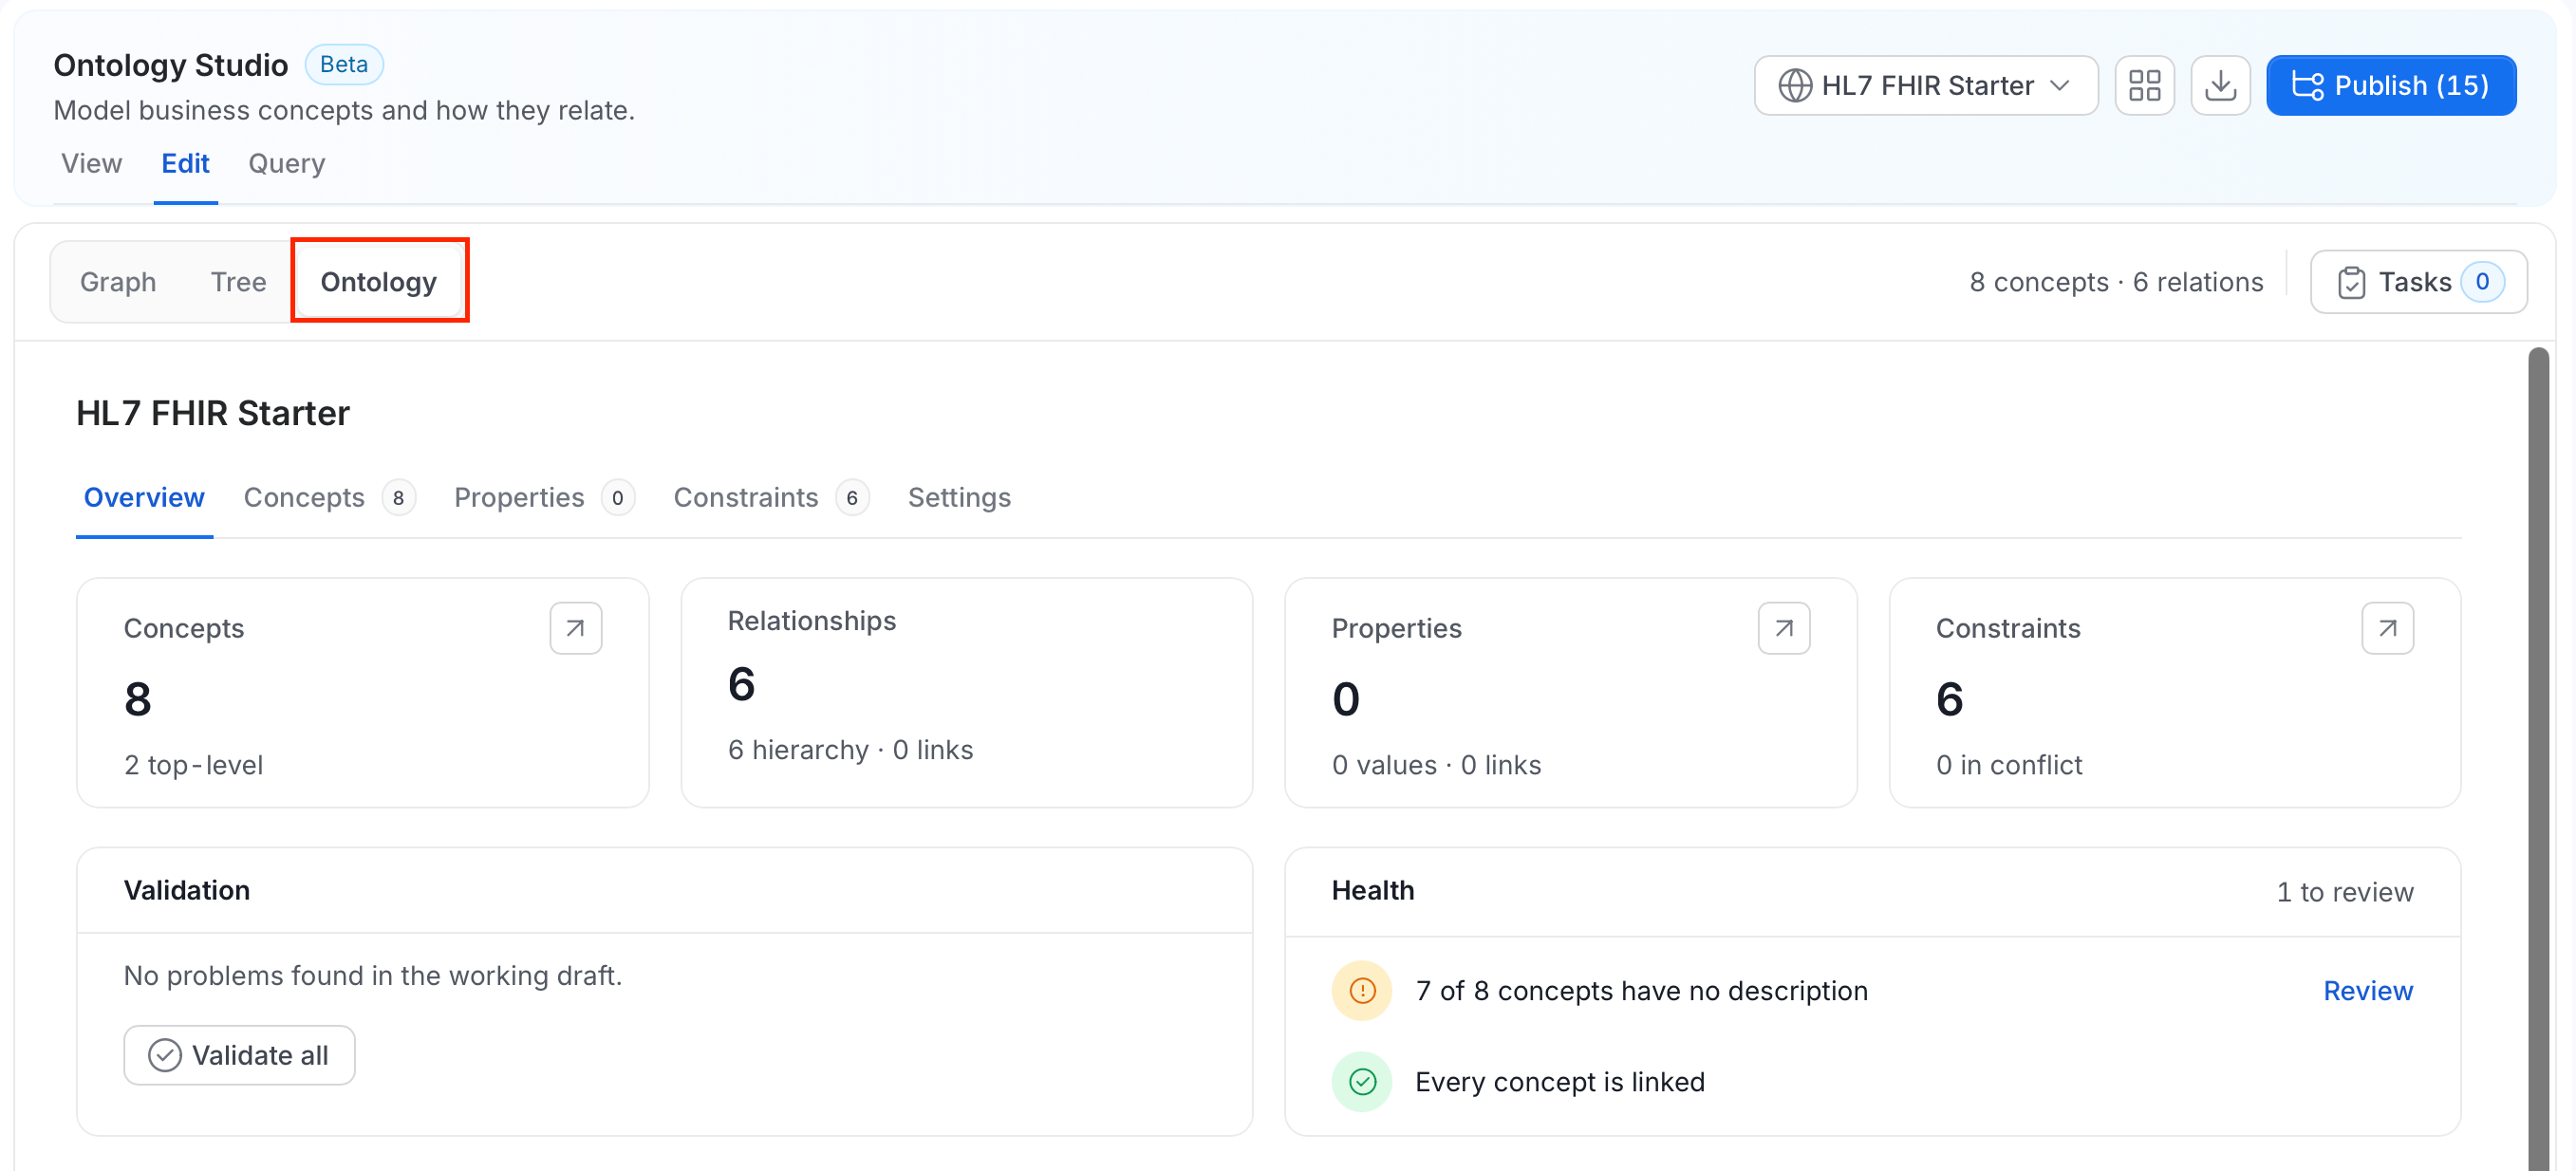
In the sub-mode bar, click Ontology.
-
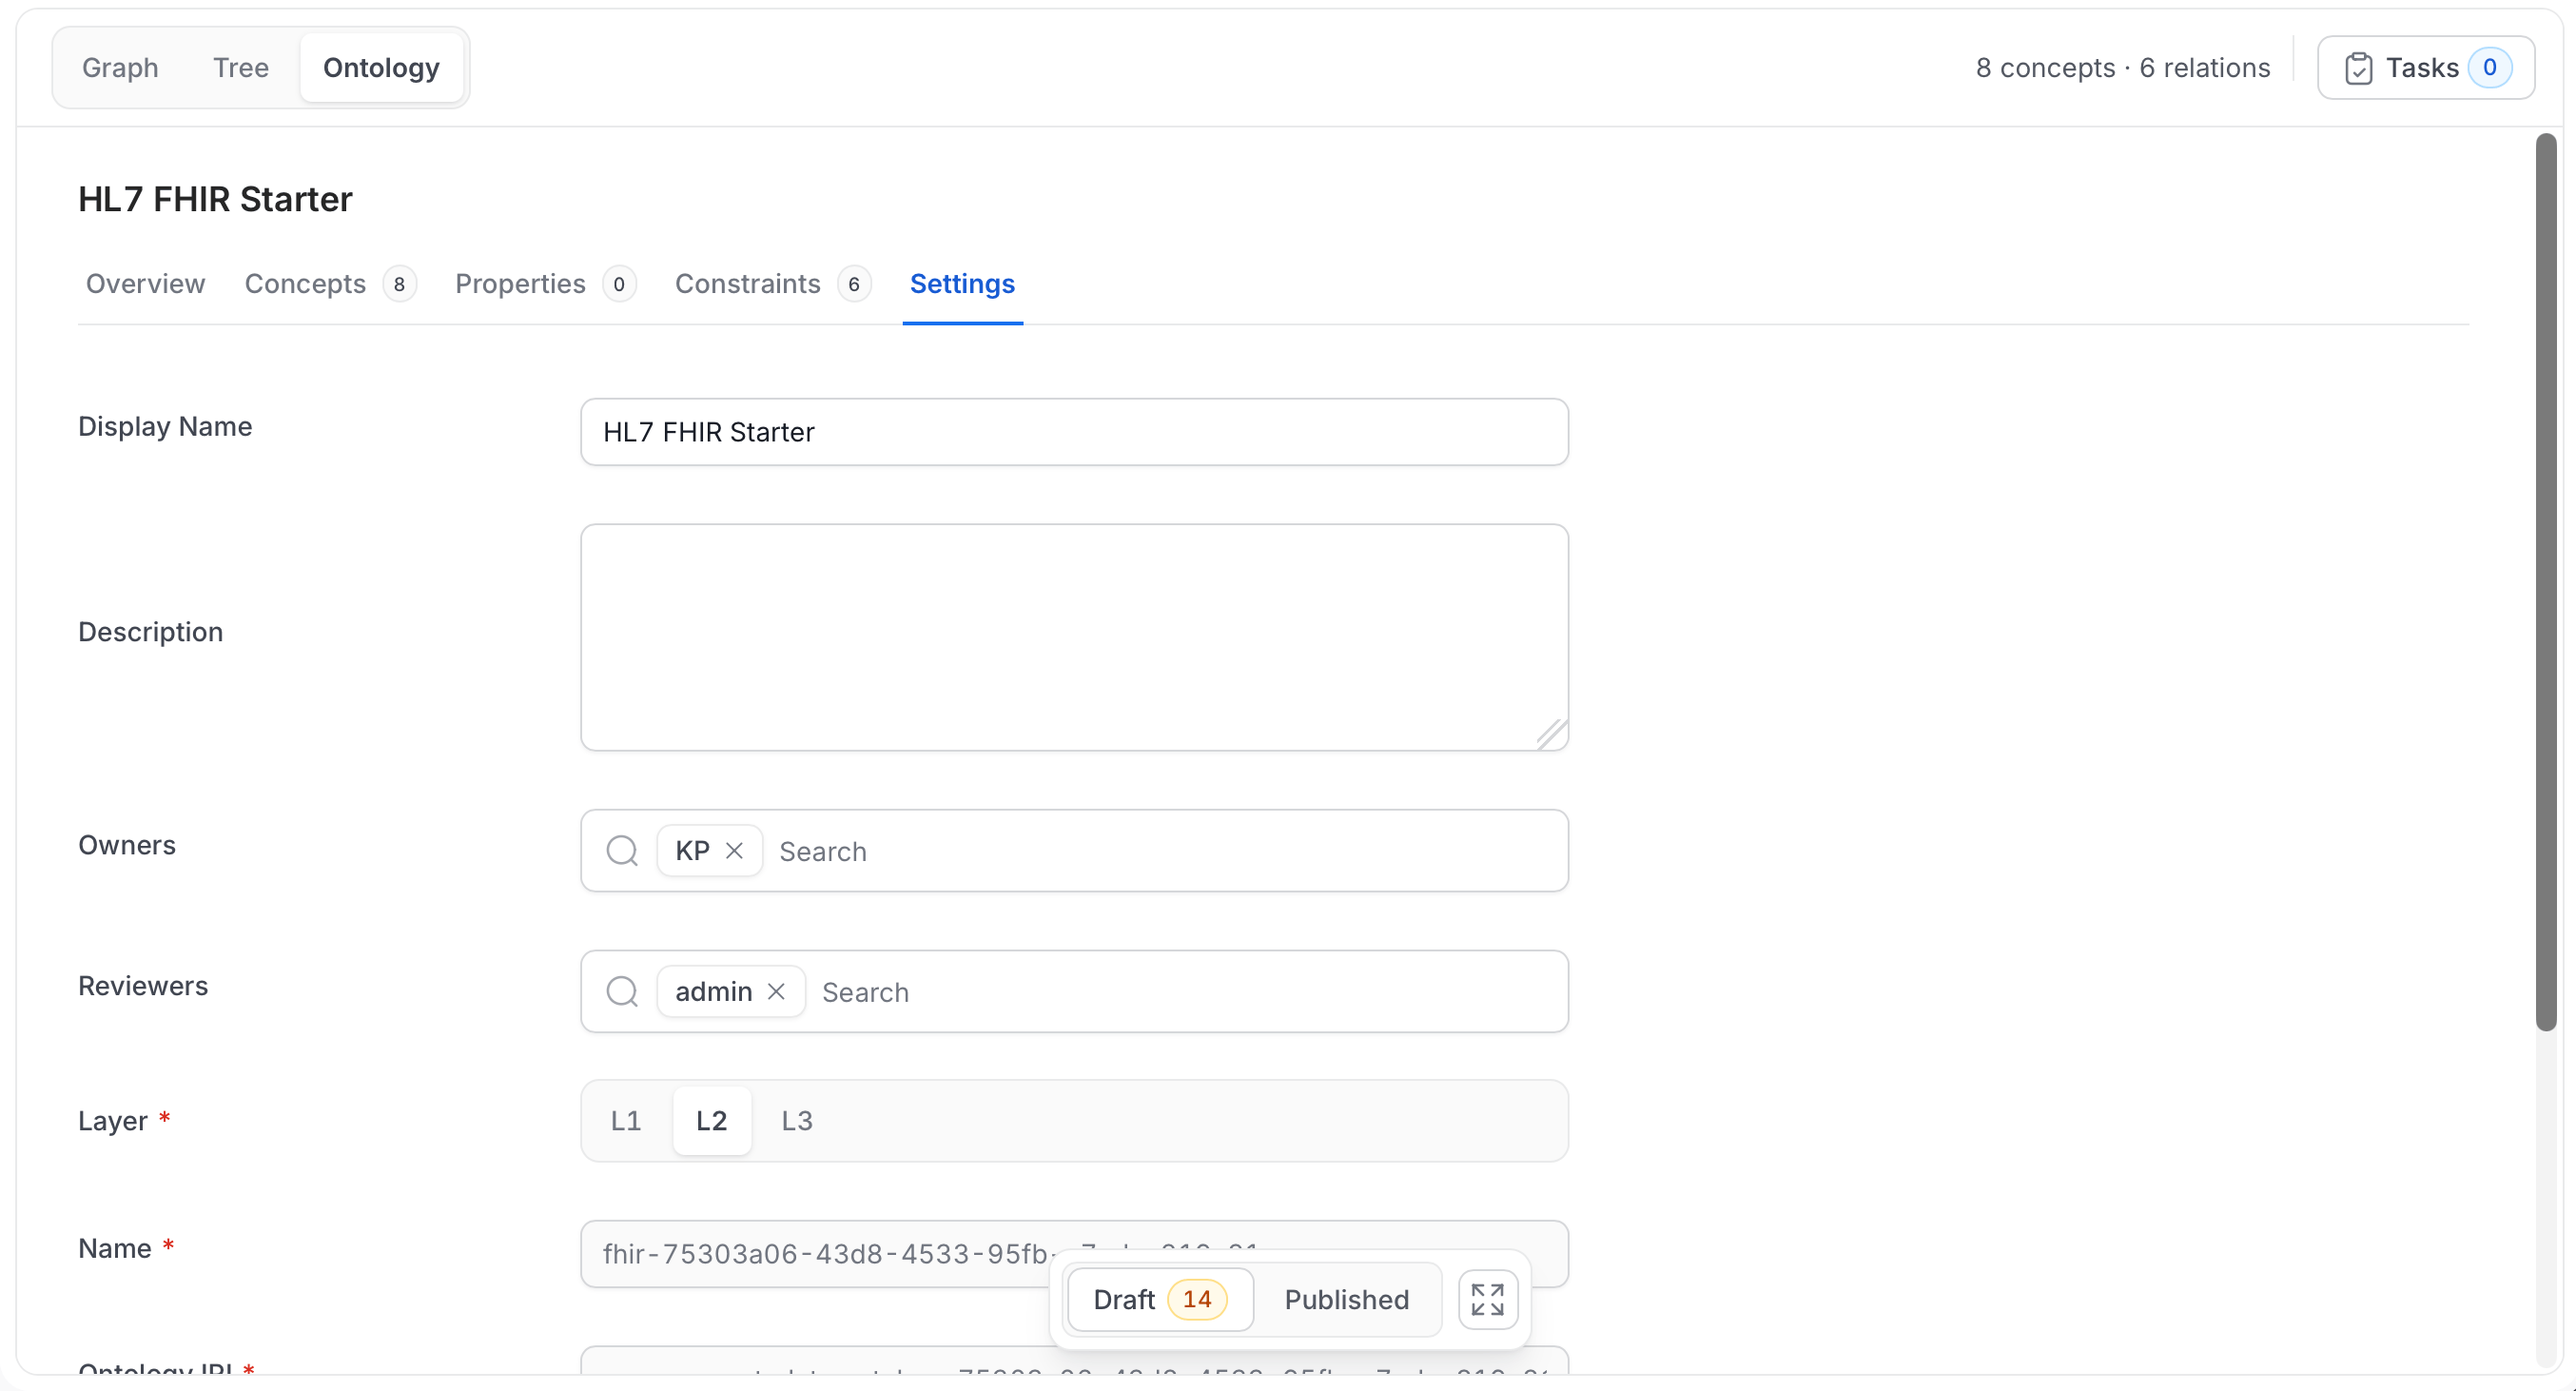
Click the Settings tab. The fields appear on the page instead of in a dialog.
Delete an Ontology
Deleting an ontology removes it together with its concepts, properties, relationships, rules, and releases. It leaves the ontology list immediately.-
Hover the ontology row in the selector, click More actions, and click Delete. The item is disabled if you don’t have
Deleteon the ontology. - In the Delete ontology dialog, review the counts of concepts and releases that will be removed.
- Type the ontology name to confirm, then click Delete.
Work in an Ontology
With an ontology selected, the Studio modes work on it:- View: Read the model as a Graph, Tree, or Ontology view. For more information, see Explore.
- Edit: Add concepts, properties, and constraints, draw relationships, and bind concepts to data assets. For more information, see Author. Each item is saved on its own, and every save is an unpublished change to the draft until you publish.
- Publish: Publish a release, or request a review. For more information, see Releases.
- Query: Search the ontology with SPARQL. For more information, see Query.
- Import / Export: Bring an RDF or CSV file in as unpublished changes, or export the draft or a release. For more information, see Import & Export.
Note: The Edit tab appears whenever you have edit permission on ontologies. Your permissions on each item decide which changes are saved. Buttons are disabled when you don’t have them.
Permissions
Ontologies use standard OpenMetadata policies, plus two seeded roles. OntologyAuthor lets a user create ontologies and publish releases. OntologyReviewer lets a user be listed as a reviewer and decide review tasks. The DataSteward role includes both. Being listed as a reviewer doesn’t give write access.Note: Which roles include these operations depends on your organization’s policies. Studio treats an admin as allowed to create ontologies.
Requirements
- No RDF setup is required to create, author, publish, import, or export ontologies, or to query them. Publishing a release does queue an update to the RDF knowledge graph in the background.
- Reviewed releases need an approval workflow. When an ontology has reviewers, a review request needs a deployed approval workflow with a user approval step. Ontologies with no reviewers publish directly and don’t need one.
REST Endpoints
Paths start with/api. For the full reference, see the Ontology API Reference.