
Building Blocks of Authorization: Rules, Policies, and Roles
OpenMetadata controls access through three building blocks: rules define what is allowed or denied, policies group rules together and apply them to teams, and roles bundle policies into job-function templates you can assign to users. Every access decision OpenMetadata makes comes down to three questions: who is the user, what are they trying to access, and what do they want to do with it?Rules
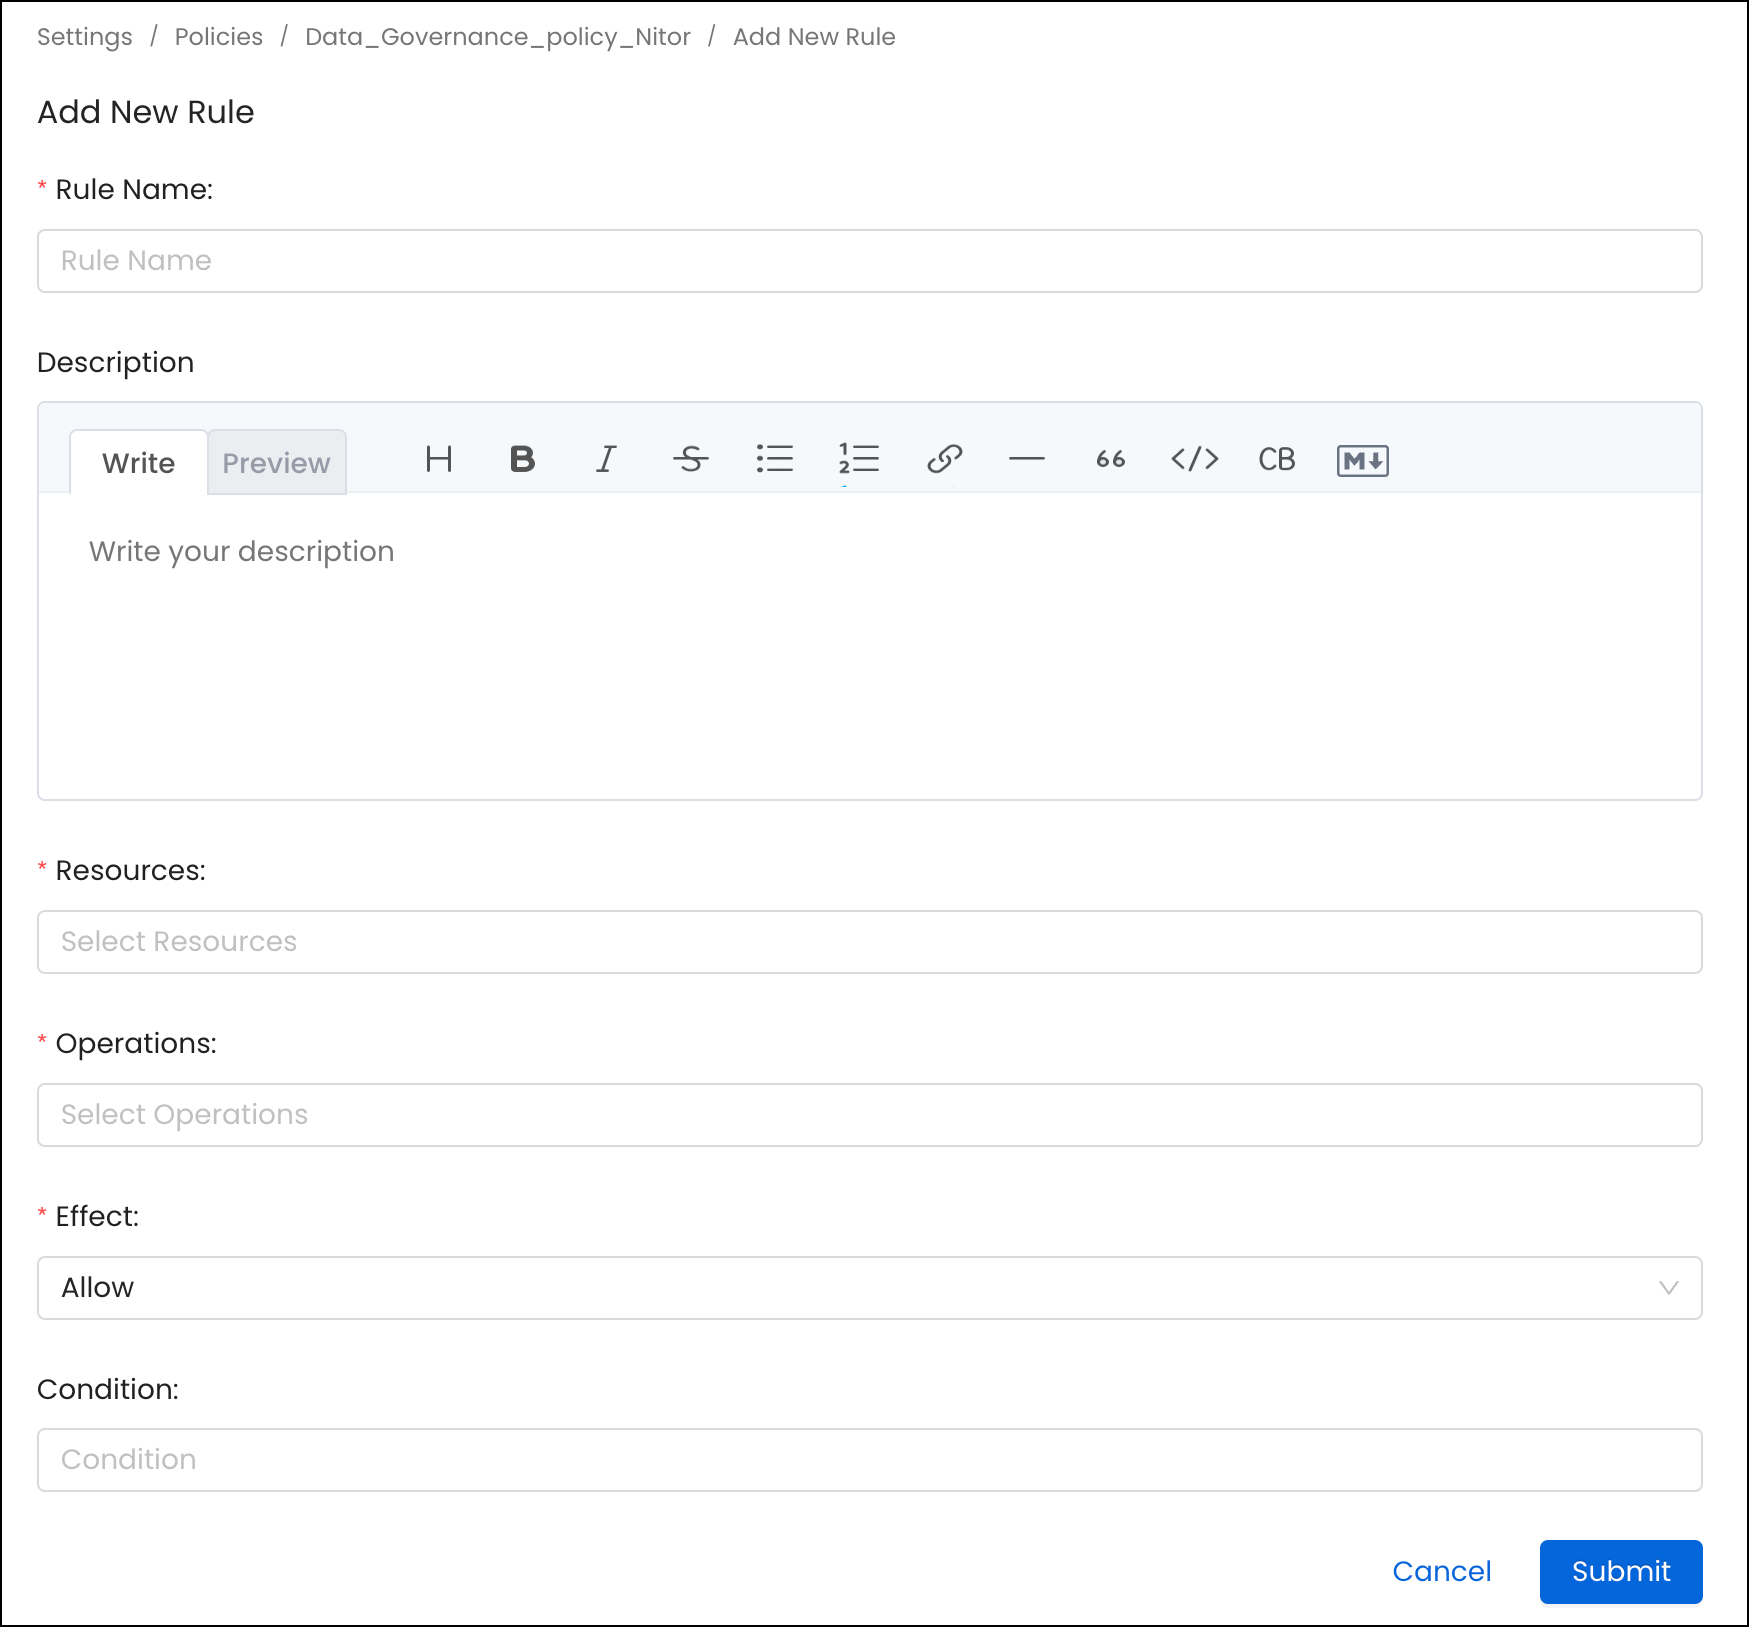
A rule in a policy is the building block of authorization. It contains the following:- Name: A unique name to define the rule
- Description: Description of the rule
- Resources: List of resources this rule applies to. An admin can select a specific resource, such as Table or All, to apply against all resources.
- Operations: List of operations this rule applies to. An admin can select a specific operation such as EditOwners or All to apply against all the operations.
- Condition: Expressions written using policy functions that evaluate true or false.
- Effect: Deny or Allow the operation.
Operations
When you build a rule, you pick one or more operations to cover. Each operation controls a specific action – for example,ViewAll, EditTags, or Delete.
Operations vary in risk level, from low-risk viewing permissions to critical
admin-only actions like Impersonate, EditPolicy, EditRole, and GenerateToken.
For a reference for common operations, risk levels, and recommended role assignments, see
Resource scope and operations reference.
Condition
Conditions let you make a rule apply only when certain things are true about the asset being accessed. For example, you can write a rule that only applies to assets tagged asPII.Sensitive, or only to assets that don’t have an owner yet.
OpenMetadata uses SpEL-based expressions for conditions. For more information about SpEL expressions, see Spring Expression Language (SpEL).
Following are some examples of conditions:
Use conditions to assess data assets like Tables, Topics, and Dashboards for specific attributes.
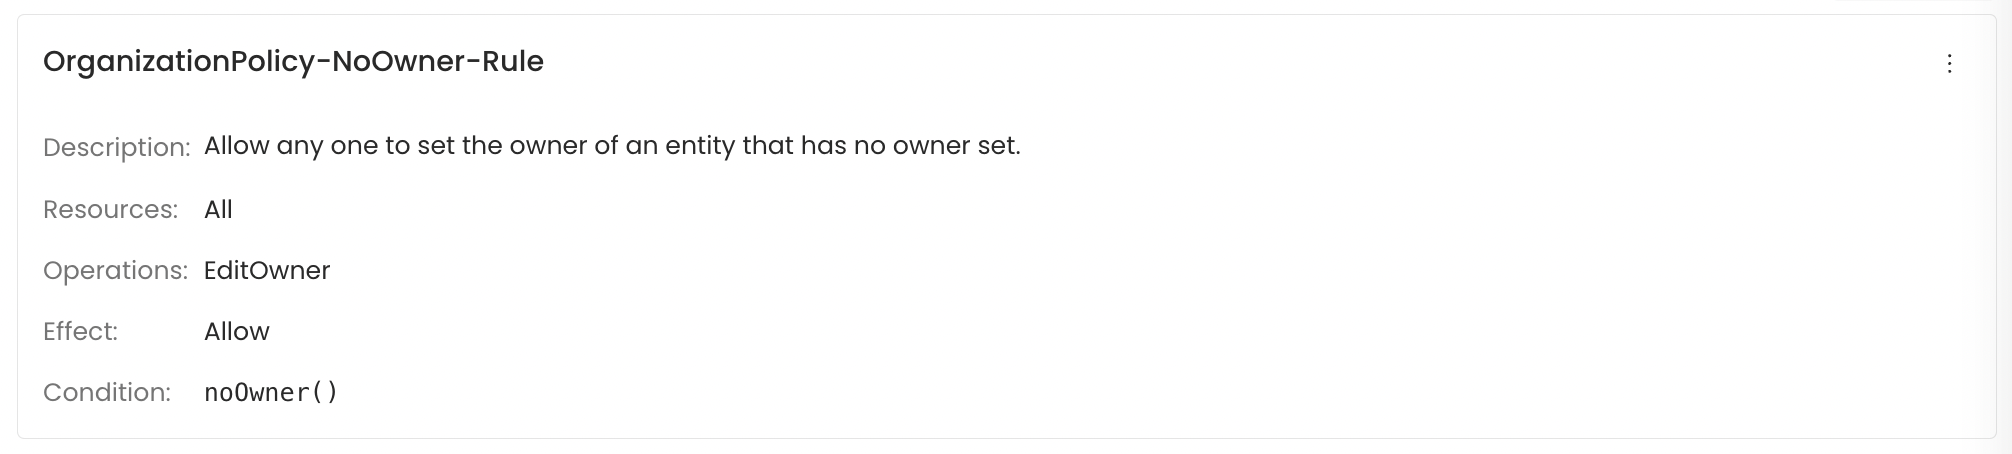
Example: Consider the noOwner() condition when applied to the table fact_orders. If this table lacks an assigned owner, then the condition returns true. However, if an owner is present, it returns false.
Another instance: The matchAnyTag(‘PII.Sensitive’) condition, when applied to the dim_address table that carries the PII.Sensitive tag, will yield true. But, without this specific tag, the outcome is false.
You can combine conditions with
&& (both must be true) or || (either can be true). For example:
Default Rules
Go to Settings > Policies > Organization Policy to see the two rules that come built in and apply to everyone in your organization.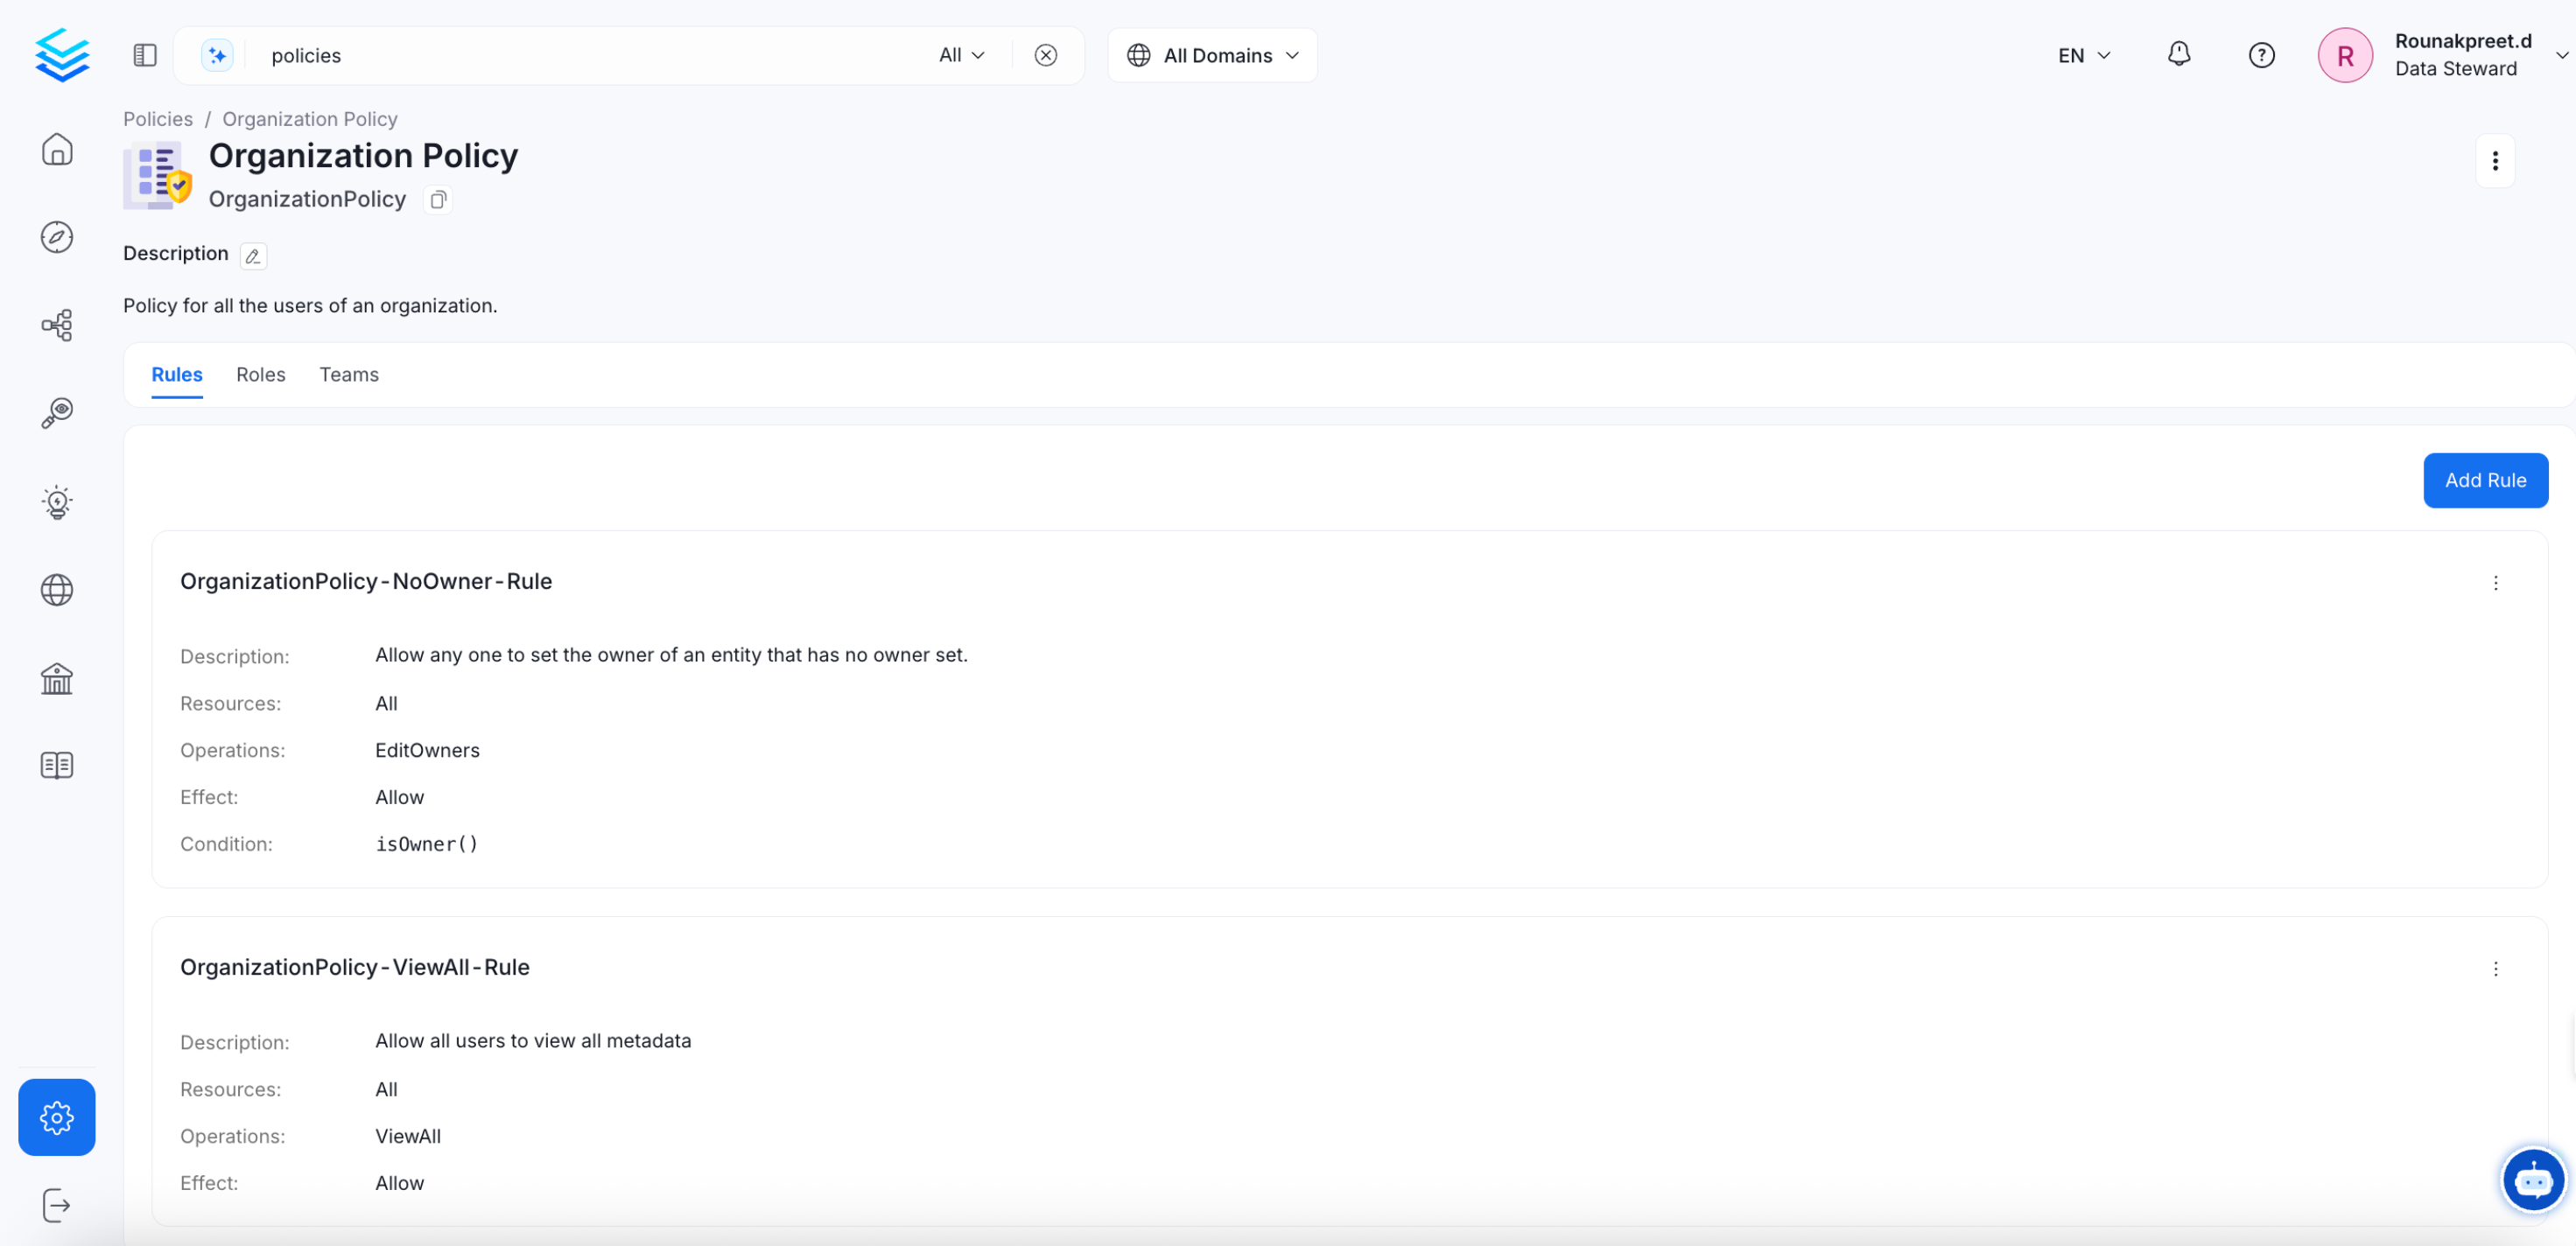
-
OrganizationPolicy-NoOwner-Rule
-
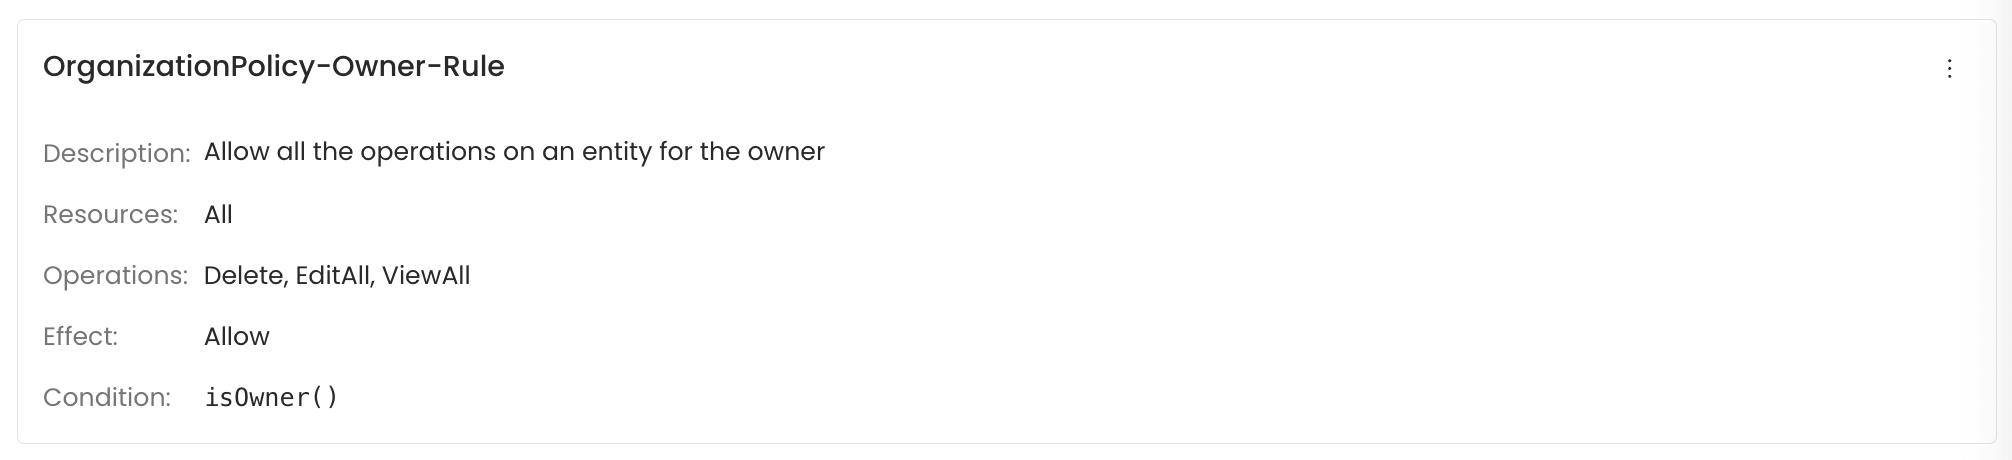
OrganizationPolicy-Owner-Rule
Policies
A policy is a named group of rules. When you access a resource in OpenMetadata, it checks all the rules in all the policies that apply to your account and decides whether to allow or deny the action.How Policies Work
When rules conflict If two rules in the same policy disagree – for example, one allowsEditDescription and another denies it – the Deny always wins.
How policies are assigned
Policies are assigned to teams, not to individual users. When you’re added to a team, you automatically inherit all the policies assigned to that team.
Inheritance and Application
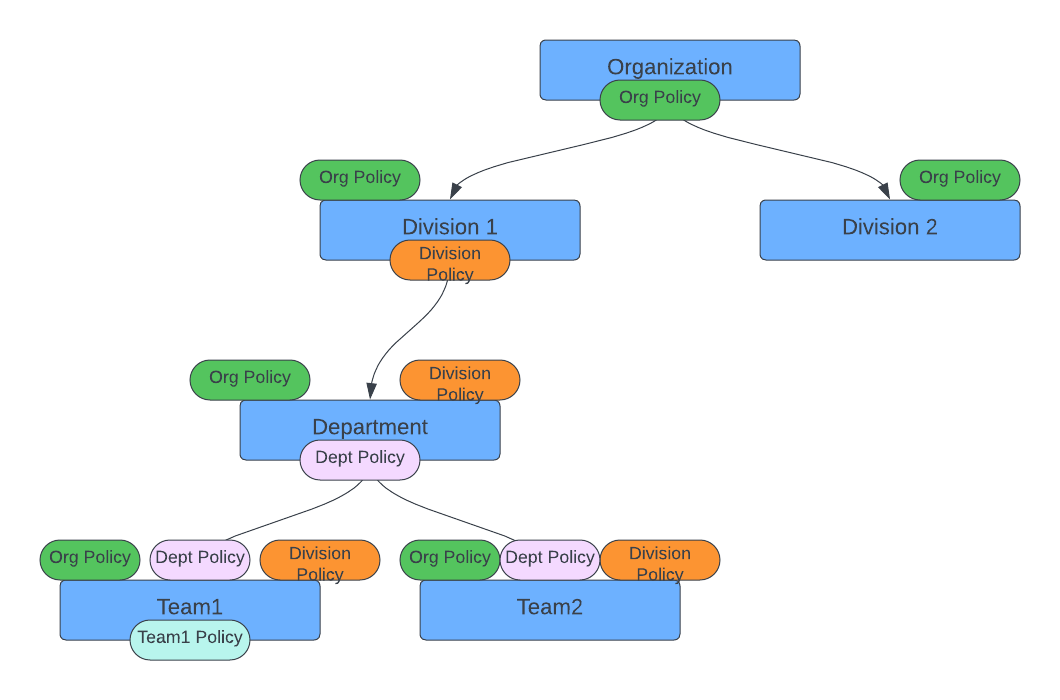
Separation of Duties
For teams with compliance or regulatory requirements, it’s good practice to make sure no single person can complete a sensitive process from start to finish on their own. Split the steps across two roles so each one requires a different person.Roles
A role is a ready-made bundle of policies that matches a job function. Instead of assigning individual policies to every user, you assign them a role and they get all the right policies in one step.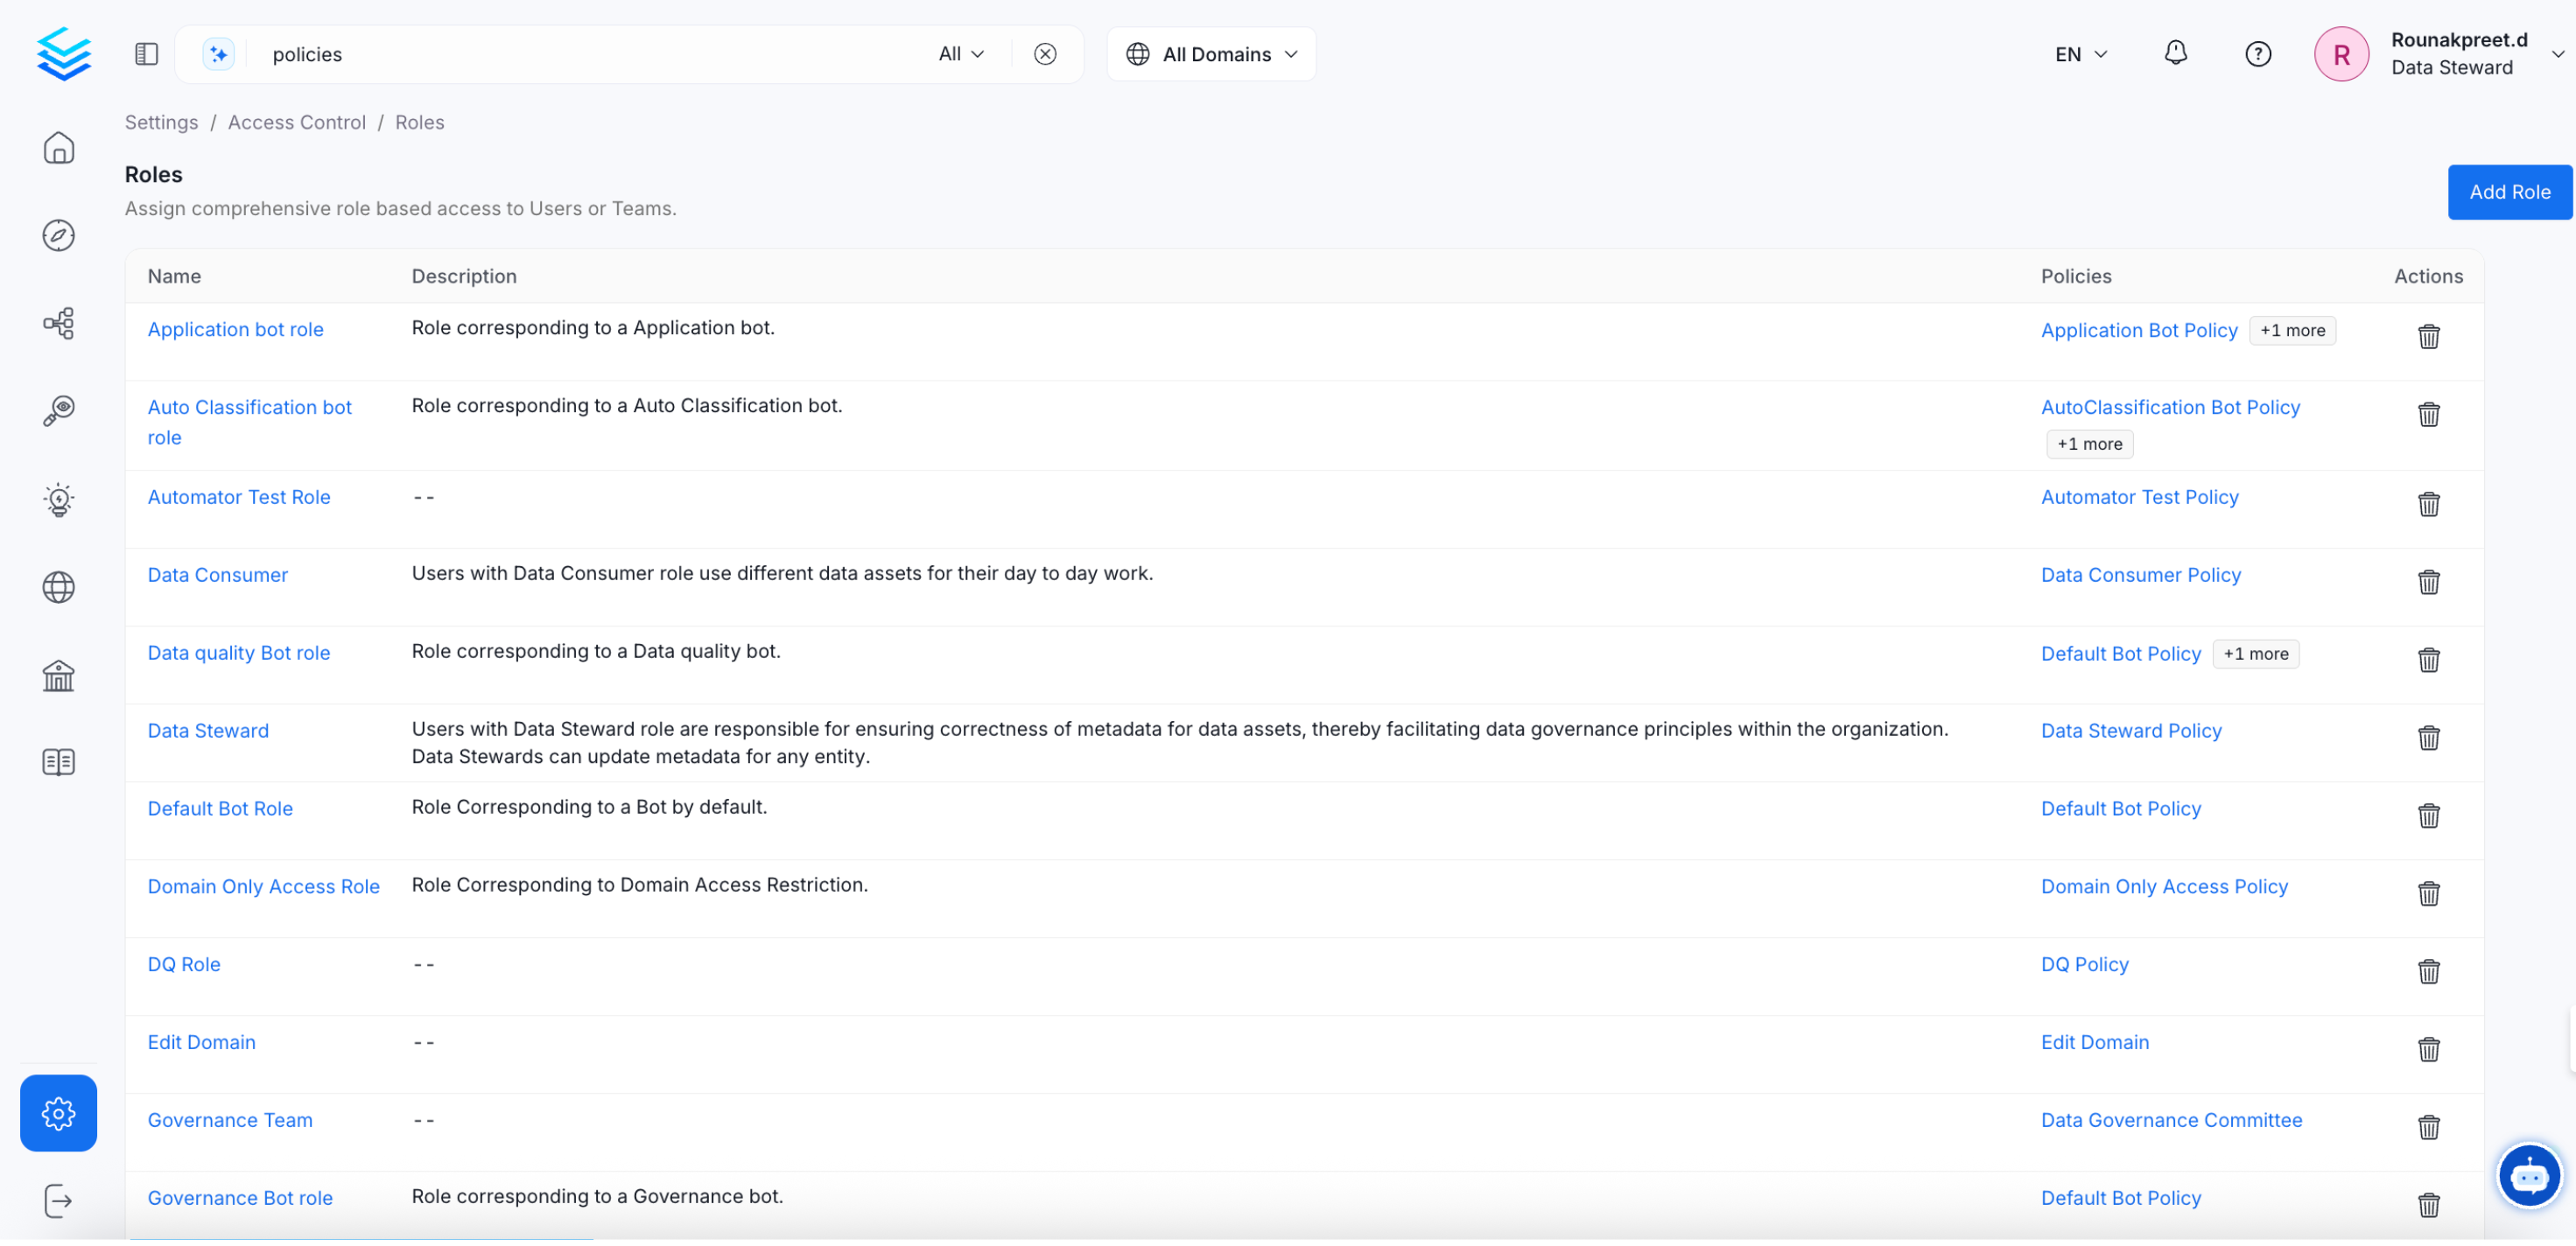
- Data engineers build and maintain data assets – they need
Create,Deploy, andTrigger - Analysts explore and use data – they need
ViewAll,ViewUsage, andViewQueries - Data stewards manage governance – they need
EditTags,EditGlossaryTerms, andEditCertification
Common Mistakes to Avoid
Roles Based Access Controls (RBAC) Search
By default, every user can search for and find any data asset in OpenMetadata, regardless of whether they have permission to access it. If you want search results to reflect each user’s permissions, turn on RBAC search – this ensures users only see assets their role allows them to access. To enable or disable this, go to Settings > Preferences > Search.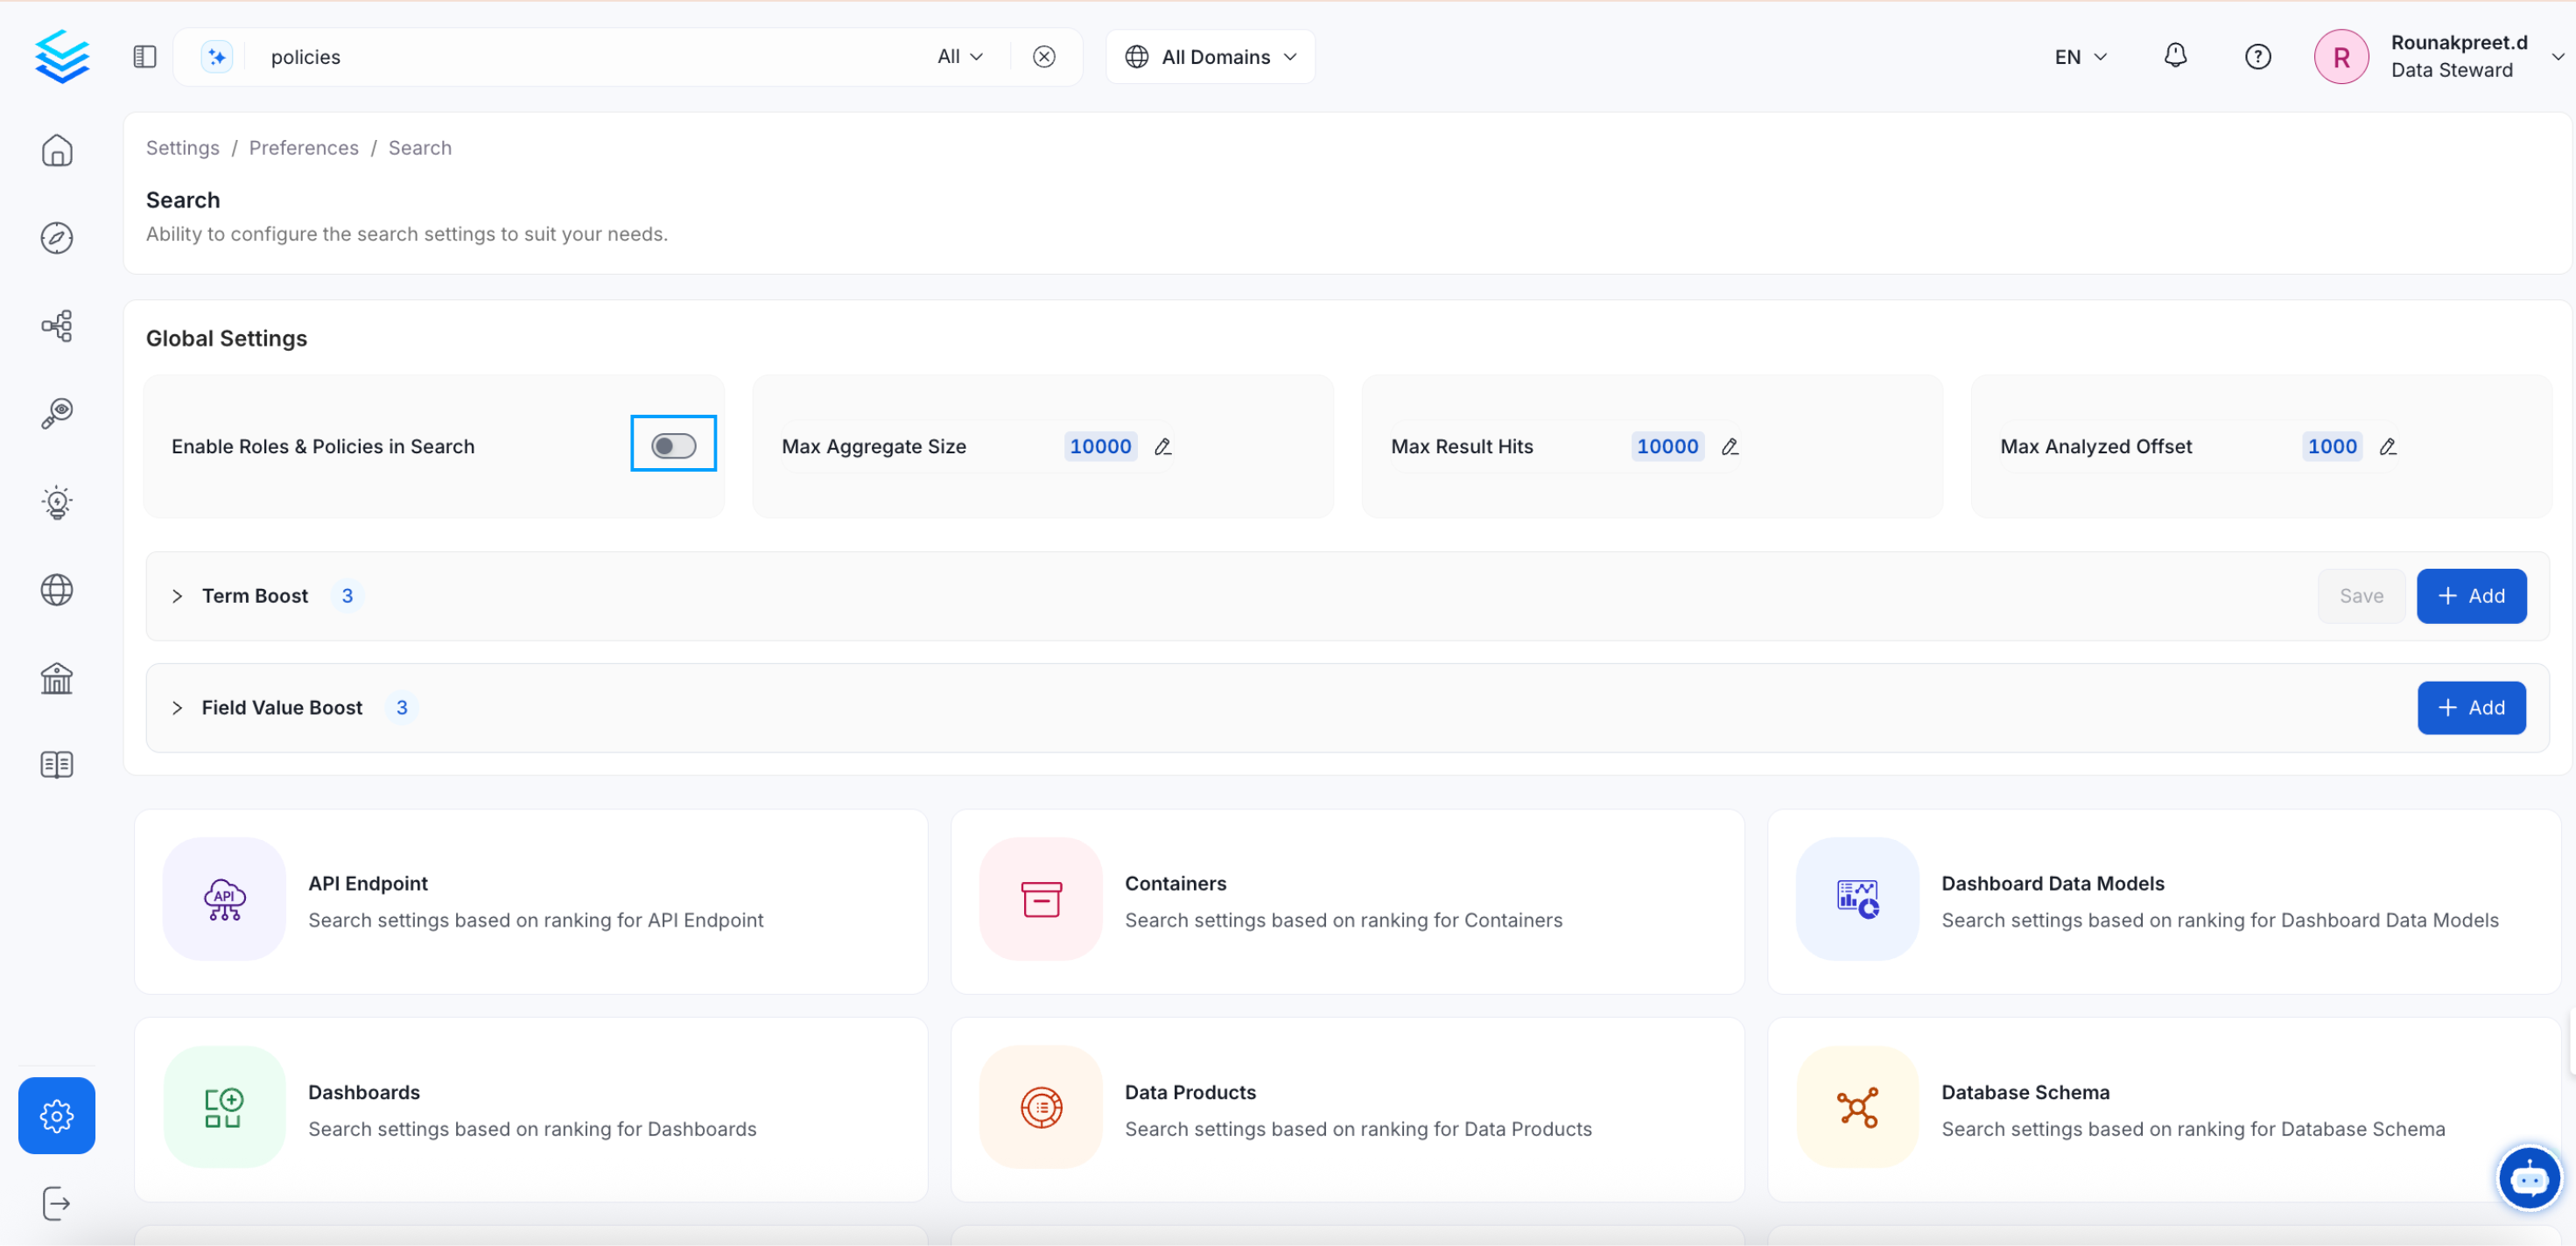
What Changes When You Turn It On
Search results are filtered by permission – users only see assets their role gives them access to, which helps with data security and compliance. Permissions apply at the point of discovery – users can’t find or browse assets they’re not allowed to access, even through search.Before You Turn It On
Check your roles and policies are fully configured – make sure every user and team has the right permissions for the assets they need. Incomplete configuration can cause users to lose visibility of assets they should see. Test with real users after enabling – ask someone from each role to run searches and confirm they’re seeing the right results. For a full guide on setting up roles and policies, see Roles and Policies. Enabling RBAC search makes sure OpenMetadata’s search aligns with your organization’s data governance and access requirements.Use Cases: Creating Roles & Policies in OpenMetadata
Tailor your policies to meet your organizational and team needs.